How to Clean a Shower Head Fast
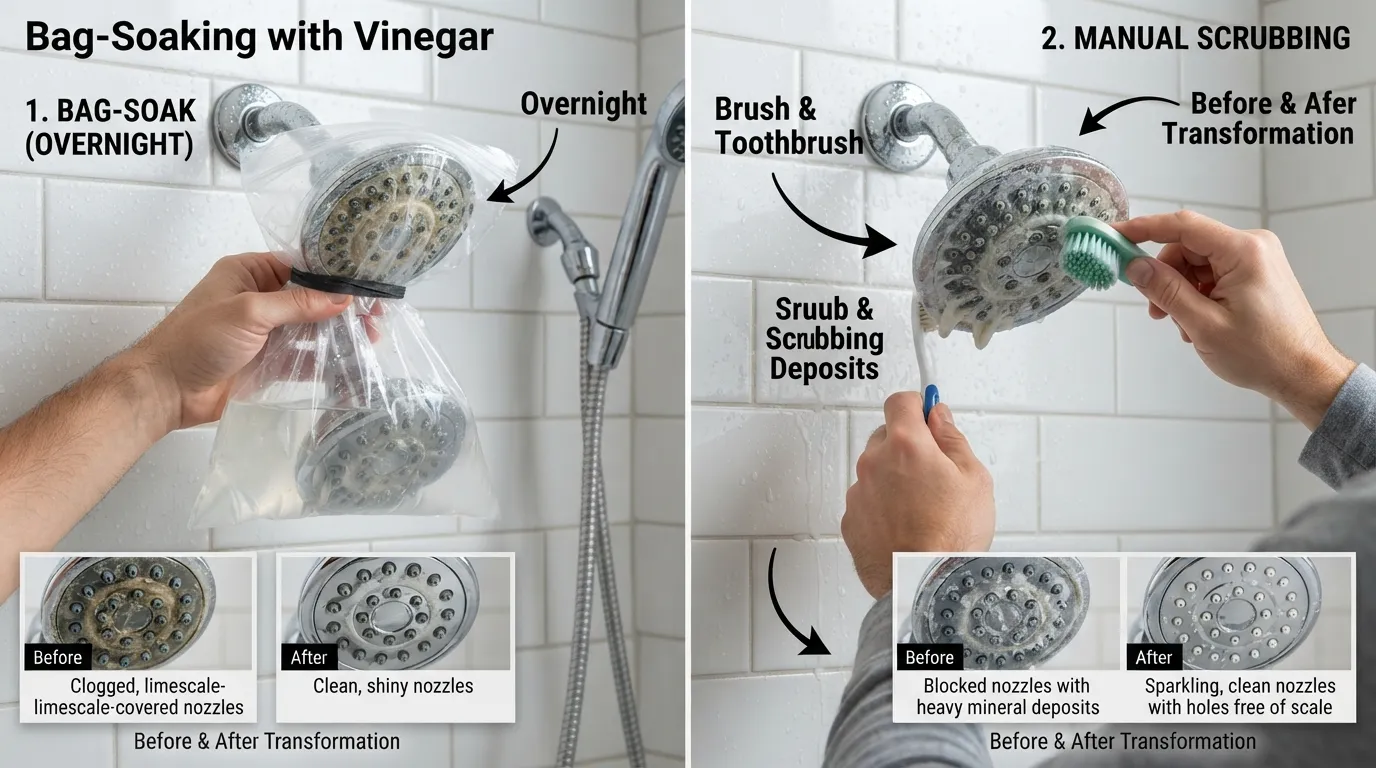
Cleaning a clogged shower head quickly requires dissolving stubborn mineral buildup without harsh scrubbing. Using common household vinegar removes calcium deposits and restores full water pressure in under an hour with minimal effort.
The 30-Second Vinegar Bag Method
The fastest way to eliminate mineral buildup on a fixed shower head is the bag soak method. This technique treats the nozzles directly without requiring you to detach the fixture from the pipe.
- Fill a sturdy plastic bag halfway with distilled white vinegar.
- Secure the bag around the shower head using a rubber band or zip tie, ensuring the nozzles are fully submerged in the liquid.
- Leave the bag in place for 30 to 60 minutes for light buildup, or overnight for severely clogged fixtures.
- Remove the bag, run hot water for one minute to flush out loosened debris, and wipe the surface clean with an old toothbrush.
Which Method Should You Use? Decision Helper
Selecting the right cleaning technique depends on your shower head material and whether it is detachable. Using the wrong approach can damage delicate finishes or plastic components.
What Causes Shower Head Buildup?
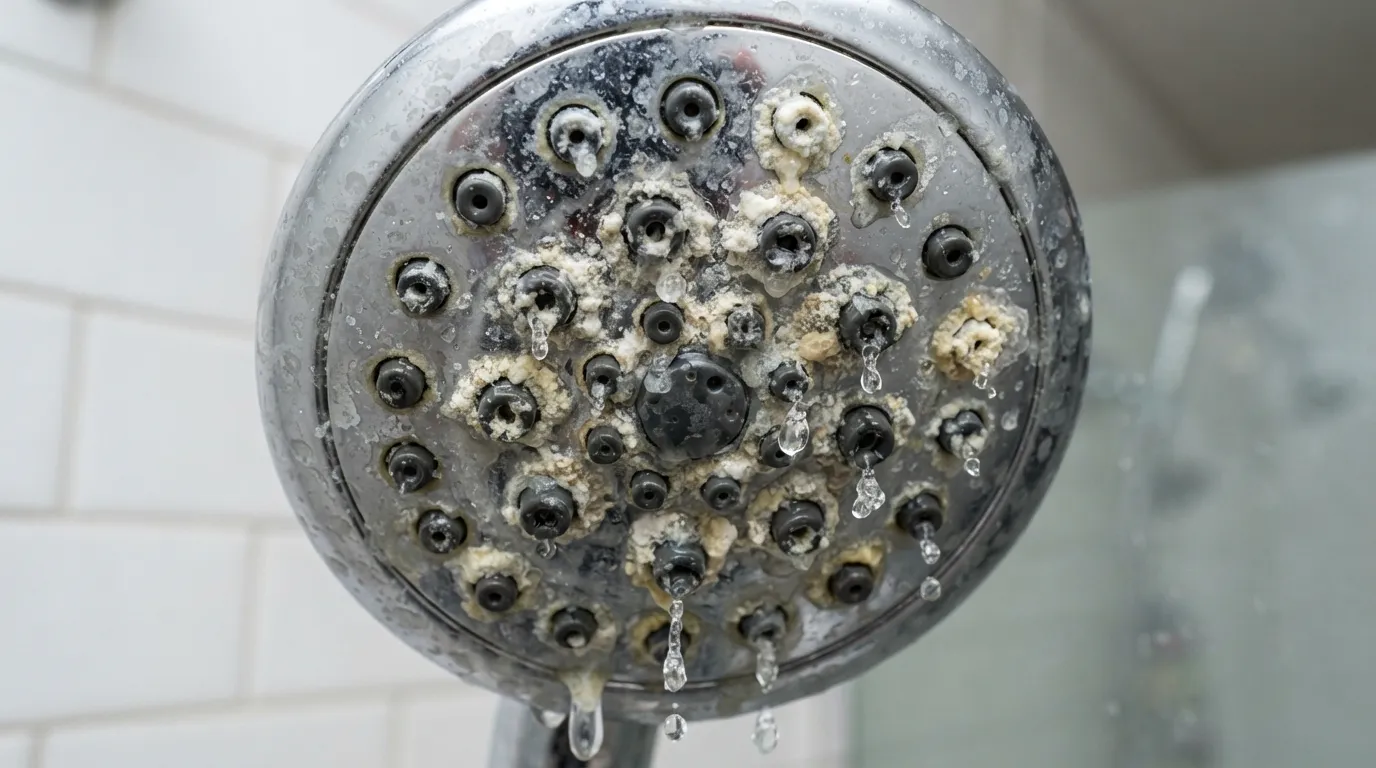
Shower head blockages stem from distinct environmental factors, primarily mineral precipitation, organic growth, or material oxidation. Identifying the root cause ensures you apply the correct removal technique instead of generic scrubbing.
Hard Water & Limescale Deposits White Green Buildup
Hard water contains high concentrations of dissolved minerals like calcium and magnesium. When water evaporates from the nozzles, these minerals crystallize into hard crusts known as limescale, which restricts water flow and distorts spray patterns.
- Calcium and magnesium ions precipitate out of heated water, bonding tightly to metal and plastic surfaces.
- White or chalky crusts typically indicate standard calcium carbonate buildup from hard municipal water supplies.
- Green or bluish-green deposits signal a reaction between copper or brass components and mineral-heavy water.
What Is Black Gunk in a Shower Head? Mold vs Mineral
The slimy black substance often found around rubber nozzles is organic microbial growth rather than mineral scale. Bathrooms provide the ideal warm, humid environment for fungi and bacteria to thrive on soap scum residue.
- Black gunk is frequently a combination of mold, mildew, and biofilm fed by organic soap and shampoo residue.
- Unlike hard mineral scale, organic buildup can trigger health concerns, making proper disinfection essential.
- According to environmental health standards, managing indoor moisture and cleaning contaminated fixtures helps prevent respiratory irritants; for comprehensive guidance, consult the US EPA Mold Guidelines.
Rust & Metal Corrosion Older Fixtures
Rust and corrosion occur when aging metal components react with oxygen and water over extended periods. This degradation causes internal flaking that permanently clogs the tiny spray apertures from the inside out.
- Low-quality metal plating degrades over time, exposing reactive underlying substrates to constant moisture.
- Flaking rust particles mix with mineral scale, turning the internal debris reddish-brown and accelerating blockages.
- Fixtures showing severe pitting or structural corrosion cannot be restored and require complete replacement.
Method 1 The Vinegar Bag Method No Removal
Cleaning a fixture without taking it apart is the fastest method to dissolve mineral deposits. This vinegar bag method targets nozzles directly using household items while keeping your plumbing completely intact.
What You’ll Need Vinegar Plastic Bag Rubber Band String
Gathering simple household supplies beforehand makes the entire process quick and hassle-free. You do not need any specialized plumbing tools for this procedure [00:00:17].
- Distilled white vinegar to break down hard calcium and mineral deposits [00:00:23].
- A plastic bag large enough to fit completely over the shower head [00:00:23].
- A heavy-duty rubber band or zip tie to secure the bag tightly [00:00:28].
- An old toothbrush or soft brush along with a cloth for final cleanup [00:00:29].
Step by Step Instructions
Executing the steps carefully ensures the acidic solution stays in contact with the clogged nozzles. Proper submersion delivers optimal descaling results [00:00:36].
- Fill your plastic bag halfway with distilled white vinegar [00:00:37].
- Place the bag over the fixture so the nozzles are completely submerged in the liquid [00:00:41].
- Fasten the bag securely around the pipe using a rubber band or zip tie [00:00:46].
- Scrub loosened residue with a toothbrush and perform a hot water flush before wiping it dry [00:01:10].
How Long Should You Soak It? Time-based PAA answer
Soak duration depends entirely on the severity of mineral buildup and crust accumulation. Adjusting the time protects delicate finishes from excessive acid exposure [00:00:57].
- Light buildup requires a standard soak time of about one hour to restore normal flow [00:00:57].
- Heavy or neglected accumulation requires leaving the bag on overnight for deep cleaning [00:01:02].
- Avoid prolonged overnight soaking on specialized metal finishes like brushed brass to prevent surface pitting [00:01:02].
Renter Hotel-Friendly Tip No Tools Needed
This technique is ideal for rental properties or temporary housing because it requires zero wrench work. You can complete the entire maintenance cycle without leaving tool marks or risking lease violations.
- Leaves permanent fixtures completely untouched, avoiding accidental pipe leaks or stripped threads.
- Requires only basic kitchen ingredients that can be packed up or discarded immediately after use.
- Quickly restores water pressure and cleanliness before property inspections or moving out.
Full Removal & Deep Soak Method
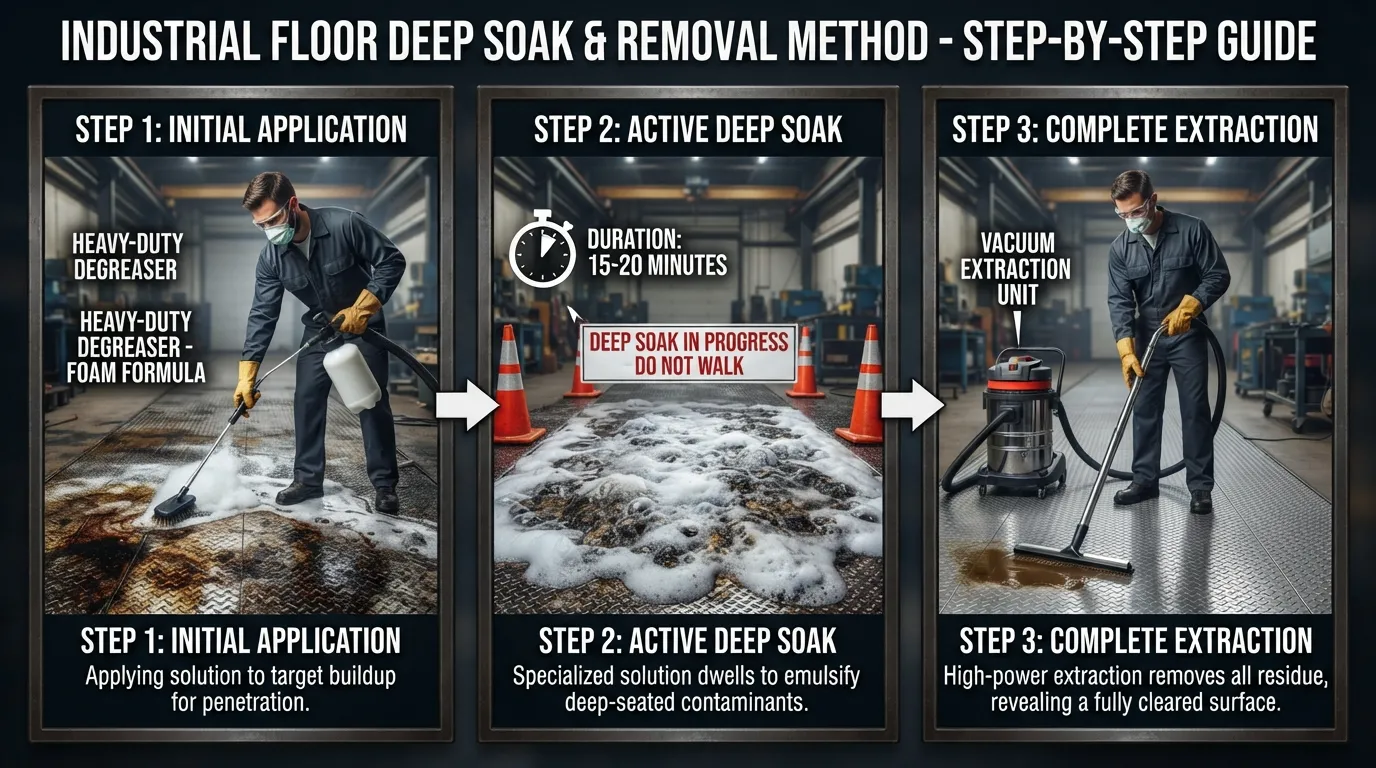
Removing the shower head entirely provides the most thorough cleaning available for heavily clogged fixtures. Submersing the unit directly in a cleaning solution allows acidic liquid to penetrate internal chambers that a bag cannot reach.
Tools Required Adjustable Wrench Bowl Plumber’sTeflon Tape
Gathering the correct hardware before starting prevents stripped connections and stops leaks during reinstallation. Proper preparation ensures a smooth, tool-assisted maintenance process.
- An adjustable wrench or channel-lock pliers to loosen the shower arm connection nut.
- A protective cloth or rag to wrap around the metal nut so the wrench teeth do not scratch the finish.
- A deep glass or plastic bowl large enough to submerge the entire shower head face down.
- Fresh plumber’s tape (Teflon tape) to seal the pipe threads properly when you screw the fixture back on.
Step by Step Removal & Soaking Process
Detaching the fixture lets you target hidden internal debris and scale accumulation trapped inside the connection collar. Immersion ensures uniform exposure to the descaling solution.
- Wrap your protective cloth tightly around the shower head mounting nut and grip it securely with your adjustable wrench.
- Turn the wrench clockwise relative to your perspective (or counter-clockwise depending on the angle) to unscrew the fixture from the shower arm.
- Place the detached shower head face-down inside your bowl and fill it with enough distilled white vinegar to completely submerge all water entry points.
- Allow the unit to soak for two to three hours, or overnight for severely calcified units, before rinsing it thoroughly under a running tap.
Clearing Stubborn Nozzle Holes Toothpick Paper Clip Trick
After soaking, softened mineral deposits may still lodge inside tiny rubber or silicone spray ports. Manually poking these apertures clears away residual blockages instantly.
- Insert a wooden toothpick, straightened paper clip, or sewing needle gently into each blocked rubber nozzle hole.
- Twist and push the tool slightly to break up remaining calcified fragments without tearing flexible silicone tips.
- Flex rubber nozzles back and forth with your thumb to crack loose any remaining internal crusts.
- Flush water backward through the inlet connection to push out all dislodged debris before final assembly.
Reinstalling the Shower Head Correctly Teflon Tape Direction Tip
Wrapping thread seal tape incorrectly causes water leaks and loose connections once the water pressure turns back on. Proper technique ensures a watertight seal every single time.
- Peel away all old, crusty layers of worn Teflon tape from the shower arm pipe threads using a fingernail or brush.
- Wrap fresh plumber’s tape tightly around the pipe threads in a clockwise direction two to three times.
- Hand-thread the cleaned shower head back onto the arm, then gently snug it down with your wrench without over-tightening.
- Turn on the water supply to check for leaks around the connection point before enjoying your restored water pressure.
Which Cleaner Works Best? Vinegar vs Baking Soda vs CLR vs Dawn
Choosing the right cleaning agent depends on the severity of your hard water buildup and whether you prefer natural or chemical solutions. Comparing performance, safety, and application methods helps you pick the ideal cleaner for your specific bathroom needs.
Comparison Table Vinegar vs Baking Soda vs CLR vs Dawn Dish Soap
Different cleaning agents target unique types of residue, ranging from light organic films to rock-hard mineral crusts. Review this quick-reference guide to select the most effective solution for your shower head material.
Is Dawn Dish Soap + Vinegar Effective? PAA Direct Answer
Combining Dawn dish soap and vinegar creates a powerful hybrid cleaner that tackles two problems at once. The vinegar dissolves hard calcium minerals while the dish soap cuts through oily body film and soap scum.
- Mix equal parts warm vinegar and Dawn dish soap in a spray bottle or cleaning container.
- Apply the mixture to exterior surfaces to wipe away sticky grime and cloudy residue effortlessly.
- Note that while this combo cleans the outside beautifully, vinegar alone is what breaks down internal mineral clogs.
Is CLR or Vinegar Better? PAA Direct Answer
Choosing between CLR and vinegar depends on how fast you need results and your preference for harsh chemicals. Vinegar is safer for everyday maintenance, whereas CLR provides heavy-duty speed.
- CLR dissolves severe, rock-solid mineral buildup in under five minutes, making it ideal for heavily neglected fixtures.
- Distilled white vinegar takes an hour or more to work, but it carries zero risk of toxic fumes or skin irritation.
- Vinegar is safe for almost all metal finishes, while commercial chemical cleaners can strip delicate plated coatings if left too long.
How to Clean Without Vinegar or Baking Soda Alternative
If you run out of household pantry staples, alternative acidic products can successfully break down mineral buildup. Lemon juice serves as a natural substitute thanks to its high concentration of citric acid.
- Squeeze fresh lemon juice into a plastic bag and secure it around the shower head using the exact same steps as the vinegar method.
- Use commercial bathroom sprays containing citric acid or sulfamic acid as direct replacements for vinegar soaks.
- Scrub exterior nozzle ports with a mixture of hydrogen peroxide and liquid soap if dealing with localized mold growth.
Important Warning Protecting Your Shower Head’s Finish
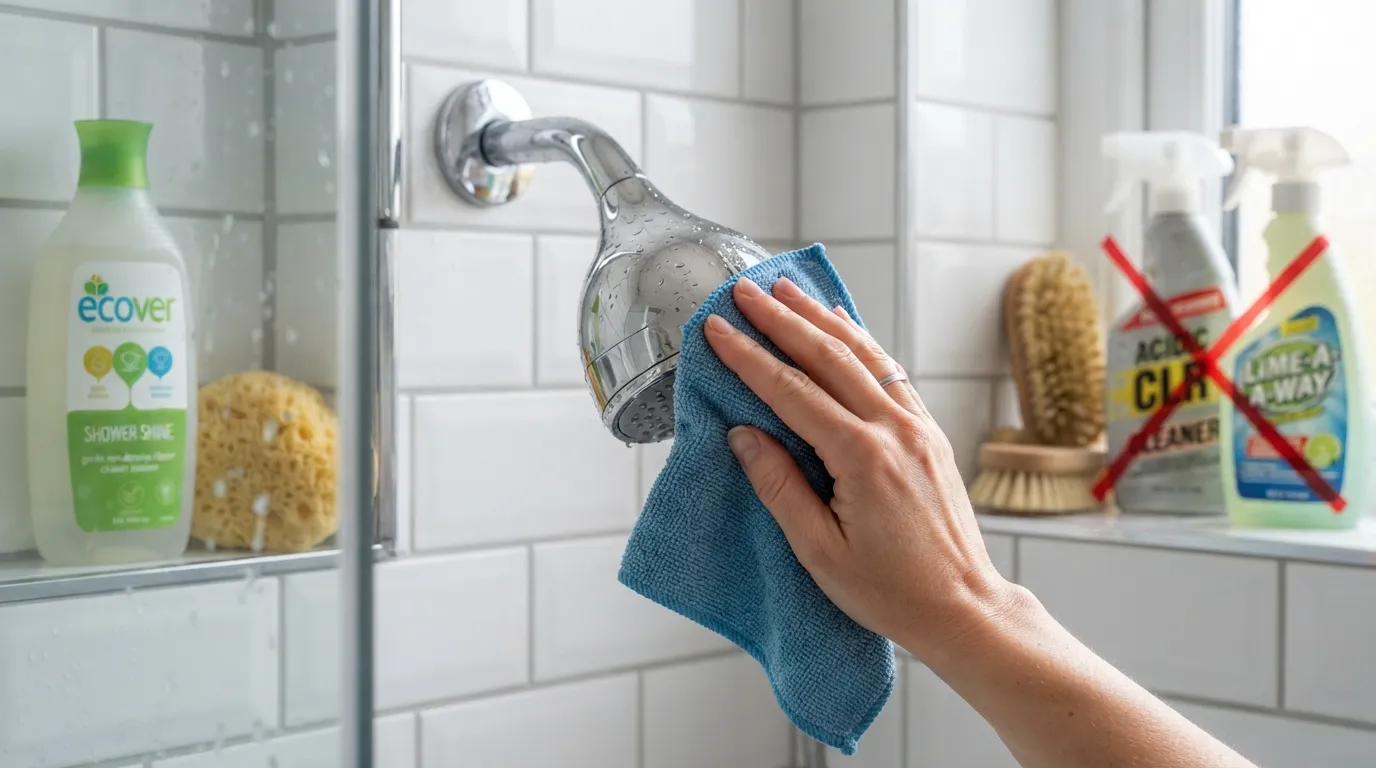
Using acidic cleaners on delicate or specialized metallic finishes can cause permanent discoloration and surface pitting. Understanding material sensitivities prevents accidental damage while maintaining your bathroom hardware’s appearance.
Finishes That Vinegar Can Damage Brass Nickel Oil-Rubbed Bronze
While distilled white vinegar is generally safe for chrome and stainless steel, its acidic nature can strip specialized coatings on luxury fixtures. High-end finishes require gentle care to preserve their protective sealants.
- Unsealed brass and oil-rubbed bronze can experience accelerated corrosion and patchy discoloration when exposed to prolonged acid soaks.
- Brushed or polished nickel finishes may lose their protective top coat, exposing reactive base metals underneath to tarnishing.
- Plated or antique decorative coatings can flake off entirely if harsh acids penetrate microscopic cracks in the finish.
How to Test Vinegar Safety Before Full Soak Practical First-Hand Tip
Performing a spot test on a hidden portion of your fixture ensures the cleaning solution will not harm the visible metal plating. This simple precaution takes less than a minute and eliminates guesswork.
- Apply a few drops of distilled white vinegar to a hidden backside area or underside joint of the shower head using a cotton swab.
- Let the vinegar sit undisturbed for five minutes, then wipe it clean with a damp microfiber cloth.
- Inspect the test spot closely under bright light for any signs of discoloration, dullness, or bubbling before proceeding with a full soak.
How to Clean Shower Head Rubber Nozzles Silicone Jets
Modern fixtures utilize flexible silicone or rubber nozzles designed to resist permanent mineral adhesion. Gentle mechanical action easily dislodges softened scale from these elastic ports [00:00:19].
- Rub your thumb or a soft cloth firmly across the rubber jets after soaking to crumble away loosened calcium [00:00:20].
- Avoid using metal pins or rigid wire brushes that can puncture or tear flexible silicone nozzles [00:00:21].
- Flex individual jets back and forth to clear out trapped internal flakes before running water [00:00:24].
Cleaning Moen & Triton Shower Heads Brand-Specific Notes
Major plumbing brands like Moen and Triton incorporate proprietary water-saving restrictors and check valves. Preserving these internal mechanisms requires careful handling during cleaning [00:00:25].
- Remove any integrated flow-restrictor screens and soak them separately in vinegar to clear fine particulate blockages [00:00:16].
- Avoid submerging proprietary thermostatic cartridges or electronic components found in advanced digital models [00:00:10].
- Consult manufacturer guidelines before applying commercial descalers to prevent voiding restricted warranties [00:00:26].
Handheld vs Fixed Shower Head Any Difference?
Maintenance procedures vary significantly depending on whether your fixture remains mounted to the wall or includes a flexible hose. Knowing structural distinctions saves time and effort [00:00:07].
- Handheld units allow you to unscrew the wand easily and drop it straight into a bucket of vinegar without awkward bagging [00:00:05].
- Fixed wall-mounted shower heads require the bag-and-tie technique since the neck pipe cannot be easily relocated [00:00:06].
- Flexible metal hoses on handheld units also require internal flushing to prevent mineral clogs in the line [00:00:25].
How Often Should You Clean Your Shower Head?
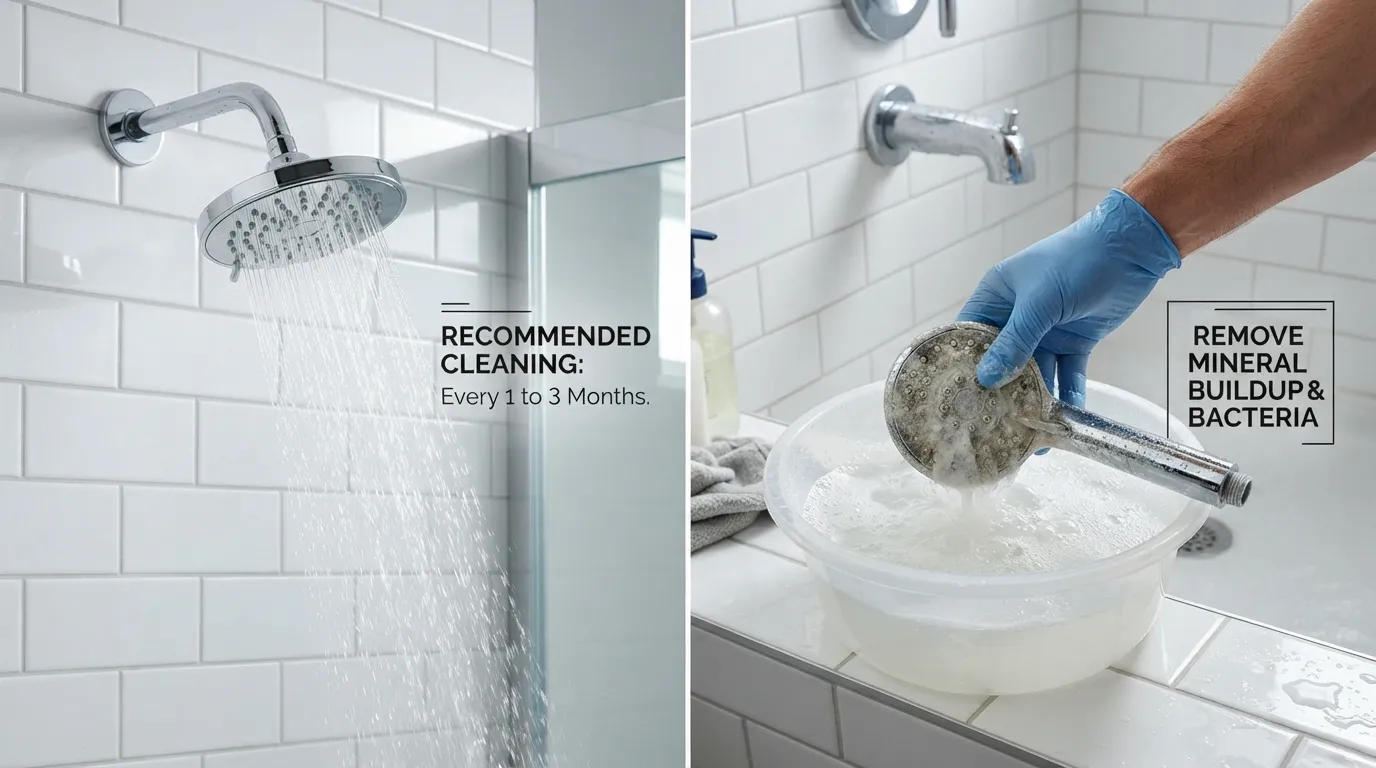
Establishing a regular cleaning schedule prevents severe mineral blockages and maintains consistent water pressure throughout your bathroom. Knowing your local water hardness levels helps determine the ideal maintenance timeline.
Recommended Cleaning Frequency Hard Water vs Soft Water Areas
The mineral content in your municipal water supply dictates how rapidly calcium deposits accumulate inside spray nozzles. Adjusting your upkeep routine accordingly avoids stubborn crust formation.
- In hard water areas, clean your shower head every one to three months to prevent heavy calcium crystallization.
- In soft water regions, a light vinegar soak every six to twelve months is sufficient to keep spray pathways clear.
- Perform a quick exterior wipe down monthly during routine bathroom cleanings to stop soap scum accumulation.
Signs Your Shower Head Needs Cleaning Now
Visible indicators and performance drops signal when your plumbing fixture requires immediate descaling. Catching these symptoms early simplifies the cleaning process.
- Water streams spraying sideways, crossing, or shooting at erratic angles indicate partially blocked nozzle holes.
- A noticeable drop in overall water pressure or flow rate points to internal mineral restrictions.
- White crusty buildup around the faceplate or visible black slime around the rubber jets requires urgent attention.
Bonus Demonstration Full Video Walkthrough
Watching a complete visual walkthrough simplifies complex descaling steps and shows you real-time before-and-after performance transformations. This demonstration breaks down the entire process from start to finish [00:00:00].
Complete Shower Head Cleaning Demonstration
Follow along with this comprehensive video guide to see exactly how vinegar dissolves stubborn mineral buildup, how to safely scrub flexible rubber nozzles, and how to verify your restored water pressure after reinstallation [00:00:16].
- Observe proper detachment techniques and safe immersion procedures for heavily calcified fixtures [00:00:20].
- See how a standard toothbrush is used to agitate softened scale without scratching specialized metal finishes [00:01:04].
- Review post-cleaning flow rate checks to measure improved water output and spray performance [00:01:45].
Frequently Asked Questions
Find direct answers to common questions about shower head maintenance, descaling solutions, and restoring optimal water flow quickly and safely.
What is the best thing to clean a shower head with?
Distilled white vinegar is widely considered the best overall cleaning agent because its acetic acid naturally dissolves calcium and hard water deposits without damaging standard chrome or stainless steel finishes.
- Safely breaks down mineral crusts without requiring toxic chemical fumes.
- Inexpensive and readily available in almost every household pantry.
- Gentle on most internal rubber gaskets and silicone spray jets.
How do you remove mineral buildup from a shower head?
Removing stubborn mineral buildup requires soaking the affected fixture in an acidic solution to soften calcium deposits before scrubbing them away.
- Detach the shower head completely and submerge it in a bowl of warm distilled white vinegar for two to three hours.
- Use a soft-bristled toothbrush to gently clear away loosened white crusts from the spray face.
- Poke out any remaining blockages in individual silicone nozzles using a wooden toothpick.
How do I clean the gunk out of my shower head without removing it?
You can clean a fixture while it remains attached to the wall by utilizing the plastic bag soaking method.
- Fill a sturdy plastic bag halfway with distilled white vinegar.
- Secure the bag tightly over the shower head with a rubber band so the nozzles stay submerged.
- Leave it on for one hour or overnight, then run hot water and wipe the surface clean.
Will soaking a shower head in vinegar really clean it?
Yes, vinegar is highly effective at dissolving alkaline mineral deposits like calcium carbonate and magnesium crusts.
- The 5% acidity in standard white vinegar breaks the chemical bond of hard water scale.
- Longer soak times dissolve even heavy, multi-year blockages completely.
- Restores original water pressure and straightens erratic spray patterns.
How can I clean my shower head without losing water pressure?
Cleaning out trapped debris and clearing clogged restrictor screens immediately restores maximum water pressure.
- Remove the fixture or use a vinegar bag soak to eliminate internal flow restrictions.
- Inspect and clean the small mesh filter screen located inside the connection inlet.
- Flush the line thoroughly before final reinstallation to clear loose particles.
How do I clean the inside of a shower head?
Cleaning internal chambers requires submerging the detached unit in vinegar or back-flushing water through the inlet port.
- Full immersion lets the acidic solution enter the back inlet and dissolve internal scale.
- Running warm water backward through the connection pushes out loosened debris.
- Removing internal flow-restrictor screens allows you to clean internal buildup trapped deep inside.
Conclusion Key Takeaways
Maintaining a clean, high-performing shower head is simple when you use the correct descaling method for your specific fixture type and water conditions. Regular upkeep prevents stubborn mineral blockages and preserves your plumbing hardware.
Choosing the Right Method for Your Shower Head
Selecting either the in-place bag soak or the full-immersion removal technique depends on your hardware type, finish durability, and time availability.
- Use the 30-minute plastic bag method for fast, tool-free cleaning on fixed shower heads in rental spaces.
- Opt for the full removal and deep soak method when dealing with severe, multi-year mineral blockages and restricted water flow.
- Always test delicate finishes like brushed brass or nickel with vinegar beforehand to prevent surface discoloration.

Oscar Vance | Master Plumber & Drainage Expert
Meet Oscar Vance, a licensed master plumber sharing practical solutions on residential repairs, preventive maintenance, and thoughtful home upkeep.

