How Long Does a Bathroom Remodel Take?
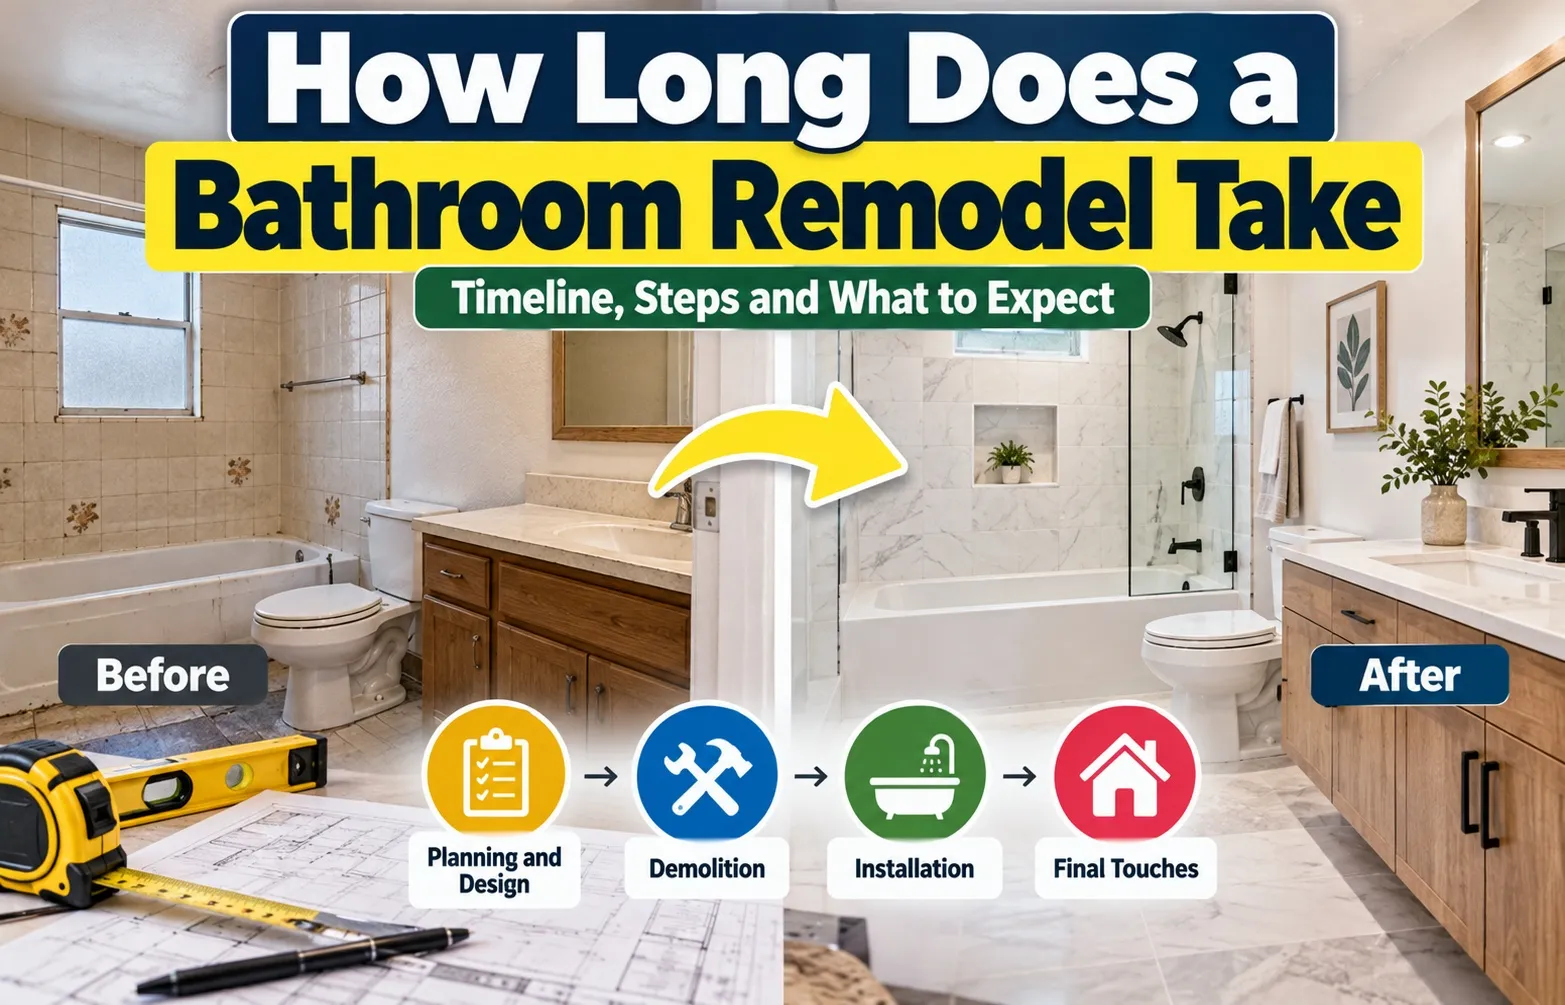 A standard bathroom remodel takes 3 to 6 weeks of active construction, while full master suite gut renovations span 8 to 14 weeks. Minor cosmetic updates can wrap up in 1 to 2 weeks.
Total project completion depends on factors like material lead times, municipal permits, structural repairs, and tradesperson availability before demolition starts.
Realistic Bathroom Remodel Timelines at a Glance
Planning requires separating active labor from pre-construction prep work. Ordering custom vanities, specialty tiles, or waiting on local city permits can add 2 to 8 weeks before work begins on-site.
Review the breakdown below to align your renovation scope with realistic project expectations:
- Cosmetic Upgrades: Surface-level fixture replacements require minimal preparation, keeping total project timelines well under a month.
- Standard Bathrooms: Replacing a bathtub, tile floor, and vanity in a standard 5×8 layout takes roughly a month of physical construction once all materials arrive.
- Major Layout Changes: Relocating drain lines, running new electrical circuits, or building custom tile showers adds several weeks of specialized trade work and municipal inspections.
Pre-Construction vs. Active Construction: The Timeline Distinction
The total duration of a home renovation spans two distinct phases: pre-construction lead time and active construction time. Homeowners often underestimate the schedule by counting only the days contractors are inside the house.
Understanding what happens during each phase prevents scheduling conflicts and delays during your project:
- Pre-Construction Phase (2 to 8 Weeks): Involves finalizing design plans, securing municipal permits, hiring a general contractor, and waiting for backordered fixtures, tile, or custom cabinetry to arrive on site.
- Active Construction Phase (1 to 10 Weeks): Begins on demolition day and covers heavy structural prep, plumbing rough-in, electrical work, drywall, waterproofing, tile installation, fixture hookups, and final trim out.
Ordering all plumbing fixtures, light vanity units, and tile stock prior to demolition guarantees that active construction proceeds without pauses caused by missing items.
Phase-by-Phase Construction Breakdown
A successful bathroom remodel relies on strict chronological sequencing. Understanding each step helps homeowners track progress and anticipate labor milestones on-site.
From initial planning through the final punch list, every phase requires precise coordination between contractors, trade specialists, and municipal building inspectors.
Phase 1: Planning Permitting and Material Procurement (Weeks 1–4)
Pre-construction preparation sets the foundation for your entire renovation project. Securing permits and ordering materials beforehand eliminates mid-project work stoppages.
Key tasks accomplished during this initial window include:
- Finalizing architectural layouts and fixture selections with your designer or contractor.
- Submitting permit applications to the local municipal office for plumbing and electrical modifications.
- Ordering long-lead items like custom vanities, specialty tiles, and frameless glass shower doors.
Phase 2: Demolition and Structural Prep (Days 1–4)
Demolition is fast, loud, and messy, stripping the bathroom down to its bare studs and subfloor. Contractors set up dust containment barriers to protect the rest of your home.
During these opening days, workers focus on core structural tasks:
- Tearing out old drywall, rotting subflooring, old tubs, vanities, and flooring materials.
- Inspecting exposed wall cavities for hidden water damage, mold, or structural sagging.
- Making necessary framing adjustments to accommodate new shower pans or larger layouts.
Phase 3: Rough-In Plumbing, Electrical, and HVAC (Days 5–10)
Rough-in work installs the hidden infrastructure that keeps your bathroom functioning safely. Licensed tradespeople configure lines behind walls before any finishes are applied.
Critical mechanical updates completed in this stage include:
- Relocating supply lines, drain pipes, and mixing valves for custom showers or freestanding tubs.
- Running new electrical circuits for vanity task lighting, heated flooring, and GFCI outlets.
- Installing proper ventilation ductwork to handle future moisture and humidity.
Phase 4: Inspections, Insulation, and Drywall/Backer Board (Days 11–14)
Before closing up the walls, municipal building officials must inspect all rough-in plumbing and electrical work. Passing inspection is legally required before proceeding.
Once approved, the room is sealed and prepped for surfaces:
- Installing moisture-resistant fiberglass or rockwool insulation in exterior wall cavities.
- Hanging mold-resistant greenboard or purple drywall on standard walls and ceilings.
- Securing cement backer board around bathtub surrounds and shower stalls to hold heavy tile.
Phase 5: Waterproofing, Tiling, and Curing Windows (Days 15–22)
Waterproofing protects your home’s structural framing from long-term moisture damage and leaks. Advanced systems like Schluter-Systems or liquid membranes create a watertight enclosure.
Tiling requires patience due to strict chemical drying rules:
- Applying waterproofing membranes across all shower niches, walls, and bathroom floors.
- Laying custom floor and wall tiles using high-grade thin-set mortar.
- Allowing proper grout curing time so mortar sets completely before foot traffic or sealing begins.
Phase 6: Cabinetry Fixtures Glass and Final Punch List (Days 23–30)
The final phase brings all design elements together as the room transforms into a polished, usable space. Contractors install surface-level hardware and test every system.
The closing steps of your renovation include:
- Vanity installation, countertop placement, and mounting sink basins with faucets.
- Hooking up toilets, light fixtures, vanity mirrors, and custom glass shower enclosures.
- Completing a final punch list walkthrough with your contractor to fix paint touch-ups and clean up debris.
Remodel Timeline by Bathroom Type & Dimensions
Bathroom dimensions and project scope directly determine total construction hours and trade labor requirements. A compact powder room finishes in days, whereas expanding a primary suite involves complex structural work.
Evaluating your specific floor plan dimensions allows for accurate scheduling, budgeting, and contractor labor planning.
How Long Does a Small or 5×8 Bathroom Remodel Take?
A standard 5×8 bathroom remodel takes 3 to 4 weeks of active construction, requiring roughly 100 to 140 professional man-hours. This 40-square-foot footprint is the most common layout in suburban homes.
Because space is limited, only one trade specialist can work inside the room at a time, dictating a strict sequential workflow:
- Days 1–3: Complete tear-out of existing tub, toilet, vanity, and subfloor prep.
- Days 4–8: Plumbing rough-in for the tub/shower valve, electrical updates, and backer board installation.
- Days 9–14: Waterproofing, setting floor and wall tiles, and allowing thin-set mortar to cure.
- Days 15–20: Grouting, installing vanity, plumbing final trim, and hanging glass shower enclosures.
Powder Room Updates (Half-Bath Timelines)
A powder room or half-bath remodel takes 1 to 2 weeks of active construction, requiring between 30 and 60 total man-hours. These small spaces lack showers or bathtubs, eliminating complex waterproofing and extensive tiling requirements.
Key scheduling phases for half-bath renovations include:
- Demolition & Rough-In (2–3 Days): Stripping wall coverings, removing pedestal sinks or vanities, and updating lighting outlets.
- Finishes & Fixtures (3–5 Days): Drywall patching, painting, setting new flooring, installing vanity cabinets, and connecting the toilet.
Master Suite & Luxury Custom Bathroom Timelines
A master suite or luxury bathroom remodel takes 6 to 10 weeks of active labor, totaling 250 to 400+ man-hours. These large spaces frequently feature layout modifications, custom tiled curbless showers, freestanding soaking tubs, and dual vanities.
Building a Bathroom from Scratch (New Addition Timeline)
Building a brand-new bathroom from scratch takes 8 to 14 weeks from initial excavation or framing to final inspection. Unlike remodeling existing spaces, new additions require structural framing, exterior foundation extensions, and utility ties.
Construction progresses through distinct structural phases:
- Framing & Utilities (Weeks 1–3): Building floor joists, stud walls, extending rooflines, and running main waste lines to the home’s septic or municipal sewer link.
- Enclosure & Rough-In (Weeks 4–6): Exterior sheathing, window installation, trade rough-ins, and passing structural/mechanical inspections.
- Interior Finishes (Weeks 7–12): Insulation, drywall, waterproofing, custom tiling, cabinet mounting, and fixture trim-out.
What Causes Unexpected Delays?
Remodeling projects frequently experience operational pauses that homeowners mistake for contractor inactivity. These delays are usually necessary technical wait times, supply chain lag, or municipal compliance checks required to maintain build quality.
Anticipating these hidden bottlenecks helps prevent frustration and keeps project expectations aligned with jobsite realities.
Material Lead Times & Custom Order Backlogs
Ordering custom finishes mid-construction is the leading cause of project stalls. Items produced to custom specifications require extended factory lead times before shipping to the jobsite.
Common lead-time bottlenecks include:
- Custom Vanity Lead Time: Special-order cabinetry and custom stone countertops typically take 4 to 8 weeks for fabrication.
- Specialty Tile Imports: Handmade or imported porcelain and ceramic tiles can take 3 to 6 weeks to arrive.
- Custom Frameless Glass: Shower enclosures cannot be templated or ordered until all wall and curb tile is completely installed, adding a mandatory 2 to 3-week fabrication window near project completion.
Mandatory Technical Pauses (Waterproofing & Tile Curing Times)
Physical progress halts during curing phases, but work cannot be rushed without risking long-term structural water damage. Applied chemical compounds require complete drying times to reach full strength.
Critical curing windows include:
- RedGard Curing: Liquid-applied waterproofing membranes require 12 to 24 hours of drying time per coat before tile installation can begin.
- Tile Mortar Set Time: Thin-set mortar requires a full 24 to 48-hour cure before installers can walk on floor tiles or apply grout.
- Grout & Sealant Cure: Cementitious grout and silicone sealants need 24 to 72 hours of moisture protection before exposing the shower stall to running water.
Municipal Permit Delays and Inspection Scheduling
Working within municipal guidelines requires waiting on city building department schedules. Work must pause completely at specified construction milestones until an official inspector approves the installation.
Common inspection checkpoints that affect momentum include:
- Municipal Permit Queue: Initial plan reviews can sit in the municipal permit queue for 2 to 5 weeks before demolition permission is granted.
- Rough-In Inspector Scheduling: Waiting for a city inspector to approve exposed plumbing, electrical, and structural framing can pause work for 2 to 5 business days.
Unforeseen Demolition Discoveries: Mold Water Rot and Non-Code Wiring
Opening walls often exposes hidden damage from past leaks, lack of waterproofing, or unsafe DIY work. Correcting these hazards takes immediate priority before continuing with new finishes.
Remodeling crews routinely pause to address hidden issues such as:
- Subfloor Water Damage: Rotted plywood subfloors and joists caused by long-term toilet or tub leaks require structural replacement.
- Mold Remediation: Uncovering trapped moisture behind shower walls requires professional containment and chemical treatment, adding 2 to 4 days to the schedule.
- Non-Code Wiring & Plumbing: Replacing outdated knob-and-tube wiring, galvanized steel pipes, or unvented drain lines to meet current safety standards.
For additional perspective on how structural surprises impact trade scheduling, read this ContractorTalk trade analysis on small bath man-hours.
Mid-Project Change Orders and Layout Shifts
Modifying project designs after construction starts breaks the project flow and alters trade scheduling. Every design shift requires adjusting material orders and labor timelines.
Common change orders that extend project timelines include:
- Deciding to move a toilet, drain, or vanity supply line after subfloors are closed up.
- Switching from prefabricated shower pans to custom-tiled curbless shower bases mid-build.
- Adding unexpected electrical features, such as in-floor radiant heating mats or recessed niche lighting.
Contractor Reality vs. DIY: Man-Hours Breakdown
Understanding the difference between cumulative labor hours and elapsed calendar days is essential for setting realistic project expectations. A project requiring 80 physical hours of labor rarely finishes in 10 consecutive calendar days due to trade scheduling, material drying times, and inspection holds.
Evaluating trade labor efficiency versus DIY execution helps homeowners choose the right approach for their budget, timeline, and lifestyle needs.
Total Professional Man-Hours vs. Calendar Days
Professional contractors schedule projects using precise trade sequencing to maximize jobsite efficiency. Multiple specialized sub-contractors—such as plumbers, electricians, tile setters, and drywallers—must complete tasks in a strict, non-overlapping order.
Labor hours distribute across calendar days based on critical workflow dependencies:
DIY vs. Licensed General Contractor Timeline Comparison
A DIY bathroom remodel typically takes 3 to 5 times longer than hiring a licensed general contractor. While professional crews work full 8-hour workdays with specialized tools, DIY homeowners usually tackle projects during evenings and weekends.
Comparing execution efficiency highlights key differences between professional and self-performed projects:
- Licensed General Contractor (3 to 5 Weeks): Managed trade sequencing, dedicated daily labor, immediate access to licensed trade specialists, and established supplier relationships to expedite backorders.
- DIY Homeowner (8 to 16+ Weeks): Extended learning curves for complex tasks like shower waterproofing, limited working hours around personal schedules, and potential delays caused by failed municipal inspections requiring rework.
Can You Live in Your Home During a Bathroom Remodel?
Living on-site during a major renovation is manageable with proper planning, but it presents logistical challenges. Construction creates noise, dust, and temporary loss of essential plumbing utilities.
Key considerations for managing single-bathroom home logistics during construction include:
- Single-Bathroom Home Logistics: If the home has only one bathroom, homeowners must arrange alternative accommodations or install temporary facilities (such as portable toilets or temporary shower units) before demolition begins.
- Dust Containment Barriers: Professional contractors install heavy-duty zip-wall plastic barriers, floor protection, and negative air machines to prevent dry-wall dust and demolition debris from spreading through living spaces.
- Utility Disconnections: Water main shutoffs are usually brief, but water service may be turned off for several hours at a time during rough-in plumbing adjustments.
Practical Strategies to Speed Up Your Remodel
Preventing construction delays requires proactive planning before work starts on-site. Applying strategic decision-making and efficient project management techniques reduces downtime and keeps contractors working without interruption.
Homeowners can streamline construction schedules and avoid costly stumbles by following these key strategies.
Finalize All Material Selections Before Demolition Day
Waiting to choose plumbing fixtures, wall tile, or vanity designs during active construction is the leading cause of preventable schedule delays. Pre-ordering materials ensures that all items are stored on-site or in local warehouse storage before workers begin tear-out.
Pre-ordering materials protects your timeline through several critical path scheduling advantages:
- Prevents tradespeople from pausing work while waiting on backordered plumbing valves or custom tile shipments.
- Allows your general contractor to verify exact physical dimensions and rough-in specifications before framing and plumbing begin.
- Eliminates mid-project rush delivery charges and stressful split-shipment logistics.
Keep Your Existing Plumbing and Electrical Layout
Maintaining your bathroom’s original layout is the single most effective way to shorten construction time. Moving main drain lines, supply lines, or subpanel circuits requires opening up structural walls, subfloors, and ceiling spaces below.
Keeping plumbing footprint and layout configurations intact delivers distinct operational benefits:
- Saves 1 to 3 weeks of heavy mechanical rough-in labor and complex structural modifications.
- Reduces the number of mandatory municipal plumbing and electrical inspection holds.
- Diverts your budget away from hidden infrastructure upgrades and toward premium visible finishes.
Choose In-Stock Finishes Over Custom Products
Custom vanities, specialty imported tiles, and custom shower enclosures add weeks or months of factory lead time. Selecting quality in-stock materials from local distributors or major suppliers keeps construction moving without supply chain stalls.
Streamline product procurement using these sourcing rules:
- Select prefabricated vanities with standard stone tops over custom cabinetry that requires multi-week fabrication schedules.
- Choose widely available ceramic or porcelain floor and wall tiles with guaranteed domestic stock counts.
- Opt for standard bypass or hinged glass shower doors rather than custom-cut, heavy frameless glass assemblies.
Work with a Single Design-Build Contractor
Hiring a single design-build contractor eliminates communication gaps between separate architects, interior designers, and general contractors. Having a unified team manages your project from initial design through final walkthrough under one roof.
Design-build firms accelerate project completion through streamlined workflows:
- Consolidates design, municipal permitting, material sourcing, and trade management into a single point of accountability.
- Implements continuous critical path scheduling so sub-contractor handoffs occur seamlessly without lost days.
- Prevents design errors by ensuring that the build team reviews architectural drawings for physical feasibility before demolition starts.
Frequently Asked Questions & PAA Answers
Below are clear, direct answers to the most common questions homeowners ask when planning a bathroom renovation, optimized for project planning and quick reference.
How long should it take a contractor to remodel a bathroom?
A licensed contractor typically takes 3 to 5 weeks to remodel a standard guest bathroom and 6 to 10 weeks for a full master suite gut renovation. Minor cosmetic updates usually wrap up within 1 to 2 weeks of active labor.
Keep in mind that overall duration spans longer when accounting for 2 to 6 weeks of pre-construction planning, material delivery, and municipal permit processing.
Do you need a permit to remodel a bathroom?
Yes, you need a permit if your remodel involves structural framing changes, relocating plumbing supply or drain lines, running new electrical circuits, or adding ventilation systems. Simple cosmetic refreshes—such as swapping out vanities, light fixtures, or repainting—do not require municipal permits.
Work requiring permits includes:
- Moving toilet stacks, shower drains, or main water supply pipes.
- Installing new subpanels or relocating electrical GFCI outlets.
- Altering load-bearing framing or exterior walls for window extensions.
Are 1-day bathroom remodels worth it?
One-day bathroom remodels are worth considering if you need a quick, low-cost fix for an accessible tub-to-shower conversion or rental property refresh. They work by fitting acrylic surrounds directly over existing tile surfaces without replacing hidden plumbing or subflooring.
However, they have notable trade-offs compared to full renovations:
- Pros: Completed in 8 to 24 hours, minimal dust, lower initial installation cost.
- Cons: Covers up existing water rot or mold without fixing structural subfloor damage, offers limited design choices, and provides lower long-term home resale value compared to custom tile.
Is $10,000 enough for a bathroom remodel?
Yes, a $10,000 budget scope is sufficient for a cosmetic refresh or standard small powder room update using stock materials. It covers pre-fabricated vanities, mid-range vinyl or ceramic tile flooring, new fixtures, and fresh paint.
However, $10,000 is generally not enough for a complete gut renovation, moving plumbing lines, or creating a custom master shower, which typically costs between $18,000 and $35,000+.
What to avoid when renovating a bathroom?
Avoiding critical design missteps saves money and prevents construction stalls during your project. Homeowners often encounter issues by making choices that complicate workflow or create long-term maintenance headaches.
Key renovation mistakes to avoid include:
- Starting demolition before all custom tiles, vanities, and plumbing valves arrive on-site.
- Skipping liquid or sheet waterproofing membranes behind shower wall backer boards.
- Inadequate ventilation fan sizing, which leads to trapped moisture, ceiling mold, and peeling paint.
- Moving plumbing fixtures unnecessarily when keeping the existing footprint achieves your design goals at a fraction of the cost.
What are the top bathroom trends and color shifts for 2026?
Current 2026 bathroom color trends and design preferences favor warm, natural, spa-like aesthetics over cold, stark-white sterile themes. Key shifts focus on rich textures, concealed storage, and organic earth tones.
Dominant design trends include:
- Warm Earthy Palettes: Rich terracotta, warm ochre, muted sage greens, and soft mushroom brown tones replacing cold grays.
- Fluted & Textured Finishes: Fluted wood vanities, zellige tile accents, and brushed warm brass or oil-rubbed bronze hardware.
- Curbless & Walk-In Showers: Seamless wet-room layouts with integrated curbless entryways and continuous floor tiling.

Oscar Vance | Master Plumber & Drainage Expert
Meet Oscar Vance, a licensed master plumber sharing practical solutions on residential repairs, preventive maintenance, and thoughtful home upkeep.