Standard Bathroom Sink Drain Rough-In Height
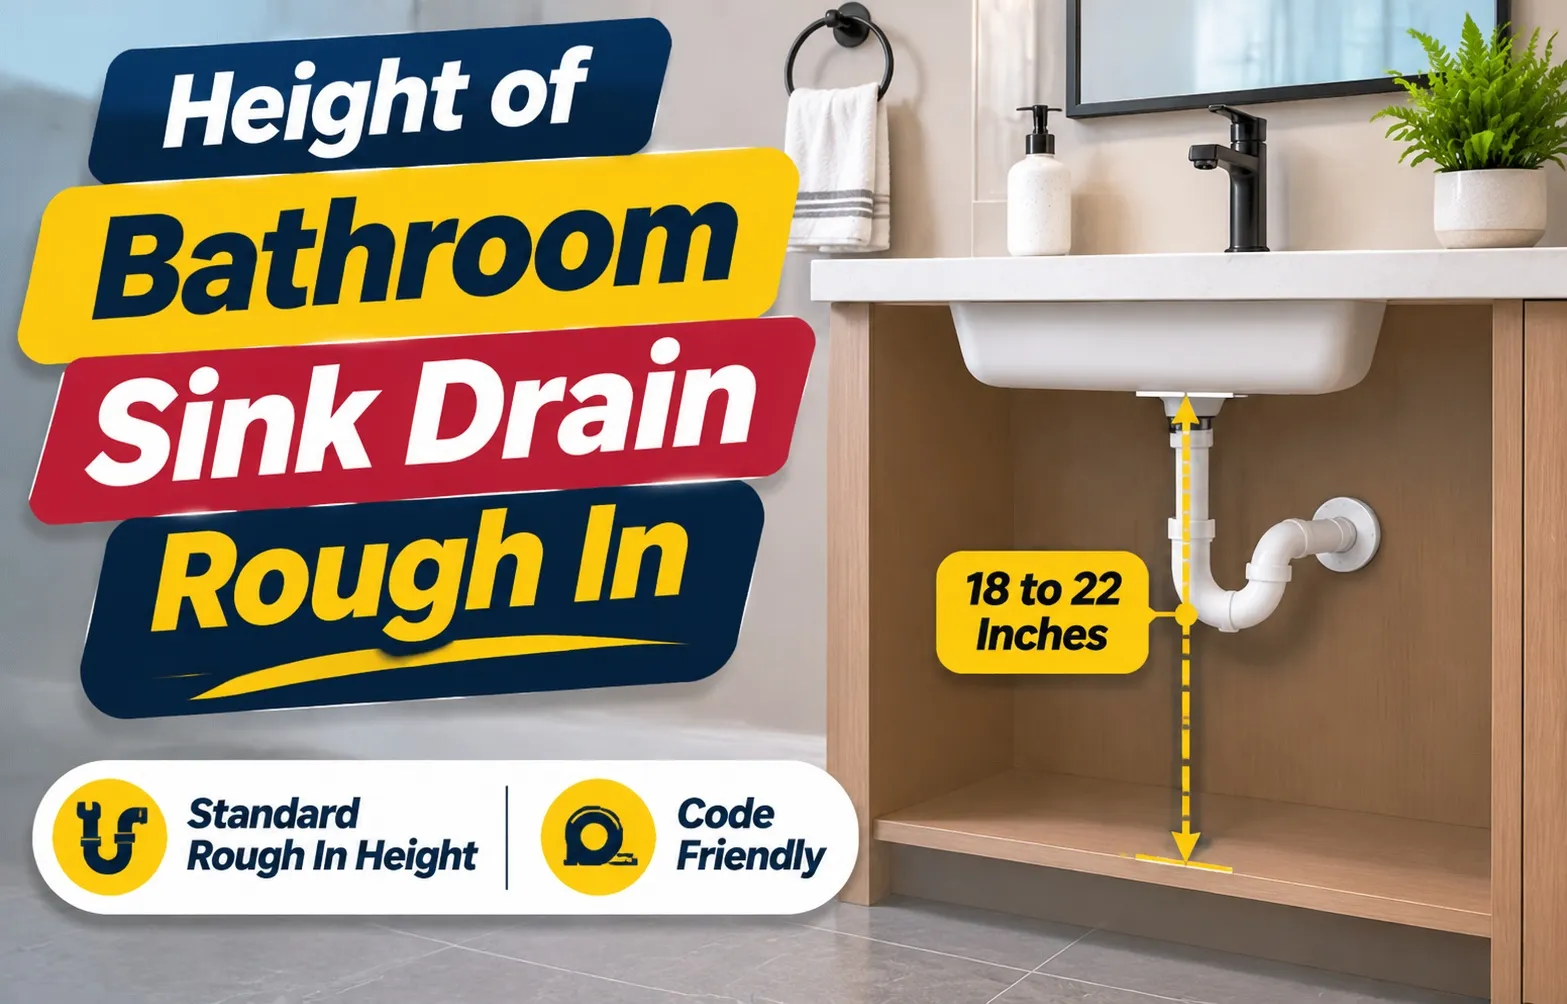 Correct plumbing rough-in layout is essential for a seamless bathroom installation. Precision at this stage prevents costly modifications, misaligned P-traps, and clearance issues inside your standard bathroom vanity.
Standard Drain Center Height (18 to 20 Inches)
The standard rough-in height for a bathroom sink drain is 18 to 20 inches from the finished floor to the center of the drain pipe. This specific measurement accommodates nearly all standard vanity configurations, allowing the sink tailpiece to connect smoothly to the P-trap.
- Center Line Measurement: Measure precisely to the exact center of the waste pipe stub-out, not the top or bottom edge.
- P-Trap Alignment: This 18-to-20-inch range guarantees enough vertical drop for proper wastewater drainage while leaving clearance below the cabinet floor.
- Standard Vanities: Most pre-built bathroom cabinets feature a rear access cutout designed specifically around this height range.
Hot and Cold Water Supply Line Heights (20 to 22 Inches)
Hot and cold water supply lines should be roughed in at 20 to 22 inches from the finished floor, placing them slightly above the drain pipe stub-out. These lines are typically spaced approximately 4 inches apart horizontally to align properly with standard bathroom sink faucet shut-off valves.
- Vertical Spacing: Position supply lines 2 to 4 inches higher than the center of the drain pipe to prevent plumbing overlap and connection bottlenecks.
- Horizontal Spacing: Keep lines roughly 4 inches apart (2 inches to the left and right of the sink centerline) for easy wrench clearance.
- Valve Protection: Ensure stub-outs extend far enough past the drywall to accommodate escutcheon plates and shut-off handles.
Why Measuring from the “Finished Floor Level” (FFL) Matters
Always base your rough-in measurements on the Finished Floor Level (FFL) rather than the bare concrete or plywood subfloor. Neglecting to account for upcoming flooring materials will misalign your entire plumbing assembly.
- Flooring Thickness: Factor in the combined height of tile, hardwood, luxury vinyl planks, cement backer boards, and mortar beds before marking heights on the wall.
- Preventing Disasters: A rough-in calculated on a bare subfloor can easily end up 1 to 2 inches too low once finished flooring is installed, causing severe P-trap alignment failure.
- Laser Levels: Use a professional laser level referenced from the finished threshold to maintain accurate horizontal layout lines across the bathroom walls.
Breakdown of Rough-In Heights by Sink & Vanity Type
Plumbing rough-in dimensions vary significantly depending on whether you are installing a standard vanity cabinet, an above-counter vessel sink, or a wall-hung basin. Following model codes like the Uniform Plumbing Code (UPC) and International Plumbing Code (IPC) ensures safe wastewater flow and prevents costly layout errors.
Standard Vanity Cabinets (19–20 Inch Sweet Spot)
Standard bathroom vanities equipped with drop-in or undermount sinks require a drain rough-in height between 19 and 20 inches from the finished floor. This time-tested range provides the ideal balance for standard plumbing components without interfering with interior cabinet structures.
- Universal Compatibility: Fits almost all pre-assembled bathroom vanities with standard center cutout doors.
- Tailpiece Clearance: Leaves enough vertical room for the sink tailpiece to connect directly to the P-trap assembly.
- Drawer Allowance: Cleans standard lower shelf configurations while maintaining proper gravity fall.
Vessel Sinks: How to Calculate Custom Rough-In Heights
Vessel sinks sit entirely on top of the countertop, elevating the rim and lowering the connection point for the drain tailpiece. To determine the correct rough-in height, apply this precise formula: Countertop Height minus Basin Depth minus P-Trap Clearance.
- Countertop Height: Standard vanity counters sit at 34 to 36 inches high before the vessel basin is added.
- Basin Depth: Subtract the actual depth of the vessel sink basin (often 4 to 6 inches) to locate where the drain tailpiece exits.
- P-Trap Clearance: Maintain a clean vertical drop that complies with UPC and IPC standards for smooth wastewater flow.
Wall-Mounted and ADA-Compliant Sinks (Strict Accessibility Heights)
Wall-mounted sinks and ADA-compliant commercial or residential installations demand strict adherence to accessibility guidelines. Because the plumbing trap and supply lines remain completely exposed beneath the basin, layout precision is critical for both legal compliance and visual appeal.
- ADA Rim Height: Standard ADA-compliant sink rim heights are set at 34 inches maximum from the finished floor to accommodate knee clearance below.
- Lower Rough-In: Wall-hung units often require a slightly lower drain rough-in (around 18 inches) to conceal piping behind aesthetic shrouds or P-trap covers.
- Inspection Standards: Local building officials strictly enforce clearance requirements and vertical drop limits on all accessible plumbing fixtures.
Critical Pre-Installation Checks to Avoid Costly Mistakes
Preventing costly plumbing errors requires methodical pre-installation checks before opening walls or running PVC pipes. Overcoming critical factors like floor finish thickness or internal cabinet geometry protects your project from misaligned drains and failed inspections.
Accounting for Finished Flooring Thickness (Tile vs. Hardwood vs. Vinyl)
Always calculate your rough-in heights from the final finished floor level rather than the bare subfloor. Measuring from raw concrete or plywood causes severe pipe misalignments once tile, hardwood, or luxury vinyl flooring is installed.
Flooring materials add unexpected vertical height to the room, instantly throwing off precise layout calculations if ignored. A thick tile bed with mortar can raise the floor elevation by over an inch.
- Tile and Mortar Beds: Ceramic and porcelain tiles combined with cement backer board and thick mortar can elevate finished flooring by 1.25 to 1.5 inches.
- Hardwood and Underlayment: Solid wood or engineered flooring paired with foam underlayment typically adds 0.75 inches of elevation.
- Subfloor Baseline: Always snap your laser level lines or mark wall studs using the finished threshold height as your definitive baseline.
The 24-Inch P-Trap Vertical Drop Rule Explained
The vertical distance from the sink tailpiece down to the center of the P-trap must never exceed 24 inches according to standard plumbing codes. Exceeding this drop limit creates dangerous siphoning issues and violates code requirements across municipal jurisdictions.
Maintaining this vertical threshold protects your drainage system from losing its water seal and allowing noxious sewer gases to enter the home.
- Tailpiece Extension Limits: Long vertical drops cause excessive water velocity, which can siphon standing water right out of the P-trap assembly.
- Code Compliance (UPC/IPC): International and Uniform Plumbing Codes strictly cap the maximum vertical distance between the strainer weir and the trap weir at 24 inches.
- Corrective Adjustments: If your drain rough-in was placed too low during framing, you must raise the waste line or utilize manufacturer-approved extensions carefully within safe limits.
Inspecting Interior Vanity Drawer and Shelf Clearance Before Roughing-In
Modern bathroom vanities frequently feature center drawer boxes or integrated interior shelving that directly conflict with poorly placed wall stub-outs. Inspecting your cabinet’s interior dimensions prior to cutting drywall prevents severe drawer box conflicts during final assembly.
Many contemporary floating or freestanding cabinets allocate minimal clearance behind internal drawers to maximize modern aesthetic profiles and storage capacity.
- Drawer Box Interferences: A drain stubbed out at standard height can easily hit the back panel of a deep middle vanity drawer, preventing the drawer from closing completely.
- Manufacturer Specifications: Always review the technical specification sheet or physical cabinet layout before marking your rough-in heights on the stud wall.
- Custom Cutouts: Planning ahead lets you notch out interior cabinet backs cleanly or adjust pipe centerlines slightly to accommodate complex vanity configurations.
What to Do If Your Rough-In Height is Wrong?
Real-world remodeling projects frequently encounter misaligned plumbing where the waste pipe stub-out is placed too high or too low. Correcting these errors without tearing open finished drywall requires specific slip-joint components and smart cabinet modifications.
Problem 1: Waste Pipe is Too High (Using Shallow P-Traps and Offset Tailpieces)
When your waste pipe is too high, standard P-trap assemblies will physically collide with the sink tailpiece or the bottom of the vanity basin. Resolving this misalignment requires swapping standard hardware for compact plumbing components designed for tight spaces.
Installing specialized fittings creates the necessary vertical clearance while maintaining proper trap seals and code-compliant drainage flow.
- Shallow P-Traps: Replace a standard deep-seal P-trap with a low-profile or space-saving P-trap to gain several crucial inches of vertical clearance.
- Offset Slip-Joint Tailpieces: Use an offset tailpiece to shift the drop alignment horizontally, bridging the gap between a high wall stub-out and the sink strainer basket.
- Professional Adjustments: If the pipe is excessively high, cutting into the drywall to lower the sanitary tee inside the wall remains the most permanent code-compliant fix.
Problem 2: Waste Pipe is Too Low (Extension Tailpieces and Correct Connections)
A waste pipe that is too low creates a negative slope or requires an excessive drop from the sink tailpiece, which violates code limits and causes slow drainage. Correcting a waste pipe too low is generally simpler than fixing a high pipe by utilizing rigid extensions.
Extending the vertical path safely bridges the distance down to the misaligned wall connection while preserving gravity flow.
- Extension Tailpieces: Attach a flanged extension tailpiece to the sink strainer to lower the trap arm connection point cleanly down to the wall stub-out.
- Slip-Joint Adapters: Ensure all extended slip-joint connections remain accessible and hand-tightened with proper washers to prevent leaks inside the cabinet.
- Maintaining Slope: Verify that horizontal trap arms maintain a downward slope of at least 1/4 inch per foot toward the main drain stack.
How to Modify Vanity Drawer Backs to Clear Misaligned Pipes
Modern bathroom vanities often feature deep center drawers that collide directly with P-traps or supply lines even when rough-in heights are correct. Executing a custom vanity drawer cutout resolves this physical interference without sacrificing your entire storage capacity.
Modifying the rear wooden panel of a drawer box lets you salvage your cabinetry choice while accommodating complex plumbing alignments.
- U-Shaped Drawer Cutouts: Trace the footprint of the drain assembly onto the back panel of the drawer, cut a U-shaped notch using a jigsaw, and edge-band the exposed wood.
- False Back Panels: Reconfigure deep drawer boxes into double-tier or shortened drawers with a protective plumbing shroud covering the exposed waste pipe.
- Precision Alignment: Always test-fit modified drawers repeatedly before tightening plumbing fittings to ensure smooth gliding action without pipe friction.
Essential Plumbing Code & Fitting Questions Answered
Navigating complex plumbing codes and fitting rules prevents inspection failures and chronic drainage clogs. Understanding how fittings, vents, and shared lines interact keeps your bathroom rough-in fully compliant with modern municipal codes.
Can You Use a 90-Degree Elbow on a Sink Drain? (Sanitary Tees vs. Standard 90s)
Standard 90-degree elbows should never be used to connect a horizontal drain line to a vertical stack because they cause sharp directional changes and clog risks. Plumbing code mandates sanitary tees or long-sweep elbows to direct wastewater downward smoothly without backing up.
- Sanitary Tees: Designed specifically for drainage systems, sanitary tees feature an internal sweep that guides water downward rather than forcing it to hit a flat wall.
- Standard 90s vs. Long-Sweep Elbows: Standard 90s create abrupt 90-degree corners restricted to pressure lines or dry vents, whereas horizontal-to-vertical drainage requires long-sweep elbows.
- Slip-Joint Fitting Rules: Ensure all fittings used downstream comply with local code requirements and maintain proper drainage code compliance.
How Close Must the Sink Drain Be to the Plumbing Vent?
A standard 1.5-inch bathroom sink drain must typically be located within 6 feet of its primary vent stack measured along the trap arm. Exceeding this maximum plumbing vent pipe distance creates unvented sections that risk siphoning water out of the P-trap.
- Trap Arm Distance Limits: Under most international plumbing codes, a 1.5-inch drain pipe can run a maximum of 6 feet from the trap weir to the vent connection.
- Proper Slope: Horizontal trap arms must maintain a continuous downward slope of 1/4 inch per foot toward the vent and drain stack.
- Avoiding Siphoning: Proper venting prevents vacuum pressures from pulling the water seal out of the P-trap when other fixtures discharge.
Can a Bathroom Sink Share a Drain and Vent with a Toilet or Shower?
A bathroom sink can safely share a drain and vent stack with a toilet or shower through approved wet venting configurations. Drainage code compliance requires proper pipe sizing—usually increasing the wet vent diameter to 2 inches—to accommodate multi-fixture wastewater volume.
- Wet Venting Principles: A wet vent acts as both a drain for one fixture and a vent for another, saving material while meeting code standards.
- Fixture Unit Load: Multi-fixture layouts must calculate total drainage fixture units (DFUs) to ensure the main waste stack is thick enough to handle simultaneous use.
- Comprehensive Layouts: For a comprehensive breakdown of fixture clearances and measurements, you can review the Home Depot Bathroom Plumbing Rough-In Guide.

Oscar Vance | Master Plumber & Drainage Expert
Meet Oscar Vance, a licensed master plumber sharing practical solutions on residential repairs, preventive maintenance, and thoughtful home upkeep.