Understanding Mobile Home Plumbing Basics and Underbelly Architecture
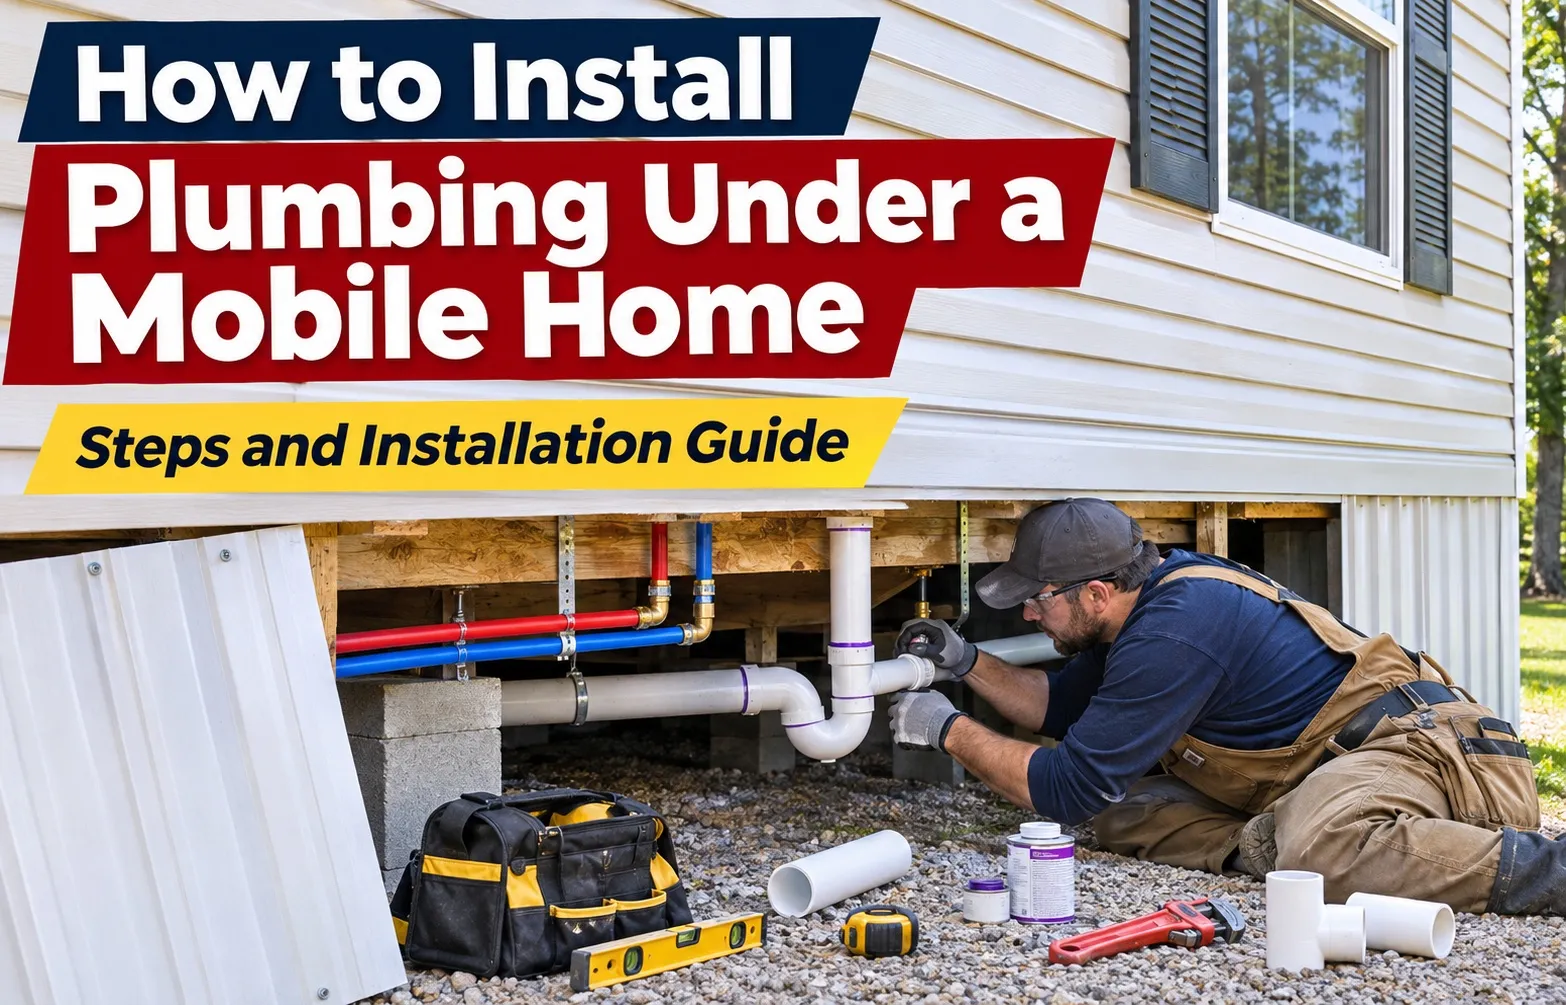 Installing or repairing plumbing in a manufactured home requires a completely different approach than working on traditional site-built houses. Instead of concrete slabs or interior wall cavities, mobile home plumbing relies entirely on a suspended network running directly through the crawl space beneath the subfloor.
What Makes Mobile Home Plumbing Unique?
Mobile home plumbing systems are suspended within the insulated underbelly rather than buried or sealed behind drywall. This exposed configuration leaves supply and drain lines directly vulnerable to environmental shifts, making proper support, thermal protection, and correct material selection critical for long-term performance.
- Suspended Layout: Water supply and drainage lines hang freely from the floor framing instead of being routed through internal walls.
- Vulnerability to Freezing: Because pipes travel through an unconditioned crawl space, external cold temperatures demand rigorous insulation and heat tape installation.
- Flexible Materials: Modern installations utilize flexible PEX tubing to absorb structural settling and thermal expansion without cracking rigid joints.
The Anatomy of a Manufactured Home Underbelly and Frame
Successfully navigating a mobile home crawl space requires a thorough understanding of the structural components supporting your plumbing. Every pipe, hanger, and protective layer interacts directly with the heavy-duty steel chassis and wooden floor framing of the manufactured home.
- Steel I-Beams: The heavy structural backbone of the home running lengthwise, serving as the primary anchor point for hanging supply and waste lines.
- Floor Joists & Rim Joists: Wooden framing members running perpendicular to the I-beams that directly support the subfloor and dictate where pipe penetrations occur.
- Belly Wrap (Vapor Barrier): The durable black polyethylene sheet sealing the entire underside, protecting floor insulation and plumbing from moisture and pests.
- Subfloor: The upper plywood or OSB layer forming the base of your living space, where supply lines drop down into fixtures.
Essential Tools, Materials, and Safety Checklist
Preparing the correct selection of materials, compact tools, and safety protocols before entering the crawl space prevents costly delays and ensures a code-compliant mobile home plumbing installation.
Pipe Materials Breakdown: PEX vs. CPVC vs. PVC/ABS
Selecting the right piping material is essential for enduring the unique thermal fluctuations and physical vibrations of a manufactured home crawl space. Modern installations typically divide materials between flexible supply lines and rigid drainage piping to ensure structural durability.
- PEX Tubing: The industry gold standard for mobile home supply lines due to its superior freeze-resistance, cost-efficiency, and flexibility around tight framing.
- CPVC: A rigid alternative used for hot and cold water distribution, though it is less forgiving of seismic shifts or severe ground settling.
- PVC and ABS: Durable, rigid plastics designated strictly for Drain-Waste-Vent (DWV) systems, requiring proper solvent welding and sizing.
Specialized Tools for Confined Crawlspaces
Working beneath a manufactured home requires compact, reliable equipment designed for restricted vertical clearance. Standard heavy workshop tools are often impossible to maneuver inside tight mobile home bellies, making specialized gear mandatory for a successful installation.
- Tubing Cutters: Precision hand tools required to deliver clean, burr-free cuts on PEX and PVC pipes to ensure leak-free compression fittings.
- Expansion/Crimping Tool: Essential mechanical devices used to secure copper or plastic rings tightly around PEX fittings for permanent water-tight seals.
- Sharkbite Fittings: Push-to-connect fittings that allow fast, solder-free temporary or permanent repairs without specialized crimping gear in tight spots.
- Headlamp: A high-lumen, hands-free lighting device critical for navigating dark crawl spaces and inspecting hidden joint connections safely.
Critical Safety & Main Water Shut-Off Protocols
Before touching any plumbing components underneath your home, you must completely isolate the water supply and prepare for hazardous crawl space conditions. Skipping these shutdown and protection steps risks catastrophic indoor flooding or personal injury.
- Utility Pedestal & Main Shut-Off Valve: Locate and close the primary water control valve at your park utility pedestal or property entry point to relieve system pressure entirely before cutting lines.
- Protective Gear: Wear heavy-duty gloves, safety glasses, and rugged clothing to shield against sharp steel framing edges, abrasive insulation fibers, and unwanted pests.
Site Preparation and Accessing the Underbelly
Proper site preparation and controlled access to your mobile home’s crawl space are essential for maintaining structural integrity while executing plumbing repairs. Safeguarding the work area protects both you and the home’s protective envelope.
Clearing, Cleaning, and Ground Protection
Establishing a clean, dry, and protected workspace beneath your manufactured home prevents moisture transfer, shields you from contaminated soil, and ensures safe maneuverability while handling tools in tight crawl spaces. Laying down heavy-duty sheeting creates an effective barrier against mud and standing water.
- Ground Cover: Roll out thick polyethylene sheeting across the bare earth to act as a clean moisture barrier before crawling underneath.
- Debris Clearance: Clear away rocks, old construction scraps, and organic clutter to prevent punctures to your protective gear and equipment.
- Workspace Ergonomics: Position thick rubber mats or cardboard to create comfortable knee and body rests during extended under-home operations.
Cutting and Pulling Back the Belly Board (Vapor Barrier)
Creating a controlled U-shaped flap in your polyethylene belly wrap allows you to access plumbing lines without permanently destroying or compromising the surrounding moisture barrier and insulation layer. This clean-cut technique makes final patching fast and secure.
- The U-Shaped Flap Method: Cut three sides of a square or U-shape into the belly board, leaving one side intact to fold the flap open like a door.
- Insulation Handling: Gently push aside or lower the exposed insulation layer, wearing gloves to protect skin from abrasive fiberglass or mineral wool.
- Temporary Securing: Clamp or tape the folded flap out of your immediate work zone to prevent tearing while you route pipes.
Mapping Existing Utility Lines and Routing Paths
Visually inspecting and mapping current pipe runs before beginning any installation work prevents accidental punctures, helps align new PEX and drain runs with existing rim joists, and ensures proper clearances. Taking time to map out the workspace ensures precise execution.
- Tracing Current Runs: Follow existing supply and drain lines back to their main entry points through the subfloor and steel frame.
- Identifying Obstacles: Note cross-members, heating ducts, and electrical lines running through the crawl space to avoid drilling or strapping conflicts.
- Planning New Penetrations: Mark exact alignment points where new supply lines will rise toward fixtures through the floor framing.
Installing and Routing Water Supply Lines (The PEX Advantage)
Running water supply lines beneath a manufactured home requires careful hydraulic planning and strict adherence to structural support standards. Utilizing flexible PEX piping allows the system to endure thermal expansion and structural shifts while delivering reliable water pressure to every fixture.
Sizing and Running Main Trunks vs. Branch Lines
Configuring your water supply network correctly ensures consistent flow rates and prevents pressure drops when multiple fixtures run simultaneously. High-capacity main lines distribute water efficiently before stepping down to localized fixtures.
- Main Trunk Sizing: Run a 3/4-inch PEX trunk line from your main water entry point underneath the home, keeping it close to the central steel I-beam frame for maximum stability.
- Branch Line Distribution: Tee off the 3/4-inch trunk into 1/2-inch branch lines that feed individual fixtures like sinks, toilets, showers, and laundry units.
- Thermal Efficiency Routing: Route supply lines close to heating ducts or bundle them safely to utilize ambient warmth and minimize winter freezing risks in unconditioned crawl spaces.
Correct Code-Compliant Support Spacing (The 32-Inch Rule)
Securing PEX piping incorrectly causes excessive vibration, water hammer, and premature fitting failure against metal framing members. Following recognized building codes ensures your installation remains secure over years of thermal expansion and contraction.
- The 32-Inch Support Interval: Fasten horizontal PEX lines with approved plastic or cushioned pipe straps at least every 32 inches to prevent sagging or undue stress on joints.
- Avoiding Metal Friction: Never allow plastic tubing to rest directly against sharp steel I-beam edges or floor joists without protective rubber grommets or sleeves.
- Regulatory Compliance: Ensure all installation methods align with recognized guidelines outlined by the HUD Manufactured Home Construction and Safety Standards.
Upgrading and Transitioning Away from Legacy Polybutylene Pipes
Older manufactured homes frequently feature brittle gray polybutylene piping prone to catastrophic sudden ruptures under pressure. Upgrading these legacy systems requires specialized transition fittings to safely tie modern PEX lines into older setups.
- Identifying Legacy Lines: Locate brittle, dull-gray plastic tubing and verify if brittle compression joints need immediate replacement.
- Transition Fittings: Utilize certified barbed or push-to-connect adapter fittings designed specifically to bridge old plastic piping dimensions with new PEX tubing securely.
- System Flushing: Flush the entire upgraded network thoroughly before making final fixture tie-ins to clear out debris, mineral scale, and installation filings.
Installing Drainage, Waste, and Vent (DWV) Lines
Proper wastewater evacuation beneath a manufactured home depends entirely on precise pipe sizing, strict gravity pitch, and secure chemical welding. Installing robust DWV lines prevents chronic backups and structural water damage in your crawl space.
Matching Pipe Sizes for Toilets, Sinks, and Showers
Correct pipe sizing ensures wastewater evacuates efficiently without choking flow or causing trap siphonage. Using inappropriate diameters leads directly to sluggish drains and frequent system clogs.
- 4-Inch Toilet Drop: Dedicated high-capacity main vertical and horizontal drops required for toilets to handle solid waste evacuation smoothly.
- 1.5-Inch Gray Water Pipe: Standard diameters utilized for sinks, showers, tubs, and washing machines to manage gray water discharge effectively.
- Material Selection: Choose rigid PVC or ABS piping engineered specifically for code-compliant residential drainage applications.
The Critical 1/4-Inch Per Foot Slope Rule
Maintaining a consistent downward pitch is the single most important factor in gravity drainage performance. Improper slopes cause liquids to outrun solids or leave heavy waste stranded inside horizontal runs.
- The 1/4-Inch Slope: Slope all horizontal DWV lines downward toward the main sewer outlet by precisely 1/4 inch for every linear foot of pipe.
- Avoiding Flat Runs: A pitch that is too flat causes standing water and rapid solid accumulation, leading to stubborn clogs.
- Preventing Excessive Pitch: Pitching pipes too steeply causes liquid waste to rush past solid waste, leaving debris behind in the line.
Solvent Welding and Joining Dissimilar Pipes with Fernco Adapters
Creating permanent, leak-proof joints requires proper chemical preparation and specialized mechanical fittings when transitioning between different plastic materials. Reliable joints protect your home’s underbelly from environmental contamination.
- Primer and Solvent Cement: Apply purple primer to clean and soften PVC or ABS surfaces before brushing on solvent cement to create a permanent chemical weld.
- Quarter-Turn Lock: Push joined fittings together and twist roughly a quarter-turn to distribute the solvent evenly and lock the chemical bond.
- Fernco Rubber Clamp Adapters: Utilize heavy-duty rubber sleeves with stainless steel band clamps when transitioning between dissimilar pipe types like ABS and PVC.
Pressure Testing, Insulation, and Armor-Sealing the Underbelly
Concluding a plumbing installation requires rigorous verification, freeze protection, and airtight pest sealing to protect your mobile home’s structural integrity. Testing lines and armor-sealing the crawl space prevents catastrophic water leaks and rodent invasions.
Conducting a Reliable Pressure Test Before Sealing
Before closing up the belly wrap, pressurize your newly installed water lines with water or air to verify joint integrity. Uncovering slow drips now prevents hidden crawl space damage and costly exploratory repairs later.
- Water Pressure Test: Gradually open the main supply valve to fill lines, letting system pressure stabilize while inspecting every joint, tee, and fixture connection.
- Gauging Leaks: Monitor pressure gauges for at least 15 to 30 minutes to detect any subtle drops indicating micro-leaks or unsealed fittings.
- Immediate Remediation: Dry any damp joints and replace faulty crimps or loose clamps before applying thermal insulation or sealing the underbelly.
Winterization: Foam Sleeves and Pipe Heating Cables
Protecting exposed supply lines from severe winter freezes requires wrapping pipes in thick closed-cell foam and installing electrical heat tapes. This multi-layered thermal defense keeps water flowing smoothly even during sub-freezing weather conditions.
- Foam Pipe Insulation: Slip pre-slit polyethylene or rubber foam sleeves tightly over all exposed PEX and CPVC supply lines in the crawl space.
- Thermal Wrap & Sealing: Secure foam joints using waterproof vapor barrier tape to eliminate air gaps that cause localized freezing spots.
- Pipe Heating Cables: Wrap thermostatically controlled heat tapes along vulnerable low-clearance sections to automatically activate during freezing drops.
Rodent-Proofing and Resealing the Belly Wrap
Armor-sealing the mobile home underbelly requires repairing the polyethylene belly wrap and installing galvanized hardware cloth to block destructive pests. A properly sealed crawl space maintains thermal efficiency and safeguards plumbing lines from chewing rodents.
- Galvanized Hardware Cloth: Staple fine-mesh wire barriers across high-risk entry points and perimeter edges to completely block mice and rats.
- Belly Wrap Restoration: Fold the access flap back into place and seal all cuts using heavy-duty, waterproof woven polyethylene repair tape.
- Spray Foam Sealant: Apply expanding spray foam around major pipe penetrations and frame gaps to establish an airtight moisture and pest barrier.
Expert Troubleshooting and Frequently Asked Questions
Navigating mobile home plumbing issues often brings up unique challenges related to crawl space environments, lot-line hookups, and suspended framing. Addressing these common troubleshooting scenarios prevents minor plumbing glitches from escalating into costly emergency repairs.
Why Do I Have Water Outside at the Hose Bib But Frozen Pipes Inside?
Discovering that your outdoor hose bib has running water while your indoor fixtures remain completely dry is a classic symptom of a localized frozen water line within the unconditioned crawl space. Outdoor spigots are often tied directly to the main supply line before it enters the vulnerable underbelly, or the uninsulated riser pipe beneath the floor has frozen solid.
- Unconditioned Underbelly Exposure: Sub-freezing winds blowing through gaps in the belly wrap quickly freeze suspended PEX or CPVC lines that lack adequate foam insulation or heat tape protection.
- Lot-Line Shut-Off Isolation: Check if your park utility pedestal or main lot-line shut-off valve is partially frozen or restricted, which can limit indoor pressure while surface lines remain thawed by ground warmth.
- Safe Thawing Protocols: Safely thaw frozen indoor lines using a portable hair dryer or thermal wrap, avoiding open flames that can instantly melt PEX tubing or ignite the plastic vapor barrier.
How to Fix Sagging Drain Lines Causing Slow Evacuation
Slow-draining sinks and showers in a manufactured home are frequently caused by sagging drain lines rather than standard hair clogs. Because mobile home DWV pipes hang from flexible strapping, structural shifting over time can flatten or reverse the critical 1/4-inch per foot slope.
- Inspect horizontal runs in the crawl space to locate sections where water pools or pipes dip below the correct downward pitch.
- Install sturdy, adjustable pipe hangers or framing straps attached securely to the steel I-beams to lift sagging sections back to proper grade.
- Verify that the re-secured drainage slope consistently drops 1/4 inch per foot toward the main sewer outlet to ensure rapid, unhindered waste removal.
What is the Average Cost to Replace Plumbing Under a Mobile Home?
Budgeting for a complete or partial plumbing overhaul depends heavily on material selection, crawl space accessibility, and whether you complete the project yourself or hire professional assistance. Reviewing a professional repipe cost estimate helps you plan your home maintenance effectively.
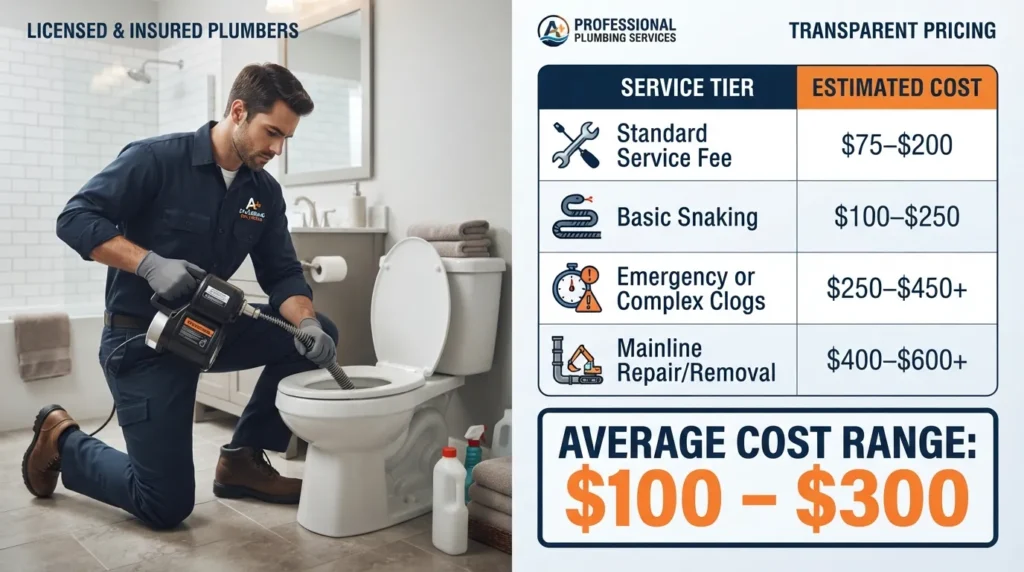
- Professional Estimates: Hiring a licensed contractor for a full mobile home repipe typically ranges from $1,500 to $4,500+ depending on single-wide or double-wide square footage and labor rates.
- Per-Fixture Breakdown: Professional partial replacements usually cost between $600 and $1,600 per individual fixture based on line accessibility.
- DIY Material Costs: Purchasing raw PEX tubing, fittings, and tools independently drastically cuts costs, though you must account for local plumbing permit fees ranging from $50 to $500.
- Park Guidelines: If you rent your land, verify responsibilities with mobile home park maintenance, as utility lines running from the main lot-line shut-off to the home connection point may fall under park management jurisdiction.

Oscar Vance | Master Plumber & Drainage Expert
Meet Oscar Vance, a licensed master plumber sharing practical solutions on residential repairs, preventive maintenance, and thoughtful home upkeep.