Can You Install a Bidet Yourself?
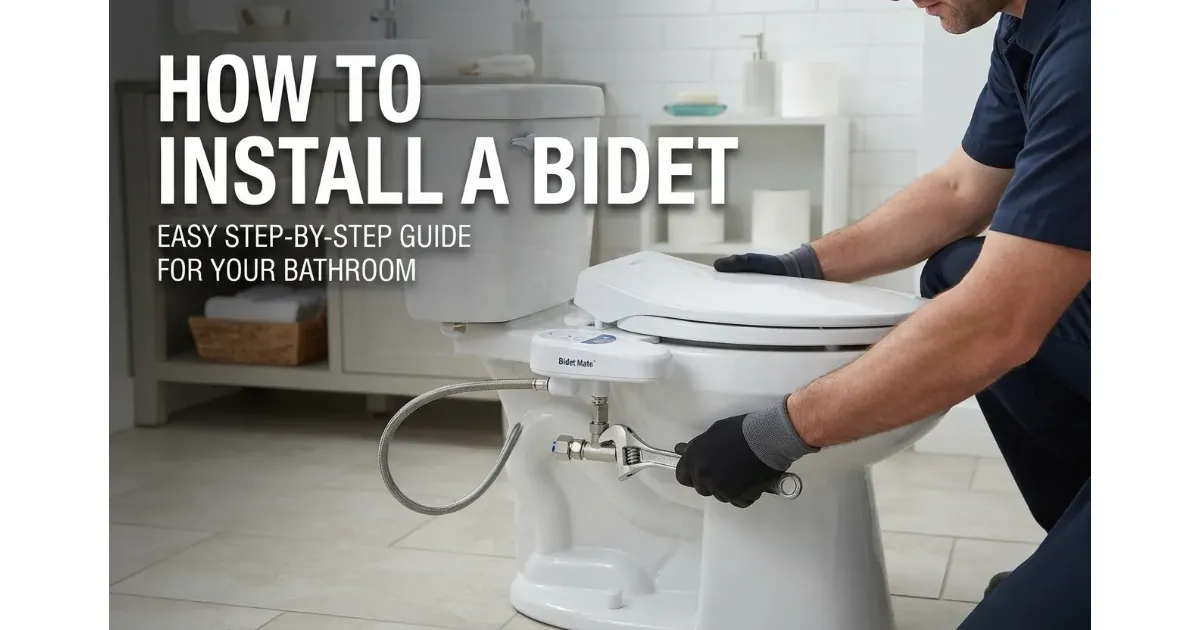
Yes, you can easily install most bidets yourself without hiring a professional plumber. Standard bidet attachments and electric bidet seats can be set up using basic hand tools in under 20 minutes.
- Time Commitment: Most installations take between 10 to 30 minutes depending on the model.
- Difficulty Level: Beginner-friendly, requiring zero specialized plumbing experience or pipe cutting.
- Tools Required: Usually just an adjustable wrench or simply your bare hands for tightening connections.
How Long Does It Really Take?
While a basic bidet attachment takes about 10 to 15 minutes, first-timers might need up to 30 minutes. Factors like tight spaces behind the toilet or stubborn water supply valves can slightly increase your overall installation time.
- Standard Attachments: Quickest to install, connecting directly beneath your existing toilet seat.
- Electric Bidet Seats: Take slightly longer because they require mounting brackets and access to a nearby GFCI electrical outlet.
- Potential Delays: Stuck T-valves or hard-to-reach water supply lines can add an extra 10 minutes of careful maneuvering.
Which Type Do You Have?
Your installation process depends entirely on the specific bidet fixture you purchased. Identify your model type to follow the correct setup steps:
- Non-Electric Bidet Attachments: Thin plates that slide under your current seat, connecting straight to the T-valve.
- Electric Bidet Seats: Full replacement seats offering advanced features like warm water, heated drying, and remote controls.
- Handheld Bidet Sprayers: Trigger-controlled wands mounted on the wall or tank, ideal for flexible manual rinsing.
Types of Bidets and How Their Installation Differs
Non-electric bidet attachments are the most affordable and popular entry-level option on the market. They feature a slim nozzle plate that slides directly underneath your existing toilet seat.
- Installation Time: Typically takes between 10 to 20 minutes to set up completely.
- Mechanism: Powered entirely by water pressure from your home supply line, requiring zero electricity or batteries.
- Setup Complexity: Extremely straightforward, involving just a simple connection to the toilet tank’s water supply valve via a T-valve.
Electric Bidet Seat
Electric bidet seats replace your entire existing toilet lid and ring, offering premium hygiene and comfort features. These advanced models require both a water connection and a nearby electrical power source.
- Key Features: Built-in water heaters, adjustable warm air dryers, heated seats, and customizable nozzle oscillation.
- Installation Requirements: Must be installed near a GFCI-protected electrical outlet to safely power the internal heating elements.
- Setup Complexity: Moderate; involves securing a mounting bracket to the porcelain bowl, sliding the unit into place, and connecting the water line.
Handheld Bidet Sprayer
Handheld bidet sprayers—often called shattafs—consist of a trigger-operated spray nozzle connected to a flexible metal hose. They offer maximum flexibility and manual control during use.
- Mounting Options: The holster can be clipped directly onto the side of the toilet tank or mounted permanently on a nearby bathroom wall.
- Water Control: Features a hand-pressed trigger to regulate water pressure manually, requiring careful attention to turning off the T-valve after use.
- Installation Process: Fast installation that utilizes the standard T-valve adapter beneath the tank, though wall-mounting requires basic drilling.
Quick Comparison Table
Before You Start Will a Bidet Fit Your Toilet?
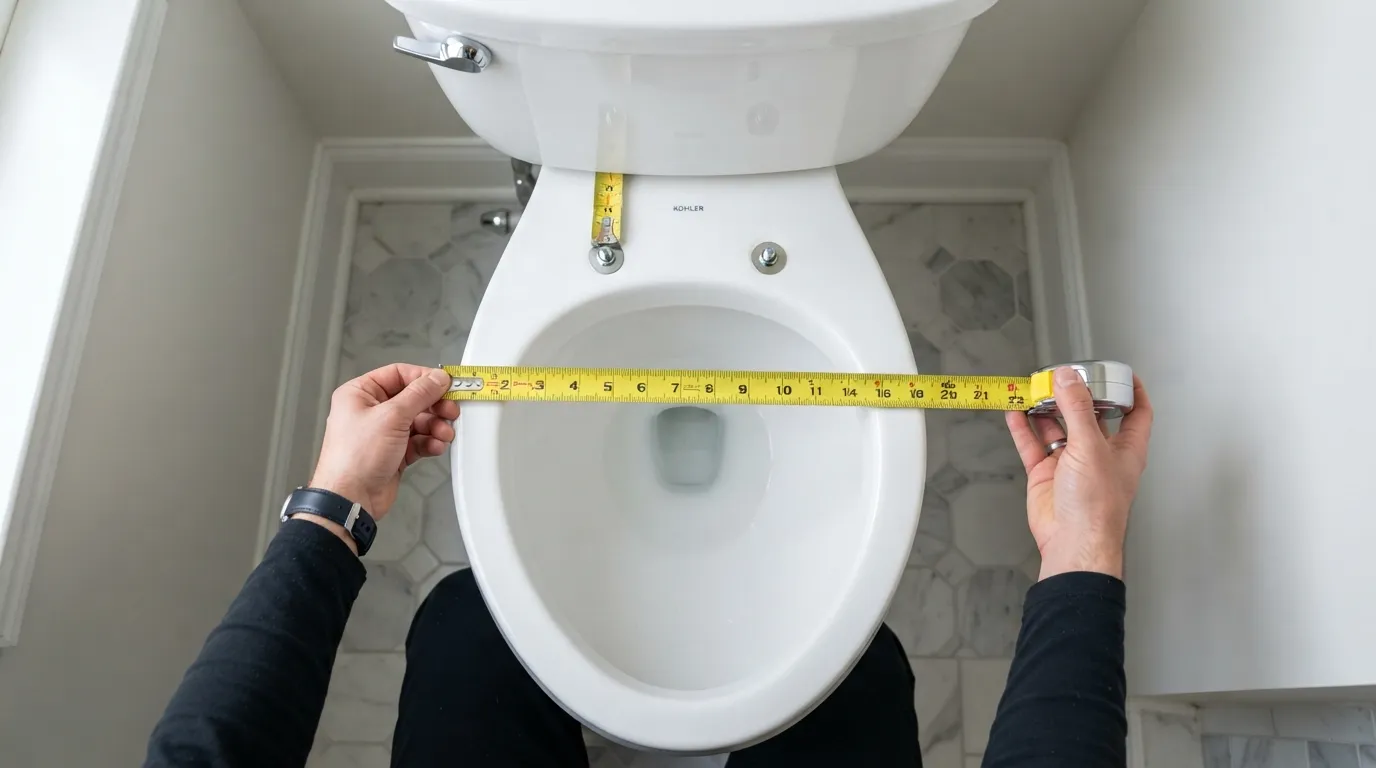
Toilet bowls come in two primary shapes: round and elongated. You must match your bidet seat or attachment precisely to your bowl shape to ensure proper alignment and a secure fit.
- Round Bowls: Typically measure about 16.5 inches from the front of the rim to the center of the mounting holes. They are more compact and ideal for smaller bathrooms.
- Elongated Bowls: Measure roughly 18.5 inches and feature an oval shape. Most modern bidet attachments and electronic seats are specifically designed for this configuration.
- Mismatch Risks: Installing a round bidet attachment on an elongated bowl—or vice versa—will cause overhang, misaligned spray nozzles, and an uncomfortable seating experience.
Check the Space Behind and Beneath the Tank
Inspecting the clearance around your toilet tank prevents frustrating roadblocks mid-installation. Tight spaces can block the bidet attachment’s mounting plate or prevent the T-valve from turning freely.
- Mounting Hole Clearance: Measure the distance between your toilet tank and the seat mounting holes. Most attachments require at least 1.5 inches of clearance to slide snugly into position.
- Tank-to-Bowl Angle: Ensure your tank doesn’t curve directly over the mounting bolts, which can block thin bidet attachment plates from seating flat against the porcelain.
Check the Water Supply Valve and Fill Valve Connection
Your bidet requires access to the pressurized water line feeding your toilet tank. Examining your existing shut-off valve and fill valve configuration helps you confirm compatibility before starting.
- Shut-Off Valve Integrity: Locate the water supply valve on the wall. Ensure it turns completely off to stop water flow; old, corroded valves may need replacement first.
- Fill Valve Thread Size: Standard North American toilets use a 7/8-inch connection, which matches standard bidet T-valves. Unique or older toilets may require a specialty adapter.
Toilets That May Cause Problems
Certain toilet designs lack the standard contours required for universal bidet components. Identifying these structural challenges early saves you from incompatible purchases.
- One-Piece Toilets: Feature a seamless design where the tank and bowl are molded together. This often creates tight curves that block standard T-valves or rigid connection hoses.
- Skirted Toilets: Conceal the trapway down the sides, hiding the water supply line inside a smooth porcelain channel. This makes accessing the fill valve nut exceptionally difficult.
- Tight Wall Proximity: If your toilet is cramped directly against a side wall or vanity cabinet, you may lack the lateral clearance needed to tighten supply lines or mount handheld sprayers.
Electric Seats: Is There an Outlet Nearby?
Electric bidet seats demand a reliable power source to run internal water heaters and warm air dryers. You cannot safely operate these units using standard extension cords in a wet bathroom environment.
- GFCI Requirement: A Ground Fault Circuit Interrupter (GFCI) outlet must be located close to the toilet to prevent electrical shock hazards in wet zones.
- Proximity Check: Ensure an existing outlet is within 3 to 4 feet of the toilet base so the power cord reaches safely without creating a tripping hazard across the floor.
60-Second Compatibility Checklist
Run through this quick verification list to confirm your setup is ready for a seamless, hassle-free bidet installation:
- Bowl Shape Verified: Measured your bowl to confirm whether you need a round or elongated bidet model.
- Clearance Confirmed: Checked that at least 1.5 inches of flat space exists between the tank and mounting bolts.
- Valve Functional: Tested the wall shut-off valve to ensure it completely shuts off water flow without leaking.
- Standard Fittings: Verified your fill valve utilizes standard threading or that you have acquired the correct adapter.
- Power Ready (Electric Only): Confirmed a nearby, code-compliant GFCI electrical outlet is available within cord reach.
Tools and Parts You Need
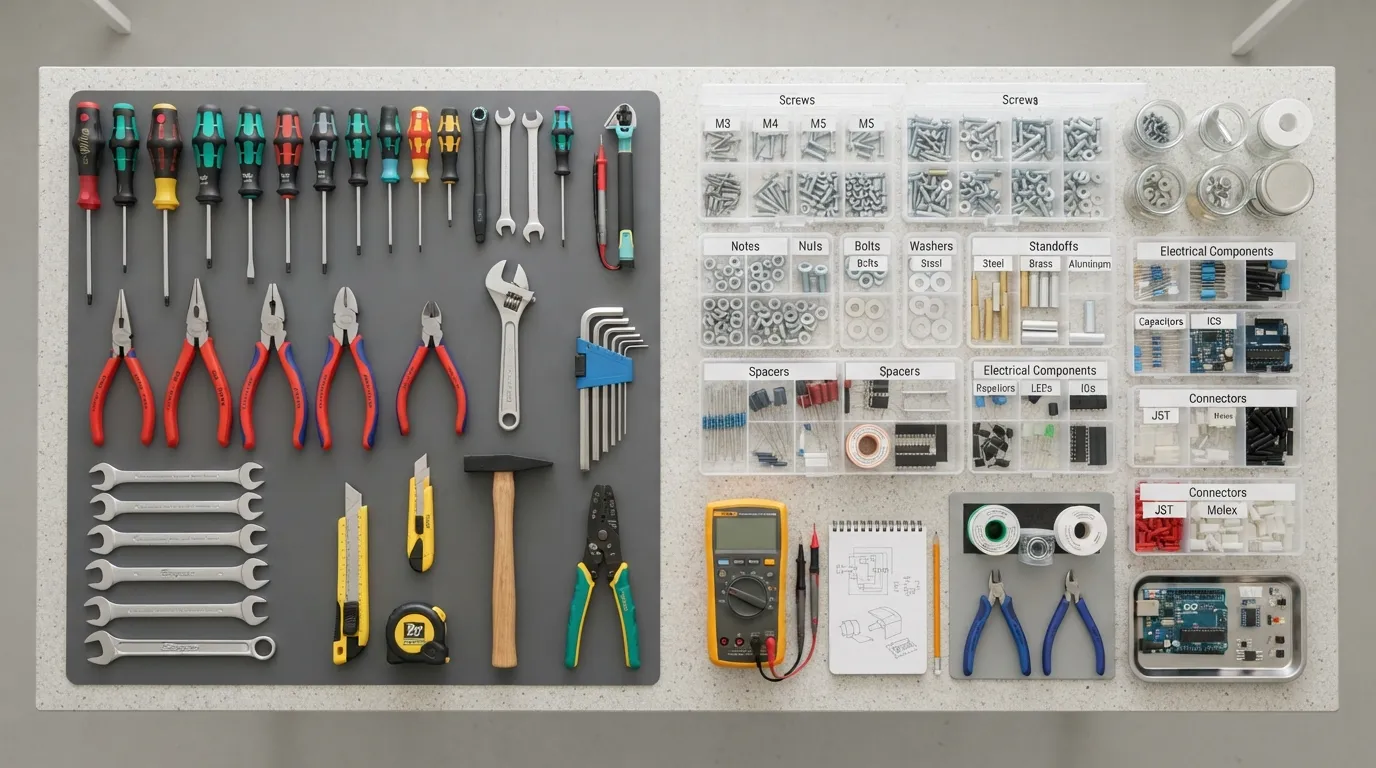
Gathering your basic hand tools before you begin ensures a smooth installation without unexpected trips to the hardware store. Most bidet setups require items you likely already own in your household toolbox.
- Adjustable Wrench: Essential for gently tightening the water supply line nuts and the T-valve adapter without stripping the threads.
- Pliers: Useful for gripping stubborn or corroded slip-joint nuts, though you should wrap the jaws in tape to protect chrome finishes.
- Flathead or Phillips Screwdriver: Required for removing your existing toilet seat and securing new bidet mounting bolts.
- Small Bucket or Bowl: Placed directly beneath the shut-off valve to catch residual water trapped inside the supply hose when disconnected.
- Microfiber Towel: Handy for wiping down porcelain surfaces and immediately mopping up any minor drips or condensation.
What Comes in the Box
Manufacturers typically package most standard bidet attachments or electric seats with all the essential plumbing hardware required for a baseline setup. Open your package and verify these standard components before starting.
- T-Valve Adapter: A specialized brass or plastic connector that splits your water supply to feed both the toilet tank and the bidet.
- Flexible Supply Hose: A braided metal or high-grade polyurethane hose designed to bridge the T-valve to the bidet inlet.
- Rubber Washers and Gaskets: Crucial sealing rings placed inside every threaded connection to prevent annoying leaks.
- Mounting Plates and Bolts: Adjustable brackets or sliding tracks used to anchor the bidet securely onto the toilet bowl.
Extra Parts You Might Need
While the standard kit covers most installations, certain plumbing configurations require inexpensive backup parts to guarantee a watertight fit. Keep these on hand just in case your specific bathroom demands them.
- Teflon (Plumber’s) Tape: Wrapped around male threaded connections to create an extra layer of leak protection, especially if threading is slightly loose.
- Specialty Reducer Adapters: Necessary if your home features non-standard metric or older plumbing fixtures that do not match standard North American T-valve sizes.
- Replacement Shut-Off Valve: If your current wall valve is ancient, rusted, or fails to shut completely, replacing it beforehand avoids a major flood risk.
Difficulty and Time at a Glance
Reviewing the scope of work helps set realistic expectations before you remove your old toilet seat.
- Overall Difficulty: Beginner-friendly; requires no specialized plumbing license or pipe modifications.
- Estimated Time: 15 to 30 minutes from unboxing to your first test flush.
- Mess Factor: Minimal, provided you properly drain the toilet tank using a bucket before uncoupling hoses.
How to Install a Bidet Attachment Step by Step
Locate the water shut-off valve on the wall behind your toilet and turn it clockwise until it is completely closed. Flush the toilet and hold the handle down to empty all remaining water from the tank, then use a sponge or small towel to soak up any leftover puddles at the bottom.
- Valve Closure: Ensure the water is completely cut off to prevent any unexpected spraying during hose disconnection.
- Tank Drainage: Holding the flush handle down drains the stored reservoir completely so the tank remains empty.
- Residual Moisture: Use your bucket and towel underneath the supply connection to catch drips right away.
Step 2: Remove the Toilet Seat
Pop open the decorative plastic hinge covers located at the back of your toilet seat to expose the mounting bolts. Use your screwdriver and wrench to loosen and remove the plastic or metal retaining nuts underneath the porcelain rim, then lift the seat off entirely.
- Hinge Protection: Pry open plastic caps gently with a flathead screwdriver to avoid scratching the gloss finish.
- Nut Removal: Hold the screw head on top with one hand while unscrewing the nut underneath.
- Surface Prep: Wipe down the exposed porcelain mounting area with a disinfectant wipe to ensure a clean surface for your bidet plate.
Step 3: Mount the Bidet Attachment
Align the slots of your bidet attachment base over the toilet’s porcelain mounting holes. Place your toilet seat directly on top of the bidet bracket, aligning all screw holes together, and reinsert the mounting bolts downward through both units.
- Bracket Alignment: Position the adjustable circular plates so the bidet nozzles sit neatly toward the back-center of the bowl.
- Secure Placement: Tighten the retaining nuts underneath the bowl just enough to keep the seat from shifting, leaving slight wiggle room for final adjustments.
Step 4: Install the T-Valve Adapter
Unscrew the flexible water supply line from the bottom of your toilet tank fill valve, placing your bucket underneath to catch residual drips. Check that the rubber washer is securely tucked inside the top of your T-valve adapter, then screw the T-valve directly onto the toilet tank thread.
- Washer Check: Never skip the rubber washer inside the T-valve collar; it creates the primary waterproof seal.
- Hand-Tightening First: Thread the T-valve by hand to ensure it catches the threads smoothly without cross-threading.
Step 5: Connect the Hoses
Reconnect your main toilet water supply line to the bottom threaded end of the T-valve adapter. Next, screw one end of the bidet’s flexible braided hose to the side outlet of the T-valve and the other end to the inlet connector underneath your bidet attachment.
- Hose Routing: Keep hoses free of severe kinks or pinches to ensure optimal water pressure delivery.
- Avoid Over-Tightening: Tighten connections firmly with your adjustable wrench, but stop turning once resistance builds to protect plastic fittings.
Step 6: Turn the Water On Slowly
Slowly turn the wall shut-off valve counterclockwise to let water re-enter the system in a controlled manner. Watch every connection point closely for the first 60 seconds to catch any potential leaks early before filling the tank completely.
- Gradual Pressure: Opening the valve slowly prevents sudden water hammer pressure spikes that can blow out unseated washers.
- Leak Inspection: Run your finger underneath the T-valve and hose joints to feel for tiny droplets.
Pro Tips From Doing This
Learning from hands-on experience saves time and prevents common setup frustrations. Keep these field-tested tips in mind:
- The Alignment Trick: Adjust your bidet attachment plate forward or backward before final tightening so the water stream targets precisely where intended.
- My Biggest Mistake: Overtightening the plastic T-valve connection caused a minor fracture; always rely on snug hand-tightening plus a quarter-turn with a wrench rather than brute force.
How to Install an Electric Bidet Seat
Electric bidet seats replace your entire existing toilet lid and ring rather than just sliding a thin plate underneath. Because these luxury units feature heated water, warm air blowers, and seat warmers, they require access to a nearby electrical power source.
- Full Seat Replacement: Your old toilet seat is completely uninstalled and replaced by an integrated electronic unit.
- Electrical Dependency: Must be positioned near a code-compliant GFCI outlet to power internal heating components safely.
- Advanced Controls: Usually operated via an attached side control panel or a wireless remote mounted on the bathroom wall.
Step-by-Step Seat Installation
Installing an electronic bidet seat follows a structured process similar to standard attachments, with a few extra steps for mounting brackets and power connection.
- Step 1: Shut off the water supply, flush to empty the tank, and completely remove your old toilet seat and hardware.
- Step 2: Secure the specialized mounting plate across the porcelain bowl bolt holes using the provided sliding tracks and rubber washers.
- Step 3: Slide the electronic bidet seat firmly onto the mounting bracket until you hear a secure click, ensuring it locks into position.
- Step 4: Attach the T-valve adapter to your toilet tank and connect the flexible water supply line to the bidet inlet.
- Step 5: Plug the power cord directly into a nearby GFCI-protected wall outlet, avoiding any hazardous extension cords.
Electrical Safety Basics
Working with electricity in a high-moisture bathroom environment demands strict adherence to safety standards and manufacturer guidelines.
- GFCI Protection Only: Never plug an electric bidet seat into a standard ungrounded outlet; always verify your receptacle features active Ground Fault Circuit Interrupter protection.
- Moisture Management: Keep the power cord routed cleanly away from floor puddles and ensure your hands are completely dry before plugging the unit in.
- Manufacturer Guidelines: Always review the specific wattage requirements and safety warnings outlined in your user manual before powering on.
Testing Heater Nozzle and Seat Sensor
Once everything is securely connected and powered up, perform a quick system test to confirm all electronic features are operating properly.
- Seat Sensor Activation: Sit down briefly on the seat to engage the body sensor, which safety-locks the water features from spraying when unoccupied.
- Heater & Warm Water Test: Activate the wash cycle to verify that the internal heater warms the water stream correctly.
- Nozzle Self-Cleaning: Check that the nozzles extend smoothly and undergo an automatic pre-rinse cycle before water sprays.
How to Install a Handheld Bidet Sprayer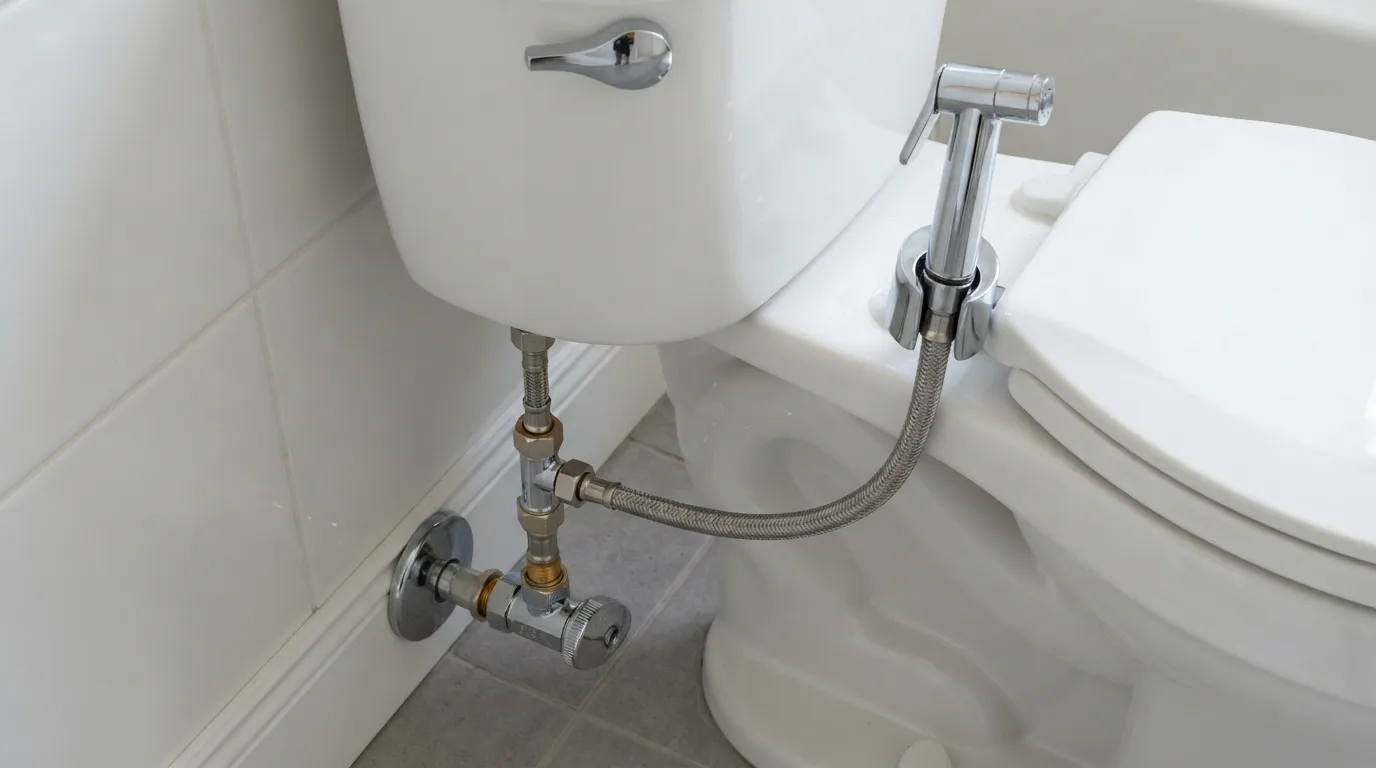
A handheld bidet sprayer—frequently called a shattaf or diaper sprayer—operates using a flexible metal hose connected directly to your toilet’s water supply via a specialized T-valve. Unlike stationary bidet attachments, the spray head remains unmounted in your hand during use, giving you complete manual control over the water angle and duration.
- The T-Valve Bridge: Splits water flow from the wall supply line, sending water upward into the toilet tank while routing a secondary line to your sprayer hose.
- Flexible Metal Hose: A high-pressure, reinforced hose that bridges the T-valve adapter to the handheld trigger wand.
- Mounting Holster: A dedicated bracket that holds the spray wand securely when not in use, mounted either on the toilet tank or the nearby wall.
Step-by-Step Sprayer Installation
Setting up a handheld bidet sprayer requires basic hand tools and only takes about 15 to 25 minutes from start to finish.
- Step 1: Turn off your wall shut-off valve clockwise, flush the toilet to drain the tank, and place a bucket underneath to catch trapped water.
- Step 2: Unscrew the existing water supply line from the bottom of your toilet fill valve.
- Step 3: Thread the T-valve adapter directly onto the toilet tank fill valve, making sure the internal rubber washer is properly seated.
- Step 4: Reconnect your main toilet supply line to the bottom of the T-valve, and screw the handheld sprayer hose onto the side outlet of the T-valve.
- Step 5: Attach the spray head to the open end of the hose, secure your mounting holder, and slowly turn the wall valve back on while checking for leaks.
Where to Mount the Holder
Choosing the right location for your sprayer holster ensures comfortable reach while preventing accidental water splashes across your bathroom.
- Tank-Mounted Brackets: Clip easily over the side of your toilet tank without drilling holes, keeping the sprayer within arm’s reach.
- Wall-Mounted Holsters: Screwed into the drywall or tiled wall adjacent to the toilet; ideal if you prefer the sprayer mounted higher or farther away.
- Accessibility and Reach: Ensure you can grab and return the wand smoothly from a seated position without twisting your wrist awkwardly.
Sprayer vs Attachment: Which Is Easier to Live With?
Choosing between a handheld sprayer and a fixed seat attachment comes down to personal hygiene preferences and daily convenience habits.
- Manual Versatility: Handheld sprayers double as a convenient tool for rinsing out the toilet bowl, washing cloth diapers, or cleaning bathroom tiles.
- Operation Habit: Sprayers require you to manually turn the T-valve off after every use to relieve water pressure in the hose, whereas fixed attachments leave the valve open permanently.
- Simplicity of Use: Fixed seat attachments offer a hands-free, streamlined experience, whereas sprayers demand active manual aiming during every use.
How to Connect Warm Water to a Bidet
While cold water bidet attachments are standard and refreshing during hot summer months, many users prefer warm water for daily comfort—especially during freezing winter mornings. However, integrating a warm water supply adds extra plumbing complexity and requires accessing a secondary hot water source.
- Cold Water Pros: Extremely easy installation, lower equipment cost, and zero risk of accidental scalding.
- Warm Water Pros: Superior comfort, gentle on sensitive skin, and a more luxurious bathroom experience.
- Complexity Factor: Requires either an electrical heating unit or a physical connection to your sink’s hot water line.
Option 1: Bidet With Built-In Heater Electric Seat
The cleanest and most popular method for getting warm water is installing an electric bidet seat that features an internal water heater. These smart units instantly heat tap water on demand without needing a separate hot water pipe.
- Instant Heating Tanks: Continuous warm water delivery through internal ceramic heating coils.
- Zero Extra Plumbing: Connects solely to your existing cold water supply line while using electricity to raise the temperature.
- Customizable Comfort: Easily adjust water temperature preferences using the wireless remote or side control panel.
Option 2: Connecting to the Sink or Hot Line
If you have a non-electric mechanical bidet that supports warm water, you can connect it directly to your bathroom sink’s hot water supply pipe using a dual-inlet adapter and a mixing valve.
- Under-Sink T-Valve: Installs beneath your vanity sink to tap into both hot and cold water shut-off valves.
-
Long Tubing Runs: Requires running braided water supply lines from your sink cabinet across or around the bathroom floor to your toilet.
- Dual-Inlet Bidets: Requires a specialized bidet attachment featuring two separate hose inlets for hot and cold water mixing.
Option 3: Simple Workarounds
If running secondary hot water lines is too complex and you don’t want an electric seat, certain manual workarounds exist, though they come with distinct drawbacks.
- Manual Sink Tap Mix: Some multi-use sprayers allow temporary hookups to sink faucets, letting you adjust warm water manually before spraying.
- Initial Temperature Delay: Be prepared to let the water run briefly so stagnant cold water clears out of long hot supply lines before warmth reaches the bidet.
Safety: Avoiding Scalding
Connecting a bidet directly to a domestic hot water line introduces serious thermal safety risks if water temperatures are left unchecked.
- Water Heater Limits: Ensure your home water heater is not set above 120°F (49°C) to prevent severe skin burns in sensitive areas.
- Thermo-Mixing Valves: Always use a certified mixing valve to blend hot and cold water streams safely before they reach the bidet nozzle.
Renters Apartments and Homes Without a Water Line
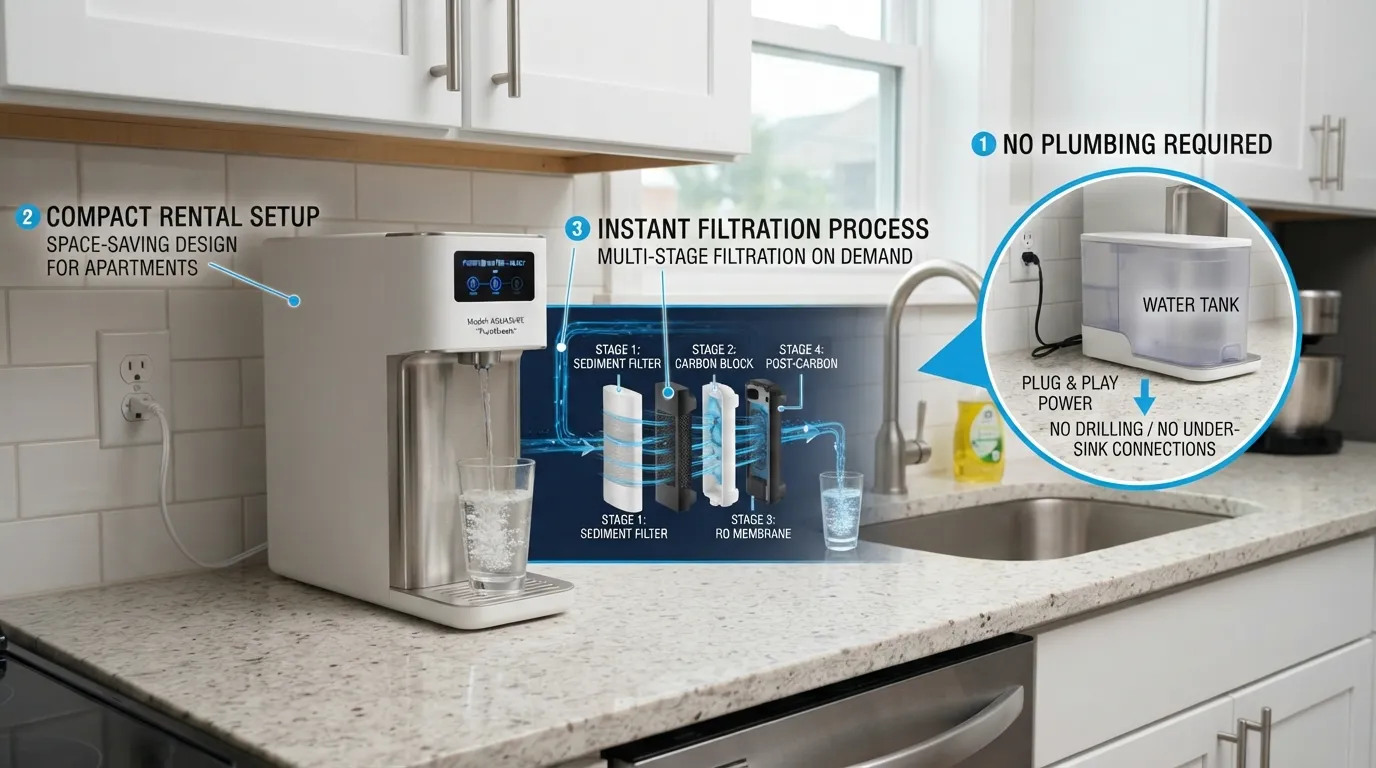
Yes, you can easily install a bidet in a rented apartment or house without violating your lease agreement. Because standard bidet attachments and non-electric seats require zero permanent plumbing modifications or wall drilling, you can fully remove them when moving out.
- Lease-Friendly Setup: Most landlords permit temporary fixtures that do not alter permanent bathroom infrastructure.
- Zero Damage Guarantee: Original toilet seats and hardware can be stored safely in a closet and reinstalled upon moving out.
- Non-Permanent Connection: T-valve adapters attach directly to existing external threads without requiring pipe cutting.
Removing a Bidet Without Damage
Reversing your bidet installation before moving out takes less than 15 minutes and restores the bathroom to its exact original condition.
- Step 1: Shut off the water supply valve and flush the toilet to drain the tank completely.
-
Step 2: Unscrew the bidet hose and T-valve adapter, placing a towel underneath to catch residual drips.
- Step 3: Reconnect your original toilet supply line directly to the bottom of the toilet tank fill valve.
- Step 4: Reattach your original toilet seat using the factory hardware, wipe down all surfaces, and open the water valve.
Bidet Options With No Water Line
If your bathroom layout lacks a standard toilet water connection or you live in a temporary travel situation, alternative bidet styles offer instant hygiene without plumbing.
- Portable Travel Bidets: Squeeze bottles featuring an angled nozzle that let you manually direct water wherever needed.
- Battery-Operated Sprayers: Compact, handheld motorized wands that draw water from an integrated or portable water reservoir.
- Zero Hookup Required: Perfect for temporary accommodations, RVs, dorm rooms, or guest bathrooms lacking standard water supply access.
When to Skip DIY and Ask the Landlord
While standard attachments are renter-safe, certain situations require explicit landlord approval or professional plumbing intervention.
- Plumbing Modifications: If you wish to install an integrated warm water mixing line drilled into bathroom vanity cabinetry.
- Faulty Shut-Off Valves: If your rental’s wall valve is corroded or broken, forcing a professional replacement.
- Electrical Upgrades: If installing an electric bidet seat requires adding a new GFCI outlet to an unpowered bathroom wall.
Test for Leaks and Try It Out Safely
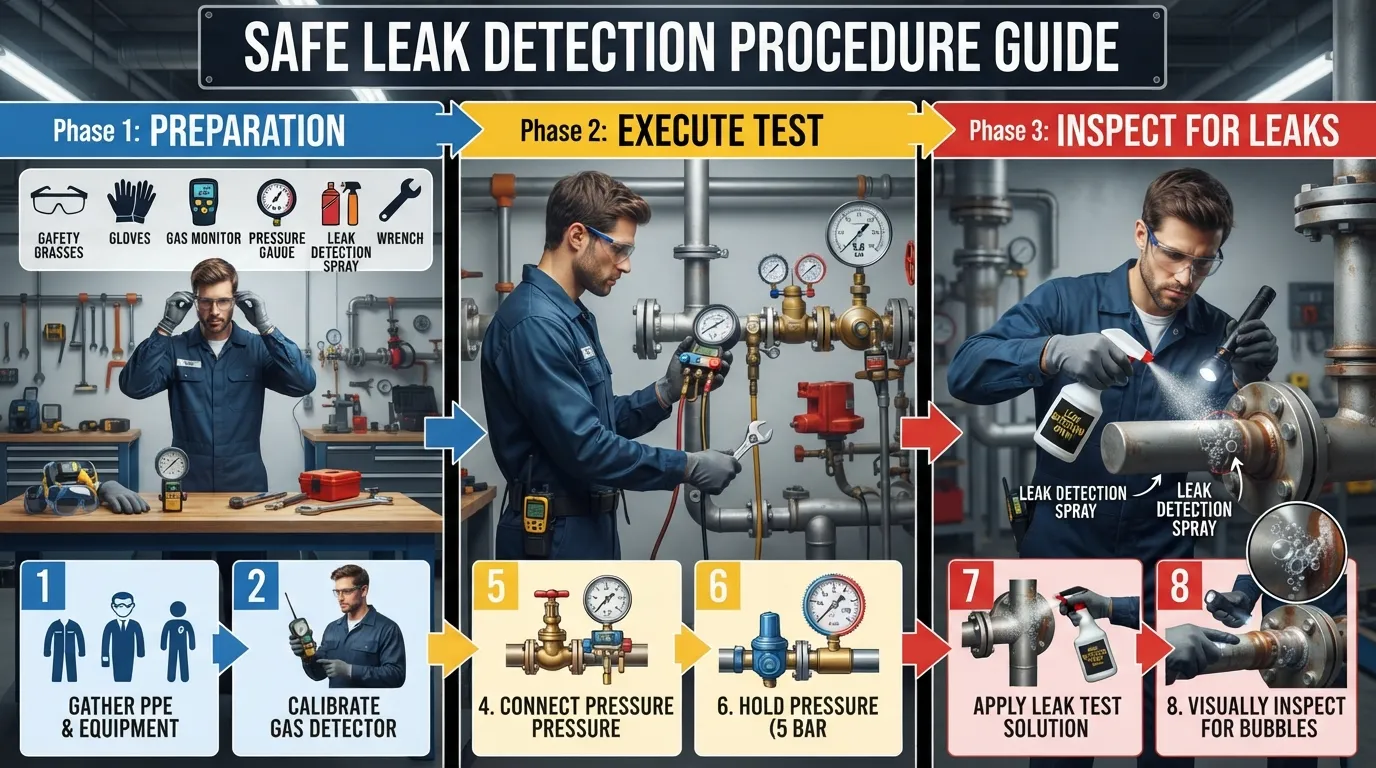
After turning your water supply back on, methodically inspect every joint to ensure a completely watertight seal. Even a microscopic bead of water can turn into a frustrating leak if left unaddressed.
- The Tissue Paper Test: Wrap dry toilet paper or a clean tissue tightly around each connection point, including the T-valve, tank inlet, and hose ends.
- Visual Inspection: If the paper absorbs moisture or darkens, you have located an active drip that requires immediate tightening.
- Joint Drying: Always wipe down all threads completely before your initial water test so you can spot the exact origin of any new droplet.
First Use: Do You Need to Sit for It to Work?
Understanding how your specific bidet model activates prevents confusion during your first test run. Modern electronic seats and simple mechanical attachments operate quite differently.
- Seat Sensor Activation: Many electric bidet seats feature an integrated weight or skin-contact sensor that prevents the nozzles from spraying unless someone is actively seated.
- Mechanical Attachments: Purely mechanical attachments or sprayers operate immediately when the control knob or trigger is turned, regardless of occupancy.
- Consulting the Manual: Always check your manufacturer instructions to confirm whether a safety sensor or self-cleaning pre-rinse cycle is expected during startup.
Adjusting Pressure and Nozzle Position
Your first test spray should be handled gently to avoid an unexpected jet of water splashing outside the bowl.
- Gradual Dial Turn: Open your bidet control valve slowly for the initial test, observing how the water stream builds in intensity.
- Nozzle Calibration: If your model features adjustable spray angles, cycle through the settings to ensure optimal target alignment.
How Long to Watch for Slow Leaks
A connection might look completely dry during the first two minutes, only to develop a slow seepage hours later under continuous pressure.
- The 30-Minute Check: Leave a dry paper towel flat on the floor directly beneath the toilet connections and check it again after half an hour.
- Overnight Monitoring: For maximum peace of mind, perform your installation during the day so you can periodically check for slow, creeping leaks before going to bed.
Common Problems and Mistakes Troubleshooting
Water leaks at connection points are the most frequent headache during a bidet installation, usually caused by misaligned rubber gaskets or under-tightened threaded collars. Pinpointing the exact drip origin allows you to resolve the issue in minutes.
- Missing or Misplaced Washers: Forgetting the rubber washer inside the T-valve or installing it upside down creates an immediate, heavy leak.
- Insufficient Tightening: Hand-tightening is a great start, but metal-to-metal or plastic connections often require a gentle quarter-turn with a wrench to seal fully.
- Cross-Threading: If a nut feels crooked while twisting, back it off completely to avoid stripping the delicate plastic or metal threads.
Low Water Pressure
If your bidet produces a weak, pathetic dribble instead of a clean, firm spray, your water delivery path is likely restricted somewhere in the system.
- Partially Closed Valve: Ensure your wall shut-off valve is turned fully counterclockwise and open 100%.
- Kinked Braided Hose: Check behind the toilet to confirm the supply hose is not pinched tightly against the porcelain bowl or wall.
- Debris Clogs: Mineral scale or sediment inside older plumbing lines can clog the tiny bidet nozzle ports, restricting flow.
Toilet Tank Filling Slowly or Not Filling
A toilet tank that refuses to fill or refills at a snail’s pace after bidet installation typically stems from an obstructed fill valve or an improperly positioned T-valve.
- T-Valve Obstruction: Some T-valves feature an internal safety flapper or narrow opening that restricts the volume of water rushing up into the tank.
- Fill Valve Float Jam: Ensure your bidet hoses are not physically interfering with the plastic float mechanism inside your toilet tank.
Seat Wobbles or Slides
A shifting, loose toilet seat makes using the bidet uncomfortable and can put undue stress on your newly installed water connections.
- Loose Mounting Nuts: The plastic or metal nuts underneath the porcelain rim have vibrated loose; tighten them securely with a screwdriver and wrench.
- Worn-Out Rubber Bushings: Old rubber expansion bolts lose their grip over time and require replacement to stay firmly anchored in the mounting holes.
Mistakes to Avoid
Learning from the most common DIY mistakes saves you from messy bathroom floods and broken hardware:
- Over-Tightening Plastic Fittings: Applying brute force with a wrench on plastic T-valves will crack the material instantly.
- Putting Washers In Backward: Pay close attention to coned rubber gaskets; seating them the wrong way breaks the watertight seal.
- Forgetting to Turn Off Water: Skipping Step 1 will result in an immediate mini-geyser when you uncouple the supply line.
Troubleshooting Table
When to Call a Plumber
While over 90% of bidet installations are successful DIY weekend projects, certain pre-existing plumbing issues require professional intervention.
- Rusted, Seized Shut-Off Valves: If your old wall valve refuses to turn or leaks when closed, a plumber must replace the angle stop.
- Cracked Porcelain Bowl: Deep stress cracks around the mounting holes mean your toilet needs total replacement before supporting a bidet.
- Persistently leaking lines that defy all troubleshooting steps should be handed over to a licensed professional to prevent water damage.
Cost Plumber Fees and Water Bill
Understanding your financial and time investment options before buying helps you weigh whether to tackle the project yourself or hire a professional plumber or home improvement service.
Will Home Depot Install a Bidet?
Major home improvement retailers like The Home Depot offer professional bathroom installation services through certified local contractors for complex plumbing upgrades. However, standard bidet attachments and plug-in electric seats are typically designed as direct consumer DIY products that do not require store-contracted labor.
- In-Store Services: Home Depot contracts licensed plumbers who can handle complete bathroom remodels, dedicated standalone bidet rough-ins, and complex electrical wiring.
- DIY Applicability: Standard bidet attachments and electronic seats can be purchased directly in-store or online and installed at home within minutes without booking a professional service call.
Does a Bidet Increase Your Water Bill?
Many homeowners worry that adding a water-spraying fixture will cause utility costs to skyrocket. In reality, a bidet consumes a surprisingly minimal amount of water per use—typically only about 0.1 to 0.15 gallons per wash cycle—which has an almost negligible impact on your monthly municipal utility statement.
- Minimal Consumption: A single bidet use consumes far less water than a standard toilet flush or a typical handwashing session at the vanity sink.
- Paper Production Savings: By dramatically reducing reliance on manufactured toilet paper, bidets offer indirect environmental and household budgeting benefits. Learn more about resource efficiency through the EPA WaterSense Program.
Does a Bidet Add Value to a House?
Modern bathroom upgrades consistently rank high on homebuyer wish lists, making smart or high-end bidet features an attractive selling point.
- Modern Appeal: Luxury bathroom fixtures signal a well-maintained, contemporary home with a focus on hygiene and comfort.
- Easy Reversibility: Because bidet attachments and seats can be uninstalled in minutes, you can easily take your investment with you when moving or leave them behind as a bonus feature.
Using a Bidet After Installation What Users Ask
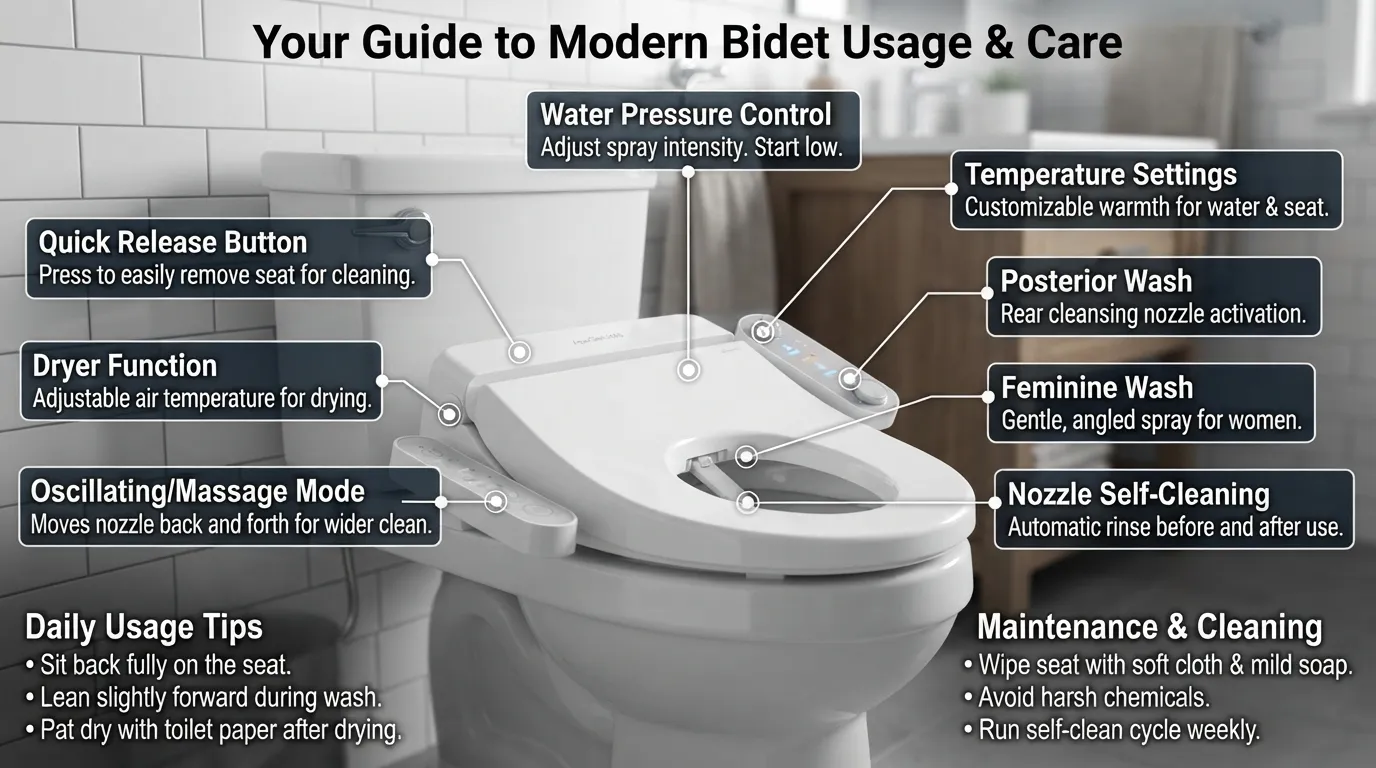
Whether you should wipe with toilet paper before using a bidet is largely a matter of personal preference and hygiene habit. Many users prefer a quick initial wipe to remove heavy residue, allowing the bidet stream to perform the primary cleaning and rinsing efficiently.
- The Pre-Wipe Approach: Using a single square of toilet paper first reduces heavy soil, allowing the water stream to target clean skin directly.
- The Direct Wash Approach: Modern high-pressure bidet nozzles are designed to handle the entire cleansing cycle without needing any pre-wiping.
Is a Bidet Healthier Than Wiping?
Using a bidet offers a thorough cleaning method that relies on water rather than dry paper friction. While medical conditions or personal sensitivities vary, water-based cleansing is widely recognized as a gentle alternative for maintaining daily personal hygiene.
- Gentle Cleansing: Rinsing with water minimizes skin irritation caused by repetitive wiping with dry, textured toilet paper.
- Consulting a Professional: Individuals managing specific medical or dermatological conditions should consult a healthcare provider for personalized hygiene recommendations.
Is There a Downside to Using a Bidet?
While bidets provide incredible comfort and cleanliness, they do come with a few minor drawbacks worth noting before you buy.
- Initial Adjustment Period: First-time users often experience a brief learning curve regarding water pressure control and proper positioning.
- Cold Water Shock: Non-electric attachments connected straight to cold water lines can feel quite chilly during winter months.
- Maintenance Requirements: Nozzles and attachments require periodic cleaning to prevent mineral scale buildup and maintain optimal hygiene.
How to Dry and Keep It Clean
Drying off after a bidet wash is simple, and establishing a quick cleaning routine keeps your equipment operating flawlessly for years.
- Drying Options: Use a designated small microfiber hand towel kept near the toilet, or pat dry using just two or three squares of toilet paper.
- Automatic Air Dryers: Electric bidet seats feature built-in warm air blowers that eliminate the need for paper or towels altogether.
- Routine Nozzle Maintenance: Run the built-in self-cleaning cycle weekly and wipe down the exterior plastic surfaces with a mild disinfectant.
Frequently Asked Questions
Can you add a bidet onto an existing toilet?
Yes, you can easily add a bidet onto your existing toilet without replacing the entire bowl. Standard bidet attachments slide directly underneath your current toilet seat, while electric bidet seats replace just the lid and ring, utilizing your existing plumbing and mounting holes.
Can you install a bidet on any toilet?
Most standard two-piece round or elongated toilets are fully compatible with standard bidet attachments and seats. However, one-piece toilets with curved contours, skirted toilets with concealed trapways, or non-standard tank designs can occasionally block the mounting hardware or T-valve connections.
Can I install a bidet spray on my existing toilet?
Yes, you can easily install a handheld bidet sprayer onto any standard existing toilet using the included T-valve adapter. The installation simply requires uncoupling your current water supply line, threading the T-valve beneath the tank, and mounting the sprayer holster.
Is it hard to add a bidet to a toilet?
Adding a standard bidet attachment is very beginner-friendly and typically takes only 15 to 30 minutes. It requires no specialized plumbing experience, pipe cutting, or professional tools—just basic hand tools like an adjustable wrench and a screwdriver.
Who do I pay to install a simple bidet attachment?
You do not need to pay anyone, as basic bidet attachments are designed specifically for effortless DIY installation. If you prefer professional help for complex electric seats or custom warm water lines, a local handyman or licensed plumber will typically charge between $150 and $400 for labor.
Why isn’t my toilet tank filling after installing a bidet?
If your toilet tank refuses to fill, your wall shut-off valve may not be fully opened, or internal bidet hoses are physically obstructing the plastic float mechanism inside the tank. Ensure your water valve is opened completely and that internal tank components move freely.
Can I install a bidet without a water line?
If your bathroom lacks a standard toilet water connection, you cannot use plumbed attachments, but you can easily use portable travel bidet bottles or battery-operated handheld sprayers. These standalone solutions require zero plumbing or permanent hookups.
Conclusion and Next Step
Installing a bidet is one of the quickest and most rewarding DIY bathroom upgrades you can tackle over the weekend. Reviewing your fixture type ensures you follow the right path for a seamless setup:
- Non-Electric Attachments: Quick 15-minute budget-friendly setups that slide straight under your existing seat.
- Electric Bidet Seats: Feature warm water and heated drying, requiring a nearby GFCI outlet and a bit more setup time.
- Handheld Sprayers: Offer maximum versatility for rinsing and cleaning, requiring a wall-mounted or tank-mounted holster.
- The Golden Rule: Always perform a thorough leak test using dry tissue paper after reopening your water supply valve.
Final Safety Reminder
Before you unbox your new bidet and grab your adjustable wrench, keep these final safety precautions in mind to protect your bathroom and hardware:
- Hand-Tightening First: Always thread plastic T-valves and hose collars by hand initially to prevent cross-threading and cracking.
- Water Shut-Off Integrity: Verify that your wall shut-off valve closes completely before uncoupling any supply lines to prevent accidental leaks.
- Patience Pays Off: Take your time adjusting water pressure gradually during your first test run to ensure a comfortable and splash-free experience.

Oscar Vance | Master Plumber & Drainage Expert
Meet Oscar Vance, a licensed master plumber sharing practical solutions on residential repairs, preventive maintenance, and thoughtful home upkeep.

