Start Summary & Practical Prerequisites
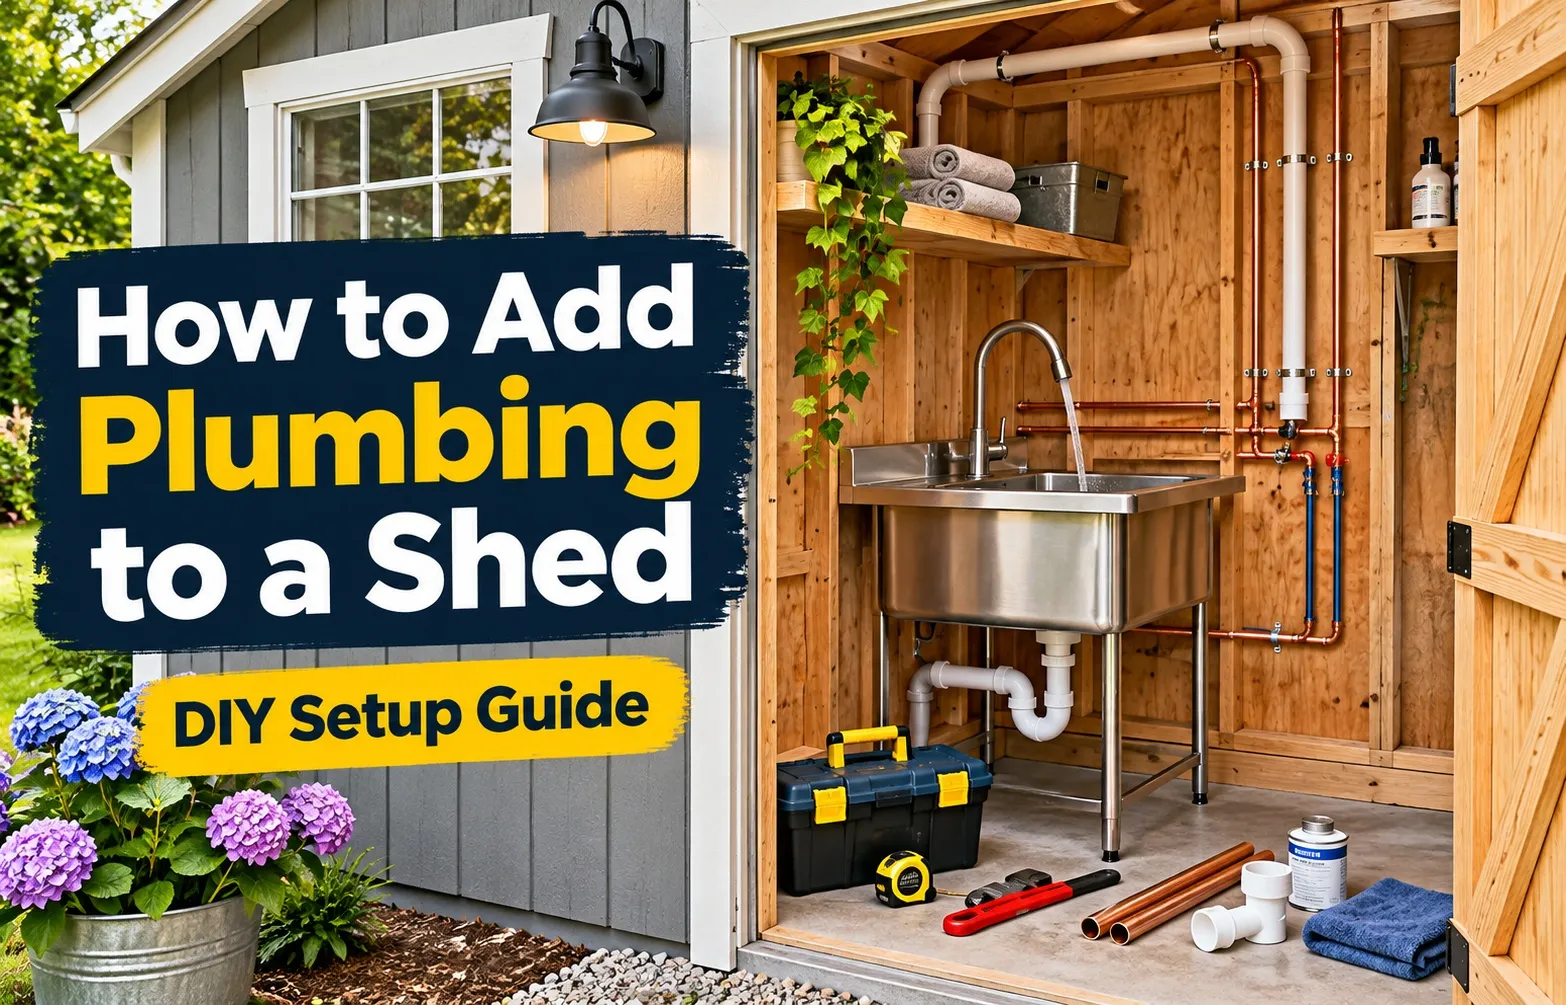 Adding plumbing to a shed requires running a frost-safe fresh water supply line from your house and installing a properly sloped drainage system. Completing this project involves securing permits, digging utility trenches below the local frost line, running PEX supply pipes, setting up waste lines, and pressure-testing the installation before closing the walls.
Key Steps at a Glance
Executing a shed plumbing installation requires a structured approach to ensure code compliance, freeze protection, and reliable water flow. Follow this core project flow from initial planning to final winterization:
- Permits & Planning: Verify local zoning regulations, secure building permits, and group fixtures along a single wet wall to streamline pipe runs.
- Utility Mark-Out & Excavation: Place an 811 utility line call to identify underground services, then dig a trench deep enough to sit below your area’s local frost line.
- Water Supply Installation: Execute a main water line tap at the primary home supply, installing a master shut-off valve, a backflow preventer, and a continuous run of underground PEX tubing.
- Drainage & Waste Line Setup: Lay PVC DWV pipes maintaining a mandatory pitch of 1/4 inch per foot toward the sewer line, or set up an upflush macerating system if gravity drainage is unavailable.
- Interior Rough-In & Venting: Route supply and drain lines through wall studs, mount fixture rough-ins, and install Air Admittance Valves (AAVs) to secure proper trap ventilation.
- Testing & Freeze Protection: Conduct a 65 PSI air or water pressure test to verify leak-free joints, apply heat trace tape, and fit insulation sleeves around exposed pipe sections.
Essential Tools and Technical Sizing Rules
Using correct pipe dimensions and specialized plumbing tools prevents pressure drops, line blockages, and premature pipe failures. The baseline equipment and technical sizing specifications required for outbuilding plumbing include:
- Freshwater Supply Lines: Use 3/4-inch or 1-inch flexible PEX tubing (PEX-A or PEX-B) for the main underground run from the home to prevent pressure loss over long distances.
- Drain, Waste, and Vent (DWV) Pipes: Standard installations require 3-inch Schedule 40 PVC DWV pipes for main toilet waste stacks and 2-inch PVC pipes for sinks and showers.
- Trench Depth Standards: Excavate trenches between 12 inches (in warm, frost-free climates) and 3 to 5 feet deep (in northern regions) to keep supply lines below the regional frost line.
- Specialized Plumbing Tools: Gather a PEX crimping tool, a PVC pipe cutter, a 65 PSI pressure test gauge kit, a trenching shovel or mechanical trencher, and pipe bedding sand.
- Safety & Control Valves: Install a main shut-off valve at the point of origin, localized shut-off valves for each fixture, and an inline backflow preventer to protect the main home’s potable water source.
Legal Regulations, Building Codes & The 135-Degree Rule
Adding plumbing to a shed transitions the structure from a simple storage unit to a serviced accessory building, which triggers strict municipal oversight. Before laying pipe or excavating soil, you must verify local zoning designations, obtain required plumbing permits, and design the system to comply with structural drainage codes.
Zoning Laws & Building Permit Requirements for Shed Conversions
Municipal zoning boards regulate outbuilding usage based on property setbacks, lot coverage ratios, and intended occupancy. Installing running water often reclassifies a shed as an Accessory Dwelling Unit (ADU) or habitable space, requiring formal architectural review and property inspections.
- Permit Acquisition: Most jurisdictions require separate building, plumbing, and electrical permits before connecting an outbuilding to municipal or private sewer systems. Review Sheds Direct Code Guidelines to understand baseline structural and utility permit requirements.
- Setback Restrictions: Local zoning codes mandate minimum distance buffers between plumbed structures, property lines, and existing septic fields to ensure maintenance access and fire safety.
- Unpermitted Work Penalties: Executing unpermitted plumbing installations can result in stop-work orders, municipal fines, mandatory wall opening for uninspected pipes, and insurance claim denials in the event of water damage.
International Plumbing Code (IPC) Basics for Outbuildings
The International Plumbing Code (IPC) governs pipe sizing, mechanical venting, and waste line slope to ensure sanitary conditions and prevent sewer gas invasion. Compliance requires maintaining continuous downward gravity flow and proper trap sealing throughout the installation.
- Mandatory Drain Slope: Horizontal drainage pipes sized 2 inches or smaller require a minimum downward pitch of 1/4 inch per foot. Pipes sized 3 inches to 6 inches must maintain at least 1/8 inch per foot of continuous fall toward the main sewer tie-in.
- Trap and Vent Mechanics: Every fixture must connect to an individual P-trap and a dedicated venting stack. Mechanical Air Admittance Valves (AAVs) may be installed inside walls to permit air intake without requiring a roof penetration.
- Backflow Prevention: Supply connections to an outbuilding require an inline backflow preventer or vacuum breaker at the point of origin to safeguard the primary home’s potable water supply from siphonage.
What is the 135-Degree Rule in Plumbing Waste Lines?
The 135-degree rule restricts the maximum cumulative change of direction a horizontal drainage pipe can make between accessible cleanout points. Under IPC guidelines, horizontal waste line turns must not exceed 135 degrees of total curvature without installing a removable cleanout fitting to allow mechanical snake access.
- Calculating Directional Changes: Combining three 45-degree elbows equals a 135-degree change in direction (45° + 45° + 45° = 135°). Adding any further bend beyond this limit creates severe obstruction risks and violates code unless a cleanout is added.
- Approved Fitting Selection: Hard 90-degree elbows are prohibited on horizontal drain runs. Install long-sweep 1/4 bends or dual 45-degree elbows to ensure smooth waste flow and prevent solid debris accumulation.
- Cleanout Placement Rules: Position accessible pipe cleanouts at the base of vertical stacks, at the exterior wall transition where the waste line leaves the shed, and at every horizontal turn exceeding 135 degrees.
Designing Your Waste Management & Drainage System
Managing wastewater properly prevents structural clogs, plumbing backups, and sanitary hazards in your converted shed. Choosing the correct drainage approach depends entirely on your outbuilding’s elevation relative to the main home, the distance to existing sewer lines, and whether you are connecting to municipal infrastructure or setting up an off-grid system.
Option A: Gravity Sewer Line Hookup (Best for Nearby Main Lines)
Gravity drainage is the most reliable, cost-effective, and maintenance-free method to handle shed waste if your outbuilding sits at a higher elevation than the main house sewer or septic cleanout. This method relies entirely on natural downward slope and gravity to transport solid and liquid waste without mechanical assistance.
- Mandatory Gravity Drain Slope: Main drain pipes measuring 3 inches or 4 inches in diameter must maintain a continuous, unvarying downward pitch of exactly 1/4 inch per foot toward the sewer tie-in to maintain self-cleansing velocity.
- ABS and PVC Pipe Selection: Construct your underground drainage network using durable Schedule 40 PVC or ABS pipe, securing solvent-welded joints to prevent root intrusion and liquid leaks.
- Sewer Cleanout Access: Install accessible sewer cleanout fittings at the exterior shed wall and along long horizontal runs to allow easy mechanical snaking in the event of a blockage.
Option B: Upflush / Macerating Toilet Systems (Saniflo Solution)
Upflush or macerating toilet systems (such as a Saniflo system) provide an efficient alternative when your shed sits lower than the main sewer line, or when digging a deep gravity trench across a long lawn is structurally impractical or cost-prohibitive. These units macerate solid waste into a fine slurry and pump it upward or horizontally through a narrow discharge pipe.
- Small-Diameter Discharge Lines: Unlike traditional 3-inch gravity stacks, macerating systems pump waste through a flexible 3/4-inch or 1-inch discharge line that can easily route through walls and floor joists.
- Dedicated Electrical Supply: Macerating pumps require a dedicated GFCI-protected 120V electrical circuit to power the internal motor and grinder blades whenever a fixture is flushed.
- Check Valve Protection: Always install an integrated or inline check valve on the discharge line to prevent pumped wastewater from flowing backward into the macerating unit basin.
Option C: Composting Toilets & Graywater Diversion (Off-Grid Option)
For remote outbuildings lacking access to municipal sewer connections or septic tanks, off-grid sanitation offers a practical and environmentally sustainable alternative. This setup completely separates solid waste management from graywater drainage without requiring extensive trenching or heavy plumbing installation.
- Aerobic Composting Toilets: Composting systems use natural aeration, peat moss, and controlled heat to break down solid waste safely into safe humus material, eliminating blackwater lines entirely.
- Graywater System Design: Run sink, basin, and shower runoff through dedicated 1.5-inch PVC pipes equipped with P-traps, directing the filtered water into an approved dry well, subsurface leach field, or graywater holding tank.
- Holding Tank Maintenance: If municipal regulations prohibit graywater dispersion on your property, collect liquid runoff in a sealed outdoor holding tank for periodic professional pump-out and disposal.
Call 811 & Trenching Below the Local Frost Line
Safe underground excavation requires contacting 811 to mark buried utilities before digging a trench that extends below your region’s local frost line depth. Proper trenching, sand bedding, and thermal protection safeguard your outbuilding’s water supply pipes from freezing temperatures and mechanical crushing.
Utility Line Safety: Dialing 811 Before Digging
Initiating an official 811 dig alert protects you from striking buried electrical, gas, and communication lines, preventing catastrophic property damage and serious injury. Municipal utility providers require advance notification before any mechanical excavation work begins across your property.
- Advance Notice Requirement: Contact 811 or submit an online locate request at least 48 to 72 hours prior to operating a backhoe or mechanical trencher.
- Utility Mark-Out Flags: Wait for professional locators to mark underground utility lines with color-coded spray paint and flags across your workspace.
- Hand-Digging Tolerance Zone: Maintain a safe hand-digging tolerance zone (typically 18 to 24 inches) on either side of marked utility lines to prevent accidental punctures.
Underground Trench Depth Guide by Regional Climate
Burying water supply lines below the regional frost line prevents expanding ice from rupturing pipes during severe winter freezes. Trench depth requirements vary dramatically depending on geographic latitude and local ground-freezing extremes.
- Warm Southern Climates: Require shallow trenches ranging from 12 inches to 18 inches deep to protect pipes from surface heat and accidental lawn damage.
- Temperate Mid-Latitude Regions: Mandate trench depths between 24 inches and 36 inches to stay safely below seasonal frost penetration limits.
- Cold Northern Zones: Require deep excavation down to a 3-to-5-feet trench (36 to 60 inches), matching local municipal building code requirements.
Excavation, Pipe Bedding & Backfill Protocols
Proper trench bottom preparation and backfill layering prevent sharp rocks from puncturing flexible PEX tubing over time. Careful installation ensures structural stability and long-term pipeline integrity beneath the ground.
- Trench Bedding Sand: Lay a compacted 3-to-4-inch layer of clean trench bedding sand along the bottom of the excavation to create a smooth, rock-free foundation.
- Thermal Protection: Encase vulnerable pipe sections in thermal insulation sleeves or apply self-regulating heat trace tape where shallow burial is unavoidable.
- Backfill & Warning Tape: Backfill the trench in compacted 6-inch lifts, laying detectable warning tape 12 inches above the water line to alert future excavators.
Running Supply Lines & Heating Water
Connecting fresh water to an outbuilding requires tapping into your home’s main pressurized water line, running flexible underground piping, and installing a reliable hot water heating system. Proper fitting selection, backflow prevention, and pipe material choices ensure clean water delivery without pressure drops or contamination risks.
Tapping into the Main Home Water Line
Connecting your shed to potable water begins by tapping into an existing indoor cold water pipe or basement main supply line. Installing dedicated control valves and protection hardware at this connection point safeguards the primary residence during repairs and complies with plumbing codes.
- Main Line Tee-Fitting Installation: Shut off your home’s main water supply and splice into a 3/4-inch or 1-inch cold water line using a full-port main line tee-fitting to preserve water volume.
- Master Shut-Off Valve & Drain: Install a master shut-off valve with a drain port immediately downstream of the tee-fitting to isolate the shed supply line and simplify winter freeze preparation.
- Backflow Preventer & Pressure Regulation: Mount a dual-check inline backflow preventer to block stagnant shed water from siphoning back into your drinking supply. Install an expansion tank or pressure regulator if main line pressure exceeds 80 PSI.
PEX Piping Selection: Type A vs. Type B for Underground Supply
Cross-linked polyethylene (PEX) tubing is the standard material for underground water runs due to its flexibility, freeze resistance, and seamless installation. Understanding the differences between PEX-A and PEX-B ensures structural reliability for long burial runs.
- PEX-A Tubing (Expansion Method): Offers maximum flexibility and highest freeze resistance. PEX-A expands to accept expansion fittings, maintaining full internal diameter without restricting water flow over long distances.
- PEX-B Tubing (Crimp Method): Features higher burst pressure resistance and lower material cost. Uses standard Copper Tube Size (CTS) crimp or cinch rings, though crimp fittings slightly reduce internal pipe diameter at joints.
- Continuous Underground Runs: Avoid using underground couplings whenever possible. Lay a single continuous run of 3/4-inch or 1-inch PEX tubing inside a protective sleeve from your home foundation directly into the shed interior.
Hot Water Solutions: Point-of-Use Electric vs. Tankless Propane Units
Selecting an efficient water heater depends on your available electrical capacity, natural gas/propane access, and daily hot water demand. Compact point-of-use systems fit easily under sinks or inside tight utility closets.
- Point-of-Use Electric Water Heaters: Small 2.5-to-6-gallon mini-tank electric units or 120V tankless heaters provide instant hot water for single sinks. They plug into standard circuits but lack the heating capacity for multi-fixture bathrooms.
- Tankless Propane Water Heaters: Tankless propane water heaters provide continuous hot water for full shed bathrooms containing showers and sinks. They require exterior wall venting and dedicated propane tank connections.
- Water Expansion Protection: Pair tankless or mini-tank water heaters with a mini thermal expansion tank on the cold supply inlet to absorb thermal expansion and protect internal valves from pressure spikes.
Interior Rough-In & Wet Wall Plumbing Layout
Routing internal plumbing through a shed requires grouping water and waste lines along a consolidated framing layout to conserve square footage and minimize pipe runs. Executing a clean rough-in involves sizing drain lines correctly, installing dedicated P-traps, and setting up an Air Admittance Valve (AAV) to secure proper trap seal pressure without penetrating the roof structure.
Maximizing Space with Single Wet Wall Design
A single wet wall layout concentrates all water supply lines, drain stacks, and fixture drop points within one insulated wall framing cavity. Consolidating your bathroom sink, shower, and toilet along a unified wall saves interior floor space, speeds up installation, and reduces materials cost.
- Fixture Layout Strategy: Align the sink vanity, toilet flange, and shower drain along a common interior or perimeter wall to eliminate complex cross-joist pipe routing.
- Stud Drilling and Structural Integrity: Bore centered holes through wall studs using a self-feeding bit. Maintain a minimum 5/8-inch distance from stud edges or install steel nail plates to protect PEX and PVC pipes from drywall screws.
- Fixture Rough-In Positioning: Mount sturdy wooden backing blocks between studs to secure water supply stub-outs, drop-ear elbows for shower heads, and localized shut-off valves for each fixture.
Sizing Interior Drain & Vent Pipes
Correctly sizing Drain, Waste, and Vent (DWV) pipes ensures proper flow capacity and prevents siphoning that could pull protective water seals out of P-traps. Every fixture connection requires specific pipe diameters matching code standards.
- Main DWV Stack Sizing: Install a 3-inch Schedule 40 PVC stack to handle toilet waste discharge and serve as the main vertical drainage backbone for the shed.
- Branch Drain Lines: Route 2-inch PVC pipes for shower drains and washing machine hookups, while 1.5-inch to 2-inch PVC lines handle lavatory sink basins.
- Sanitary Tee & P-Trap Connections: Connect horizontal branch lines to vertical stacks using directional sanitary tees. Ensure every sink, shower, and floor drain features a self-scouring P-trap to block toxic sewer gas.
Installing Air Admittance Valves (AAVs) for Shed Venting
Air Admittance Valves (AAVs) are one-way mechanical valves that open under negative pressure to admit fresh air into the DWV system when a fixture flushes, then seal shut under positive pressure. Installing an AAV inside the shed eliminates the need to cut a hole through the roof envelope for traditional vent stacks.
- AAV Mounting Height Rules: Position the Air Admittance Valve at least 4 inches above the horizontal branch drain or 4 inches above the highest flood level rim of the connected fixture (such as a sink rim).
- Accessibility & Airflow Access: Install AAVs in accessible locations with adequate air circulation, such as inside vanity cabinets or behind removable wall access panels. Never permanently seal an AAV inside a solid wall cavity.
- Code Compliance & Sizing: Select an IPC-approved AAV matching the fixture unit rating of your shed plumbing circuit (typically a 1.5-inch or 2-inch threaded connection unit).
Winterization & System Pressure Testing
Verifying system integrity through rigorous pressure testing and protecting vulnerable water lines from freezing temperatures prevents catastrophic pipe bursts. Testing joints prior to closing walls and implementing reliable freeze-prevention strategies ensures long-term outbuilding plumbing reliability and structural safety.
How to Pressure-Test Supply Lines (65 PSI Water/Air Test)
Conducting a pressure test before closing wall cavities is essential for identifying hidden joint leaks or defective fittings. Attaching a pressure test gauge to your supply manifold and pressurizing the system to 65 PSI confirms structural integrity under standard residential water pressure limits.
- Pressure Test Gauge Assembly: Screw an analog or digital pressure test gauge equipped with a Schrader valve or test nipple onto the end of your PEX supply manifold.
- Pressurizing the System: Pump air into the system using a standard bicycle pump or fill with water, raising internal pressure to exactly 65 PSI.
- Monitoring Pressure Retention: Allow the system to sit for 24 hours while monitoring the gauge needle. A drop in pressure indicates a leaking joint or faulty crimp that must be repaired before finishing drywall.
Winterization Tactics: Heat Trace Cable & Pipe Insulation
Protecting outbuilding plumbing from extreme winter freezes requires wrapping vulnerable pipes in closed-cell foam insulation sleeves and running self-regulating heat trace cable. These active and passive thermal defenses prevent standing water from freezing and expanding inside unheated wall cavities.
- Self-Regulating Heat Cable: Wrap electrical heat trace tape helically along the exterior of cold-water supply pipes. Self-regulating cables automatically increase heating output as ambient temperatures drop.
- Pipe Insulation Sleeves: Slip thick polyethylene pipe insulation sleeves over the entire length of insulated PEX or copper supply runs, sealing all longitudinal slits with waterproof foil tape.
- Thermostatic Control Plugs: Connect heat trace cables to a thermostatic control plug that activates power only when ambient temperatures drop below freezing, optimizing energy efficiency.
Seasonal Draining Procedures for Unheated Sheds
If your shed remains unheated during freezing winter months, completely draining the plumbing system prevents trapped water from cracking fixtures and valves. Installing dedicated low-point drain valves and blowing out lines with compressed air provides total freeze protection.
- Isolating Supply Lines: Close the master shut-off valve located inside your main house to cut off all incoming water before winter dormancy begins.
- Opening Fixture Faucets: Open all indoor shed faucets, shower handles, and flush valves completely to relieve internal pressure and let standing water flow out.
- Blowing Out Residual Water: Attach an air compressor to the supply line inlet and inject low-pressure air (maximum 30 to 40 PSI) to force remaining droplets out through drain valves.
Shed Plumbing Cost Breakdown (DIY vs. Professional)
Calculating the overall cost to plumb a shed depends heavily on project scope, distance from the main house, regional permit requirements, and whether you execute the work yourself or hire a licensed plumber. Estimating equipment rental fees, material expenses, and labor costs helps establish an accurate budget before excavation begins.
Itemized Material & Equipment Tool Rental Costs
Plumbing an outbuilding requires specialized tools, core piping supplies, safety hardware, and municipal authorization fees. Sourcing supplies directly and renting heavy equipment can cut total costs significantly compared to full-service contractor quotes.
- Piping and Fitting Materials: Flexible PEX-A or PEX-B water supply lines cost between $0.50 and $1.50 per linear foot, while a PEX fitting kit and crimping tool starter set ranges from $80 to $150. Schedule 40 PVC DWV drainage pipe averages $2 to $5 per linear foot depending on diameter.
- Heavy Tool & Equipment Rentals: Renting a mechanical walk-behind or ride-on trencher incurs a trenching rental fee of $125 to $300 per day, saving considerable manual excavation labor over deep frost-line trenches.
- Permit and Inspection Fees: Municipal permit fees for outbuilding water and sewer connections typically run between $150 and $500 depending on local zoning rules and property valuation.
Total Budget Expectations: Simple Sink Setup vs. Full Bathroom
Project scope heavily impacts the total cost to plumb a shed. A minimal utility sink requires short supply runs and basic drainage, while a complete shed bathroom conversion requires comprehensive fixture rough-ins, water heating units, and complete waste line infrastructure.
- Simple Sink Setup ($600 to $1,800 DIY): Covers running a single cold-water supply line, small point-of-use electric water heater, single vanity sink, and basic graywater or main line drain hookup.
- Full Bathroom Conversion ($2,500 to $6,500 DIY): Includes running cold and hot water lines, installing a shower stall, vanity basin, toilet, macerating toilet kit price additions if needed, AAV venting, and a complete waste stack setup.
- Professional Labor Considerations ($4,000 to $12,000 Total): A licensed plumber hourly rate averages between $75 and $175 per hour. Contracting out the entire installation—including ground excavation, rough-in work, and fixture mounting—typically triples baseline material expenses.
Frequently Asked Questions
Adding plumbing to a shed raises critical questions regarding total expenses, legality, permit compliance, and structural depth standards. Review these concise answers to satisfy common planning concerns and align your project with regional regulations.
How much does it cost to add plumbing to a shed?
Adding plumbing to a shed typically costs between $600 and $1,800 for a basic DIY sink installation, or $2,500 to $6,500 for a full DIY bathroom conversion. Hiring a licensed plumber increases total costs to between $4,000 and $12,000, depending on trench depth, distance from the main home, and fixture selections.
- DIY Basic Sink Setup: Costs $600 to $1,800 including PEX supply piping, basic drainage, point-of-use water heater, and permit fees.
- DIY Full Bathroom Setup: Costs $2,500 to $6,500 including shower, vanity, macerating toilet system, AAV venting, and water heater.
- Professional Turnkey Installation: Costs $4,000 to $12,000 covering professional excavation labor, code compliance, rough-in work, and fixture installation.
Can I legally put a bathroom in a shed?
Yes, you can legally put a bathroom in a shed provided the installation complies with local zoning codes, property setback regulations, and building codes. Converting an outbuilding into a habitable space with running water often requires reclassifying the shed as an Accessory Dwelling Unit (ADU) through your local zoning board.
- Zoning Classification: Verify whether your municipal zoning board allows plumbed outbuildings or requires ADU status for living spaces.
- Building Code Compliance: Systems must follow the International Plumbing Code (IPC) for proper drain slope, mechanical venting, and backflow prevention.
- Impact on Property Valuation: Permitted bathroom additions legally increase functional square footage and total real estate valuation.
Do I need a permit to run water to a shed?
Yes, almost all municipalities require local building permits and plumbing permits before running underground water lines or connecting waste pipes to an outbuilding. Permit requirements ensure that excavation depths, backflow protection, and sewer connections meet public health and safety standards.
- Plumbing Permits: Mandatory for splicing into main home water lines or connecting to municipal sewer/septic systems.
- Building & Electrical Permits: Required if running new circuits for water heaters or executing structural wall framing changes.
- Inspection Triggers: Permits mandate open-trench and pre-drywall rough-in inspections by local code officials.
What happens if I don’t get a permit for shed plumbing?
Installing shed plumbing without a permit can result in severe municipal penalties, stop-work orders, forced demolition of uninspected work, and future real estate transaction issues. Unpermitted plumbing also invalidates homeowner’s insurance coverage in the event of water leaks or freeze damage.
- Municipal Sewer Penalty & Fines: Local authorities can issue heavy fines and force you to open wall cavities or uncover buried trenches for retroactive inspection.
- Insurance Claim Denials: Insurance providers regularly deny claims for water damage or flooding caused by unpermitted plumbing systems.
- Real Estate Sale Complications: Unpermitted structures must be disclosed during real estate sales, often requiring complete removal or costly retroactive permitting before closing.
How deep do water pipes need to be buried to a shed?
Water pipes must be buried below your region’s local frost line, which ranges from 12 inches deep in warm southern climates to 3 to 5 feet deep (36 to 60 inches) in cold northern states. Digging a deep trench frost line prevents standing supply water from freezing and bursting underground PEX or copper pipes during winter.

Oscar Vance | Master Plumber & Drainage Expert
Meet Oscar Vance, a licensed master plumber sharing practical solutions on residential repairs, preventive maintenance, and thoughtful home upkeep.