How to Clear a Plumbing Vent with a Hose
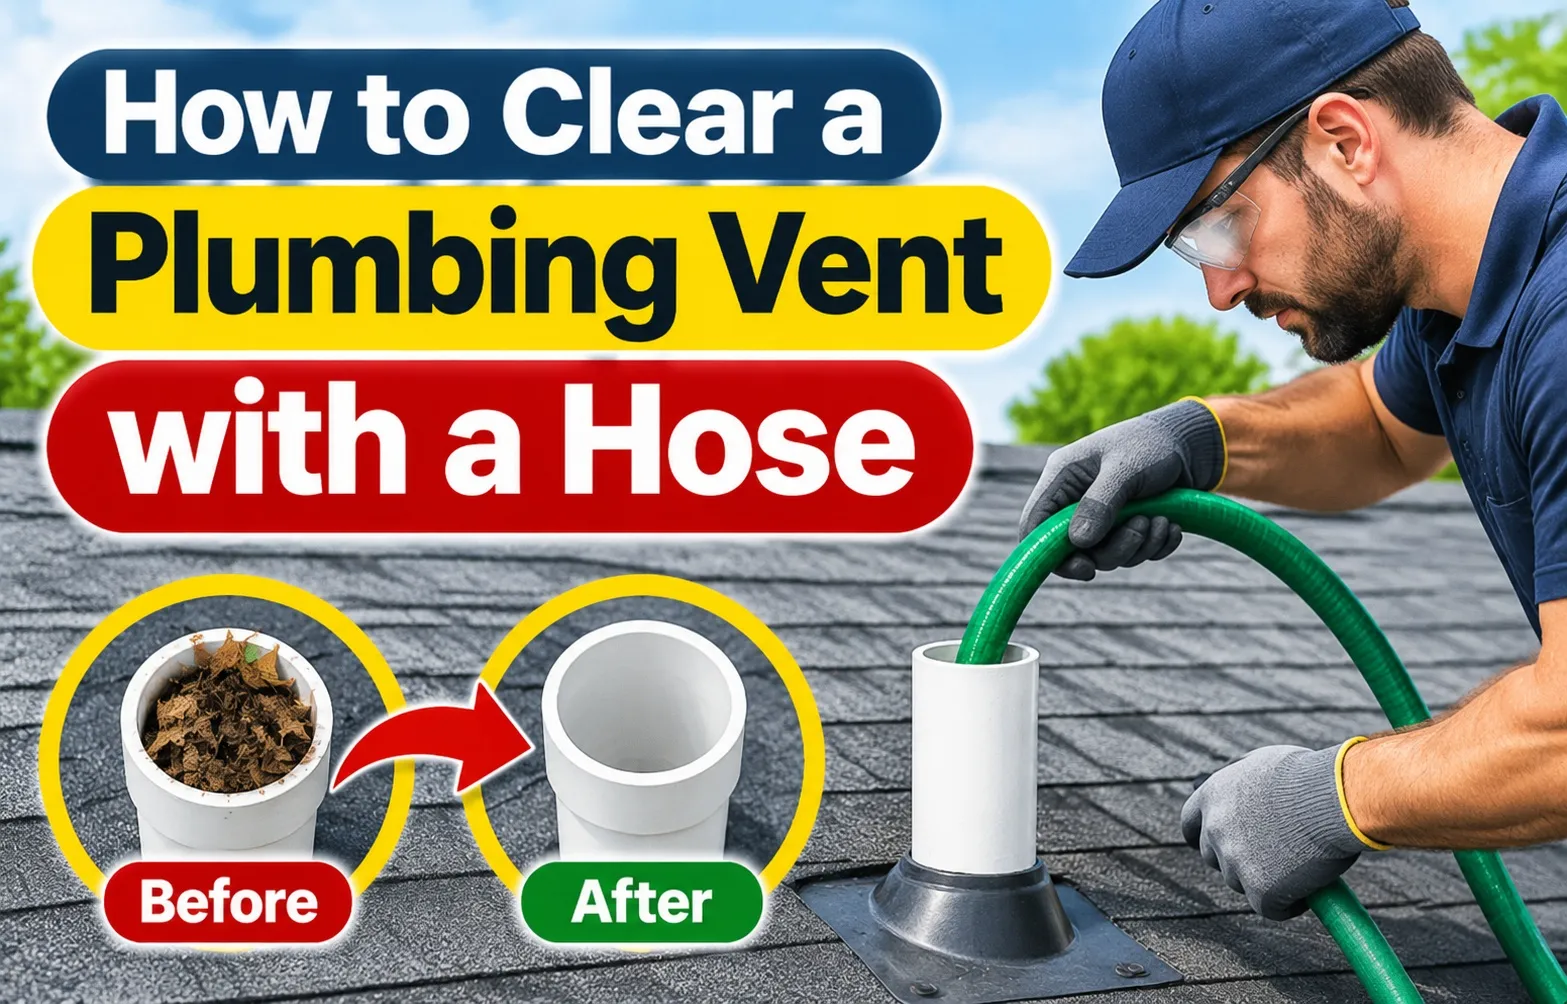 Clearing a clogged plumbing vent with a garden hose involves flushing the main vent stack from the roof to push debris down into the sewer line. Introducing a controlled stream of water into the pipe breaks up soft blockages like leaves, dirt, or bird nests, restoring proper atmospheric pressure across your home’s drain system.
Your Drain-Waste-Vent (DWV) system relies on roof vent stacks to maintain neutral atmospheric pressure inside your pipes. When a vent pipe becomes obstructed, wastewater creates a vacuum lock that slows down drainage and pulls water out of P-traps, allowing hazardous sewer gases to enter living spaces.
How to Know Your Plumbing Vent Stack is Clogged (Before Climbing the Roof)
Before retrieving a ladder, verify that your drainage issues stem from a blocked vent stack rather than a clogged main sewer line or isolated fixture drain. A venting failure affects multiple fixtures simultaneously throughout the house.
Inspect your home for these common symptoms of a compromised vent pipe:
- Gurgling Drains and Toilets: Sinks, tubs, or toilets make loud glug-glug noises when draining as water struggles against an airlock.
- Slow Drainage Across Multiple Fixtures: Water drains sluggishly even after you clean P-traps and remove hair or soap scum from individual fixture traps.
- Persistent Sewer Gas Odors: Foul hydrogen sulfide smells emerge near sinks or showers due to atmospheric pressure differences sucking water out of P-traps.
- Standing or Fluctuating Toilet Water: Water levels in the toilet bowl drop unexpectedly or bubble when another fixture like a washing machine or shower drains.
Why a Hose is the Best DIY Solution for Light-to-Moderate Blockages
Using a garden hose is the most accessible and effective first-line DIY method for clearing roof vent obstructions. The weight and direct hydraulic force of water easily break up organic material without damaging plastic or cast-iron piping.
A hose flushing approach offers several distinct advantages for home maintenance:
- High Hydraulic Force: Pressurized water cuts through compacted organic matter like pine needles, spider webs, and dry leaves faster than handheld wire snakes.
- Complete Pipe Washing: Water rinses down the full interior circumference of the vent stack, washing away sludge buildup along the pipe walls.
- Immediate Verification: If the vent stack opens up, the water flows straight down to the main sewer line without backing up over the roof collar.
- Minimal Equipment Cost: Homeowners can clear standard clogs using existing yard hoses and standard spray nozzles without renting specialized power augers.
Safety & Pre-Job Preparation for Roof Vent Clearing
Working on a roof to clear a plumbing vent stack involves serious fall risks and potential home water damage if executed improperly. Proper pre-job preparation, safety gear assembly, and environmental assessment are required before attempting any overhead maintenance.
Evaluating weather conditions, gathering professional-grade tools, and stationing an indoor monitor ensure the job proceeds safely without causing attic ceiling floods or personal injury.
Essential Safety Equipment & Tools List
Climbing onto a roof with a running hose requires specialized equipment designed for pitch stability and leak prevention. Gathering all necessary tools before ascending eliminates hazardous trips up and down the ladder.
Assemble these essential safety items and clearing tools before starting:
- Extension Ladder: Duty Rating Class IA ladder set at a 4:1 slope angle and secured at the top rung to the fascia board.
- Safety Harness & Fall Protection: A certified roof anchor system with a shock-absorbing lanyard for steep pitch roofs.
- Non-Slip Rubber Shoes: High-traction rubber-soled boots or shoes to maintain grip on asphalt shingles or metal panels.
- Garden Hose with High-Pressure Nozzle: A 50-to-100-foot heavy-duty hose equipped with a twist nozzle or brass jet tip.
- Expandable Rubber Drain Bladder: An expanding water bladder attachment to seal the pipe and concentrate forward water pressure.
- High-Lumen Flashlight & Plumber’s Snake: A small waterproof flashlight and a 25-foot handheld auger as a mechanical backup.
Roof Access Rules: When NOT to Go Up
Roof surfaces become exceptionally hazard-prone under specific weather and structural conditions. Assessing environmental factors prior to ladder setup prevents catastrophic falls and equipment damage.
Abide by these strict safety protocols and postpone roof access if any of the following conditions exist:
- Wet or Frosty Surfaces: Morning dew, rain, ice, or algae growth render shingles slick and unnavigable.
- High Wind Gusts: Winds exceeding 15 mph can unbalance workers carrying stiff garden hoses on steep roof pitches.
- Overhead Electrical Proximity: Power service lines running within 10 feet of the ladder placement area pose lethal shock risks.
- Steep Pitch Roofs: Roof slopes exceeding a 6/12 pitch require full professional scaffolding or specialized roofing brackets.
Critical Step: Coordinating with an Indoor Spotter
Working with an indoor spotter is a non-negotiable requirement when flushing a vent stack with water. If a severe blockage exists below the roofline, high-pressure water can quickly back up and overflow indoor fixtures.
Assign specific communication protocols to your indoor spotter during the process:
- Fixture Monitoring: The spotter stands near low-lying toilets, bathtubs, and sinks to watch for rising water or gurgling sounds.
- Emergency Communication: Establish phone or walkie-talkie contact to command an immediate water shut-off at the first sign of backflow.
- Preventing Ceiling Damage: Catching a water backup instantly prevents overflow onto floors, avoiding costly attic insulation and ceiling drywall damage.
How to Clear a Plumbing Vent with a Hose
Clearing a plumbing vent stack using a garden hose requires a methodical approach to ensure clogs are fully eliminated without causing indoor water backups. Following a structured procedure protects your drainage system and restores proper rooftop airflow.
Watch the video below for a visual walkthrough on how to clear a roof plumbing vent pipe efficiently:
Step 1: Locate and Inspect the Vent Stack Opening
Locate the correct PVC vent pipe, ABS line, or cast iron stack protruding through your roof directly above the affected bathroom or kitchen fixtures. Shine a high-powered flashlight down the opening to identify nesting materials, ice, or dense blockages.
- Roof Identification: Match the vent location on the roofline to the interior layout of your clogged plumbing fixtures.
- Visual Assessment: Check if a debris cap or plumbing vent cap is damaged, missing, or blocked by external objects.
Step 2: Clear Visual Debris Manually
Before applying water pressure, perform manual removal of surface debris clustered right at the mouth of the pipe. Pushing loose material deeper into the stack can pack the obstruction tighter.
- Glove Protection: Wear thick work gloves to pull out sharp pine needles, leaves, twigs, and decomposing bird nests.
- Auger Assistance: Use a flexible wire or small hand auger to extract objects like tennis balls or acorns lodged near the top edge.
Step 3: Insert and Feed the Garden Hose
Bring your heavy-duty garden hose up to the roof and feed the nozzle end directly into the open pipe stack. Push the hose gently downward until you encounter firm resistance from the clog.
- Depth Measurement: Most residential clogs occur within the first 2 to 4 feet of the vertical stack or at the first 90-degree elbow joint.
- Hose Handling: Avoid kinking the hose as you feed it into the PVC vent pipe or cast iron stack to ensure uninterrupted water flow.
Step 4: Flush with Controlled Water Pressure
Turn on your garden hose water supply gradually, starting with a steady stream before ramping up to full pressure. Coordinate closely with your indoor spotter to monitor for any backflow or gurgling.
- Spotter Check: Ensure your indoor assistant watches lower-level fixtures to detect a backup at the obstruction point instantly.
- Rhythmic Thrusting: Apply gentle, rhythmic upward and downward thrusting motions with the hose to break up compacted sludge and debris.
Step 5: Test Drains and Confirm Full Airflow
Once water pressure flushing washes the obstruction down into the municipal sewer or septic system, perform a comprehensive diagnostic test. Confirm that full atmospheric airflow and rapid drainage are restored throughout the house.
- Full System Test: Run tub faucets, flush toilets, and empty bathroom sinks simultaneously to verify the airlock is completely resolved.
- Final Roof Check: Ensure water drained smoothly down the stack without pooling on the roof collar or venting flashing.
Advanced Technique: Using an Expanding Water Bladder
When a standard garden hose stream fails to dislodge severe buildup or a compacted stubborn obstruction, an expanding rubber drain cleaning bladder offers professional-grade hydro-jetting power. This specialized tool transforms regular tap water pressure into a concentrated jet stream that breaks down dense blockages.
Watch the video below to see how a water bladder functions inside a plumbing vent stack:
What is a Drain Cleaning Rubber Bladder and How Does It Work?
An expanding rubber bladder is a heavy-duty device that attaches directly to a standard garden hose and expands when water pressure is applied. Instead of water spraying backward out of the pipe, the rubber casing swells up to lock tightly against the interior walls of the vent stack.
This expansion mechanism creates a pressurized hydro-jetting effect that delivers distinct mechanical benefits:
- Forward Pressure Concentration: Seals the pipe completely to direct 100% of the water force forward into the blockage rather than losing pressure upward.
- Hydro-Jetting Action: Shoots high-velocity streams of water that cut through mineral scale, frozen ice, and stubborn debris clusters.
- Elimination of Water Lock: Forces stagnant water and waste downward through the drainage system without risk of roof splashback.
Step-by-Step Rubber Bladder Jetting Procedure
Operating an expanding water bladder requires careful positioning and controlled water pressure release to protect your plumbing infrastructure. Follow a structured approach to maximize cleaning efficiency safely.
Execute these steps to clear tough blockages using a rubber bladder:
- Secure Connection: Screw the threaded end of the expanding bladder tightly onto your heavy-duty garden hose fitting to prevent leaks under high pressure.
- Proper Depth Positioning: Feed the uninflated bladder down into the vent stack, pushing it deep enough to clear side-vent junctions and reach the primary obstruction point.
- Full Water Activation: Turn the outdoor spigot on fully; the internal water pressure will automatically inflate the rubber housing, locking it securely inside the pipe.
- Pressure Pulsation & Movement: Allow the jet stream to work for 30 to 60 seconds, gently moving the hose up and down to create pressure pulsation against the clog.
- Safe Pressure Release: Shut off the water supply completely to deflate the bladder before pulling the assembly back out of the vent pipe stack.
Ground-Level & No-Roof Alternative Methods
Clearing a plumbing vent stack does not always require climbing onto a steep or hazardous roof. Homeowners seeking ground-level access or indoor unclogging options can resolve venting issues safely using alternative entry points throughout the home’s plumbing system.
Alternative methods rely on accessible access fittings, indoor fixture entries, and attic branch pipes to bypass high-elevation roof work while restoring proper air intake to your drains.
Can You Unclog a Plumbing Vent Without Getting on the Roof?
Yes, you can unclog a plumbing vent without climbing onto the roof by accessing internal cleanouts, upper-floor fixture drain lines, or attic vent sections. These ground-level and indoor methods allow you to feed augers or push air through the Drain-Waste-Vent system safely from inside or around the base of your home.
Choosing an alternative access point depends on your home layout and available tool setups:
- Safety First: Eliminates the risks associated with ladders, slippery shingles, and high roof pitches.
- All-Weather Accessibility: Allows vent troubleshooting during rain, snow, or high wind conditions when roof access is impossible.
- Direct Pipe Access: Focuses clearing efforts on lower-level junction points where heavy debris or waste often settles.
Method 1: Clearing via Main Cleanout Fittings
Your home’s main sewer cleanout fitting provides direct ground-level access to the primary drainage trunk and vertical stack connections. Removing the threaded cleanout cap allows you to bypass upper roof lines entirely.
Follow these steps to clear obstructions from a ground-level cleanout:
- Locate the Cleanout Cap: Find the T- or Y-shaped PVC or cast-iron pipe extension located near your home’s foundation or front yard.
- Unscrew the Fitting: Use a pipe wrench to slowly loosen the threaded plug, keeping clear in case of standing line pressure.
- Feed a Plumbing Auger: Insert a motor-driven or manual sewer auger into the branch leading back toward the vertical vent stack, rotating the cable to clear caught debris.
Method 2: Using a Plumbing Snake from Indoor Fixtures
When the vent blockage is located close to specific upper-floor fixtures, you can feed a mechanical plumbing snake directly through sink drain lines or roof-vent cleanout tees installed inside the house.
Execute this indoor snake procedure to clear near-fixture airlocks:
- Disconnect P-Traps: Remove the slip-nuts on upper-bathroom P-traps to access the exposed wall drain stub-out directly.
- Insert the Cable: Pass a 1/4-inch or 3/8-inch handheld plumbing snake into the wall opening, pushing past the elbow junction into the vertical vent line.
- Apply Forced Air (Optional): Attach the blower port of a wet/dry shop vacuum to the fixture opening to blow loose debris upward or downward through the stack.
Method 3: Attic-Level Vent Pipe Inspection
Many modern homes feature accessible attic vent line runs before the pipe penetrates the roof deck. If your attic contains flexible couplings or test-tee cleanouts, you can service the line from inside the attic space.
Inspect and clear attic-level vent runs using this structured approach:
- Check for No-Hub Couplings: Locate rubber flexible couplings held by hose clamps along the PVC or ABS attic vent stack.
- Loosen and Inspect: Unclamp and slide back the rubber sleeve to visually inspect the vertical drop for bird nests or leaf dams using a flashlight.
- Run the Snake Downward: Drop a handheld auger straight down through the exposed pipe section to dislodge blockages above the main floor line.
Critical Warning: What NEVER to Do
Attempting improper DIY shortcuts when clearing a plumbing vent stack can cause catastrophic structural damage, chemical burns, and severe indoor flooding. Protecting your home and personal safety requires avoiding high-risk methods that compromise pipe integrity or overflow interior fixtures.
Understanding critical warnings prevents costly plumbing repairs and ensures your clearing efforts remain safe and effective.
Why Chemical Drain Cleaners Should NEVER Go Down a Vent Pipe
Pouring caustic chemical drain cleaners—such as lye, sodium hydroxide, or concentrated sulfuric acid—down a rooftop vent stack is extremely dangerous. Unlike standard sink drains, vent pipes are long, vertical air channels that create unique hazards when exposed to reactive chemicals.
Chemical application in vent stacks creates severe risks for homeowners and plumbing systems:
- Hazardous Roof Splashback: Trapped air pockets inside a blocked vent stack can force caustic liquid to bubble back up, causing chemical burns to your eyes and skin while standing on a roof.
- Corrosion and Pipe Damage: Harsh chemicals sitting on stubborn blockages eat through old cast iron stacks, weaken PVC joints, and degrade rubber vent boot seals.
- Toxic Fume Trapping: Chemical reactions generate heavy toxic fumes and heat inside dry pipe walls, venting dangerous gases directly back into your home through dry traps.
How to Prevent Indoor Water Damage During Hose Flushing
Using excessive water pressure during hose flushing can quickly backfire if the main sewer line is obstructed below the vent stack junction. Introducing water continuously into a blocked system forces wastewater upward into your home’s lowest living spaces.
Follow these protocols to prevent sewer line backup and ceiling flooding:
- Observe Strict Pressure Limits: Never leave a hose running unmonitored inside a vent stack; keep the flow rate low to moderate until drainage is confirmed.
- Immediate Water Shut-off: Stop the water flow immediately if your indoor spotter signals rising water levels in bathtubs, showers, or toilets.
- Identify Main Line Blockages: Water rapidly backing up out of low-level fixtures indicates a clogged main sewer line rather than an isolated vent pipe blockage, requiring immediate professional auger equipment.
Troubleshooting, Professional Costs & Prevention
When basic flushing fails to clear an obstructed vent stack, underlying structural or sewer line issues may require specialized equipment. Evaluating the severity of the blockage, comparing professional service costs, and taking preventative measures ensures long-term drainage reliability without recurring maintenance headaches.
Adhering to proper installation and maintenance standards—such as those outlined in established IAPMO standards—protects your Drain-Waste-Vent (DWV) system from severe debris accumulation and environmental wear over time.
What to Do If the Water Backs Up Out of the Vent Pipe
If water fills the vent stack and spills onto your roof deck during flushing, the obstruction is either severely compacted or located below the main sewer line junction. This symptom points to a blockage beyond the reach of standard garden hose water pressure.
Identify and address these advanced pipe obstructions systematically:
- Identify Main Line Blockages: Stagnant water backing up out of the top of the vent indicates a main sewer line clog, often caused by deep tree root intrusion or collapsed pipe sections underground.
- Halt Water Flushing: Turn off the water hose immediately to prevent excess weight from straining rooftop pipe joints or forcing wastewater out of lower interior drains.
- Deploy Heavy-Duty Machinery: Utilize a commercial-grade motor auger or hire a licensed specialist to perform high-pressure hydro-jetting to scour heavy root masses and calcified scale out of the line.
How Much Does Professional Vent Clearing Cost?
Resolving a vent stack issue varies in cost depending on whether you complete the task yourself, rent specialized plumbing tools, or hire a certified service technician. Comparing these financial options helps you choose the right approach for your budget and skill level.
Review the standard cost comparison breakdown below to plan your repair budget effectively:
Preventative Maintenance: Installing Vent Stack Protectors
Preventing leaves, twigs, and animals from entering your plumbing vent line eliminates the need for emergency rooftop maintenance. Installing durable protection over exposed pipe openings secures your system year-round.
Consider these effective preventative additions for your roof vent pipes:
- Mushroom Caps & Louvered Vent Caps: Install heavy-duty plastic or metal covers that allow full atmospheric airflow while completely blocking falling debris and rain.
- Wire Mesh Screen Guards: Secure stainless steel mesh over the top opening to block small birds, squirrels, and rodents from building nests inside the warm pipe stack.
- Routine Leaf Prevention: Trim back overhanging tree branches within 8 feet of your roofline to minimize pine needle and leaf drop around vent collars.
Frequently Asked Questions About Plumbing Vents
Understanding how plumbing vents operate and interact with your home’s drainage system helps resolve common troubleshooting questions quickly. Below are direct answers to frequent user queries regarding vent stack clogs, winter maintenance, and structural modifications.
Will a toilet flush if the vent pipe is clogged?
Yes, a toilet will still flush if the vent pipe is clogged, but the flushing performance will drop significantly. Without proper atmospheric air intake, flowing water creates a vacuum lock inside the pipes, leading to specific drainage issues:
- Sluggish Flush Cycle: The bowl drains slowly and may require multiple flushes to clear waste completely.
- Gurgling and Glugging Sounds: The toilet makes loud glugging noises as air is pulled forcefully through the water seal.
- Siphoning Nearby P-Traps: Negative pressure sucks protective standing water out of adjacent shower or sink traps, allowing sewer gas to enter the room.
Can you pour water down a plumbing vent pipe?
Yes, you can safely pour clean water down a plumbing vent pipe. The vent stack connects directly to your home’s main Drain-Waste-Vent (DWV) system, meaning any liquid poured into the rooftop opening flows straight down into the main sewer line or septic tank.
Flushing water down the vent stack is a standard maintenance practice used to test drainage capacity and clear light organic obstructions like dust, pine needles, or dry leaves.
How do you clear a plumbing vent in the winter (ice blockages)?
Warm air and moisture rising from interior drains can freeze near the cold rooftop vent opening, forming an ice bridge that seals the pipe. Clearing winter frost caps requires gentle thermal melting techniques to avoid damaging frozen PVC or ABS plastic.
Use these methods to remove winter ice blockages safely:
- Warm Water Flush: Pour warm tap water down the hose into the vent pipe to melt the ice plug gradually. Never use boiling water, as extreme temperature shocks can crack rigid plastic pipes.
- Attic Heat Tape: Wrap self-regulating heat tape around the exposed section of the vent stack inside the attic space to prevent frost buildup during severe cold snaps.
- Insulation Sleeves: Slide foam insulation sleeves over the attic-level pipe section to reduce condensation freezing near the roof line.
Can you install a cleanout tee on a vent pipe?
Yes, installing a cleanout tee on a plumbing vent pipe is a code-compliant modification that provides convenient access for maintenance. Placing a threaded cleanout fitting on an accessible branch line—such as in an attic space or utility room—offers major diagnostic benefits:
- Rooftop Safety Bypass: Allows homeowners and plumbers to run snake cables or inspection cameras directly into the vent stack without climbing onto the roof.
- Easier Maintenance Access: Provides a convenient access point for clearing stubborn clogs near upper-floor bathroom runs using standard hand augers.

Oscar Vance | Master Plumber & Drainage Expert
Meet Oscar Vance, a licensed master plumber sharing practical solutions on residential repairs, preventive maintenance, and thoughtful home upkeep.