How a Mixing Valve Works Inside Your Plumbing System
 Inside a plumbing network, a mixing valve continuously regulates water temperature by dynamically balancing hot and cold streams through precision internal mechanics. Understanding this continuous flow modulation helps homeowners and plumbing apprentices diagnose temperature inconsistencies and pressure shifts effectively.
Step-by-Step Internal Regulation Process
The internal mechanism of a thermostatic mixing valve operates through continuous physical adjustments driven by thermal and hydraulic forces. As water flows through the valve body, internal components react instantly to maintain safe output parameters.
- Hot & Cold Inlet Entry: Separated streams of hot water from the storage heater and cold water from the municipal supply enter dedicated inlet ports within the brass valve body.
- Thermal Expansion or Contraction: A specialized internal wax thermal element expands when exposed to rising water temperatures and contracts when temperatures drop.
- Real-Time Piston or Diaphragm Modulation: This thermal movement physically shifts an internal piston or mechanical diaphragm, precisely adjusting the hot-to-cold ratio in milliseconds.
- Constant Blended Output: The proportioned water mixes thoroughly inside the internal chamber before exiting through the mixed water outlet toward your household faucets.
Thermostatic vs. Pressure-Balancing Mixing Valves
While both valve styles protect against sudden temperature extremes, they utilize distinct internal technologies to manage supply disruptions. Knowing the operational differences ensures proper application for whole-house loops versus local fixtures.
- Thermostatic Mixing Valves (TMVs): Utilize a wax thermal element to monitor and adjust water temperature directly, compensating for both temperature fluctuations and supply pressure drops.
- Pressure-Balancing Valves: Rely on a sliding piston or mechanical diaphragm that shifts solely based on pressure differentials between hot and cold lines, without altering the underlying thermal blend.
- Operational Difference: A pressure-balancing valve prevents scalding when a toilet flushes by restricting hot flow during cold pressure drops, whereas a TMV actively maintains an exact preset temperature degree.
Practical Field Insight: Testing Outlet Temperature Consistency
Professional plumbers do not rely solely on factory gauge markings when installing or servicing a mixing valve; they verify actual delivery performance in the field. Testing the output under sustained flow conditions guarantees the valve is properly calibrated.
- Stabilized Flow: Open the nearest hot water tap fully and let water run continuously for at least 60 seconds to allow the internal thermal element to achieve complete thermal saturation.
- Digital Measurement: Insert a calibrated digital stem thermometer directly into the running stream to record the exact blended output temperature.
- Calibration Adjustment: Remove the protective cap and turn the adjustment screw clockwise to lower the temperature or counter-clockwise to raise it until the thermometer matches your target 120°F threshold.
Why Mixing Valves Are Essential: Core Benefits & Safety Standards
Installing a mixing valve solves one of plumbing’s biggest contradictions: water heaters must run hot enough to kill waterborne pathogens, yet tap water must stay cool enough to prevent severe skin burns. Certified mixing valves bridge this gap while expanding your tank’s overall hot water capacity.
Scald Prevention and the 120°F Safety Rule
Unregulated domestic hot water poses a serious thermal injury risk, particularly in households with young children, older adults, or individuals with reduced skin sensitivity. Certified anti-scald devices governed by ASSE 1017 (point-of-source) and ASSE 1070 (point-of-use) standards enforce a strict 120°F safe delivery temperature at fixtures.
- At 140°F (60°C): Tap water causes painful second- and third-degree burns in under 5 seconds of skin contact.
- At 130°F (54°C): Severe scalding occurs within approximately 30 seconds of continuous exposure.
- At 120°F (49°C): Water remains comfortably hot for bathing and washing while extending safe exposure tolerance to roughly 5 minutes, giving users ample time to react.
Eliminating Legionella Bacteria Growth in Water Heaters
Lowering your water heater thermostat directly to 120°F creates an ideal breeding environment inside the storage tank for dangerous waterborne pathogens. Maintaining a 140°F tank storage temperature eliminates microbial growth inside the heater while the mixing valve safely tempers water downstream.
- Pathogen Multiplication Zone: Legionella bacteria thrive and multiply rapidly in stagnant warm water between 77°F and 113°F (25°C–45°C), posing a severe respiratory risk if inhaled via shower mist.
- Thermal Disinfection: According to CDC Legionella control guidelines, storing hot water at 140°F (60°C) or higher effectively destroys Legionella pneumophila and prevents Legionnaires’ disease outbreaks in residential and commercial systems.
- Dual-Zone Protection: A point-of-source thermostatic mixing valve keeps the tank sanitized at 140°F while stepping outlet temperatures down to 120°F before water reaches household pipes.
Extending Usable Hot Water Tank Capacity
Pairing a high-temperature water heater setting with a thermostatic mixing valve substantially increases your home’s available hot water supply without buying a larger tank. Because superheated tank water requires more cold water dilution at the valve, your stored energy stretches much further.
- Increased Effective Volume: Storing water at 140°F and blending it down to 120°F boosts usable hot water capacity by roughly 20% to 30% compared to running a tank at 120°F.
- Reduced Cold-Water Runouts: Larger families experience fewer mid-shower cold water drops during back-to-back morning routines or simultaneous laundry cycles.
- Energy and Space Efficiency: Homeowners achieve higher peak hot water delivery from existing 40- or 50-gallon tanks without upgrading to bulky commercial units.
Common Types and Applications in Residential Plumbing
Residential plumbing systems deploy different mixing valve configurations depending on whether temperature control is needed at the primary heat source, at individual fixtures, or within closed-loop heating circuits. Selecting the right valve ensures code compliance, equipment longevity, and consistent water delivery across every application.
Point-of-Source Valves (Water Heater & Tankless Outlets)
Point-of-source mixing valves install directly on the hot water outlet piping above a storage tank or tankless water heater to temper the entire domestic hot water (DHW) distribution system. Manufacturers like Watts mixing valves build these heavy-duty brass units to handle high continuous flow rates across multiple simultaneous fixtures.
- Whole-House Temperature Control: Blends superheated tank water with cold supply water before it enters the main household trunk line, capping maximum tap temperatures throughout the home.
- Tankless System Stabilization: Smooths out brief temperature spikes—commonly known as the “cold-water sandwich” effect—when tankless heaters cycle on and off during intermittent draws.
- High-Flow Capacity: Engineered with wider internal ports (typically 3/4-inch to 1-inch connections) to prevent noticeable water pressure drops when showers and appliances run together.
Point-of-Use Valves (Showers, Tubs, and Under-Sink Installations)
Point-of-use valves provide localized temperature protection right at individual plumbing fixtures where direct skin contact occurs. These compact units serve as the final line of defense against sudden pressure fluctuations or overheated branch lines.
- Shower and Tub Mixing Valves: Built directly into shower wall bodies to combine thermostatic or pressure-balancing protection with single-handle volume and temperature control.
- Under-Sink Thermostatic Valves: Compact three-port valves mounted beneath bathroom lavatories, soaking tubs, and kitchen sinks to limit fixture output to 120°F without lowering water temperatures sent to dishwashers.
- Precision Low-Flow Regulation: Calibrated to maintain steady output temperatures even at low faucet flow rates (as low as 0.5 gallons per minute).
Hydronic Heating and Boiler Mixing Valves
In hydronic radiant heating systems, boilers generate water at 160°F to 180°F—temperatures far too hot for underfloor PEX tubing or wood subfloors. A dedicated boiler mixing valve blends cooler return water from the floor loop with hot boiler supply water to achieve safe circulating temperatures.
- Radiant Floor Protection: Steps high boiler loop temperatures down to a safe 95°F to 120°F range, preventing subfloor warping, tile cracking, and uncomfortable floor hot spots.
- Boiler Return Protection: Prevents cold return water from shocking cast-iron boiler heat exchangers, eliminating corrosive flue-gas condensation.
- Three-Way and Four-Way Configurations: Available in manual, thermostatic, or motorized actuator designs that automatically adjust loop temperatures based on outdoor weather sensors.
Quick Comparison Table: Choosing the Right Mixing Valve by Application
Use the reference table below to match each residential plumbing or heating setup with its certified valve standard and operating temperature range.
Mixing Valve vs. Diverter Valve: Clearing Up the Confusion
Homeowners frequently confuse a mixing valve with a diverter valve because both components sit behind shower walls or inside a plumbing manifold, yet they perform completely separate jobs. A mixing valve controls water temperature by blending hot and cold supplies, whereas a diverter valve controls water direction by routing already-mixed water to different outlets.
Core Functional Difference (Temperature Blending vs. Flow Routing)
In a standard bathtub and shower combination, water passes through both devices sequentially before reaching you. First, the mixing valve blends incoming hot and cold water to reach your chosen temperature, and then the diverter valve directs that tempered stream to your desired fixture.
- Mixing Valve (Thermostatic Blending): Takes two separate water temperatures—hot and cold—and combines them inside a central chamber to produce a single, safe output temperature.
- Diverter Valve (Flow Redirection): Takes a single stream of already-blended water and redirects its physical path from one outlet to another, such as shifting flow from a tub spout up to a showerhead or handheld wand.
- Combined Manifold Assemblies: Many modern shower valves house both a thermostatic mixing valve cartridge and a multi-port diverter valve cartridge inside one brass rough-in body, leading many homeowners to mistake them for a single component.
Side-by-Side Comparison: Mixing Valve vs. Diverter Valve
Review the structural breakdown below to distinguish between mixing and diverter valves when diagnosing fixture issues or ordering replacement parts.
Signs of a Failing Mixing Valve & How to Clean or Descale It
Over time, hard water scale, mineral deposits, and mechanical fatigue can impair a mixing valve’s internal components. Recognizing early failure signs and performing routine maintenance can prevent complete hot water loss and extend the life of your valve.
4 Warning Signs Your Mixing Valve Is Going Bad
When internal thermal elements or mechanical pistons begin to degrade, your plumbing system will show clear operational symptoms. Identifying these indicators early helps prevent sudden scalding or complete loss of hot water.
- Only Lukewarm Water: If your hot water heater is functioning correctly but your taps only deliver lukewarm water, the internal thermal element may be stuck, causing excess cold water dilution.
- Sudden Temperature Spikes: Fluctuation in water temperature during use indicates a worn pressure-balancing spool or degraded thermal element unable to stabilize the hot-to-cold ratio.
- Zero Hot Water Flow: A completely blocked internal cartridge or failed check valve screen can shut off the hot water line entirely as a safety precaution.
- Mineral Crusting Around Unions: White, chalky calcium buildup or green oxidation around the valve body and union connections points to persistent micro-leaks caused by mineral scaling.
Step-by-Step Guide to Descaling and Cleaning a Stuck Mixing Valve
Hard water scale and mineral buildup are the leading causes of mixing valve malfunction. Restoring smooth operation often requires a simple descaling soak rather than a full replacement.
- Shut Off Water Supplies: Close both the hot and cold water shut-off valves leading to the mixing valve, and open a nearby tap to relieve line pressure.
- Remove Check Screens & Cartridge: Unthread the valve union nuts, remove the valve body, and extract the internal cartridge and check valve screens.
- Soak in White Vinegar or Descaler: Submerge the internal components and screens in undiluted white vinegar or a food-grade descaling solution for 1 to 2 hours to dissolve calcium buildup.
- Inspect and Lubricate O-Rings: Rinse the parts thoroughly with clean water, inspect the EPDM O-rings for cracking, and apply a light coat of food-grade silicone grease before reassembling the valve.
Why You Should Never Use Standard Penetrating Oil on Plumbing Valves
Using petroleum-based penetrating oils (such as standard WD-40) to free a stuck mixing valve stem or unthread corroded connections can cause severe damage to your plumbing system and contaminate your water supply.
- Degradation of EPDM Rubber O-Rings: Petroleum distillates cause synthetic EPDM seals and rubber gaskets inside the valve cartridge to swell, soften, and break down quickly.
- Drinking Water Contamination: Standard chemical penetrating oils are non-potable and release toxic hydrocarbon compounds into your home’s drinking water line.
- Safe Alternatives: Use white vinegar descaling or specialized food-grade descaling fluids for mineral deposits, and lubricate moving parts exclusively with NSF-61 certified food-grade silicone grease.
Mixing Valve Replacement Cost, Plumber Rates, and Lifespan
Budgeting for a mixing valve installation or repair requires understanding hardware prices, labor costs, and long-term durability factors. Whether replacing an existing unit or installing a new point-of-source valve above your water heater, realistic cost figures help you decide between a DIY fix and hiring a licensed professional.
Average Lifespan of a Plumbing Mixing Valve
Under normal operating conditions, a high-quality brass mixing valve typically lasts between 5 and 10 years. However, several environmental and operational factors directly influence how long the internal cartridge and thermal element remain effective.
- Water Hardness Impact: High mineral content (calcium and magnesium) accelerates hard water scale accumulation, which can seize internal pistons or clog check valve screens in as little as 3 to 5 years.
- Water Temperature Settings: Running water heater storage temperatures above 150°F causes thermal expansion stress and speeds up mineral precipitation inside the valve body.
- Preventative Maintenance: Periodically flushing the water heater tank and descaling the valve cartridge during regular plumbing inspections can stretch the valve’s working service life past the decade mark.
Cost Breakdown: DIY Parts vs. Professional Plumber Installation
The total mixing valve replacement cost depends on valve sizing, brand (such as Watts or Honeywell), connection style, and local plumber labor rates. The breakdown below details typical hardware and service costs.
- DIY Hardware Purchase ($50–$180): Standard 3/4-inch point-of-source mixing valve kits with integrated union tailpieces generally cost between $70 and $130 at retail suppliers.
- Standard Plumber Rates ($150–$350): Most licensed plumbers charge between $85 and $175 per hour, with a basic valve replacement taking roughly 1 to 2 hours under standard pipe access conditions.
- Additional Expenses: Retrofitting older plumbing lines that lack shut-off valves or require custom pipe soldering may add $100 to $200 in extra labor and fittings.
When to DIY vs. When to Call a Licensed Plumber
Determining whether to replace a mixing valve yourself or hire a professional comes down to your pipe connection type and local building code mandates.
- Favorable DIY Scenario (Union Connections & Threaded NPT): If your existing valve features three-piece union connections or threaded NPT fittings with accessible shut-off valves, swapping the unit is a manageable project requiring basic wrenches and pipe thread tape.
- Professional Required (Sweated Copper Piping): If your valve body is directly soldered into copper pipes without unions, cutting pipe, sweating copper fittings, and re-soldering near water heater lines requires specialized plumbing tools and torch safety experience.
- Code Compliance & Permits: Many local jurisdictions require certified anti-scald protection installed by a licensed plumber during water heater replacements to ensure compliance with local plumbing standards.
Frequently Asked Questions About Plumbing Mixing Valves
Is a mixing valve required by plumbing code?
Yes, most modern residential jurisdictions adopting the International Plumbing Code (IPC) mandate certified anti-scald devices on showers, bathtubs, and public handwashing fixtures. Additionally, local codes require a master thermostatic mixing valve on water heaters whenever tank storage temperatures are raised to prevent Legionella growth or supply hydronic heating loops.
What does a mixing valve look like on a water heater?
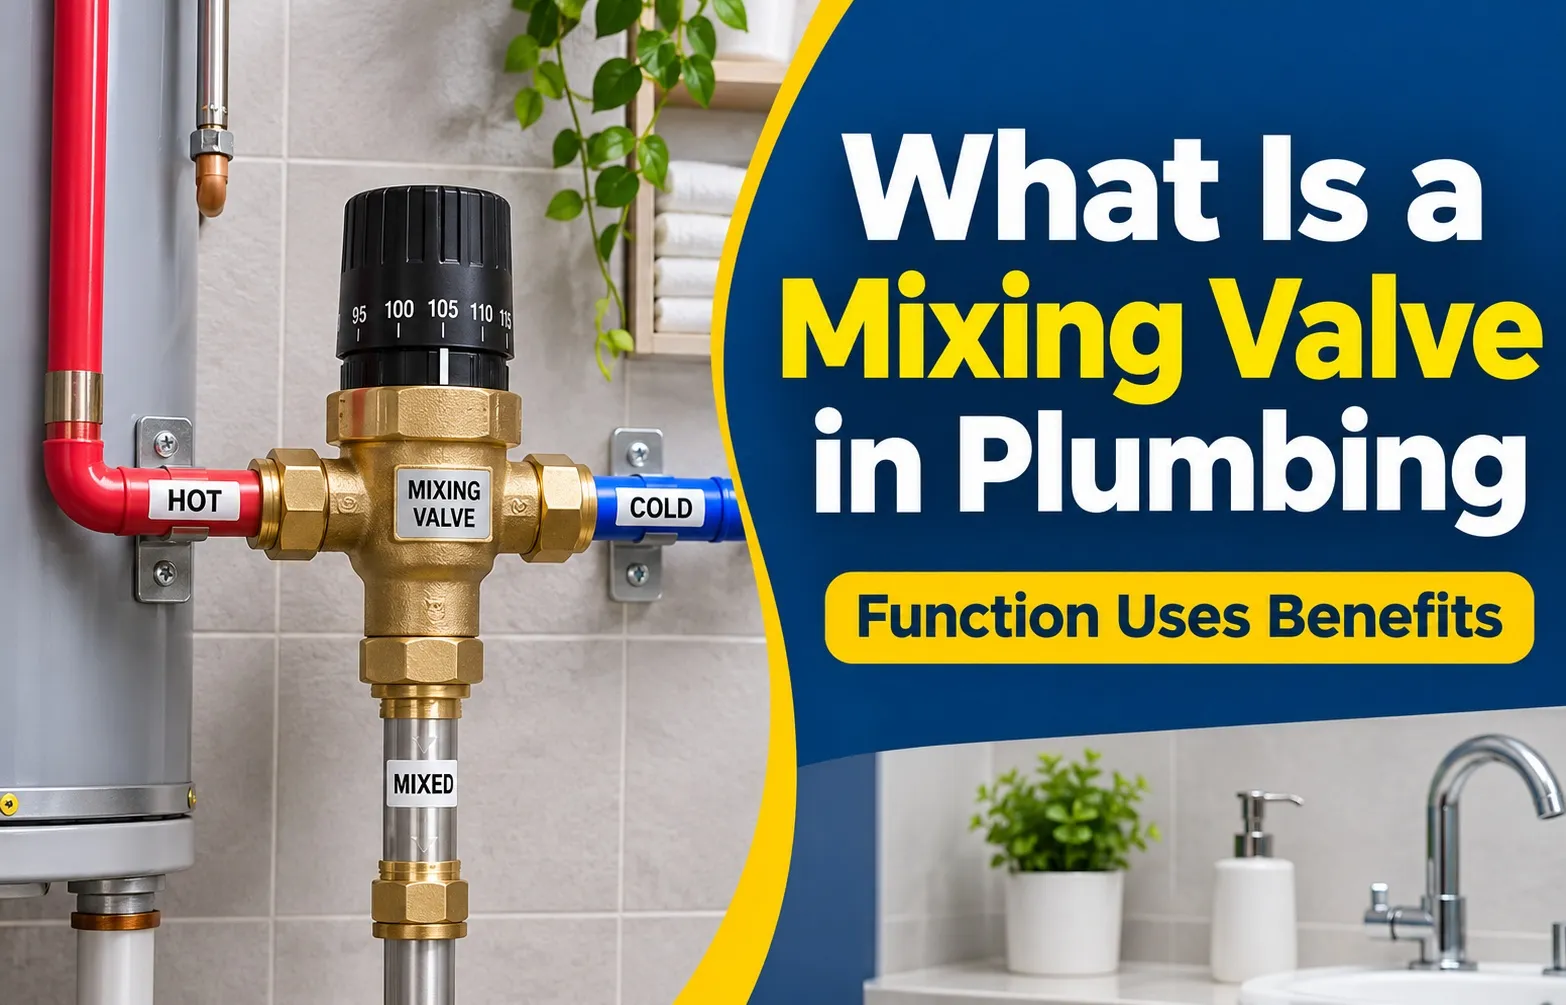
A water heater mixing valve is a compact, heavy-duty brass T-shaped valve body installed in the piping directly above the tank. It features three threaded or union ports stamped with clear H and C markings (hot and cold inlets) plus an M or arrow for the mixed outlet, topped with a protective plastic temperature adjustment cap.
Can a bad mixing valve cause low water pressure?
Yes, a malfunctioning mixing valve frequently restricts household hot water pressure. Over time, hard water mineral deposits, rust flakes, and sediment accumulate inside a clogged inlet screen or seize the internal sliding piston, choking off water flow to downstream faucets and showers even when cold water pressure remains strong.
How do you adjust the temperature on a mixing valve?
To adjust output temperature, remove or loosen the protective cap on top of the valve body to expose the temperature adjustment knob or slotted brass stem. Turn the knob clockwise (toward the minus sign) to lower the mixed water temperature, or counter-clockwise (toward the plus sign) to increase it while verifying output with a thermometer.

Oscar Vance | Master Plumber & Drainage Expert
Meet Oscar Vance, a licensed master plumber sharing practical solutions on residential repairs, preventive maintenance, and thoughtful home upkeep.