How Does a Bottle Trap Work? Anatomy & Mechanics
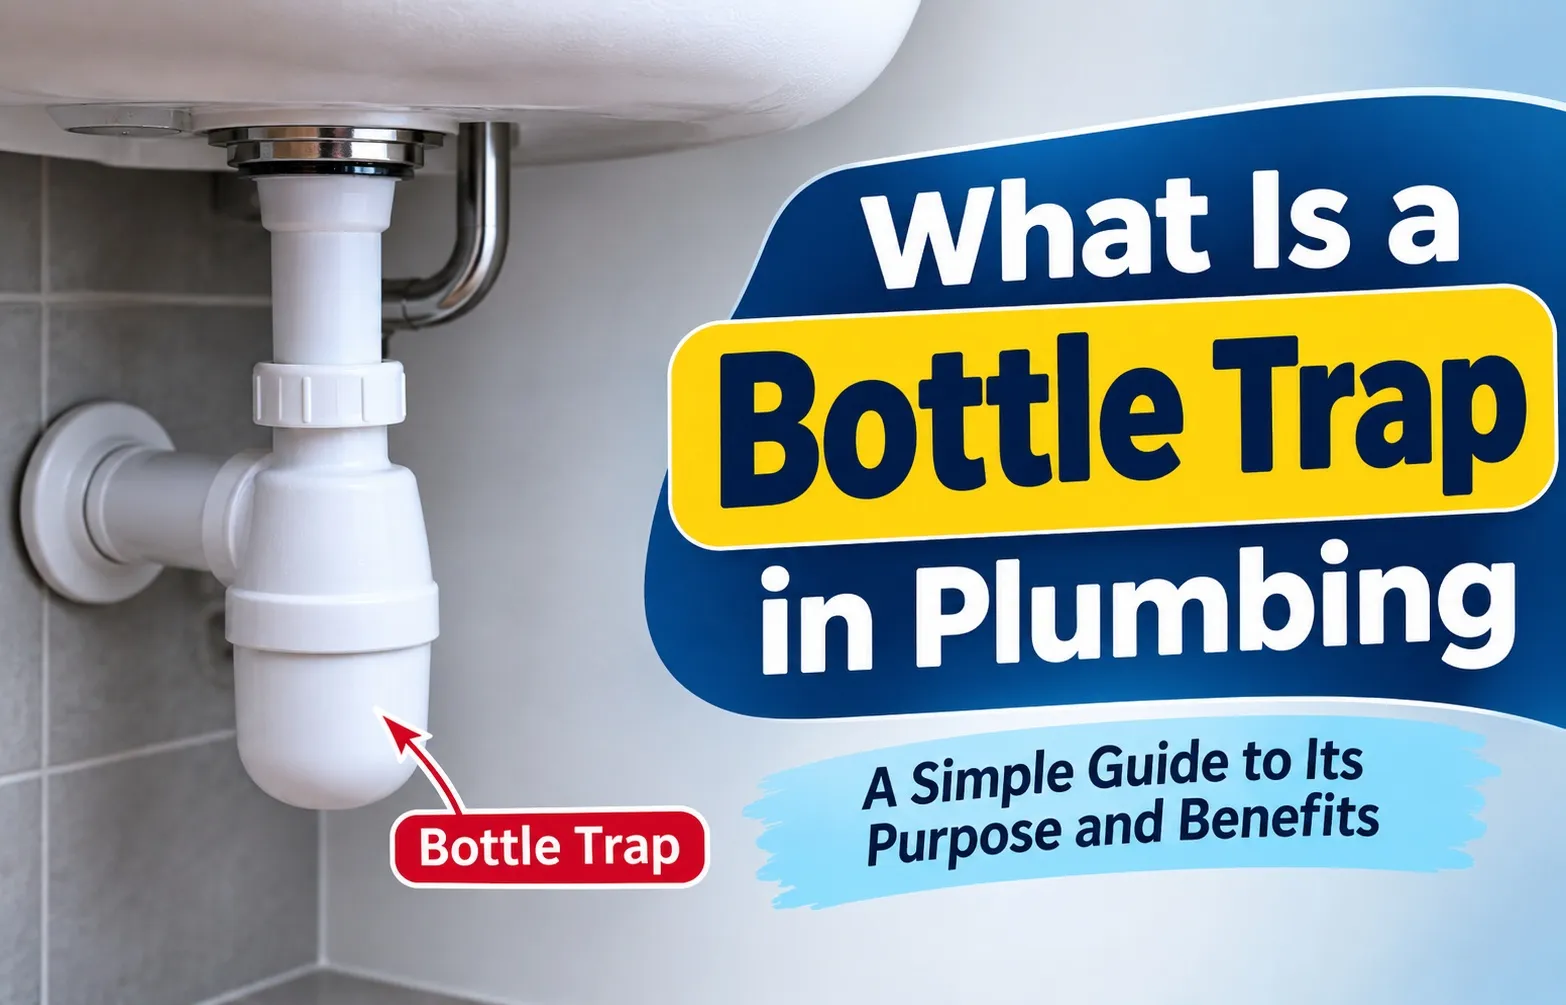 A bottle trap operates on precise fluid dynamics, utilizing a vertical cylindrical chamber to manage wastewater drainage while blocking toxic gases. Unlike traditional curved pipes, its unique internal architecture forces water through a vertical drop and a horizontal exit, creating a reliable hydraulic barrier without requiring a deep under-sink footprint.
The 4 Core Components of a Bottle Trap
Understanding how this plumbing fixture functions begins with examining its physical assembly. Each component works together to ensure smooth drainage, airtight sealing, and easy maintenance access.
- Dip Tube (Inlet): Connected directly to the sink tailpiece, this vertical tube extends downward into the liquid pool, submerging its bottom tip to establish the primary seal.
- Main Chamber (The Bottle): The wide exterior cylinder that houses the standing water pool and catches settling debris, designed to maintain a continuous volume of liquid.
- Outlet Pipe: The horizontal pipe positioned higher up on the side of the bottle body that channels cleared wastewater directly into the wall waste pipe.
- Removable Bottom Cleanout Cap: A threaded cap sealed with rubber washers and gaskets at the base of the chamber, allowing for fast manual inspection and debris removal.
Step-by-Step Water Seal Mechanism
The internal mechanics rely heavily on maintaining a consistent liquid barrier to prevent the escape of sewer gases. As wastewater leaves the wash basin, it moves down through the following sequence:
- Inflow: Water flows from the sink tailpiece down through the vertical dip tube, entering the submerged lower section of the main chamber.
- Pooling and Sealing: The liquid pools at the bottom of the bottle, forming an airtight trap seal that completely blocks harmful gases like methane and hydrogen sulfide from entering the room.
- Overflow and Exit: As fresh water continues to enter, the existing liquid level rises to the height of the outlet pipe, spilling over and exiting horizontally into the wall waste pipe while preserving enough liquid at the base to maintain the seal.
- Pressure Regulation: The design stabilizes internal air pressures, preventing the suction forces of the siphon effect from pulling the water seal dry during high-volume drainage.
The Valuables & Debris Catcher
Beyond gas control, the geometry of a bottle trap offers a practical safety net for dropped items. Because wastewater must change momentum and pool within the wider lower chamber, gravity naturally pulls heavy, dense objects straight down away from the fast-flowing current.
- Accidental Recovery: Items like wedding rings, earrings, coins, and cufflinks drop directly to the bottom cleanout cap rather than washing away into the municipal sewer system.
- Maintenance Access: When valuables are trapped, placing a bucket underneath and unscrewing the bottom cap provides immediate access without dismantling the entire drainage assembly.
Bottle Trap vs. P-Trap: Which Is Better for Your Sink?
Choosing between a bottle trap and a traditional P-trap depends on your sink style, available under-counter space, and regional building regulations. While both fixtures successfully maintain a standing water seal to block dangerous sewer odors, their internal geometry creates distinct performance trade-offs in hydraulic flow, maintenance demands, and visual appeal.
Side-by-Side Comparison Table
Evaluating key structural and performance differences helps determine which drainage option aligns best with your plumbing setup.
When to Choose a Bottle Trap
A bottle trap is the superior choice when plumbing aesthetics and compact dimensions take priority over maximum water velocity. Because the entire unit sits directly beneath the drain assembly, it keeps the surrounding wall space clean and uncluttered.
- Exposed Architectural Sinks: Ideal for wall-mounted sinks, vessel basins, and open-framed vanity tables where pipes remain visible.
- Premium Design Finishes: Highly suited for luxury bathrooms utilizing high-end metallic finishes like chrome-plated brass, matte black, or brushed nickel.
- Tight Space Constraints: Perfect for powder rooms or small vanity units with limited depth to fit a traditional curved pipe extension.
When a Traditional P-Trap Wins
A standard P-trap remains the industry standard for functional, high-capacity drainage systems. Its smooth continuous U-bend utilizes smooth hydraulic flow to generate a continuous self-scouring action, washing away debris automatically without settling inside the pipe.
- Concealed Storage Cabinets: Best used inside enclosed vanity cabinets where appearance is secondary to robust plumbing performance.
- High-Volume Fixtures: Essential for fixtures handling heavy discharge or continuous usage, reducing maintenance frequency.
- Strict Code Requirements: Mandatory for home construction or remodeling projects subject to stringent US municipal plumbing inspections, where alternatives like S-trap or drum trap designs are non-compliant.
Can You Put a Bottle Trap on a Kitchen Sink? (Critical Usage Warning)
You should almost never install a bottle trap on a kitchen sink. While a bottle trap offers a compact and attractive footprint, installing one under a heavy-use kitchen basin creates severe plumbing vulnerabilities. The interior geometry of a bottle trap is fundamentally incompatible with the type of waste processed by kitchen sink drainage systems.
Why Bottle Traps Fail Under Kitchen Sinks
Kitchen sinks discharge heavy organic matter, including cooking grease, melted fats, food particles, oils, and soapy food residues. A bottle trap’s internal design creates two major points of failure when handling this material:
- Grease and Sediment Accumulation: Unlike smooth, curved P-traps that maintain continuous momentum, a bottle trap forces water down through a central tube into a flat-bottomed lower chamber. Dense food scrap waste and settling grease collect quickly at the base rather than flushing outward.
- Flow Restriction from Sharp Directional Turns: Water must make a sharp 90-degree bend to exit through the upper side outlet. As warm grease hits the standing water pool in the chamber, it cools, solidifies, and coats the narrow internal dip tube, leading to rapid blockages and severe flow restriction.
The Ideal Fixture Match: Bathroom Vanities & Bidets
Bottle traps are engineered specifically for low-solids, clear-water drainage applications where suspended debris is minimal. Matching the right trap material and design to the proper fixture ensures long-term reliability:
- Bathroom Vanity Basins: Designed to handle simple liquid waste like soapy water, toothpaste residue, and hair rinse.
- Bidets and Powder Room Vessel Sinks: Ideal for low-volume handwashing fixtures where aesthetic appeal is paramount and solid debris is nonexistent.
- Material Considerations: A modern brass or PVC bottle trap functions reliably on bathroom fixtures, but both types will quickly choke under the heavy grease loads of a residential kitchen. For kitchen sinks, stick exclusively to a standard code-approved P-trap.
Are Bottle Traps Legal in the US? (Building Codes Explained)
In most United States jurisdictions, bottle traps are not compliant with standard residential plumbing codes. While widely available online and featured in high-end design catalogs, US building regulations treat them with strict oversight because their internal configuration differs from traditional self-scouring plumbing fixtures.
Why US Plumbing Codes Restrict Bottle Traps
Major US model plumbing regulations—including the Uniform Plumbing Code (UPC) and the International Plumbing Code (IPC)—enforce rigid standards regarding trap design, self-scouring action, and internal mechanical barriers:
- Prohibition of Internal Partitions: Model codes generally prohibit traps that rely on internal partitions or concealed dip tubes to form a seal. If an internal partition corrodes or deteriorates, wastewater can bypass the barrier undetected, allowing sewer gas into the home while visually appearing fully intact.
- Lack of Self-Scouring Action: The sharp directional changes inside a bottle trap reduce flow velocity, making the fixture prone to sediment accumulation rather than self-cleaning during normal drainage.
- Vulnerability to Trap Siphoning: Without a properly engineered venting system, the compact vertical chamber is more susceptible to siphoning, which can pull the standing water seal dry and breach odor control.
Global Acceptance vs. Local US Inspection Reality
The regulatory status of bottle traps varies significantly across geographic regions and local municipal enforcement bodies:
- International & European Standards: Bottle traps are standard, fully compliant plumbing components across the UK, Europe, Australia, and Asia. Major international fixtures, including specialized lines like the Kohler bottle trap assembly, are engineered for global architectural markets where vertical drain standards permit them.
- US Home Inspection Reality: During a standard US pre-sale home inspection, an inspector adhering to InterNACHI or municipal guidelines will typically flag an unapproved bottle trap as a defect or code violation, requiring replacement with an approved P-trap prior to closing.
- Local Variance Exceptions: A few US municipalities permit specific certified decorative bottle traps for exposed wall-mounted basins, provided they meet strict local variance approvals. However, homeowners should always verify local code compliance before installing one.
How to Install and Clean a Bottle Trap (Step-by-Step Guide)
Installing and maintaining a bottle trap requires basic hand tools, precise pipe alignment, and proper sealing technique. Because these fixtures feature a removable base, routine clearing of debris and minor leak troubleshooting can be performed without dismantling your entire bathroom drainage pipework.
Quick 5-Step Installation Overview
Proper installation ensures a watertight seal and smooth flow to your wall waste connection. Follow this sequential assembly process:
- Verify Pipe Sizing: Confirm your wash basin drain assembly uses a standard 1 ¼ inch size for bathroom basins. Measure the horizontal distance from your sink drain tailpiece to the wall waste opening.
- Trim Pipes to Fit: Measure and cut the vertical dip tube and horizontal outlet pipe using a fine-tooth hacksaw or pipe cutter, ensuring cuts are straight and free of internal burrs.
- Position Seals and Compression Nuts: Slide the decorative flange, compression nut, and rubber O-ring or tapered washer onto the sink tailpiece and horizontal wall outlet pipe.
- Align and Hand-Tighten: Insert the vertical dip tube into the main chamber and attach the horizontal outlet pipe to the wall opening. Align all sections vertically and hand-tighten every compression nut.
- Perform a Leak Test: Turn on the sink faucet at full capacity to fill the lower chamber. Inspect all threaded joints, the bottom cleanout cap, and wall connections for water drips or moisture.
How to Clean a Bottle Trap Without Flooding Your Bathroom
Clearing hair, soap residue, or lost jewelry from a bottle trap is straightforward, but it requires careful preparation to protect your vanity flooring from spills.
- Place a Catch Basin: Position a small bucket or shallow bowl directly under the bottom cleanout cap. The base of the trap holds approximately 1 cup of stagnant water that drains instantly when opened.
- Unscrew the Bottom Cap: Grasp the textured base of the main chamber and unscrew it counter-clockwise by hand. If dealing with seized threads on older metal units, use strap wrenches to avoid scratching the finish.
- Flush Debris and Reassemble: Rinse the removed bottom cup and internal dip tube with hot water and liquid dish soap. Wipe away accumulated sediment, check the rubber seal for damage, thread the cap back into place hand-tight, and run water to test the seal.
Troubleshooting Common Issues (Leaks & “Tissue-Like Particles”)
Homeowners often encounter strange residue or minor drips when opening their sink trap for routine maintenance. Understanding these causes keeps your drainage system hygienic and leak-free.
- White or Gray “Tissue-Like” Particles: If you spot thin, pale, floating debris inside the chamber, it is not disintegrating paper. This is a common biofilm buildup—a biological layer formed by harmless bacteria, soap scum, hair oils, toothpaste binder, and shed skin cells binding together inside standing water. Regularly flushing your basin with hot water and baking soda breaks down this slime.
- Fixing Bottom-Cap Drips: Persistent leaks from the base usually indicate a displaced or degraded rubber O-ring. Unscrew the cap, clean grit from the threads, replace worn rubber washers, and apply a light coating of plumber’s silicone grease to the seal before re-tightening. Use PTFE tape on metal-to-metal male threads if minor weeping persists.
Frequently Asked Questions
What is the point of a bottle trap?
The main point of a bottle trap is sewer gas prevention while saving space under a basin. It maintains a permanent standing water seal inside a compact vertical cylinder, preventing toxic odors like methane from entering the bathroom while trapping hair and heavy debris for easy cleaning.
Is a bottle trap necessary under every sink?
No, a bottle trap is not necessary under every sink. While every sink requires a drainage trap to block sewer gases, you can use a traditional P-trap instead. Bottle traps are typically chosen for exposed wall-mounted vanity basins where a sleek, modern look and compact profile are desired.
What is the standard size of a bottle trap?
The standard size of a bottle trap for a bathroom wash basin is a 32mm (1.25-inch) waste pipe connection. Larger kitchen or utility sinks typically use 40mm (1.5-inch) pipework, though bottle traps are rarely recommended for kitchen sink drain assembly applications due to grease buildup.
How much does a bottle trap cost?
A basic plastic or PVC bottle trap costs between $10 and $20, making it an affordable utility option. Decorative models made of chrome brass, matte black, or brushed nickel range from $25 to $120+ depending on the brand, finish quality, and design aesthetics.

Oscar Vance | Master Plumber & Drainage Expert
Meet Oscar Vance, a licensed master plumber sharing practical solutions on residential repairs, preventive maintenance, and thoughtful home upkeep.