Introduction & Free Template Downloads
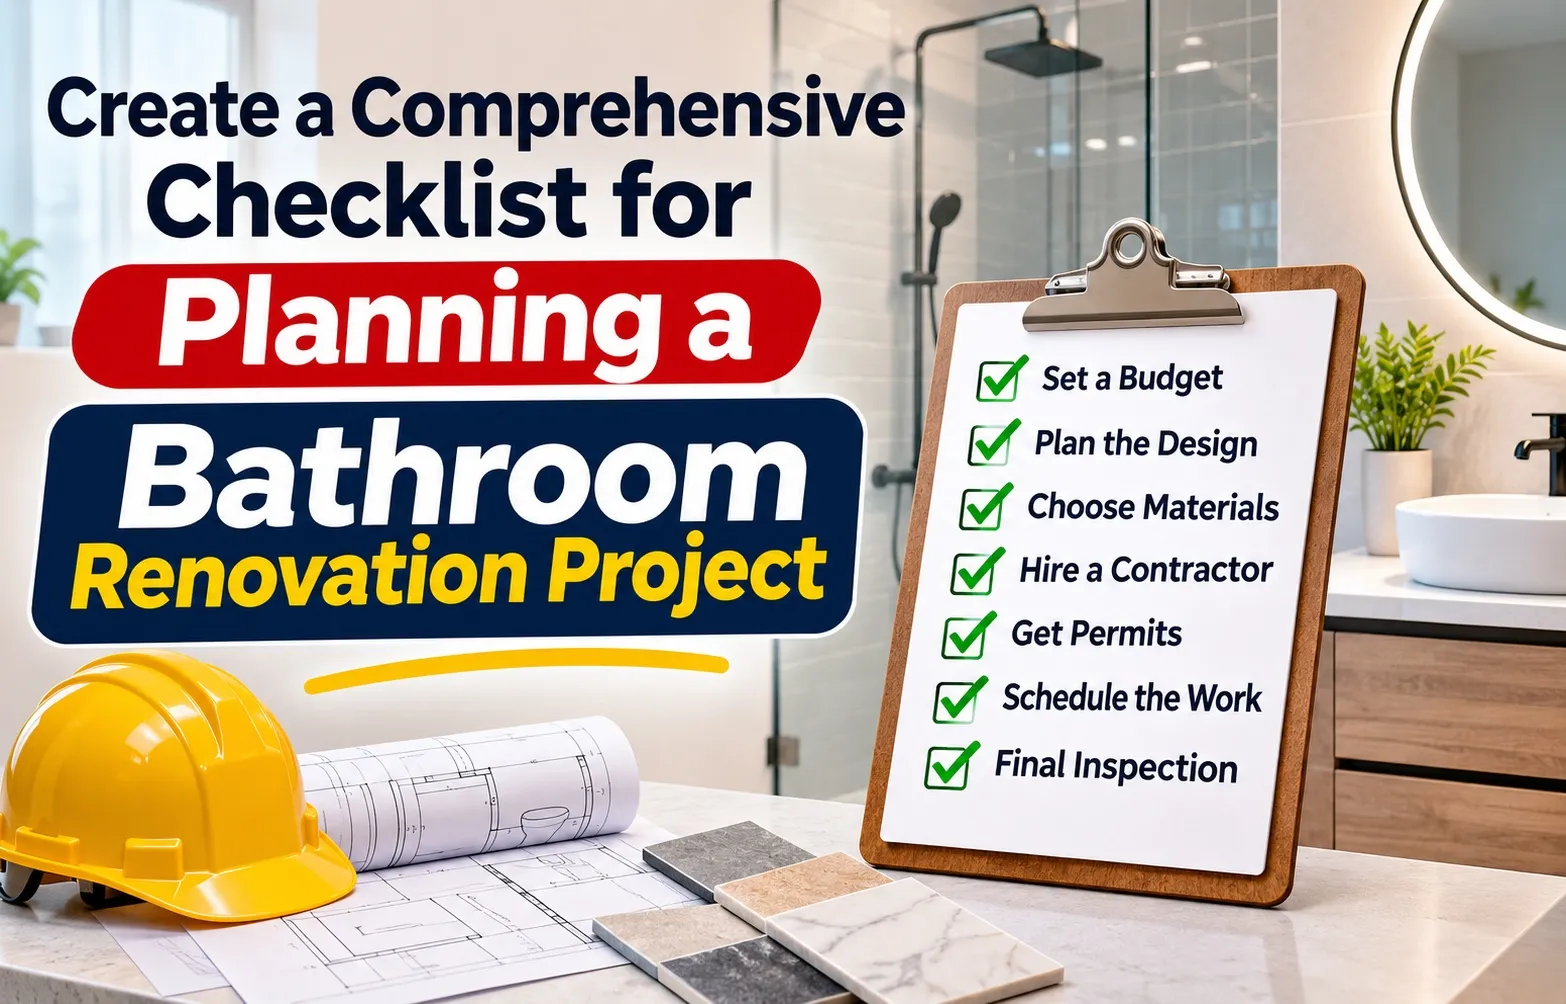 Planning a successful bathroom remodel requires strict sequence management, explicit layout clearances, and tight financial oversight. Without a master plan, hidden moisture damage, custom fixture lead times, and scope creep can rapidly cause budget overruns and prolonged delays.
Why Bathroom Renovations Fail Without a Structured Checklist
A bathroom renovation is one of the most complex residential projects because it combines high-density plumbing, electrical wiring, waterproofing, and structural load considerations into a compact footprint. Omitting crucial preliminary steps frequently leads to costly change orders and structural failures.
A structured project timeline protects your investment by establishing clear milestones before demolition begins:
- Budget Control: Prevents unplanned expenses by locking in material quantities and allocating a strict contingency fund for hidden subfloor rot or code upgrades.
- Spatial Planning Precision: Guarantees required clearances for plumbing fixtures, doors, and vanity cabinet swing paths during the initial design phase.
- Subcontracting Efficiency: Keeps plumbers, electricians, and tile setters operating in proper sequence to avoid site friction and idle labor costs.
- Supply Chain Timing: Identifies long-lead items early so custom glass, specialized vanities, and imported tiles arrive before trade rough-ins start.
Access Your Free Downloads: PDF, Excel, & Google Sheets Checklists
To keep your project on schedule and within budget, utilize our standardized planning templates tailored to your workflow preferences. These resources cover every stage from early design concepts through to final contractor sign-off and municipal permit closure.
Download your preferred project planning format:
- Printable PDF Checklist: Ideal for hard-copy tracking on the job site during contractor walk-throughs and daily progress inspections. Access the standard reference guide via the Moen Bathroom Design Checklist PDF.
- Bathroom Remodel Checklist Excel: Fully customizable spreadsheet featuring automated cost-summing formulas, allowance tracking, and line-item budget variance calculations.
- Google Sheets Live Tracker: Cloud-based, real-time collaboration tool designed for sharing updates instantly between homeowners, general contractors, and interior designers.
Planning, Budgeting & Layout Clearances
Successful bathroom renovations begin long before demolition crews touch a single tile. Establishing precise financial boundaries, defining project scope early, and enforcing strict structural clearances ensure your layout remains fully functional, compliant with local building codes, and within financial limits.
Setting a Realistic Budget & Contingency Fund (10%–20% Rule)
Formulating a realistic financial baseline requires balancing fixture costs, specialized labor fees, and hidden site conditions. Unforeseen structural repairs, historical plumbing alterations, or concealed mold frequently emerge once walls are opened up.
Structure your renovation finances using these proven allocation guidelines:
- The 10%–20% Contingency Reserve: Set aside 10% for newly constructed homes or 20% for older properties to absorb unexpected subfloor repairs or electrical updates.
- Labor vs. Materials Split: Allocate roughly 40%–50% of the core budget for trade labor (plumbing, electrical, tile setting) and 50%–60% for physical materials and fixtures.
- Fixed vs. Variable Allowance: Lock in exact quotes for high-cost items like custom vanities and stone tops to prevent gradual budget creep.
Defining Your Scope: Cosmetic Refresh vs. Full Structural Gut
Deciding between a surface-level makeover and a full tear-down dictates your timeline, permitting needs, and total investment. Maintaining existing plumbing and electrical supply locations dramatically lowers labor expenses.
Evaluate which scope aligns with your home’s requirements:
- Cosmetic Refresh: Swapping out light fixtures, faucets, wall paint, and vanities while retaining existing floor layouts and wall boards. Ideal for quick updates on tight budgets.
- Full Structural Gut: Stripping the room down to wall studs and floor joists. Necessary when fixing hidden water damage, replacing ancient piping, or altering the spatial footprint.
- Plumbing Relocation Costs: Moving toilets, showers, or sinks requires breaking concrete or rerouting floor joists, adding significant labor fees to the baseline budget. Layout preservation remains the single best strategy for cost control.
Essential Code Clearances & Ergonomic Measurements
Spatial ergonomics and National Kitchen & Bath Association (NKBA) guidelines ensure your bathroom feels comfortable and passes municipal building inspections. Incorrect fixture spacing creates cramped rooms and costly retrofits.
Incorporate these mandatory dimensions into your preliminary floor plan:
- 15-Inch Toilet Clearance: Maintain at least 15 inches of clearance from the centerline of the toilet to any side wall, vanity, or adjacent fixture (30 inches total clear width).
- 21-Inch Front Toilet Space: Reserve a minimum of 21 inches (30 inches recommended) of clear walking space in front of the toilet bowl.
- 30-Inch Shower Entry Width: Ensure shower enclosures provide a minimum 30-inch clear entry width and an unobstructed 30×30-inch interior standing footprint.
- Vanity & Door Clearance: Allow enough swing space so vanity doors, drawers, and primary room entry doors open completely without colliding.
Building a Mood Board & Material Selection Strategy
Visualizing your design scheme early streamlines product procurement and eliminates indecision during construction. Synthesizing tile textures, cabinet finishes, and metal hardware ensures aesthetic balance throughout the space.
Execute your material selection strategy systematically:
- Create a Digital or Physical Mood Board: Collect physical tile samples, paint swatches, and hardware finishes alongside digital inspiration photos to verify color harmony under natural and artificial light.
- Specify Wet-Zone Durability: Select non-porous materials like porcelain tile, quartz countertops, and cement backer boards for high-moisture zones.
- Match Finish Families: Standardize metal finishes (e.g., brushed nickel, matte black, polished chrome) across shower valves, sink faucets, towel bars, and cabinet pulls.
Contractor Vetting, Bidding & Permitting
Selecting the right trade professionals and securing municipal approvals are crucial milestones in project governance. Rigorous vetting of contractor estimates, clarifying contract structures, and ordering specialized materials early prevent costly work stoppages and legal liabilities.
How to Evaluate & Compare Contractor Bids Accurately
Evaluating bids requires an apples-to-apples comparison of labor rates, material quality, and scope definitions. Comparing line items prevents hidden fees from appearing mid-project.
Follow these criteria when reviewing contractor proposals:
- Request Itemized Estimates: Ensure bids clearly separate labor, demolition, rough-in mechanical work, tile setting, and final trim installation rather than providing a single lump-sum figure.
- Obtain Three Independent Quotes: Solicit detailed proposals from at least three licensed general contractors or specialized trade teams to establish fair market value for your project scope.
- Analyze Scope Exclusions: Verify who handles trash removal, dumpsters, permits, and tile sealing, as missing line items frequently generate unexpected change orders.
Licensing, Insurance & Permit Requirements
Hiring qualified, fully insured trade professionals safeguards your property against structural damage and ensures compliance with regional safety codes. Never permit work to commence without verified credentials.
Confirm these essential requirements prior to contract signing:
- Active License Verification: Confirm that your general contractor, licensed plumber, and electrician hold current state and municipal licenses appropriate for their respective scopes.
- Insurance Coverage Documentation: Request certificates of insurance directly from the provider, verifying both general liability coverage and active worker’s compensation policies.
- Municipal Permits Securitization: Ensure the contractor files for necessary municipal permits (building, plumbing, electrical) prior to demolition. Unpermitted work can jeopardize home sales and invalidate insurance claims.
Material Allowances vs. Fixed-Price Contracts
Understanding contract payment terms prevents sudden cost overruns during procurement. Distinguishing between flexible budget allocations and fixed costs keeps overall spending predictable.
Structure contract terms using clear spending parameters:
- Material Allowances Clarification: Audit budget line items designated as “allowances” (e.g., $500 for tile). If actual selections exceed the allowance, the price difference is charged directly to the homeowner.
- Fixed-Price Scope Agreements: Lock in fixed pricing for defined labor actions and structural work to minimize financial volatility.
- Change Order Protocol: Establish a written change order rule requiring mutual written approval and upfront cost disclosures before any extra work occurs.
Lead Time Management: Ordering Long-Lead Items Early
Supply chain delays are a primary cause of extended project timelines and idle contractor schedules. Procuring fixtures with extended manufacturing lead times before site prep prevents job site stalls.
Coordinate fixture orders using this purchasing schedule:
- Custom Vanity Lead Time: Order custom cabinetry, specialized stone slabs, and double-vanity counter setups 6 to 10 weeks before scheduled demolition.
- Specialty Plumbing & Glass: Secure custom shower doors, high-end thermostatic valves, and imported porcelain tile well in advance of rough-in phases.
- On-Site Delivery Inspection: Inspect all delivered items upon arrival for freight damage, cracks, or missing trim components so replacements can be issued before trades arrive.
Demolition & Substrate Preparation
Demolition requires a methodical approach to protect surrounding living spaces, prevent utility emergencies, and expose the underlying structure. Thorough substrate evaluation guarantees that subfloors, wall studs, and joists are structurally sound before installing new materials.
Utility Isolation & Dust Containment Setup
Isolating mechanical systems prior to demolition prevents accidental flooding, electrical hazards, and airborne dust contamination throughout the home. Establishing strict containment zones preserves indoor air quality during tear-out operations.
Prepare the work area using these safety and containment protocols:
- Utility Isolation: Shut off the main shut-off valve for water supply lines, drain remaining pressure from lines, and disconnect power at the breaker panel for GFCI circuits and bathroom lighting.
- Dust Barrier Installation: Seal doorways, supply registers, and exhaust ducts using heavy plastic sheeting and tension poles to form sealed zip walls around the demolition zone.
- Personal Safety Preparation: Equipping workers with essential demolition safety gear—including N95 or P100 respirators, eye protection, heavy-duty gloves, and steel-toe boots—prevents injuries from sharp debris and dust.
Safe Demolition Order: Fixture Removal Sequence
Removing fixtures in a systematic order prevents damage to salvageable components and maintains clean work pathways. Dismantling the space from surface elements down to structural framing keeps the site safe and organized.
Execute demolition using this step-by-step removal sequence:
- Remove Soft Furnishings & Trim: Take down mirrors, medicine cabinets, towel bars, doors, and baseboard trim.
- Disconnect & Remove Plumbing Fixtures: Unbolt the toilet, disconnect vanity supply lines, and remove the vanity cabinet, sink, and faucet assemblies.
- Dismantle Wall Finishes: Strip away drywall, plaster, or wall tile backer down to the bare wall framing.
- Tear Out Flooring & Base Layers: Pull up floor tile, mortar beds, and old underlayment to expose the underlying subfloor.
Inspecting Subfloors, Joists & Wall Framing for Water Damage
Uncovering bare framing often reveals hidden rot, mold, or structural deflection caused by long-term moisture exposure. Addressing underlying defects during demolition ensures structural integrity for heavy stone and tile installations.
Inspect and repair structural framing elements using these guidelines:
- Identify Rotted Subfloors: Check plywood or OSB subflooring around toilets, tub aprons, and shower curbs for dark staining, softness, or delamination; replace compromised sections completely.
- Evaluate Joist Integrity: Inspect underlying floor joists for structural sagging or notch damage from historical plumbing runs. Perform necessary joist repair by sistering new lumber alongside damaged beams.
- Verify Wall Framing Plumbness: Check wall studs with a level and add sistered studs or a sturdy plywood backer where necessary to ensure walls are square and plumb for tile backing systems.
Rough-Ins: Plumbing, Electrical & Ventilation
Mechanical rough-ins lay the invisible foundation for your bathroom’s performance, safety, and comfort. Executing plumbing, electrical, and ventilation installations to exact code standards ensures long-term reliability and prepares the space for structural inspections.
Plumbing Rough-In: Water Supply Lines & Drain Sizing
Plumbing rough-ins require precise pipe sizing and correct gravity slopes to prevent clogs, drainage backups, and pressure drops. Every fixture must align with local plumbing codes before walls are closed.
Ensure adherence to these plumbing installation standards:
- 2-Inch Shower Drain: Ensure the shower drain line is upgraded to a 2-inch diameter pipe (transitioning from smaller 1.5-inch lines) to handle high-flow modern shower heads and prevent wastewater backups.
- Proper Drain Slope: Maintain a consistent gravity drain slope of 1/4 inch per foot for all horizontal waste lines to ensure smooth, efficient wastewater evacuation.
- Supply Line Pressure Testing: Secure hot and cold water supply lines firmly to wall studs and conduct a rigorous air or water pressure test before closing up wall cavities.
Electrical Rough-In: Lighting Circuits, Outlets & Heated Floors
Bathroom electrical systems must comply with strict national electrical codes, emphasizing moisture safety and dedicated circuit loads for heavy-draw appliances. Proper wire management prevents electrical hazards in wet environments.
Implement these electrical safety and layout protocols:
- GFCI Protection: Mandate ground-fault circuit interrupter (GFCI) protection for all bathroom convenience outlets and lighting circuits located within wet zones to eliminate shock hazards.
- Lighting Circuit Planning: Route dedicated lines for vanity task lighting, ambient ceiling fixtures, and shower recessed lights using moisture-rated (IP65) housings.
- Heated Floor Integration: Install electric radiant floor heating mats with dedicated thermostat wiring beneath the tile substrate for enhanced thermal comfort.
Exterior Ventilation Sizing & Moisture Prevention
Adequate ventilation eliminates excessive humidity, condensation, and mold growth by extracting moisture directly to the outdoors. Undersized fans compromise indoor air quality and degrade building materials over time.
Configure your ventilation system using these specifications:
- CFM Ventilation Rating: Select an exhaust fan sized correctly for your bathroom volume, ensuring a minimum rating of 1 CFM per square foot (typically 50 to 110 CFM minimum).
- Rigid Exterior Vent Ducting: Run smooth, rigid metal exterior vent ducting directly to an outdoor roof cap or gable exhaust. Never vent bathroom fans into enclosed attics, soffits, or crawl spaces.
- Quiet Operation Standards: Choose low-sone rated fans operating under 1.0 sones to maintain minimal noise levels while maximizing extraction efficiency.
Scheduling Rough-In Municipal Inspections
Municipal building departments require a formal rough-in inspection before any insulation, backer board, or drywall can be installed over exposed framing and mechanical lines. Skipping this checkpoint invalidates project compliance.
Prepare for your inspection milestone with these steps:
- Timing the Inspection: Schedule the municipal rough-in inspection only after all plumbing pressure tests, electrical wiring, and framing modifications are fully completed and secured.
- Preparing the Job Site: Keep all framing bays accessible, ensure breaker panels and test gauges are visible, and have approved architectural plans on-site for the inspector.
- Obtaining Formal Sign-Off: Secure written or digital approval from the municipal inspector before moving forward with waterproofing and wall boarding phases.
Waterproofing & Wall Boarding
Waterproofing is the most critical phase for preserving structural integrity and preventing hidden moisture damage behind tile installations. Implementing proper wall backing, continuous membrane barriers, and verifying installation integrity with leak testing protects your home against water intrusion.
Backer Board Selection: Cement Board vs. Waterproof Gypsum
Standard interior drywall rapidly degrades when exposed to moisture, leading to tile bond failures and structural rot. Selecting the appropriate substrate for wet zones ensures a stable, long-lasting tile base.
Compare these core wall board options for wet-zone application:
- Cement Backer Board: Highly durable and completely impervious to water breakdown, cement board is an ideal substrate for tile. However, because it is porous, it requires an applied topical waterproofing membrane.
- Waterproof Gypsum Board: Engineered with a water-resistant core and glass mat facings, coated gypsum panels offer a lightweight, easy-to-cut alternative for walls outside direct high-flow shower zones.
- Fastening Standards: Secure boards using corrosion-resistant alkali-resistant screws spaced every 8 inches, taped with alkali-resistant fiberglass mesh tape and embedded in thin-set mortar.
Liquid vs. Sheet Waterproofing Membranes
Creating a continuous, watertight seal across shower walls, curbs, and floor pans prevents moisture migration into structural studs and subfloors. Choosing between liquid-applied and sheet membrane systems depends on installation complexity and budget.
Evaluate these primary waterproofing techniques:
- Sheet Waterproofing Membranes: Products like Schluter-Kerdi provide uniform thickness and instant installation readiness without cure times. Pre-formed polyethylene sheets are bonded to backer board using unmodified thin-set mortar.
- Liquid Waterproofing Membranes: Elastomeric liquid coatings are brushed or rolled directly onto substrates to create a seamless rubberized barrier. They require multiple coats applied to specific wet-film thicknesses and full curing before tile setting.
- Shower Curb Waterproofing: Pay special attention to high-risk transition zones, ensuring shower curbs, corners, and wall-to-floor junctions are reinforced with seamless pre-formed corner units or overlapping membrane bands.
The 24-Hour Flood Test Procedure
Conducting a hydrostatic flood test before laying floor tile confirms that your shower pan pan, drain connections, and curbs are 100% watertight. Identifying leaks at this stage eliminates destructive tearing out of finished tile later.
Execute a proper 24-hour flood test using this protocol:
- Plug the Shower Drain: Insert an expandable mechanical test plug into the shower drain pipe below the main flange level.
- Fill the Pan with Water: Pour clean water into the shower basin until it reaches approximately 2 inches high (or just below the top of the shower curb). Mark the exact water level line on the membrane wall with a marker.
- Perform Hydrostatic Observation: Leave the standing water undisturbed for a full 24 hours while monitoring adjacent rooms and ceilings below for damp spots or drops in the water level line.
Tiling Cabinetry & Fixture Installation
The finishing phase transforms bare structural elements into a polished, high-performing bathroom. Following a precise installation sequence—from setting tiles and mounting vanities to placing plumbing trim—ensures flawless aesthetics and protects surfaces from accidental damage during final assembly.
Wall & Floor Tile Installation & Grout Sealing
Proper tile setting creates a resilient barrier against heavy foot traffic and daily moisture exposure. Using high-grade polymer-modified thin-set mortar guarantees strong adhesion across wall boards and floor substrates.
Execute tile installation and grouting according to these technical steps:
- Mortar Application & Back-Butter: Apply modified thin-set mortar using an appropriately notched trowel, ensuring at least 95% coverage in wet zones by back-buttering large-format tiles.
- Leveling & Expansion Gaps: Utilize mechanical tile leveling clips to prevent lippage, and preserve a 1/8-inch expansion gap at all perimeter wall intersections.
- Grout Sealing Protocol: Allow grout to cure completely for 48 to 72 hours before applying a high-grade penetrating grout sealer to protect cementitious joints against staining and water absorption.
Drywall Finishing, Priming & Mildew-Resistant Paint
Finishing non-tiled wall surfaces with specialized paints prevents moisture penetration and mold growth in high-humidity conditions. Surface preparation is essential for a smooth, uniform appearance under bathroom lighting.
Prepare and paint wall surfaces using these finishing guidelines:
- Moisture-Resistant Compound: Apply setting-type joint compound over drywall seams outside shower enclosures, feathering smooth with light sanding between coats.
- High-Adhesion Primer: Coat all freshly finished drywall with a dedicated PVA primer sealer to equalize surface porosity before applying topcoats.
- Mildew-Resistant Bathroom Paint: Apply two coats of premium satin or semi-gloss mildew-resistant bathroom paint featuring antimicrobial additives to resist moisture, steam, and scrub wear.
Vanity Cabinet, Countertop & Sink Installation
Mounting cabinetry securely ensures long-term structural stability when supporting heavy stone countertops and sink basins. Leveling the base prevents uneven stress on stone surfaces and plumbing connections.
Follow these best practices for vanity and top placement:
- Secure Wall Anchoring: Mount floor-standing or floating vanity cabinets directly into solid wall studs using heavy-duty cabinet screws, verifying level across both horizontal and vertical axes.
- Countertop Placement: Set heavy quartz countertop slabs onto vanity bases using 100% silicone adhesive sealant along top edges, avoiding rigid mortars that could crack stone under expansion.
- Sink Basin Mount: Secure undermount or drop-in sink basins with structural clips and a continuous bead of waterproof silicone, allowing proper cure time before attaching waste assemblies.
Mounting Plumbing Trim, Toilets & Final Hardware
Installing final fixtures completes the functional layout and closes out the assembly phase. Precise installation prevents minor leaks, water damage, and cosmetic flaws.
Install final trim and fixtures using this sequence:
- Plumbing Trim Kits: Install the shower trim kit, thermostatic valve handles, and sink faucets over tile faces using silicone gaskets to prevent water from penetrating valve wall openings.
- Toilet Installation: Set the toilet over a fresh wax ring or foam seal, firmly tightening flange closet bolts without over-torquing the porcelain base, and hook up flexible stainless steel supply lines.
- Hardware & Electrical Finish: Secure towel bars, mirrors, paper holders, and GFCI outlets with clean wall anchors, finishing all fixture-to-wall transitions with a clean bead of 100% silicone caulk.
Final Inspection Punch List & Sign-Off
The final phase transitions your bathroom project from active construction to completed home improvement. Conducting a systematic walkthrough, finalizing municipal documentation, and establishing care routines ensure quality craftsmanship and long-term performance.
Creating a Comprehensive Contractor Punch List
A punch list documents minor cosmetic flaws, incomplete tasks, or operational issues before making final financial settlements. Inspecting every fixture alongside your contractor guarantees accountability.
Evaluate your project’s final details using these critical checkpoints:
- Drain Flow & Leak Testing: Run all faucets, showerheads, and hand sprayers simultaneously to test drain flow rates, verify hot/cold water supply lines, and check under-sink P-traps for moisture.
- Caulking Inspection: Verify continuous, smooth beads of 100% silicone sealant along all high-movement joints, including tub aprons, vanity backsplash edges, and shower floor-to-wall transitions.
- Cabinetry & Hardware Alignment: Check drawer slide operation, cabinet door alignment, magnetic latches, towel bar anchor stability, and shower glass door sweep seals.
- Final Payment Holdback: Enforce a standard 10% final payment holdback until all punch list items are completely resolved to your satisfaction.
Closing Out Open Municipal Permits
Failing to close out building, electrical, and plumbing permits can cause severe delays during future home sales and complicate property insurance claims. Obtaining official municipal sign-off verifies structural and mechanical compliance.
Finalize your legal permit obligations with these steps:
- Schedule Final Municipal Inspection: Coordinate with your contractor to have building, plumbing, and electrical inspectors visit the site for the final walkthrough.
- Permit Closeout Documentation: Receive written confirmation or a formal certificate of completion from your local building authority indicating all open permits are closed.
- Warranty Documentation Assembly: Collect component manuals, tile lot tags, paint codes, contractor workmanship guarantees, and fixture warranty documentation into a centralized home maintenance file.
Final Maintenance & Care Protocols
Establishing proper cleaning protocols preserves the integrity of new stone surfaces, grout joints, and metal finishes over their lifespan. Harsh chemicals can quickly degrade sealers and protective coatings.
Maintain your new bathroom using these care standards:
- Sealer Re-Application Schedule: Re-apply penetrating tile and grout sealer annually to prevent moisture penetration and mold stain buildup in cementitious joints.
- pH-Neutral Cleaning Products: Clean quartz countertops, natural stone slabs, and tiled surfaces using non-abrasive, pH-neutral cleaners to avoid stripping protective finishes.
- Squeegee & Ventilation Habits: Wipe down glass enclosure panels after every shower with a squeegee, and run your exterior exhaust fan for 20 minutes after use to minimize humidity accumulation.
Budget-Tier Breakdown: $500 Cosmetic Refresh vs. $15,000+ Full Remodel
Bathroom renovations vary wildly in scope and financial commitment. Whether you are executing a ultra-low-budget weekend upgrade or undertaking a luxury structural overhaul, aligning your material choices and labor expectations with your target price point prevents mid-project budget strain.
Micro-Budget Refresh (Under $1,000): Paint, Hardware & Refinishing
Transforming a functional yet outdated space under a strict micro-budget requires leveraging high-impact cosmetic updates and DIY refinishing techniques. Preserving all existing fixtures and wall structures keeps costs within a modest spending limit.
Focus on these cost-effective enhancement strategies:
- Vanity & Cabinet Renewal: Utilize a specialized vanity paint kit to coat worn wood cabinets, replacing cabinet handles and pulls with modern matte black or brushed brass hardware.
- Tub & Tile Reglazing: Hire a professional or use DIY refinishing kits for tub reglazing to restore cracked or discolored porcelain and cast iron tubs for a fraction of replacement costs.
- Surface Fixture Swap: Perform a simple fixture swap for sink faucets, showerheads, vanity light bars, and towel rings without altering underlying wall piping or junction boxes.
- Fresh Paint & Frame Accents: Apply a fresh coat of mold-resistant paint across walls and trim, adding a decorative wood frame around plain plate-glass mirrors.
Mid-Tier Upgrade ($5,000 – $10,000): Replacement Without Moving Plumbing
A mid-tier renovation balances complete material replacement with strict layout preservation. Retaining the existing plumbing footprint allows you to invest heavily in modern fixtures, custom tiling, and updated vanity units without triggering major labor fees.
Incorporate these balanced renovation elements:
- Pre-Fabricated Vanity & Stone Top: Replace old vanities with new pre-assembled furniture-grade cabinets featuring integrated quartz or marble tops and undermount sinks.
- Complete Tile & Backer Replacement: Strip out old acrylic shower surrounds and floor vinyl to install modern porcelain wall tiles, custom shower pans, and water-resistant backing boards.
- Upgraded Plumbing & Electrical Trim: Replace basic shower valves, toilet units, and light fixtures with high-efficiency dual-flush models and stylish recessed LED lights.
- Professional Trade Assistance: Hire licensed plumbers and tile setters for high-risk wet-zone tasks while handling demolition, painting, and trim painting as a homeowner.
High-End Structural Remodel ($15,000+): Layout Changes & Custom Finishes
A full-scale luxury renovation involves stripping the room down to the studs, altering floor plans, and integrating high-end finishes. Investing in structural modifications turns a basic bath into a spa-like retreat engineered for maximum property value.
Design a premium space with these luxury features:
- Structural Wall Removal & Layout Changes: Relocate toilets, expand shower footprints, or execute structural wall removal to open up spatial flow and double the room’s usable area.
- Custom Wet-Zone Features: Build frameless glass curbless showers, freestanding soaking tubs, thermostatic multi-jet shower systems, and linear floor drain channels.
- Luxury Finishes & Amenities: Install radiant electric heated flooring, custom stone slab countertops, architectural floating vanities, and smart digital plumbing controls.
- Full Trade Contractor Management: Utilize a general contractor to oversee specialized trade teams, manage municipal permitting, and run full hydrostatic leak testing programs.
Frequently Asked Questions
Addressing common planning, financial, and regulatory questions helps streamline your project and avoid unexpected delays. Below are clear, structured answers to the most frequently asked questions about bathroom remodeling.
What is the correct sequence for remodeling a bathroom?
Executing a bathroom remodel in the correct order prevents damaging newly installed surfaces and avoids repeating labor. A structured project timeline ensures work flows logically from structural prep to final finishes.
Follow these essential sequencing steps for a smooth installation:
- Planning & Design: Establish the budget, finalize layouts, select materials, and secure municipal permits.
- Demolition: Shut off utilities, set up dust protection, and strip out old fixtures, wall boards, and flooring.
- Rough-In Trades: Run new plumbing supply and drain lines, execute electrical wiring, and install exterior ventilation ducting.
- Framing & Waterproofing: Inspect/repair subfloors, install cement backer boards, apply waterproofing membranes, and complete a 24-hour flood test.
- Finishes & Fixtures: Lay wall and floor tile, apply mildew-resistant paint, mount vanities, set the toilet, and install final plumbing trim.
- Punch List & Sign-Off: Conduct a final walkthrough, resolve minor cosmetic issues, and close out open permits.
How much contingency budget should I save for hidden bathroom repairs?
A contingency budget of 10% to 20% of your total project estimate is recommended for absorbing unexpected costs. Older homes or full structural gut renovations should lean toward 20% due to the higher likelihood of concealed moisture damage, rotted subfloors, outdated plumbing, or non-compliant electrical wiring uncovered during demolition.
Does Medicare or insurance cover bathroom renovation costs?
Standard homeowner’s insurance typically covers bathroom repairs only if the damage stems from sudden, accidental incidents—such as a burst pipe—rather than gradual wear, age, or lack of maintenance. Standard Medicare (Parts A and B) generally does not cover general bathroom remodeling costs.
However, financial support may be available through specific medical channels:
- Medical Accessibility Modifications: Modifications like walk-in tubs, roll-in showers, grab bars, or widened doorways may qualify for coverage under specific Medicare Advantage (Part C) plans or long-term care insurance if prescribed by a physician as medically necessary.
- Tax Deductions: Medically required home modifications may qualify as deductible medical expenses under IRS guidelines if they do not increase the overall property value.
How long does a full bathroom remodel typically take?
A full bathroom remodel typically takes between 3 to 6 weeks of active construction time, depending on the scope and room size. However, total project duration—including initial planning, material lead times, permitting, and trade scheduling—spans approximately 8 to 14 weeks from concept to completion.
Anticipate these average active timeline phases:

Oscar Vance | Master Plumber & Drainage Expert
Meet Oscar Vance, a licensed master plumber sharing practical solutions on residential repairs, preventive maintenance, and thoughtful home upkeep.