How to Remove a Faucet Aerator
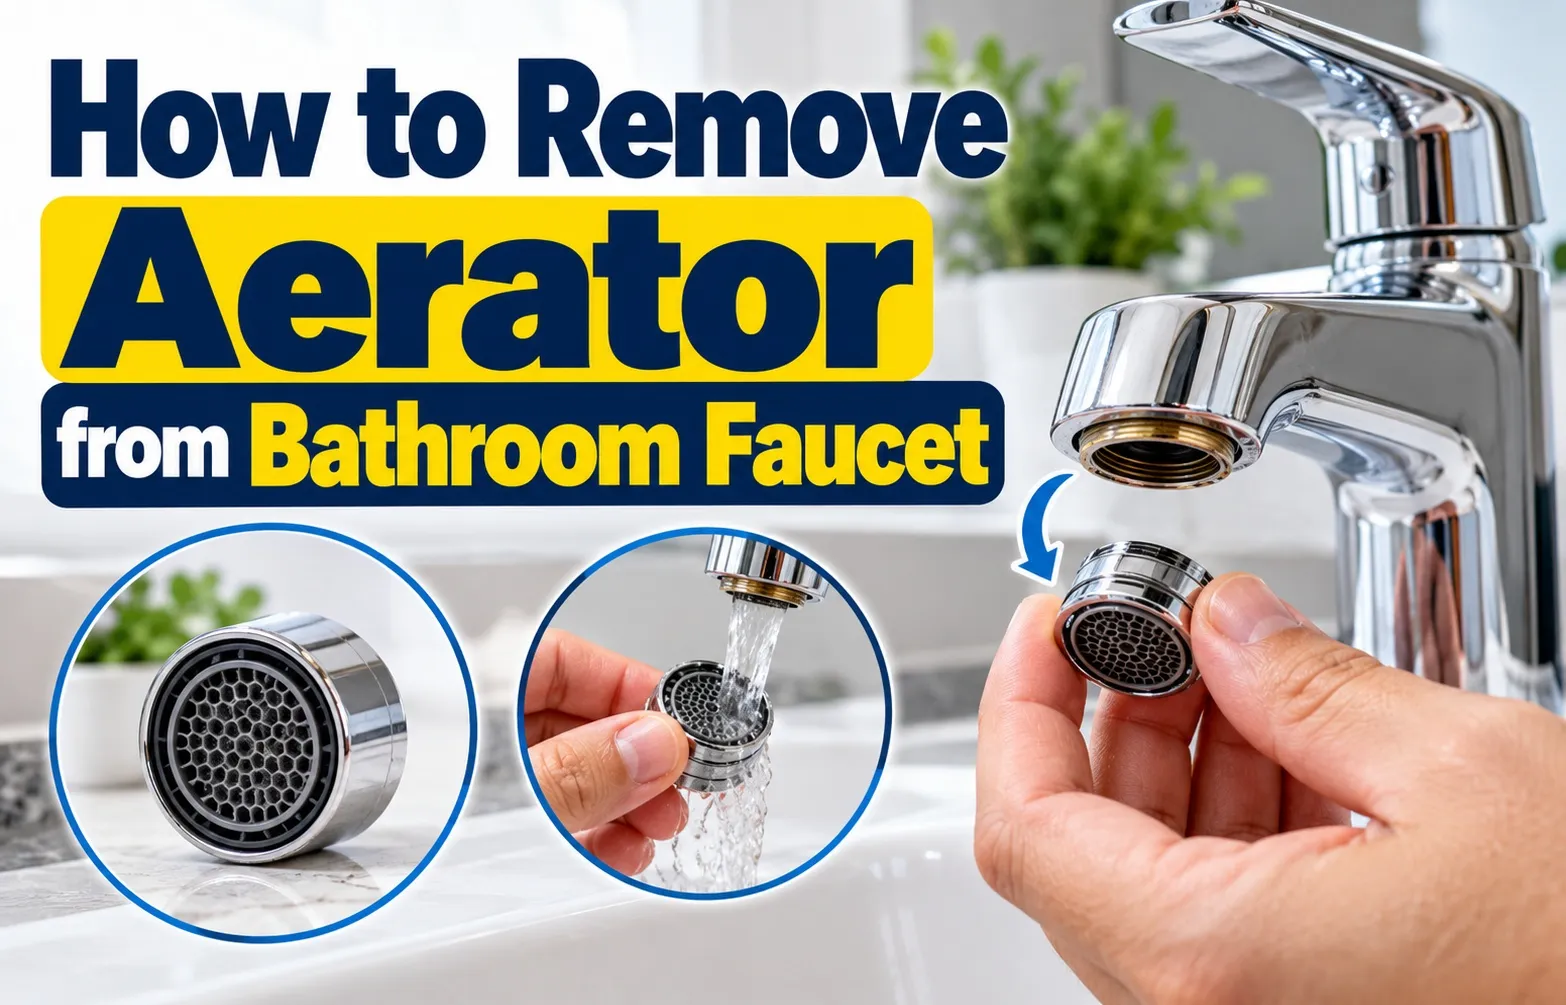 Removing a faucet aerator takes less than five minutes and requires minimal tools. Whether your spout has standard visible threads or a hidden cache design, turning the unit counterclockwise releases it from the faucet assembly.
The 30-Second Removal Formula (Step-by-Step)
To perform a rapid faucet aerator removal, follow these five essential steps to safely loosen, unthread, and detach the component from your sink spout:
- Block the Drain: Place a towel or drain stopper over the sink opening to prevent loose parts, calcified debris, or the internal rubber washer from falling down the pipe.
- Grip the Collar: Grasp the outer metal housing shell firmly with your dry hand or a rubber grip pad.
- Turn Counterclockwise: Twist the assembly to the left using the standard “lefty-loosey” direction.
- Apply Padded Tools (If Stuck): Wrap painter’s tape or a cloth around the metal housing to protect the finish, then gently turn it counterclockwise with slip-joint pliers.
- Extract Internal Components: Unscrew the unit completely by hand and pull out the inner sediment screen, flow restrictor, and rubber washer from inside the spout tip.
Identification: Standard vs. Recessed Aerators
Identifying your specific fixture type determines whether you can remove the unit by hand or if you need a specialized removal key before proceeding.
- Standard Aerator: Features a metal collar that screws onto the outside or inside tip of the spout. The housing shell is fully visible and accessible for grip with hands or wrapped pliers.
- Recessed (Cache) Aerator: Sits completely hidden inside the spout tip with no exposed metal ring. It features tiny plastic teeth or notches along the inner rim and requires a matching aerator key or notched tool to unthread.
Essential Tools & Surface Protection Setup
Proper preparation prevents scratched chrome finishes, damaged brass threads, and lost components during your faucet aerator removal. Gathering the right household items before starting ensures a smooth, damage-free DIY process.
Tools You’ll Need (and Household Substitutes)
Having the correct equipment on hand makes quick work of stubborn, calcified fixtures without requiring professional plumbing assistance.
- Slip-Joint Pliers or Adjustable Wrench: Used to provide extra torque on stubborn, hard-water-stuck aerator housings.
- Painter’s Tape or Duct Tape: Essential for wrapping metal tool jaws to protect decorative polished chrome or brushed nickel finishes.
- Microfiber Cloth or Rubber Jar Opener: Offers a non-slip grip for hand-twisting and protects the fixture surface from scratches.
- White Vinegar & Small Brush: Used for soaking and scrubbing away stubborn mineral deposits during the removal process.
Step-Zero Prep: Protecting Your Drain and Faucet Finish
Before applying any tools to your plumbing fixtures, safeguarding your workspace prevents costly mistakes and frustrating accidents.
- Seal the Drain Opening: Insert your sink stopper or pack a thick microfiber towel tightly into the drain basin so tiny washers and sediment pieces cannot slip down the pipes.
- Pad Your Pliers: Wrap two to three thick layers of painter’s tape tightly around the metal teeth of your slip-joint pliers to prevent gouging the soft chrome finish.
- Clean the Spout Tip: Wipe away exterior moisture, soap scum, and grime around the aerator base so your gripping tool or hands do not slip during torque application.
How to Remove a Standard (External Thread) Aerator
Standard aerators feature a visible metal ring or housing collar exposed at the base of the spout tip. Removing these units requires applying steady counterclockwise rotation to unthread the housing from the external threads of the faucet.
Method 1: Manual Hand-Twist Removal
Most standard faucet aerators can be unthreaded by hand if they are not locked up by mineral buildup or hard water deposits.
- Dry the Housing: Wipe the external metal ring thoroughly with a dry towel to eliminate water or soap slickness.
- Enhance Your Grip: Wrap a wide rubber band, a rubber jar opener, or a textured microfiber cloth tightly around the outer metal collar.
- Unscrew Counterclockwise: Looking down at the sink basin, twist the aerator collar to the left (counterclockwise) using firm, even pressure until it spins freely off the spout tip.
Method 2: Pliers & Wrench Removal (For Tight Aerators)
When mineral crust welds the aerator collar to the spout threads, hand pressure alone will not break the initial seal.
- Wrap the Metal Finish: Apply three thick layers of painter’s tape or a folded cloth directly over the outer metal aerator ring.
- Position Your Tool: Set the padded jaws of your slip-joint pliers or adjustable wrench around the taped collar.
- Break the Lock: Apply gentle, controlled force counterclockwise just enough to break the initial thread friction.
- Finish by Hand: Once the unit turns a quarter-revolution, remove the tool and complete unthreading the housing by hand to avoid cross-threading.
Extracting the Internal Gasket and Mesh Stack
Unscrewing the outer metal shell is only half the removal process, as crucial inner components often remain trapped inside the spout.
- Check Inside the Spout Tip: Look directly up inside the open faucet outlet using a flashlight to verify if the black rubber gasket or inner plastic flow restrictor stayed behind.
- Remove the Rubber Washer: Insert a small flathead screwdriver, hook tool, or bent paperclip into the spout to carefully pry out the hardened rubber gasket without scratching the internal threads.
- Separate the Stack: Lay out the removed assembly components—the outer housing shell, rubber washer, plastic flow restrictor, and fine mesh sediment screen—in order for easy cleaning or exact replacement matching.
Removing Recessed (Cache Hidden) Aerators by Brand
Recessed or cache aerators sit flush inside the faucet spout without an exposed outer ring to grip with pliers. Removing these concealed units requires engaging internal notches using a matching removal tool or improvised household alternatives.
Understanding Cache Aerator Removal Key Sizes
Hidden cache aerators come in four standard industry sizes, each requiring a specific key profile to interlock with the internal plastic teeth:
- Standard (M24x1): Roughly the diameter of a quarter; common in standard residential bathroom spouts.
- Junior (M21.5×1): Slightly smaller, approximately nickel-sized, used in modern sleek fixtures.
- Tiny / Small Junior (M18.5×1): Roughly dime-sized; found in narrow designer spouts.
- Tom Thumb (M16.5×1): The smallest concealed format, typically found in low-flow compact spouts.
Removing Recessed Aerators on Delta, Moen, and Kohler Faucets
Major fixture manufacturers design concealed spouts with specific notch patterns that match specialized removal tools:
- Identify Key Teeth Alignment: Select the aerator key size that matches your spout diameter and push its plastic teeth into the bottom notches of the recessed plastic face.
- Engage and Twist Counterclockwise: Turn the removal key to the left to break the seal; consult the official Delta cache key replacement guide if your fixture model uses color-coded custom key sets.
- Extract the Sleeve: Unthread the plastic insert completely using the key, ensuring both the plastic cartridge and its upper rubber sealing ring come out as a single unit.
How to Remove a Hidden Aerator Without an Aerator Key
If you lost your original plastic factory tool, several household items can substitute for a key without damaging the internal plastic teeth:
- Needle-Nose Pliers Trick: Insert the tips of small needle-nose pliers into two opposing outer notches on the aerator face. Hold the handles firm and rotate counterclockwise.
- The Coin Slot Method: Find a rigid quarter or thick metal washer that fits tightly across the center slot of the recessed plastic face, then turn counterclockwise using the coin as a key handle.
- Fork Tine Engagement: Carefully insert two sturdy metal fork tines into opposite perimeter notches to create leverage for hand-twisting.
Troubleshooting Stuck, Calcified, or Broken Aerators
Hard water minerals, calcification, and age can fuse faucet aerators into place or snap delicate plastic cache collars mid-extraction. Resolving these severe challenges safely protects your expensive fixture from permanent damage.
The Vinegar Soak Method for Severe Limescale & Hard Water Buildup
When heavy limescale and hard water deposits weld a metal aerator or stubborn housing shell into the spout, chemical dissolution breaks down the calcium crust without requiring brute force.
- Fill a Baggie: Pour household white vinegar halfway into a small plastic sandwich bag.
- Secure Over Spout: Lift the bag up so the vinegar completely submerges the aerator tip, then secure the bag tightly around the faucet neck using a sturdy rubber band.
- Soak Overnight: Let the fixture soak for 2 to 4 hours (or overnight for extreme build-up) to dissolve the mineral bond.
- Twist and Clean: Remove the bag and gently unthread the aerator counterclockwise by hand or with padded pliers.
How to Remove a Broken Plastic Aerator Snapped Inside the Spout
If a plastic cache aerator cracks or snaps in half during removal, leaving the threaded collar trapped inside the spout housing, a careful collapsing technique is required to protect internal brass threads.
- Insert a Small Flathead: Take a narrow flathead screwdriver and position the tip against the inner plastic wall of the stuck collar.
- Score the Plastic: Gently tap the end of the screwdriver with a small mallet to press a notch into the plastic ring, being careful not to strike the inner brass threads.
- Collapse Inward: Push the screwdriver handle inward toward the center of the spout to buckle and crack the plastic ring away from the housing wall.
- Pull Out the Pieces: Use needle-nose pliers to grab and pull out the collapsed plastic pieces, then brush away remaining debris.
Dealing with Corroded Threads Without Damaging Faucet Brass
Corrosion inside the spout threads can create a gritty barrier that prevents smooth reinstallation or causes new aerators to jam.
- Scrape Mineral Residue: Use an old toothbrush or a soft nylon wire brush dipped in vinegar to scrub away loose corrosion flakes from the interior threads.
- Rinse and Dry: Flush the spout thoroughly with clean warm water and dry the interior completely with a rolled microfiber towel.
- Apply Protective Grease: Dab a microscopic film of plumber’s silicone grease onto the clean threads to repel future hard water adhesion and ensure effortless removal next time.
Cleaning, Reinstalling, & Preventative Maintenance
Once you have removed your faucet aerator, restoring full water pressure requires thorough sediment cleaning, precise reassembly, and protective measures during installation. Taking time to service the components prevents future leaks and ensures effortless removal during routine plumbing maintenance.
Deep Cleaning Sediment and Limescale from Aerator Screens
Accumulated mineral scale, rust particles, and pipe debris throttle your sink’s water flow and distort the stream pattern.
- Disassemble the Screen Stack: Gently push the internal plastic flow restrictor and stainless steel mesh screens out from the metal housing shell.
- Scrub Away Debris: Use a firm toothbrush scrub under warm running water to dislodge sand, rust flakes, and loose sediment trapped inside the fine screen layers.
- Dissolve Hard Minerals: Submerge all metal and plastic parts in a small bowl of white vinegar for 30 minutes to dissolve calcified scale deposits entirely.
Reassembly Order: Stack Sequence Matters
Reassembling internal components in the wrong order causes spraying around the spout collar and reduces water aeration performance.
- Stack Internal Components: Place the fine mesh sediment screen at the bottom of the housing shell, followed by the plastic flow restrictor face-down.
- Set the Rubber Washer: Seat the rubber gasket flat on top of the inner plastic stack, ensuring correct washer orientation so it forms an airtight seal against the spout seat.
- Thread Carefully by Hand: Align the assembly straight with the spout tip and hand-tighten clockwise; use gentle hand pressure for initial turns to guarantee cross-threading prevention before final tightening.
Pro Tip: Preventative Lubrication for Future Maintenance
Hard water and calcification frequently fuse metal and plastic threads together, making future maintenance difficult without preventative steps.
- Apply Plumber’s Silicone Grease: Spread a microscopic film of food-grade plumber’s silicone grease lightly across the male and female threads before screwing the unit back onto the spout.
- Avoid Over-Tightening: Hand-tighten the housing firmly until snug against the rubber washer; avoid forcing the unit with pliers, as over-tightening can crush the gasket seal or warp fine brass threads.
Frequently Asked Questions About Removing Faucet Aerators
Find quick answers to common questions about removing, loosening, and maintaining bathroom faucet aerators.
Which direction do you turn to loosen a bathroom faucet aerator?
You must turn a faucet aerator counterclockwise to loosen it, following the standard “lefty-loosey” rule. When looking directly up at the bottom of the spout from inside the sink basin, turn the aerator housing to the left to unthread it safely.
Can you remove a faucet aerator without a wrench or key?
Yes, many standard aerators can be unthreaded by hand using a rubber jar opener, wide rubber band, or dry microfiber cloth for extra grip. For recessed cache aerators without a factory key, you can use the tips of needle-nose pliers, a thick coin, or a small flathead screwdriver inserted into the notch slots to apply rotational friction.
How do you remove an aerator that doesn’t unscrew or has no flat sides?
For smooth, round aerators without wrench flats, wrap painter’s tape or a thick rubber band around the metal collar to create surface traction for slip-joint pliers. If hard water minerals have frozen the threads, soak the entire spout tip in a plastic bag filled with white vinegar for several hours to break down calcification before twisting again.
Do some bathroom faucet aerators not come off?
While the vast majority of residential bathroom aerators are removable for cleaning, a few commercial, vandalism-resistant, or budget non-serviced fixtures feature permanently integrated flow restrictors. If your spout tip has no seam, notches, or removable housing shell, the aerator assembly is molded into the spout body and cannot be removed.
Is it safe to operate a faucet without an aerator installed?
Yes, it is entirely safe to run your sink without an aerator, though the water stream will splash significantly and lack flow regulation. Running the faucet for 10 to 15 seconds without an aerator is actually recommended to flush out loose sediment, mineral chips, and pipe debris after plumbing repairs.

Oscar Vance | Master Plumber & Drainage Expert
Meet Oscar Vance, a licensed master plumber sharing practical solutions on residential repairs, preventive maintenance, and thoughtful home upkeep.