Safety Preparation
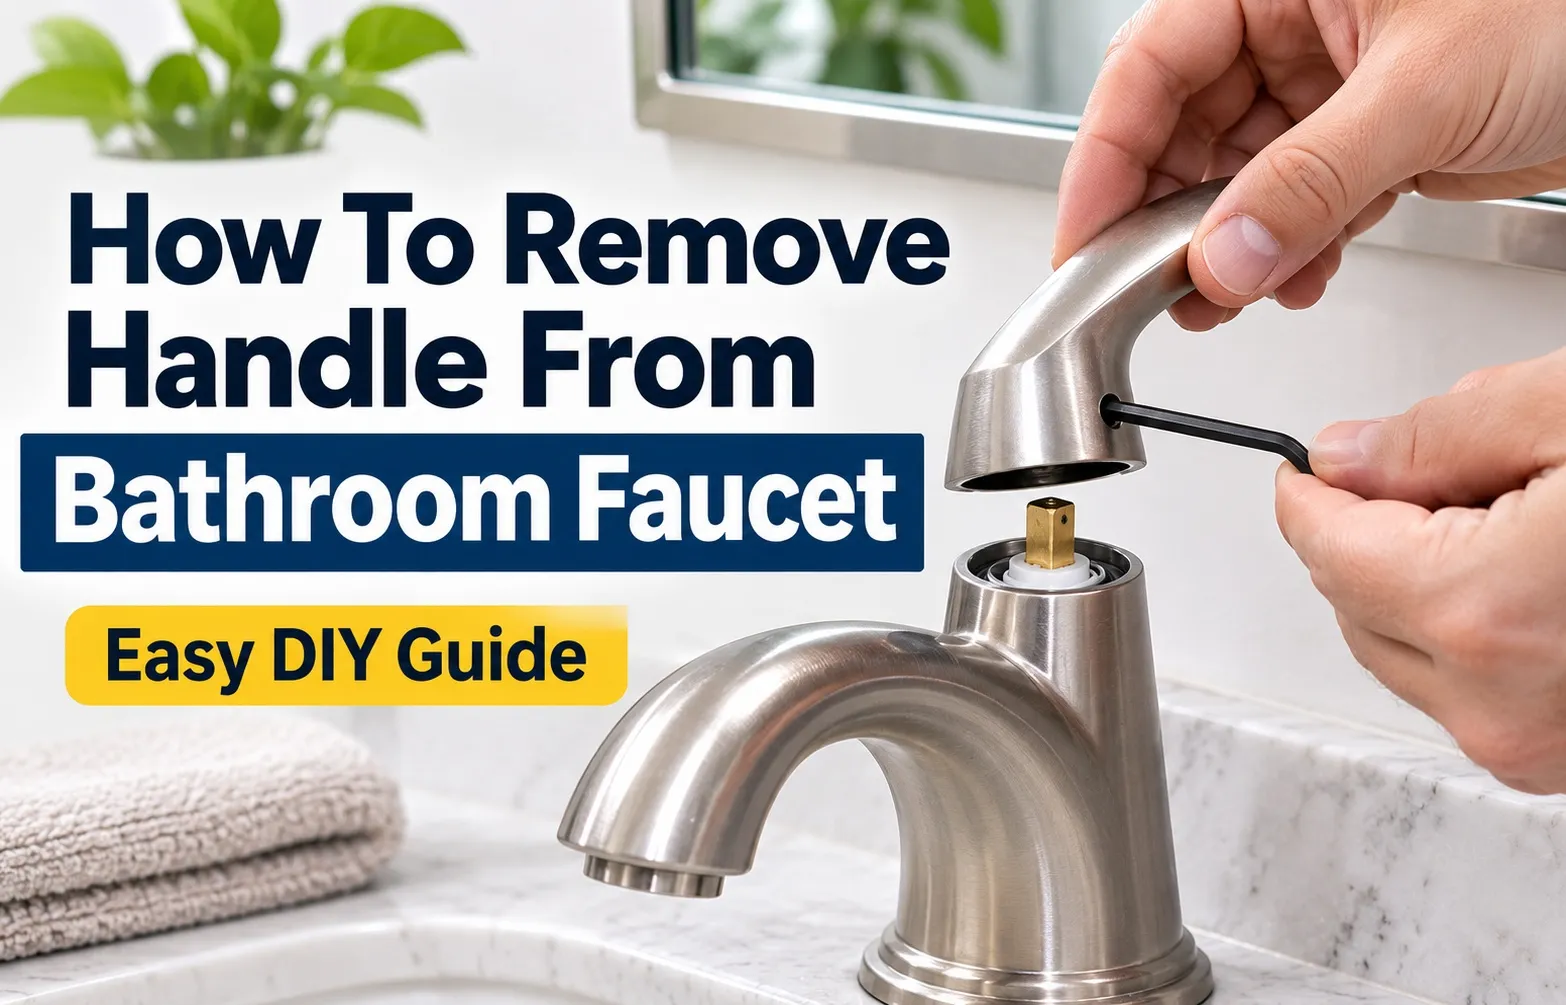 Removing a bathroom faucet handle requires isolating the water supply, protecting your sink basin, identifying the fastener type, and loosening the retaining mechanism. Most handles detach after removing a hidden set screw, prying off a decorative index cap to access a stem bolt, or unthreading the decorative collar base counterclockwise.
How to Remove Any Faucet Handle in 4 Basic Steps
To safely detach any standard bathroom faucet handle, follow this essential workflow before attempting repair or replacement:
- Shut Down Water & Seal Drain: Turn off both hot and cold water shutoff valves beneath the sink basin. Insert a drain stopper or cover the opening with a shop towel to catch falling hardware.
- Locate the Fastener: Inspect the fixture for a decorative index cap covering a top screw, a small hex set screw along the side collar, or a threaded base assembly.
- Loosen Internal Hardware: Unthread side set screws counterclockwise using a 3/32″ or 1/8″ Allen wrench, or remove top bolts using a Phillips screwdriver after prying off the index button.
- Extract the Handle: Pull the handle unit vertically off the exposed cartridge stem splines. Use white vinegar or a faucet handle puller if mineral buildup locks the assembly.
Essential Pre-Removal Safety Protocol (Water Shutoff & Drain Protection)
Before introducing hand tools to your bathroom fixture, completing fundamental prep work prevents sudden high-pressure leaks and lost internal components.
- Isolate Water Supply Lines: Locate the twin shutoff valves mounted under the sink cabinet. Rotate both handwheels fully clockwise until snug to halt pressure to the faucet assembly.
- Depressurize the Lines: Open both hot and cold tap levers above the basin to drain residual line pressure and verify complete water cutoff.
- Protect Basin Finish & Drains: Lay a plush bath towel inside the porcelain basin to cushion against tool drops. Insert the primary drain stopper or cover the outlet with a rag so small set screws cannot fall down the drain pipe.
For detailed structural diagrams on internal valve pressure release, consult official manufacturer reference standards such as the Delta Faucet Handle Maintenance Guide.
Identification Matrix Determining Your Faucet Handle Type
Identifying your faucet handle mechanism before applying mechanical force prevents broken valve stems and marring on decorative finishes. Bathroom faucet handles secure to internal cartridges through three primary design methods: concealed top bolts beneath cover caps, lateral recessed set screws, or internal threaded base collars.
Type 1: Top-Screw Handles (Decorative Index Cap)
Top-screw mechanisms are commonly found on traditional dual-handle fixtures and acrylic knob designs. This configuration hides the primary mounting bolt beneath a protective cosmetic cover on top of the handle structure.
- Visual Indicators: A circular cover, hot/cold index button, or decorative emblem sitting flush on top of the handle head.
- Fastener Location: Directly under the top cover cap, aligned vertically with the internal valve stem.
- Key Components: Flathead access notch, central Phillips mounting bolt, internal spline teeth interface.
Type 2: Side Set-Screw Handles (Lever Style)
Side set-screw fasteners are standard on modern single-handle lever faucets and sleek architectural fixtures. These designs rely on a small internal fastener pressing laterally against the flat edge of the cartridge stem.
- Visual Indicators: A smooth handle exterior with a tiny, subtle pinhole opening near the lower base or rear neck.
- Fastener Location: Recessed deep inside the side or rear access hole, requiring a hex socket key for engagement.
- Key Components: Recessed Allen set screw (3/32″ or 1/8″), smooth trim sleeve, lateral tension fit.
Type 3: Threaded Base & Screwless Handles (Hidden Mechanisms)
Screwless handles utilize concealed fasteners and integrated threaded collars to maintain a seamless, high-end appearance without visible screw access points or caps.
- Visual Indicators: Complete absence of cap seams, access pinholes, or visible screw heads across the entire handle body.
- Fastener Location: Internal threads integrated directly into the lower escutcheon ring or threaded collar base.
- Key Components: Threaded base collar, internal retaining nut, concealed stem adapter assembly.
Step-by-Step Removal Guide by Handle Mechanism
Removing your bathroom faucet handle requires matching the correct mechanical technique to your specific fixture design. Whether dealing with a top cover cap, a lateral set screw, or a threaded base collar, following precise removal steps prevents structural damage to the underlying valve cartridge and brass stem.
Method A: Removing Top-Screw Handles with Decorative Caps
Top-screw handles are detached by prying off the decorative index button to expose the central mounting screw. Once the internal fastener is turned counterclockwise with a screwdriver, the handle lifts vertically away from the stem spline without twisting.
- Locate and Pry Cap: Insert the flat edge of a screwdriver or your fingernail into the thumbnail notch of the decorative hot/cold index cap on top of the handle.
- Remove Cover: Apply a gentle prying motion to pop the cap out of the handle housing, exposing the central mounting screw underneath.
- Extract Fastener: Insert a Phillips screwdriver into the screw head and turn counterclockwise to completely unscrew and remove the fastener.
- Lift Handle: Grip the handle body firmly with both hands and pull straight up along the stem spline to separate it from the valve cartridge.
Method B: Removing Side Set-Screw Handles Using Hex Keys
Modern lever handles are secured by a tiny lateral set screw hidden inside a rear or side access port. Loosening this internal fastener with the correct size hex key relieves the tension holding the lever tightly against the smooth valve cartridge stem.
- Locate Access Port: Inspect the lower base or back neck of the lever handle to locate the recessed pinhole containing the hex set screw.
- Engage Hex Key: Insert the appropriate Allen wrench into the hex socket until it seats fully inside the fastener head.
- Loosen Fastener: Turn the wrench counterclockwise by two to three full rotations to back the set screw completely out of the stem locking groove.
- Pull Assembly Free: Pull the handle straight away from the faucet body or wiggle it gently upward if slight mineral resistance binds it to the stem.
Method C: Removing Threaded Base & Screwless Faucet Handles
Screwless and minimalist fixtures rely on concealed threaded collars that secure the handle directly to the valve assembly. Twisting the lower trim base using counterclockwise rotation unthreads the internal locking mechanism, allowing the complete assembly to slide off.
- Inspect Fixture: Verify that no visible screw heads, caps, or access pinholes exist anywhere on the exterior handle structure.
- Protect Finish: Wrap a soft cloth around the lower trim base if manual grip is insufficient, preparing to use gripping tools without scratching the finish.
- Unthread Collar Base: Apply a firm grip and rotate the base sleeve counterclockwise by hand to unthread it from the internal valve body.
- Use Mechanical Leverage: If the threaded collar is tightly bound by hard water scale, use a rubber strap wrench to gain torque before lifting the handle and trim components off.
Brand-Specific Removal Instructions (Delta, Moen & Kohler)
Major faucet manufacturers utilize brand-specific locking mechanisms, internal cartridge adapters, and hidden access locations. Understanding how Delta, Moen, and Kohler secure their handle assemblies ensures a smooth removal process without damaging internal valve components or proprietary trim parts.
How to Remove Delta Faucet Handles (Concealed Set Screw Locations)
Delta Faucet handle designs primarily rely on concealed set screws located inside tiny pinhole access ports along the lever neck or beneath subtle rubber cover plugs on single-handle units.
- Locate Access Port: Look for a small rubber plug or open pinhole on the side or underside of the lever arm. Pop rubber plugs out with a small flathead tool if present.
- Engage Allen Key: Insert a 3/32″ Allen wrench (or a 1/8″ hex key for older Delta models) firmly into the set screw socket.
- Unscrew Counterclockwise: Turn the hex key counterclockwise 3 to 4 turns to loosen the set screw from the flat face of the valve stem.
- Extract Handle: Pull the lever straight off the cartridge stem. If lifting a single-handle ball-valve style unit, lift up while gently rocking the base to clear the cam assembly.
How to Remove Moen Faucet Handles (Cartridge Clip & Adapter Variations)
Moen handles often feature modular construction with plastic stem adapters, top-screw cover buttons, or retaining clips holding the internal cartridge in place.
- Access Mounting Screw: Pry off the top decorative index cap on traditional models, or loosen the hidden set screw (7/64″ Allen wrench) on modern Moen single-lever models.
- Unthread Center Bolt: Remove the exposed Phillips screw holding the handle to the plastic stem adapter.
- Remove Handle Body: Pull the handle unit off the stem to expose the internal white or black plastic stem adapter.
- Inspect Cartridge Retaining Clip: If replacing internal components, pull the brass or plastic cartridge clip straight up with needle-nose pliers before extracting the valve body.
How to Remove Kohler Faucet Handles (Threaded Skirts & Bonnet Nuts)
Kohler bathroom fixtures frequently utilize continuous threaded skirts, concealed bonnet nuts, or friction-locked trim collars instead of exposed side set screws.
- Unthread Base Collar: Hold the top lever stationary with one hand while gripping the lower decorative skirt (bonnet collar) at the sink surface.
- Rotate Counterclockwise: Twist the base skirt counterclockwise by hand (or with a non-marring strap wrench) to unthread it from the brass valve assembly.
- Lift Handle & Trim: Once unthreaded, slide the entire upper handle structure and escutcheon sleeve vertically off the cartridge stem.
- Expose Bonnet Nut: Use an adjustable wrench on the underlying hex bonnet nut if you need to service the valve cartridge beneath the handle mechanism.
Troubleshooting How to Remove a Stuck or Corroded Faucet Handle
Stubborn faucet handles locked in place by years of calcium buildup and severe corrosion require a structured, multi-phase escalation protocol. Moving sequentially from gentle acid softening to chemical lubrication and dedicated mechanical extraction prevents accidental valve stem fracturing and expensive plumbing damage.
Phase 1: Dissolving Mineral Deposits & Hard Water Scale (White Vinegar Compress)
Dissolving heavy mineral scale is the safest initial step when a handle is fused to the internal cartridge stem. Wrapping the base in an acidic white vinegar compress softens hard water calcification naturally without scratching or stripping sensitive decorative metal finishes.
- Saturate Rags: Soak clean paper towels or cotton rags thoroughly in standard household white vinegar or a 50/50 water-vinegar solution.
- Apply Compress: Wrap the saturated cloth tightly around the base and junction of the handle where it meets the escutcheon plate.
- Let Sit: Allow the acidic compress to dwell undisturbed for 20 to 30 minutes, giving the acetic acid time to break down accumulated calcium carbonate.
Phase 2: Chemical Lubrication & Thermal Expansion (Penetrating Oil & Controlled Heat)
When vinegar treatment fails to break through advanced oxidation, introducing a specialized penetrating catalyst or controlled thermal expansion unlocks the tight metal bond. This strategy penetrates micro-crevices to loosen fused brass components without requiring dangerous brute force.
- Apply Penetrating Catalyst: Spray WD-40 or a professional-grade penetrating fluid directly into the set-screw access port or around the lower handle collar.
- Allow Penetration: Give the lubricant 15 minutes to creep deep into the threaded or splined interfaces.
- Apply Gentle Heat: Wave a hair dryer set to medium heat around the handle body for 60 seconds; thermal expansion helps break the grip of oxidized scale.
Phase 3: Mechanical Extraction (Using a Dedicated Faucet Handle Puller Tool)
If chemical soaking and thermal tricks fail to budge a stuck fixture, a dedicated faucet handle puller provides the mechanical advantage needed. The device uses adjustable puller arms and center screw compression to lift seized handles straight off their splines smoothly and evenly.
- Position Puller Arms: Hook the puller’s dual gripping arms securely beneath the flared rim or base of the handle.
- Align Center Screw: Rest the threaded center bolt directly on top of the exposed brass valve stem center.
- Compress and Lift: Turn the center bolt clockwise with a wrench; the downward pressure against the stem forces the puller arms to pop the handle upward cleanly.
Critical Warning: How to Support the Valve Stem to Prevent Plumbing Fractures
Applying aggressive upward pulling or violent side-to-side wrenching without supporting the underlying valve body can easily snap delicate brass stems or twist internal water supply lines. Proper counter-force protects your plumbing infrastructure from catastrophic torque damage.
- Brace the Valve Body: Always cup your opposite hand firmly around the fixed base or escutcheon plate to absorb upward extraction forces.
- Avoid Lateral Prying: Never use heavy hammers or leverage screwdrivers against the porcelain basin edge, as this causes chipping and structural cracks.
- Inspect Stem Integrity: Once removed, inspect the brass splines for stress fractures before installing replacement components.
Post-Removal Maintenance & Preventative Prepping
Performing targeted surface maintenance immediately after removing a faucet handle prevents future corrosion and ensures smooth, effortless handle rotation. Prepping the brass components before reinstalling hardware eliminates hard water scale, protects fine spline teeth, and stops metal-on-metal binding before it starts.
Cleaning the Exposed Valve Stem & Splines
Accumulated mineral deposits and oxidation along the stem splines create friction and lock handles in place over time. Thoroughly scrubbing these surfaces restores precise mechanical alignment for replacement or reinstalled handle assemblies.
- Scrub Spline Teeth: Use a fine wire brush or a stiff nylon toothbrush dipped in white vinegar to scrub away residual scale buildup along the fine spline teeth.
- Wipe Away Corrosion: Clean the exposed brass stem using a micro-fiber rag to lift loosened mineral fragments and old degraded lubricant.
- Inspect Threads: Check side set-screw holes and base collar threads for remaining rust, ensuring smooth engagement when tightening hardware later.
Applying Silicone Plumber’s Grease for Smooth Operation
Applying a protective layer of non-petroleum lubricant serves as an anti-seize barrier that shields exposed metal from moisture, hard water minerals, and chemical oxidation.
- Select the Right Lubricant: Use only high-grade, non-petroleum plumber’s silicone grease; petroleum-based lubricants break down synthetic rubber O-rings and internal plastic seals.
- Coat Stem Splines: Dab a thin, uniform layer of silicone grease directly onto the cartridge stem splines and surrounding O-rings.
- Treat Fastener Threads: Lightly coat the threads of the handle set screw or top mounting bolt to guarantee effortless removal during future bathroom maintenance.
Frequently Asked Questions
How do I remove a faucet handle if there are no visible screws?
If there are no exposed screws or side pinholes, the handle relies on a hidden top index cap or an unthreading base collar. Pry off any decorative cover pop-out button on top to check for a concealed bolt, or firmly twist the lower decorative trim sleeve counterclockwise to unthread the handle assembly from the valve body.
Can you remove a faucet handle without turning off the main water valve?
While you can physically unscrew a handle without shutting off the water supply, doing so creates a serious water pressure hazard if the cartridge stem gets jostled or dislodged. Always shut off the local isolation valves beneath the sink basin to prevent sudden high-pressure flooding during maintenance.
What can I use if I don’t have a faucet handle puller?
If you lack a specialized extraction tool, perform a 30-minute vinegar soak alternative to dissolve internal mineral scale. After soaking, wrap a shop towel around the handle base and use two wooden spoons for balanced, improvised levering while gently tapping the back of the handle with a rubber mallet.
How do I remove an old-style two-handle vintage faucet cap?
Vintage brass fixtures typically feature threaded porcelain or brass index buttons on top of each knob. Wrap a rag over the cap to protect delicate antique finishes, use slip-joint pliers to turn the cap counterclockwise, and remove the internal brass screw holding the vintage handle to the stem.

Oscar Vance | Master Plumber & Drainage Expert
Meet Oscar Vance, a licensed master plumber sharing practical solutions on residential repairs, preventive maintenance, and thoughtful home upkeep.