Emergency Triage: The First 10 Minutes
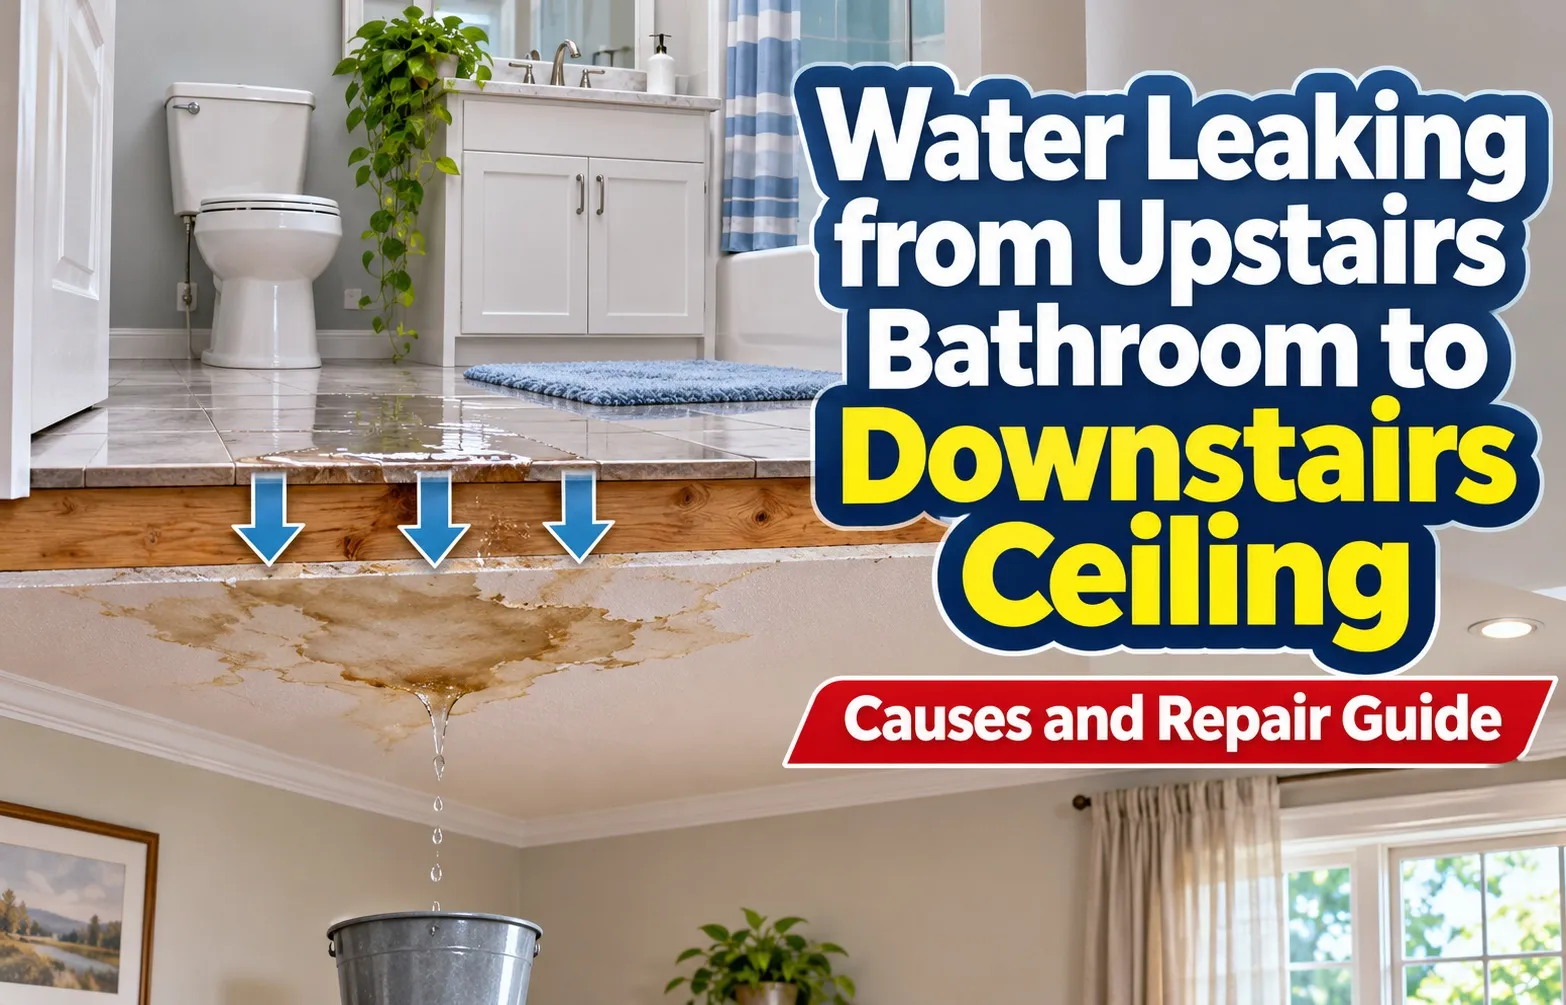 A ceiling leak from an upstairs bathroom requires immediate action to stop active structural destruction, mitigate severe mold growth, and avoid catastrophic ceiling collapse. Follow this emergency protocol within the first 10 minutes of discovering water pooling or dripping through your downstairs ceiling.
4 Immediate Steps to Stop Water Damage Right Now
Executing rapid mitigation steps instantly reduces repair costs and stops continuous water saturation into your home’s floor joists and ceiling drywall.
- Turn Off the Main Water Supply Valve: Locate your house’s main shut-off valve (typically in the basement, crawl space, or exterior utility box) and turn it off immediately if the specific fixture leak source is unknown.
- Isolate Local Fixture Shut-Offs: If water is visibly overflowing from a toilet or sink supply line, turn the local chrome angle stop valve clockwise until tight to stop the flow without shutting down the entire house.
- Clear the Spill Zone and Set Buckets: Move all furniture, rugs, and portable electronics away from the drip area, then place large buckets or plastic storage bins directly underneath active drips to catch water.
- Layer Towels to Contain Runoff: Lay thick bath towels or tarps across the floor perimeter to absorb splashing water and prevent secondary damage to downstairs flooring and baseboards.
The Screwdriver Trick: How to Relieve Bulging Drywall Water Pressure Safely
Water pooling above ceiling drywall creates extreme weight, causing the material to sag, soften, and potentially collapse across a wide area. Puncturing the wet drywall releases trapped water into a controlled container, preserving the surrounding ceiling framework.
- Identify the Lowest Point of the Bulge: Locate the center of the damp, sagging ceiling section where water is visibly collecting.
- Position a Bucket Directly Below: Center a 5-gallon bucket or wide container directly underneath the sagging drywall point.
- Puncture the Drywall Center: Take a standard Phillips-head screwdriver and push the tip firm into the center of the bulge to create a clean drain hole.
- Allow Water to Drain Completely: Step back and let the pooled water stream directly into the bucket until the flow stops and the ceiling tension eases.
Electrical Hazards: When to Cut Power at the Breaker Box
Water traveling through subfloors often follows electrical wiring runs, pooling inside light fixtures, ceiling fan junction boxes, and recessed lighting cans. This overlap creates immediate electrical shock risks and short-circuit fire hazards.
- Check Light Fixtures and Outlets: If water is dripping out of ceiling lights, smoke detectors, or running down walls near electrical outlets, treat the situation as an active electrical danger.
- Shut Off the Breaker Box Immediately: Access your main electrical panel and switch off the circuit breakers dedicated to both the downstairs room and the upstairs bathroom.
- Avoid Wet Switches and Fixtures: Do not touch light switches, adjust ceiling fans, or unplug appliances in the affected rooms until power is fully disconnected at the breaker box.
Pinpoint the Source: The 4 Main Bathroom Culprits
Identifying the exact origin of an upstairs bathroom leak prevents unnecessary demolition of downstairs ceilings. Most bathroom leaks stem from four recurring plumbing and waterproofing failures.
Culprit 1: Toilet Wax Ring Failure (Leaks Only When Flushed)
A failed wax ring seal allows wastewater to seep directly into the subfloor every time the toilet is flushed. Because the leak only occurs under flushing pressure, it often creates periodic damp spots on the downstairs ceiling rather than a continuous drip.
- Symptom Pattern: Water drips downstairs only immediately after a toilet flush.
- Risk Factor: Prolonged seepage quickly rots wood subfloors and bathroom floor joists.
- Immediate Fix: Remove the toilet, clean away the degraded seal, and install a new reinforced wax ring.
Culprit 2: Shower & Tub Drain Shoe or Overflow Gasket (Leaks During Baths)
Bathtubs handle high-volume water pressure through the drain shoe and overflow plate assembly. Worn rubber gaskets or loose PVC connections behind the tub allow water to escape when a bath is drawn or when water backs up quickly.
- Symptom Pattern: Leaks occur specifically when filling the tub or taking a deep bath, but rarely during a quick standing shower.
- Component Check: Inspect the rubber gasket behind the overflow plate and the P-trap connections underneath.
- Resolution: Tighten slip joints or replace deteriorating rubber gaskets to restore a watertight seal.
Culprit 3: Pressurized Water Supply Line & Valve Cracks (Constant Dripping)
Supply lines, angle stop valves, and shower mixing valves remain under constant household water pressure. Cracked braided steel lines, loose fittings, or degraded internal O-rings cause continuous or intermittent spraying inside walls.
- Symptom Pattern: A steady, constant drip that does not depend on whether a toilet is flushed or a tub is drained.
- Vulnerable Areas: Connections under the sink vanity, behind toilet tanks, and inside shower wall cavities.
- Action Required: Replace damaged flexible supply lines or rebuild faulty valve stems immediately.
Culprit 4: Tile Grout, Missing Caulk, & Shower Door Pan Seepage (Slow Intermittent Dampness)
Water splashing against shower walls or pooling on shower pan floors finds its way through compromised barriers. Cracked tile grout, missing silicone caulk, or leaky shower door seals let water seep down through unsealed subfloors over time.
- Symptom Pattern: Ceilings get damp during or right after a standard shower session.
- Subsurface Damage: Moisture accumulates silently behind wall tiles and tile beds before reaching the downstairs ceiling.
- Remediation: Strip old caulk, regrout damaged tile joints, and apply waterproof sealant across the shower surround.
Step-by-Step Diagnostic Test: Isolating Fixtures Without Calling a Plumber Yet
Systematically testing each fixture eliminates guesswork and pinpoints the exact source of failure before you open up drywall or hire professional services. Follow a structured isolation protocol to trace the root cause.
- Step 1: The Toilet Test: Flush the upstairs toilet three times consecutively while monitoring the downstairs ceiling for fresh water movement.
- Step 2: The Tub Drain Test: Plug the bathtub drain, fill it with a few inches of water, and let it drain completely to check drain shoe integrity.
- Step 3: The Shower Spray Test: Direct the showerhead spray strictly against the tile walls and glass doors for five minutes to test grout and caulk barriers.
- Step 4: Supply Line Observation: Dry all visible pipes and supply lines with a towel, then wrap toilet paper around fittings to catch the first sign of moisture.
Structural Drying & Mold Prevention Timelines
Stopping the initial plumbing leak solves only half of the crisis; mitigating hidden moisture within the ceiling cavity and subfloor is essential to prevent severe structural rot and toxic mold colonization. Rapid and aggressive drying protocols must begin immediately after water flow ceases to protect your home environment.
The 24 to 48-Hour Mold Window: Why Time is Critical
Mold spores germinate and colonize rapidly on damp drywall, wood framing, and insulation within 24 to 48 hours of water exposure. Acting inside this narrow window stops fungal growth before it spreads through HVAC systems and creates chronic indoor air quality hazards.
- Rapid Spore Activation: Dormant mold spores activate instantly in humid, stagnant ceiling cavities created by trapped plumbing leaks.
- Official Regulatory Guidance: Following established protocols like the EPA’s Moisture and Mold Prevention Standards ensures proper containment and remediation safety.
- Immediate Action Required: Do not wait for drywall to feel dry to the touch before introducing active air circulation and antimicrobial treatments.
How to Dry Wet Drywall & Ceiling Cavities (Dehumidifiers vs. Air Movers)
Effective structural drying requires deploying specialized equipment to force trapped moisture out of building materials and extract it from the indoor atmosphere. Relying on passive room air is insufficient for enclosed ceiling voids.
- Industrial Dehumidifiers: Commercial-grade refrigerant or desiccant dehumidifiers pull high volumes of moisture out of the air, preventing humidity from re-saturating structural wood.
- High-Velocity Air Movers: Floor fans and specialized directional blowers accelerate evaporation by pushing continuous airflow directly across damp drywall and subfloor surfaces.
- Cavity Drying Setup: Removing small access panels or recessed light fixtures allows air movers to force air directly into closed ceiling voids.
Can Wet Ceiling Drywall Be Saved, or Must It Be Replaced?
Determining whether to salvage or demolish water-damaged ceiling drywall depends on the volume of water, contamination level, and structural sagging extent. Porous drywall loses its core integrity once saturated.
- When Drywall Can Be Saved: Clean water leaks exposed for less than 24 hours can often be dried out in place using industrial fans and treated with an antimicrobial spray.
- When Replacement is Mandatory: Sagging drywall, compromised structural seams, or insulation contaminated by grey/black water must undergo immediate drywall replacement.
- Subfloor Inspection: Always check the damp subfloor above the ceiling leak to ensure plywood or OSB subflooring has not delaminated or begun rotting.
Financial Breakdown: Repair Costs & DIY vs. Professional Matrix
Managing a ceiling leak requires understanding the financial scope of three distinct repair phases: stopping the plumbing failure, restoring damaged drywall, and remediating secondary moisture issues. Total expenses vary based on whether you handle minor fixes yourself or hire specialized trades.
Estimated Cost Breakdown: Plumbing Fix vs. Ceiling Repair vs. Mold Cleanup
Repairing water damage involves separate trade costs depending on the extent of structural impact and water contamination. The table below details standard industry estimates across plumbing, drywall restoration, and environmental remediation.
Decision Matrix: Safe DIY Repairs vs. Mandatory Professional Jobs
Evaluating whether to undertake a repair yourself depends directly on safety risks, technical complexity, and structural integrity. Minor surface fixes can be managed independently, while complex plumbing and structural work demand professional licensing.
- Safe DIY Projects: Replacing a accessible DIY wax ring, re-caulking shower base perimeters, tightening exposed P-trap slip nuts, or applying cosmetic stain-blocking primer on minor dry ceiling patches.
- Mandatory Professional Jobs: Repairing hidden supply line breaks behind tile walls, replacing compromised subfloors, rewiring wet electrical junction boxes, and handling large-scale mold removal.
- Risk Assessment: Attempting DIY repairs on pressurized water lines or structural joists risks expanding water damage and voiding homeowners insurance coverage.
What Type of Contractor Should You Call First? (Plumber vs. Water Damage Specialist)
Calling the wrong trade first delays effective damage control and increases total repair costs. Sequence your contractor outreach based on the status of the active leak.
- Step 1: Call a Licensed Plumber First: If water is actively leaking, dripping, or flowing, hire a licensed plumber immediately to locate and isolate the source of the plumbing failure.
- Step 2: Engage a Restoration Contractor Second: Once the leak is officially stopped, hire a water damage restoration contractor to set up commercial drying equipment, extract trapped moisture, and handle mold mitigation.
- Step 3: Hire a Drywall & Painting Specialist Last: After structural drying verification confirms the subfloor and joists are completely dry, bring in a drywall contractor for patching, texturing, and refinishing.
Insurance, Landlord & Neighbor Liability
Determining financial responsibility for ceiling leaks involves navigating property boundaries, insurance policy nuances, and legal obligations. Understanding these rules ensures you file claims correctly and avoid paying out-of-pocket for damage caused by neighboring units or property neglect.
Does Homeowners Insurance Cover Ceiling Leaks from Upstairs Bathrooms?
Homeowners insurance generally covers ceiling leaks if the cause is sudden and accidental, such as a burst supply pipe or a sudden appliance rupture. Coverage applies to both the structural repairs of the ceiling and damaged personal property inside the home.
- Covered Scenarios: Sudden pipe bursts, accidental tub overflows, or high-pressure valve failures typically fall under standard dwelling coverage (Policy A).
- Policy Deductibles: The homeowner must pay their agreed policy deductible before insurance funds kick in for drywall restoration or plumbing repairs.
- Personal Property Limits: Damaged furniture, electronics, or flooring underneath the leak fall under personal property coverage (Policy C).
Sudden Pipe Bursts vs. Gradual Leaks: What Insurance Denies
Insurance adjusters closely evaluate whether damage occurred rapidly or built up slowly over time. Claims resulting from long-term neglect or unaddressed maintenance issues are routinely denied.
- Gradual Wear and Tear: Insurance policies explicitly exclude slow leaks from old caulk, deteriorating tile grout, or long-standing toilet wax ring failures that developed over months.
- Maintenance Obligations: Homeowners are expected to perform routine property maintenance; failing to repair a known slow drip invalidates coverage.
- Special Policy Endorsements: Some insurers offer optional water backup or gradual leak endorsements that add partial coverage for hidden, long-term pipe seepage inside wall cavities.
Rental & Condo Liability: Who Pays When Water Leaks into a Downstairs Unit?
In multi-family buildings, condos, and rental apartments, liability depends on where the leak originated and whether negligence was involved under HOA rules or tenancy law.
- Landlord vs. Tenant Rights: Landlords are financially responsible for structural plumbing failures (burst pipes, fixture age), while tenants bear liability if the leak resulted from negligence, such as overflowing a bathtub.
- Condo Association (HOA) Rules: The master HOA policy typically covers common elements (studs, shared plumbing stacks), while individual unit owners must claim drywall and personal property damage under their HO-6 policies.
- Neighbor-to-Neighbor Damage: An upstairs neighbor is only legally liable for a downstairs unit’s damage if negligence can be proven (e.g., ignoring a known leaking toilet after repeated warnings). Otherwise, the downstairs owner files through their own insurance.
Step-by-Step Guide to Filing a Successful Water Damage Claim
Following a precise documentation routine when filing a property damage claim prevents claim denials and speeds up payout approvals from your insurance adjuster.
- Step 1: Document Damage Immediately: Take clear, wide-angle photos and videos of the wet ceiling, active drips, subfloor condition, and all damaged personal belongings before starting cleanup.
- Step 2: Mitigate Further Loss: Take mandatory emergency action—such as turning off the main shut-off valve and placing catch buckets—to show your insurer that you attempted to minimize structural damage.
- Step 3: Contact Your Insurance Agent: Report the property damage claim right away, clearly stating whether the event was a sudden, accidental water release.
- Step 4: Keep All Professional Invoices: Retain detailed itemized receipts from plumbers, water restoration specialists, and equipment rentals to submit directly to the insurance adjuster for reimbursement.
Frequently Asked Questions
Clear, direct answers to common questions help resolve uncertainty and guide swift action when dealing with water damage from an upstairs bathroom leak.
How long can a ceiling leak before it collapses?
Standard drywall can saturate and fail within 24 to 72 hours depending on the water volume and trapped insulation weight. A heavily sagging or bulging ceiling can collapse in a matter of hours if water pressure is not relieved immediately.
- Critical Timeframe: Structural weakening begins as soon as drywall paper and gypsum cores absorb standing water.
- Warning Signs: Deep bowing, active dripping, and cracking paint indicate immediate collapse risk.
- Prevention: Puncture bulging drywall safely with a screwdriver to drain water before structural failure occurs.
What to do when the ceiling is wet but there is no noticeable active leak?
A damp ceiling with no visible drip points to a hidden plumbing leak, such as a slow supply line weep or a cracked drain pipe inside the wall cavity. Tracing the source requires systematic testing and moisture detection.
- Isolate Fixtures: Test the toilet, shower, and sink separately while monitoring the ceiling to identify which action triggers moisture.
- Inspect Wall Cavities: Check baseboards and walls directly above the damp ceiling area for running water trails or damp insulation.
- Call a Professional: Use thermal imaging or hire a leak detection specialist to locate hidden pipe damage without random demolition.
Is a bathroom ceiling leak considered a medical or structural emergency?
A ceiling leak is a severe structural and environmental emergency that requires immediate intervention. Ignoring the problem escalates safety hazards quickly.
- Collapse Hazard: Saturated drywall can fall unexpectedly, risking injury to anyone underneath.
- Electrical Shock Risk: Water contacting light fixtures and wiring creates immediate short-circuit and fire hazards.
- Health Hazards: Unchecked moisture breeds toxic mold colonies within 24 to 48 hours, threatening indoor air quality.
Do plumbers fix the actual ceiling drywall after stopping the leak?
Licensed plumbers specialize exclusively in repairing pipes, valves, and drainage fixtures; they do not patch or refinish ceiling drywall. Coordinating multi-trade repairs is necessary to restore your home fully.
- Plumber Role: Stops the active water source and repairs faulty plumbing components.
- Restoration Contractor Role: Handles industrial drying, structural moisture extraction, and mold remediation.
- Drywall Contractor Role: Patches, tapes, textures, and paints the downstairs ceiling after structural drying is verified.
How can I dry out a wet ceiling fast after a toilet overflow?
Drying a wet ceiling rapidly after a toilet overflow requires active mechanical equipment rather than passive room ventilation. Speed is essential to prevent permanent subfloor warping.
- Deploy Air Movers: Position high-velocity floor fans or blowers to direct continuous airflow across the damp ceiling surface.
- Use Commercial Dehumidifiers: Run industrial refrigerant or desiccant dehumidifiers in the room to pull moisture out of the air.
- Open Cavity Access: Remove recessed light fixtures or cut small access holes to allow dry air to circulate inside closed ceiling voids.

Oscar Vance | Master Plumber & Drainage Expert
Meet Oscar Vance, a licensed master plumber sharing practical solutions on residential repairs, preventive maintenance, and thoughtful home upkeep.