How to Check for Mold in HVAC System
 Discovering a persistent musty smell whenever your climate control kicks on can be an alarming sign of trouble. Detecting mold early protects your indoor air quality and prevents microscopic spores from circulating throughout your entire home.
Whether you are noticing unexplained allergy symptoms or dark discoloration near your vents, knowing how to inspect your climate system safely is the first step toward a healthier living environment.
Why HVAC Systems Are Prime Breeding Grounds for Mold
Modern heating, ventilation, and air conditioning units naturally create the exact environment that fungi love: moisture, darkness, and organic debris. As warm indoor air passes over cold cooling coils, condensation forms continuously.
When condensate drain lines clog or air filters trap organic dust and skin cells, stagnant moisture accumulates inside the air handler and ductwork. This creates a fertile breeding ground where mold spores can rapidly colonize and multiply.
- Constant Moisture: Condensation from cooling cycles provides ongoing hydration for microscopic spores.
- Organic Food Sources: Accumulated dust, pet dander, and lint serve as organic nutrients for fungal growth.
- Hidden Dark Spaces: Enclosed interior chambers prevent ultraviolet light from inhibiting microbial proliferation.
How to Check Your System in Under 10 Minutes
If you suspect contamination and want an immediate overview of your system’s condition, follow this rapid 4-step checklist to evaluate your setup right now:
- Perform the Smell Test: Turn the fan setting to “ON” without heating or cooling, and check if a sharp, earthy odor emits from your supply vents.
- Inspect the Air Filter: Pull out your current filter to check for dampness, dark splotches, or caked-on organic debris.
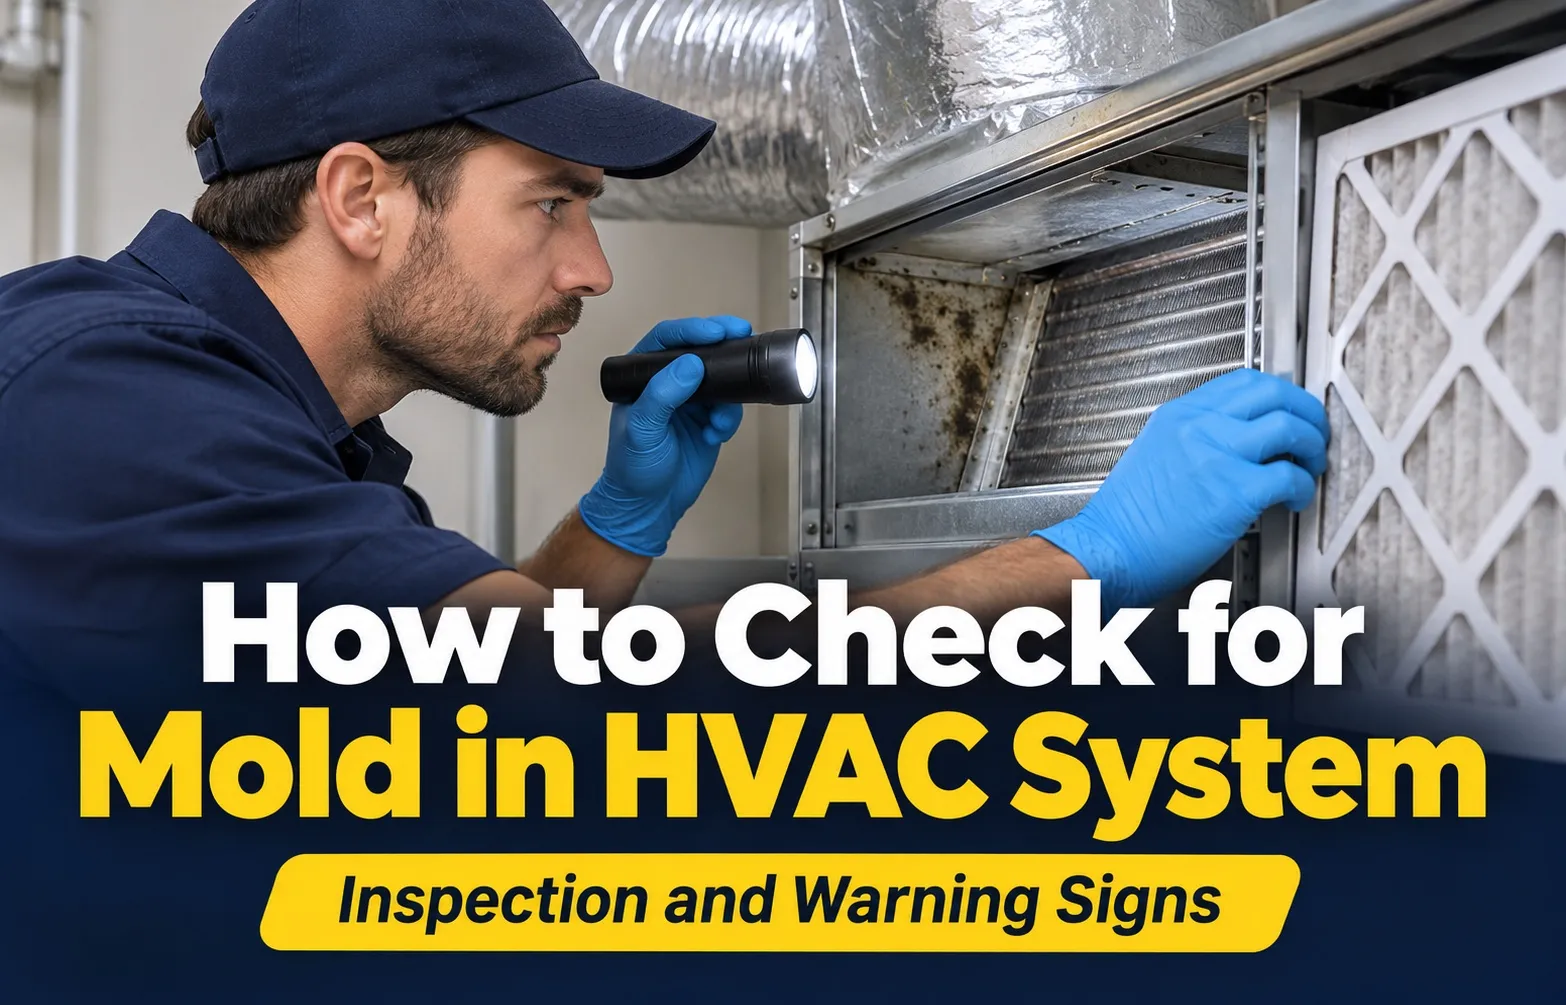
- Check Supply Registers: Remove vent covers and shine a bright flashlight down into the duct runs to look for fuzzy or dark growth.
- Examine the Air Handler Compartment: Open the main indoor unit panel to inspect the evaporator coils and condensate drain pan for standing water or slime.
Early Warning Signs: How to Tell If Your HVAC Has Mold
Detecting microbial growth before it spreads extensively through your home starts with recognizing early sensory cues. Long before you open up your equipment, your nose, physical health, and home fixtures offer definitive clues that moisture has compromised your indoor climate network.
The Olfactory Clue: Identifying the Distinct Musty, Earthy Smell
A persistent, earthy, or stale locker-room odor that emerges whenever your climate system activates is the classic sign of hidden fungal activity. This distinct scent is generated by microbial volatile organic compounds released as active colonies break down organic matter inside dark ductwork.
- Initial Kick-on Odor: The smell is typically most concentrated during the first few minutes after the blower motor starts up.
- Damp Basement Scent: An overwhelming aroma of wet soil or rotting leaves indicates trapped humidity inside your air handler.
Unexplained Health Symptoms: When Your AC Triggers Allergies and Headaches
Airborne spores and toxic mycotoxins circulating through your supply vents frequently trigger sudden, unexplained physical discomfort for household occupants. If chronic allergy symptoms flare up indoors but diminish rapidly when you leave the building, your system may be actively distributing allergens like Aspergillus and Penicillium.
- Respiratory Distress: Frequent coughing, sneezing, wheezing, and chest tightness whenever the system runs.
- Systemic Irritation: Persistent eye irritation, skin rashes, sinus congestion, and unexplained morning headaches.
Visual Red Flags Around Supply Vents and Registers
Physical evidence often appears directly on your metal or plastic register grilles and surrounding drywall as an infestation progresses. Inspecting these terminal points gives you a reliable visual confirmation of whether microbial colonies are colonizing your interior pathways.
- Discolored Grilles: Dark gray, green, or fuzzy black splotches forming directly on or around your supply vents.
- Wall and Ceiling Stains: Powdery residue or damp water rings staining the drywall immediately adjacent to return vents.
HVAC Mold Inspection Guide for Homeowners
Safe investigation of your climate control equipment requires systematic hardware access and protective gear. Follow this detailed diagnostic walkthrough to examine core components without exposing yourself to airborne irritants or electrical hazards.
Safety First: What Gear You Need Before Opening Your HVAC Unit
Prioritizing personal safety before unlatching your HVAC unit prevents accidental spore inhalation and electrical hazards. Always power down the system at your circuit breaker and equip yourself with proper protective equipment before handling inner panels or inspecting damp compartments.
- N95 Respirator Mask: Blocks microscopic spores and mycotoxins from entering your respiratory tract during close inspections.
- Protective Gloves & Eyewear: Prevents direct skin and eye contact with fungal growth, accumulated dust, and chemical residues.
- Circuit Breaker Shutdown: Eliminates live electrical risks by completely cutting power to the blower compartment before you begin.
Step 1: Inspect the Air Filter for Dampness and Discoloration
Your air filter serves as the first line of defense and the most common accumulation point for trapped moisture and organic debris. Pulling out the filter immediately reveals whether humidity is overloading your filtration housing and fostering premature mold colonies.
- Locate the filter slot near the return air intake or directly inside the lower blower compartment.
- Examine the pleats for wet spots, dark grey or green staining, and heavy caked dust mats.
- Replace saturated or discolored filters immediately to stop fungal spores from multiplying across internal surfaces.
Step 2: Examine Supply Vents and Use a Flashlight/Smartphone Camera Check
Peering past your register grilles using targeted illumination lets you inspect deep inside the accessible duct runs. Using a flashlight or a smartphone endoscope reveals hidden microbial growth clinging to interior duct linings before it spreads further.
- Unscrew and remove supply vent covers to gain clear visual access into the duct branch.
- Shine a bright flashlight down the channel or switch your smartphone camera to video mode with the flash enabled to view tight corners.
- Check interior sheet metal or flex duct walls for fuzzy colonies, dark rings, or slick slimy patches.
Step 3: Open the Air Handler to Inspect Evaporator Coils
Accessing the main blower compartment allows you to examine the indoor evaporator coils where heavy condensation collects during cooling cycles. Inspecting this core metal assembly uncovers hidden fungal mats thriving in constant dampness and dark operating conditions.
- Unlatch or unscrew the service panel of your indoor air handler unit carefully after confirming power is off.
- Inspect the metallic fins of the evaporator coils for white, green, or black microbial fuzzy buildup.
- Look closely at the surrounding insulated interior walls for degraded fiberglass or damp water staining.
Step 4: Check the Condensate Drain Pan for Standing Water and Slime
The condensate drain pan collects all moisture pulled from your home air, making it a high-risk zone for stagnant water and bacterial sludge. Checking this tray ensures clogs or drainage failures aren’t fueling active mold outbreaks.
- Locate the drain pan sitting directly underneath the evaporator coil assembly inside the unit.
- Check for standing water, thick algae slime, or blocked drain pipes that prevent proper water evacuation.
- Ensure the drainage line flows freely outside or into your home plumbing system without backups.
The Critical Content Gap: Is It Black Mold or Just Normal Dust?
Discovering dark rings or smudge marks around your air supply registers often triggers immediate panic about hazardous black mold. However, many homeowners mistake harmless particulate accumulation for toxic fungal colonies.
Understanding the actual composition of dark residue prevents unnecessary anxiety and helps you accurately diagnose your home’s air quality issues.
Why Black Residue Around Air Vents Is Often Just Dust
Airborne particulate matter continuously circulates through your home ventilation network during normal heating and cooling cycles. As conditioned air rushes rapidly past the narrow gap of a register grille, standard filtration dust settles and clings to the cooler surrounding drywall.
- Thermal Tracking: Temperature differentials between the metal vent and the wall cause particulate buildup.
- Inert Particulates: Ordinary household dust consists of skin cells, clothing fibers, and microscopic dirt.
- Non-Hazardous Staining: This greyish residue poses no biological health threat to occupants.
The Swipe Test: How to Tell the Difference Between Dust and Microbial Growth
Distinguishing harmless surface staining from active microbial colonies requires a simple physical inspection technique. Safe examination lets you determine whether you are dealing with ordinary particles or hazardous growth.
- The Dry Swipe: Use a clean white paper towel to gently wipe the dark area.
- Dry vs. Damp Texture: Dust smudges cleanly into a powdery film, whereas mold feels damp, fuzzy, or embedded.
- Surface Staining Patterns: Mold leaves persistent discoloration or roots into porous paint, while dust wipes away effortlessly.
Understanding Electrostatic Deposition and Candle Soot Accumulation
Beyond standard household particles, modern homes frequently experience dark discoloration driven by electrostatic deposition and combustion byproducts. Scented candles, oil lamps, and heating appliances release microscopic carbon particles that bond tightly to wall surfaces.
- Soot Accumulation: Incomplete combustion from indoor candles produces fine black carbon that concentrates near active vents.
- Electrostatic Attraction: Plastic register edges develop static charges that actively pull floating debris toward the opening.
- Differentiating Black Mold: True black mold, such as Stachybotrys chartarum, requires persistent moisture and cellulose sources, unlike dry soot deposits.
Testing for HVAC Mold: DIY Kits vs. Professional Lab Analysis
Determining whether your climate system harbors hazardous microbial contamination requires reliable verification methods. Navigating the choices between over-the-counter options and certified laboratory evaluation ensures you get accurate data without wasting money on unscientific gimmicks.
The Pitfalls of Cheap Over-the-Counter Petri Dish Settle Plates
Inexpensive retail mold test kits featuring open petri dishes are frequently marketed as quick diagnostic tools for homeowners. However, indoor air quality professionals and building scientists widely consider settle plates unreliable for accurate HVAC evaluations.
- Ubiquitous Spores: Mold spores float naturally in every indoor and outdoor environment, meaning open plates will almost always catch some growth.
- Lack of Context: Settle plates cannot measure active mold colonies growing inside sealed ductwork or behind air handler walls.
- False Alarms: These kits often cause unwarranted panic or provide a false sense of security without identifying specific species or sources.
When Tape-Lift Surface Testing is Effective
When you spot suspicious discoloration directly on your equipment or register grilles, tape-lift surface testing offers a practical alternative. This method physically captures material for laboratory identification rather than attempting to capture random floating particles from the air.
- Targeted Verification: Allows you to sample a specific growth area or stain inside the blower compartment.
- Microscopic Analysis: A laboratory examines the adhesive strip under a microscope to confirm mold species and concentration.
- Cost-Effective Insight: Provides concrete proof of microbial presence on hard components without expensive full-house assessments.
When and Why You Need Accredited Third-Party Lab Air Sampling
When family members experience persistent, unexplained respiratory symptoms and visual inspections remain inconclusive, accredited third-party lab air sampling becomes essential. Professional indoor air quality testing compares baseline outdoor spore counts against indoor concentrations to reveal hidden system contamination.
- Comprehensive Diagnostics: Measures exact spore counts and identifies toxic mycotoxins circulating through your supply vents.
- Unbiased Results: Independent laboratories ensure data integrity without conflicts of interest from remediation companies.
- Actionable Data: Delivers certified reports necessary for insurance claims, rental disputes, or verifying professional cleaning effectiveness.
What to Do If You Find Mold in an Apartment HVAC
Discovering mold blowing out of an apartment air conditioning unit creates immediate friction between tenants and property management. Securing your health and financial interests requires precise documentation, understanding lease agreements, and knowing local housing codes.
Navigating this dispute successfully depends on establishing a clear paper trail and holding your landlord accountable to statutory habitability standards.
Documenting Evidence: Photos, Videos, and Written Records
Building an unassailable case requires comprehensive visual and physical records before notifying your landlord. High-resolution documentation prevents property management from dismissing hazardous growth as standard household dust or tenant neglect.
- Visual Proof: Capture wide-angle and close-up photos of dark discoloration around supply registers and inside the air filter slot.
- Video Logs: Record short video clips while turning on the HVAC system to demonstrate airflow and visual contamination.
- Communication Logs: Maintain a detailed written timeline noting dates, physical symptoms experienced, and every interaction with property management.
Tenant Rights and Landlord Responsibility for HVAC Maintenance
Most standard residential lease agreements obligate landlords to maintain habitable living conditions, including functional, sanitary heating and ventilation systems. When moisture issues stem from structural building defects, roof leaks, or unserviced central air units, landlord liability applies directly.
- Lease Clauses: Review your contract for explicit habitability guarantees and landlord HVAC upkeep duties.
- Statutory Obligations: Landlords are generally bound by law to remediate toxic conditions and structural water leaks within a reasonable timeframe after notification.
- Legal Caution: Avoid withholding rent unilaterally without consulting local tenant legal aid, as non-payment rules vary strictly by jurisdiction.
How to Draft a Formal Notice and When to Involve Health Inspectors
Escalating the issue past casual phone calls requires issuing a formal written notice via certified mail or trackable email. If property management ignores your formal requests, municipal health code enforcement can intervene to legally compel landlords to act.
- Formal Notice: Draft a concise letter detailing the HVAC contamination, attaching photo evidence, and requesting immediate professional remediation.
- Action Deadlines: Establish a clear, reasonable timeframe (typically 7 to 14 days) for management to provide a licensed inspection and cleanup plan.
- Code Enforcement: Contact your local city health department or housing inspector if management fails to respond or refuses to correct severe air quality hazards.
When to Call a Certified Professional & Remediation Cost Breakdown
Knowing your limits during an HVAC inspection is vital for your health and structural safety. While minor surface dust can be wiped away, extensive biological growth requires certified expertise, specialized tools, and commercial-grade containment protocols.
Understanding when to step back and call a professional ensures the problem is resolved safely and permanently without compromising your home’s air quality.
The 10-Square-Foot Rule: When to Stop DIY and Call a Pro
According to the Environmental Protection Agency’s mold remediation guidelines, extensive contamination exceeding 10 square feet requires specialized containment and professional intervention. If you notice thick fungal mats inside insulated flex ducts or continuous musty odors despite filter replacements, stop DIY cleaning immediately to avoid spreading millions of spores.
- Large Surface Area: Contamination covering more than 10 square feet needs professional containment barriers and negative air pressure machines.
- Deep Duct Infestations: Mold growing inside porous, insulated flexible ductwork cannot be effectively hand-cleaned and requires professional duct replacement.
- Underlying Mechanical Failures: Persistent structural moisture issues or failing condensate drain systems demand a licensed HVAC contractor to correct root causes.
Average Cost of Professional HVAC Mold Remediation and Duct Cleaning
Professional remediation costs vary significantly depending on the severity of the infestation, system design, and geographic location. Investing in certified HVAC contractor services and thorough duct cleaning typically ranges from several hundred to a few thousand dollars.
- Standard Duct Cleaning: Basic professional source-removal duct cleaning generally costs between $450 and $1,000 depending on home size.
- Full HVAC Remediation: Deep sanitization of air handlers, evaporator coils, and chemical antimicrobial treatments ranges from $1,000 to $3,000+.
- Preventative Humidity Controls: Installing UV germicidal lights or whole-home dehumidification systems to manage indoor relative humidity adds $300 to $800.
Does Homeowners Insurance Cover Mold Damage in HVAC Systems?
Navigating insurance coverage for HVAC mold damage depends entirely on the root cause specified in your policy terms. Most standard homeowners policies exclude mold unless it directly results from a sudden, covered water disaster like a burst supply line.
- Sudden vs. Gradual Damage: Sudden plumbing leaks causing mold are frequently covered, whereas slow condensation buildup or poor maintenance is classified as wear-and-tear and excluded.
- Filing an Insurance Policy Claim: Document all professional inspection reports, lab results, and contractor estimates thoroughly before submitting any formal claim.
- Policy Riders and Sub-Limits: Review your specific declarations page, as some policies offer specialized mold endorsements or have strict sub-limits capping payout amounts.

Oscar Vance | Master Plumber & Drainage Expert
Meet Oscar Vance, a licensed master plumber sharing practical solutions on residential repairs, preventive maintenance, and thoughtful home upkeep.