How to Plumb a Sump Pump in 5 Steps
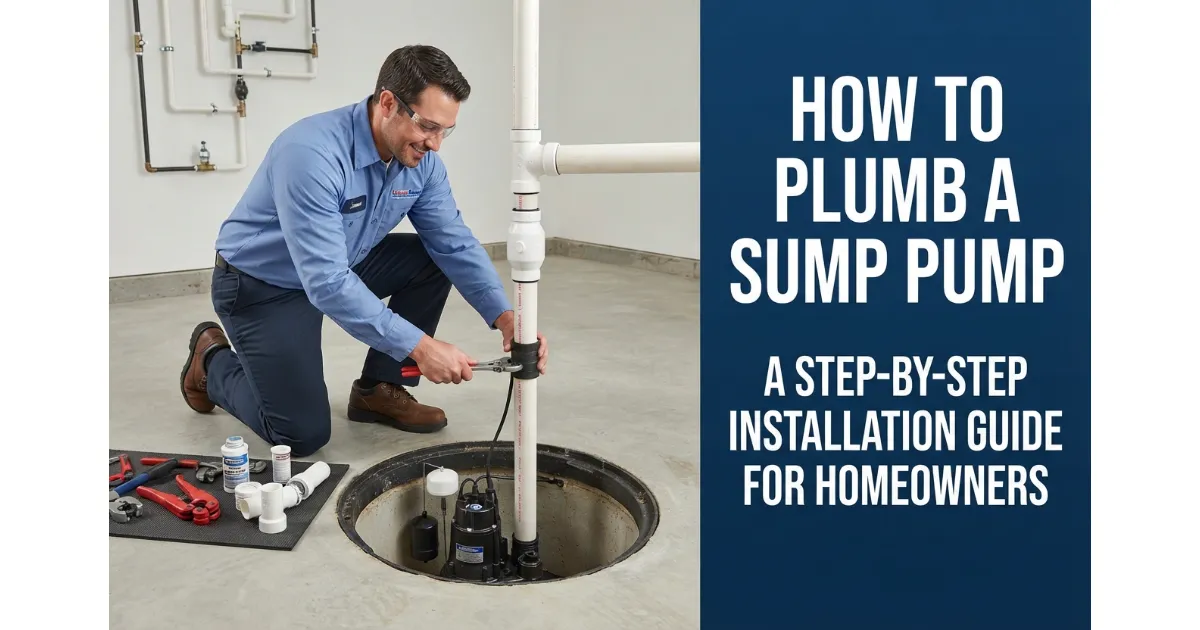
Plumbing a sump pump involves positioning a submersible pump inside a sealed sump basin, connecting a vertical PVC discharge pipe, installing a check valve to prevent backflow, and routing water safely away from your home’s foundation. This essential waterproofing system protects your basement from groundwater accumulation during heavy storms.
The Core Mechanics of Sump Pump Plumbing
An effective plumbing layout requires seamless coordination between the sump basin, pump motor, and drainage network. As groundwater rises, the basin fills, activating the pump’s float switch to expel water upward and away from the building envelope.
- Sump Basin: Collects subsurface water through perforated weep holes beneath the concrete slab.
- Check Valve: Ensures expelled water flows only outward, preventing back-siphoning into the basin.
- Discharge Line: Directs water through durable PVC piping to a safe termination point outdoors.
The 5 Steps at a Glance
- Place and level the submersible sump pump securely inside the bottom of the sump basin.
- Attach a threaded male adapter and a vertical PVC discharge pipe to the pump outlet.
- Install the check valve immediately above the pump using rubber couplings and metal hose clamps.
- Extend the PVC discharge pipe upward out of the pit and through the exterior wall or rim joist.
- Route exterior PVC piping downward and away from your foundation using a sloped grade or splash block.
Sump Pump Plumbing Diagram & How the Parts Connect
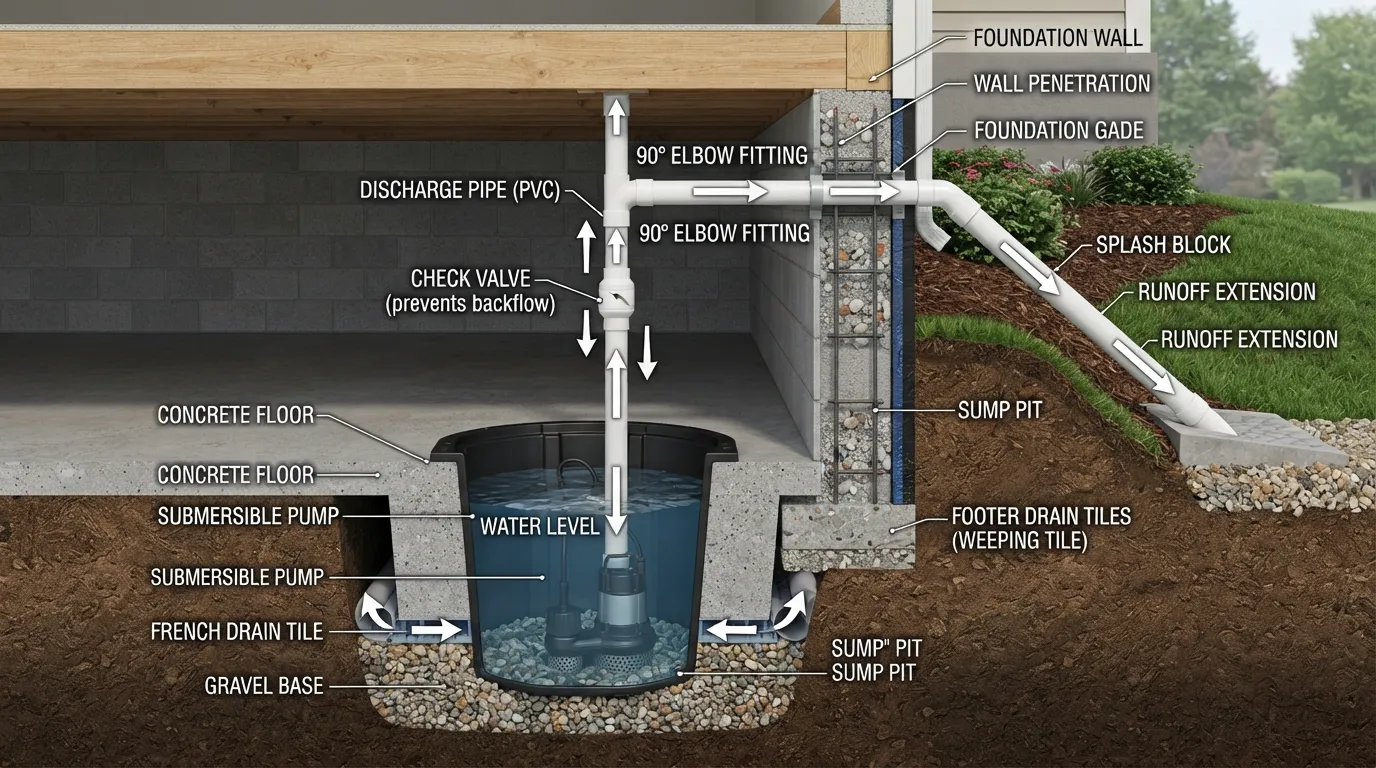
Understanding your sump pump’s plumbing layout prevents costly backflow and basement flooding. A well-designed system efficiently moves groundwater from beneath your foundation through a secure network of PVC piping, ensuring reliable waterproofing during peak storm seasons.
Labeled Sump Pump Plumbing Diagram
Examine the diagram below to see how each component integrates into the overall drainage assembly. The layout emphasizes proper vertical lift, secure check valve placement, and outward discharge routing away from the structure.
How Water Travels Pit Pump Check Valve Discharge Line
The journey of groundwater follows a precise hydraulic path designed to prevent water from re-entering the basement. Each stage in the loop plays a critical role in maintaining system pressure and continuous flow.
- The Pit (Basin): Subsurface groundwater enters through perforated walls, pooling at the bottom of the sealed basin.
- The Pump: Once water reaches a specific threshold, the submersible unit activates to push liquid upward.
- The Check Valve: Water passes through this one-way valve, which instantly snaps shut to stop backflow when the motor stops.
- The Discharge Line: Water is forced through a 90-degree elbow into horizontal or downward-sloping PVC piping leading outside.
What Each Component Does
Every individual element within the assembly ensures the sump system operates at peak capacity during severe weather events and heavy storm systems.
- Sump Basin / Pit: A heavy-duty polyethylene or structural foam container housing the pump beneath the floor slab.
- Submersible Pump: A waterproof motor unit sitting submerged at the bottom of the pit designed to lift water vertically.
- Float Switch: A mechanical or tethered switch that floats upward with rising water to automatically trigger the pump motor.
- Check Valve: A spring-loaded or flapper-style valve preventing discharged water from falling back down and short-cycling the pump.
- Weep Hole (Air Relief Hole): A tiny 1/8-inch hole drilled into the discharge pipe just above the pump to prevent air-locking.
- 90-Degree Elbow: A structural PVC fitting used to transition the vertical riser pipe horizontally toward the exterior wall.
Visual Walkthrough & Assembly Guide
Watch the detailed video walkthrough below to see a live demonstration of how components connect and align during professional sump pump installations.
DIY or Hire a Plumber? Cost Breakdown & Decision Guide
Deciding whether to install a sump pump yourself depends heavily on your plumbing experience, local electrical setup, and whether a basin already exists. While a DIY project saves hundreds in labor costs, professional installation ensures absolute compliance with local building codes and optimal basement waterproofing safety.
Can You Plumb a Sump Pump Yourself?
Yes, you can successfully plumb a sump pump yourself if a basin and proper electrical setup are already in place. This intermediate DIY project requires basic PVC cutting, priming, gluing, and aligning discharge lines, which saves you significant professional labor expenses.
- Existing Basin: Makes the job a straightforward swap rather than heavy concrete breaking and excavation.
- Basic Tools: Requires standard tools like a PVC saw, primer, cement, and measuring tape.
- Time Investment: Typically takes 2 to 4 hours for a standard replacement or straightforward hookup.
DIY vs Professional Cost
Sump pump installation costs vary dramatically depending on whether you handle the labor yourself or hire a licensed plumber. Doing it yourself usually ranges from $150 to $400 for materials, whereas professional contractor services span from $500 to $1,500+ for standard setups.
When to Call a Plumber
You should hire a licensed plumber if you need to cut a brand-new pit through a thick concrete slab, tie into a municipal sewer system, or navigate complex local building permits. Professional expertise prevents costly structural damage and ensures long-term reliability.
- New Pit Cutting: Breaking through thick basement concrete requires specialized heavy machinery and dust control.
- Permit Requirements: Certain municipalities mandate professional plumbing permits and sign-offs for home modifications.
- Complex Layouts: Long horizontal discharge runs or severe elevation changes require hydraulic expertise.
Skill and Safety Check
Combining electricity and standing water creates severe safety hazards that demand strict precautions during installation. Always disconnect power sources completely and verify that your system connects exclusively to a ground-fault circuit interrupter to prevent electrical accidents.
- Electrical Shock Risks: Working near damp environments requires absolute adherence to safe electrical handling protocols.
- Dedicated Circuit: Pumps must run on an isolated electrical line to avoid tripping household breakers during storms.
- Protective Gear: Wear gloves and safety glasses when handling PVC primers, cement solvents, and metal clamps.
Tools Materials & Choosing the Right Pipe Size
Gathering the correct tools, Schedule 40 PVC piping, and matching pump horsepower ensures your drainage system handles peak groundwater flow efficiently. Selecting proper specifications prevents premature pump burnout and costly backflow failures during heavy storms.
Tools and Materials Checklist
Having every component prepared before starting prevents mid-project delays and ensures leak-free joints throughout your discharge network. Keep this comprehensive checklist on hand when shopping for your sump pump kit or individual parts.
- Schedule 40 PVC Pipe: Rigid piping designed to withstand indoor and outdoor water pressure requirements.
- PVC Primer & Cement: Essential chemical solvents required to permanently weld PVC fittings together.
- Hacksaw or PVC Cutter: Used for clean, straight cuts through rigid plastic discharge pipes.
- Deburring Tool: Cleans up rough plastic edges on freshly cut pipe ends to prevent debris clogging.
- Flexible Rubber Couplings & Hose Clamps: Connects the pump discharge to the check valve and PVC pipe securely.
- Teflon Tape: Wrapped around threaded connections to create a watertight seal.
1-1/4 inch vs 1-1/2 inch PVC Which One and Why?
Choosing the correct pipe diameter directly impacts water flow rates and overall backpressure on your pump motor. Industry standards heavily favor 1-1/2 inch PVC piping for standard residential installations because it reduces friction and increases discharge volume.
- 1-1/2 Inch PVC: The ideal standard size for most pumps, offering optimal flow rates and reduced motor strain.
- 1-1/4 Inch PVC: Only recommended if your specific pump model features a 1-1/4 inch outlet or space constraints demand it.
- System Efficiency: Restricting a 1-1/2 inch pump down to smaller piping forces the motor to work harder, shortening its lifespan.
Choosing the Pump HP GPM and Vertical Lift
Selecting the right submersible unit requires balancing horsepower (HP), gallons per minute (GPM), and vertical lift capacity. Reliable brands like Wayne, Everbilt, and ECO FLO offer diverse models tailored to varying basement water tables.
- Horsepower (HP): Most residential homes require a 1/3 HP or 1/2 HP motor to handle heavy groundwater surges.
- Gallons Per Minute (GPM): Measures how fast the pump expels water; higher GPM ratings combat severe flooding.
- Vertical Lift (Head): The maximum height the pump can push water upward before losing all discharge pressure.
Can a Sump Pump Be Too Powerful?
Yes, installing an overly powerful sump pump in a small basin can cause frequent short-cycling, which wears out the motor prematurely. Matching the pump’s flow capacity to your basin size and groundwater volume ensures balanced operation and long-term durability.
- Short-Cycling: A massive pump empties a small pit too fast, causing the switch to click on and off rapidly.
- Basin Capacity: Larger pits accommodate high-output pumps, whereas small basins require standard 1/3 HP units.
- Balanced Performance: Selecting a balanced GPM rating prevents motor overheating and extends mechanical lifespan.
How to Plumb a Sump Pump
Following a systematic installation process guarantees a secure, watertight drainage system that protects your basement from unexpected flooding. Execute each step carefully, from basin preparation to final electrical testing, to ensure long-lasting structural reliability.
Step 1: Prepare a Clean, Level Sump Basin
Clear all debris, gravel, and sediment from the bottom of your sump basin to ensure the pump rests completely flat. A level surface prevents the motor from tilting and keeps the mechanical float switch from catching on the basin walls.
- Pro Tip: Place a solid concrete paver at the bottom of plastic basins if the subfloor is soft or uneven.
- Common Mistake: Leaving loose gravel or installation debris inside the pit that can get sucked into the impeller.
Step 2: Position the Pump Level in the Pit
Lower the submersible pump gently into the center of the sump basin, ensuring it sits upright and level. Verify that the tethered or vertical float switch has complete, unobstructed clearance to move up and down freely.
- Pro Tip: Manually lift the float switch before plugging it in to verify its click mechanism engages properly.
- Common Mistake: Allowing the power cord or discharge hose to wedge the float switch against the basin wall.
Step 3: Dry-Fit the Vertical Discharge Pipe
Measure and cut your Schedule 40 PVC pipe to connect the pump outlet to the vertical riser without applying permanent cement yet. Dry-fitting lets you verify alignment, check height clearances, and ensure a straight vertical run before permanent bonding.
- Pro Tip: Use a marker to trace alignment lines across slip joints during dry-fit assembly for quick glue-up alignment.
- Common Mistake: Gluing components together prematurely before testing the complete dry-fit alignment.
Step 4: Install the Check Valve Arrow Direction Upward
Mount the check valve directly above the pump outlet using rubber couplings and stainless steel hose clamps tightened securely. Ensure the directional arrow printed on the valve body points strictly upward toward the exterior discharge point.
- Pro Tip: Position the check valve at least 12 to 18 inches above the pump lid for easier future maintenance access.
- Common Mistake: Installing the check valve upside down, which traps water and completely blocks pump discharge.
Step 5: Drill the Weep Hole Air Relief Hole and Why It Matters
Drill a tiny 1/8-inch relief hole into the vertical PVC pipe between the pump discharge and the check valve. This vital weep hole prevents air-locks from forming around the impeller, allowing trapped air to escape so water flows freely.
- Pro Tip: Angle the drill slightly downward toward the inside of the basin so escaping water sprays safely back down.
- Common Mistake: Forgetting the weep hole entirely, which causes the pump to run dry against an air bubble and burn out.
Step 6: Prime and Glue the PVC Joints
Disassemble your dry-fitted PVC layout section by section, apply purple PVC primer to clean the surfaces, and coat with heavy-duty PVC cement. Quickly push the pieces together with a quarter-turn twist to form a permanent, chemical weld.
- Pro Tip: Hold joined PVC pieces together for 30 seconds after gluing to prevent them from pushing apart under pressure.
- Common Mistake: Skipping the primer step or applying too much cement, which creates interior plastic blockages.
Step 7: Connect the Line to the Outside Discharge
Extend your rigid PVC piping upward through the basement wall or rim joist using a 90-degree elbow fitting. Route the exterior drainage line downward away from your foundation using a sloped grade, flexible extension, or splash block.
- Pro Tip: Terminate outdoor drainage at least 10 to 20 feet away from your foundation to prevent water from seeping right back in.
- Common Mistake: Terminating the discharge pipe too close to the foundation wall, saturating the soil around your basement.
Step 8: Plug into a GFCI Outlet and Test with Water
Plug the pump power cord securely into a dedicated ground-fault circuit interrupter outlet designed for damp locations. Pour several buckets of water directly into the sump basin to simulate a flood and verify automatic activation, smooth pumping, and check valve closure.
- Pro Tip: Conduct a comprehensive operational test every three to six months to ensure reliable performance during severe storms.
- Common Mistake: Plugging the pump into a standard non-GFCI indoor outlet, creating severe electrical safety hazards.
Where to Route the Discharge Line Distance Slope & Freeze Protection
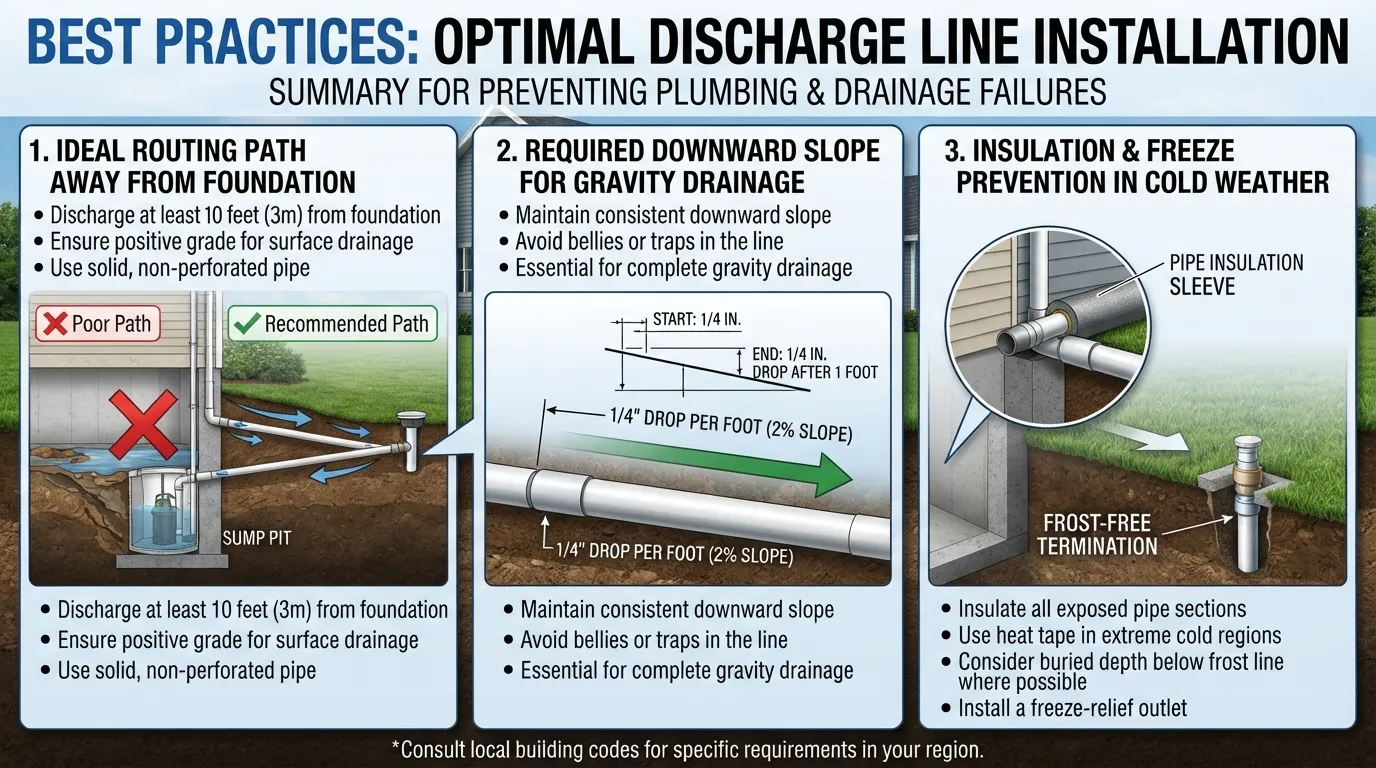
Routing your sump pump discharge line properly prevents water from recycling back into your foundation. Directing water far from your home, maintaining a downward drainage slope, and protecting pipes against freezing temperatures guarantees year-round basement waterproofing success.
How Far Should the Discharge Pipe Extend from Your House?
Your sump pump discharge pipe must extend at least 10 to 20 feet away from your home’s exterior foundation walls. Releasing water any closer allows gravity and soil saturation to pull moisture right back through your basement walls.
- Foundation Protection: Discharging far away prevents hydrostatic pressure from building up against underground masonry.
- Downspout Extensions: Combine your sump line with flexible extensions or buried corrugated pipes to carry water further into the yard.
- Grading Check: Ensure the surrounding ground slopes steadily away from your house to encourage natural runoff.
Slope and Drainage: Preventing Water from Flowing Back
Maintain a continuous downward slope of at least 1/4 inch per foot along your exterior discharge run. A proper downward grade ensures gravity pulls standing water out of the pipe completely, preventing stagnant pools and backflow risks.
- Gravity Flow: Eliminates water pooling inside low horizontal sections of piping that could freeze or clog.
- Rigid Support: Secure exterior PVC piping to stakes or siding so it doesn’t sag over time.
- Clear Terminus: Keep the discharge outlet free of leaves, mulch, and debris to maintain unobstructed water flow.
How Deep Should a Discharge Line Be? Frost Depth
Buried outdoor discharge lines should be placed below your local frost line to prevent standing water from freezing solid during winter. In colder climates, shallow underground pipes will freeze and crack, causing immediate system backups.
- Local Frost Line: Check regional weather data to determine how deep the ground freezes in your area.
- Insulated Sleeves: Wrap exposed exterior sections in foam insulation tape if full burial is impractical.
- Freezing Prevention: Transition the underground line to an above-ground pop-up emitter once clear of foundation danger zones.
Where Can Sump Water Legally Go? Storm Drain vs Sanitary Sewer vs Yard
Discharging sump pump water into a municipal storm sewer or your own yard is typically legal, but dumping it into a sanitary sewer is often strictly illegal. Review your local municipal plumbing code and storm-water regulations before finalizing your drainage tie-in.
- Yard Surface Discharge: Directing clean groundwater onto your lawn or into a dry well is universally permitted.
- Storm Sewers: Many municipalities allow direct connections to street storm drains or roadside ditches.
- Sanitary Sewer Prohibition: Sending clear groundwater into household sanitary lines overloads treatment plants and violates municipal ordinances.
What If a Neighbor’s Line Is Connected to Yours?
Connecting your sump discharge line directly into a neighbor’s property or shared drainage system can trigger legal disputes and water damage liability. Always ensure your water terminates completely within your own property boundaries or approved public easements.
- Property Boundaries: Verify property lines before digging trenches or laying underground corrugated pipes.
- Erosion Control: Uncontrolled discharge running onto adjacent lots causes soil erosion and neighborhood friction.
- Independent Systems: Keep your waterproofing setup entirely self-contained to avoid shared clog or backup issues.
Winter Problems: Frozen Discharge Pipes and Pop-Up Emitters
Freezing winter temperatures turn sump pump discharge lines into solid blocks of ice if water gets trapped in flat runs. Installing specialized pop-up emitters with gravity relief gates prevents back pressure when underground lines freeze.
- Pop-Up Emitters: Feature spring-loaded lids that open automatically under water pressure and seal shut when dry.
- Air Gaps: Add an unglued connection or air gap near the exterior wall so water escapes safely if the yard pipe freezes.
- Winter Monitoring: Inspect outdoor discharge outlets regularly during freezing storms to ensure water exits cleanly.
Power Backup & What Happens During an Outage
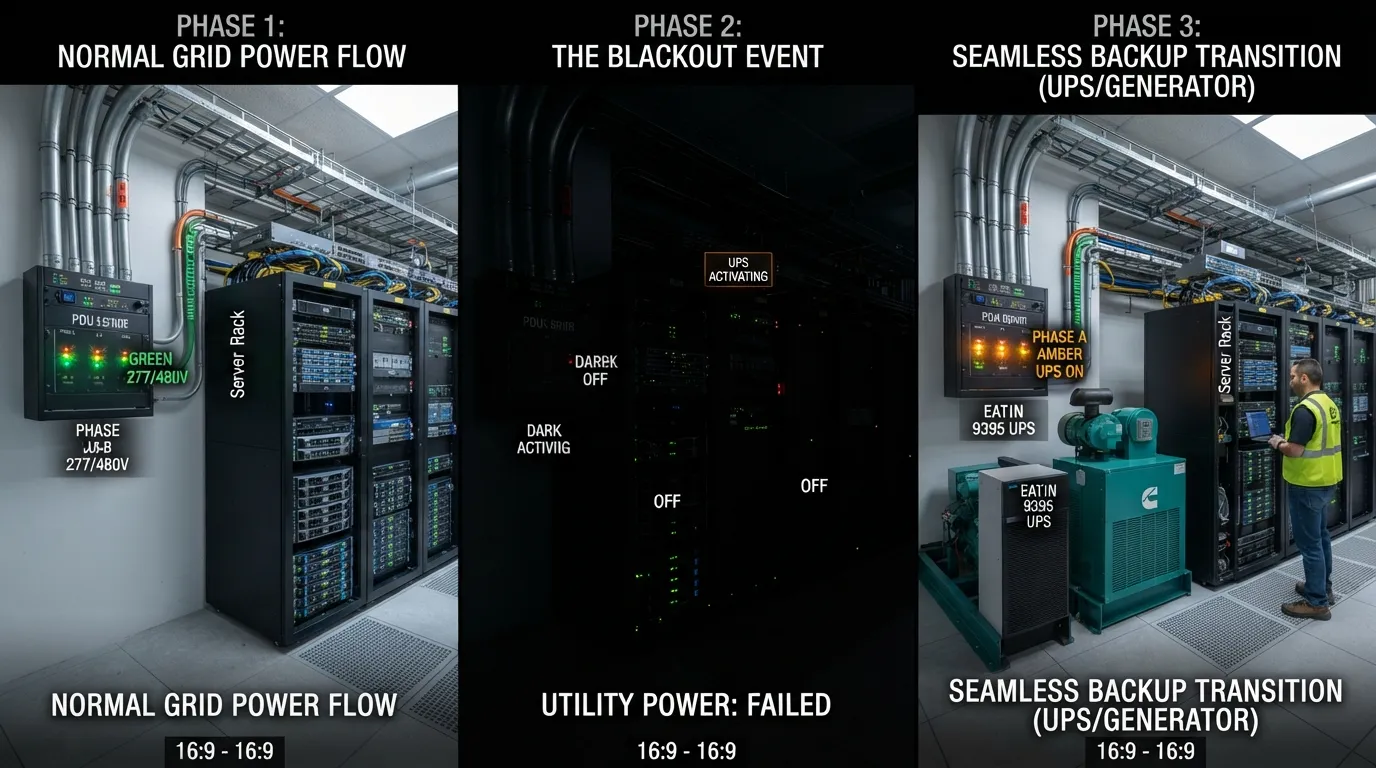
Severe thunderstorms that trigger heavy groundwater accumulation frequently knock out residential power grids. Preparing your system with a dedicated electrical circuit, battery backup unit, or emergency generator ensures continuous basement protection when power failures strike.
Electrical Setup GFCI Outlet and Dedicated Circuit
Sump pumps require a dedicated electrical circuit and a weather-resistant ground-fault circuit interrupter outlet to operate safely. Sharing this heavy-draw motor with other household appliances will constantly trip breakers and leave your basement unprotected.
- Dedicated Breaker: Prevents electrical overloads by isolating the high-amp pump motor on its own breaker switch.
- GFCI Protection: Protects against severe electrical shock hazards in damp, below-grade basement environments.
- Code Compliance: Meets standard national electrical safety codes for permanent residential pump installations.
Battery Backup vs Combination System
Installing a secondary battery backup or a dual-pump combination system safeguards your home during extended municipal power outages or primary pump mechanical failures. These backup units activate automatically when water levels rise above the primary float switch.
- Battery Backup: A standalone 12V DC pump powered by a deep-cycle marine battery that runs during power loss.
- Combination System: Features a primary AC pump and a secondary DC backup housed together in an oversized basin.
- Monitoring Alarms: Built-in electronic sensors sound audible warnings when the backup system engages or battery power dips.
Will a 1,000-Watt Generator Run a Sump Pump?
No, a standard 1,000-watt portable generator cannot safely run most residential sump pumps because motor start-up surges require significantly higher wattage. While a 1/3 HP pump only uses about 800 running watts, it demands 1,500 to 2,000 starting watts to overcome initial mechanical inertia.
- Starting vs Running Watts: Electric motors require a temporary surge of power to spin up from a dead stop.
- Generator Capacity: You typically need at least a 2,000- to 3,000-watt generator to reliably start and run a single sump pump.
- Safe Operation: Running a pump on an underpowered generator can overheat the motor windings and ruin the pump.
Troubleshooting & Common Plumbing Mistakes
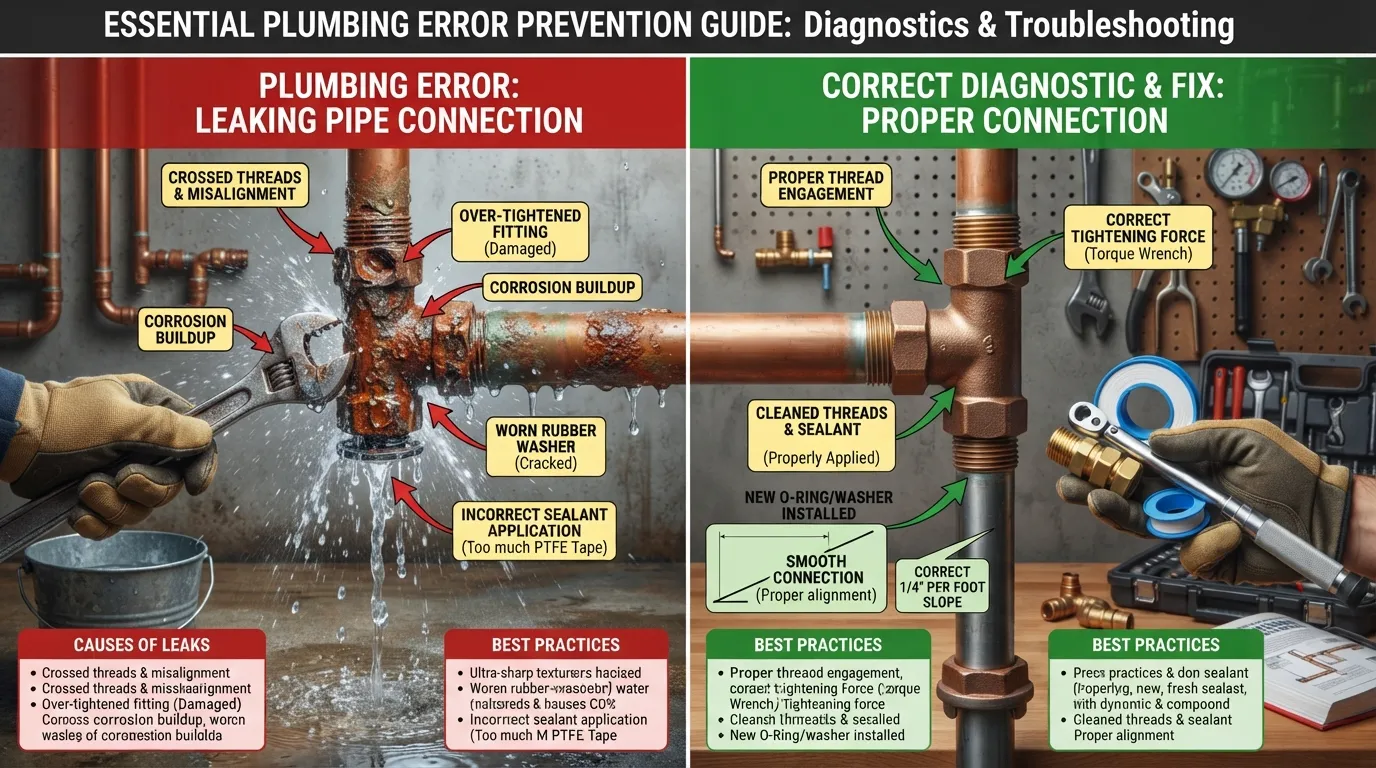
Identifying plumbing errors and troubleshooting mechanical failures early prevents unexpected basement flooding during severe weather. Recognizing symptoms like air-locks, short-cycling, or backflow issues keeps your sump system operating at peak efficiency.
7 Common Sump Pump Plumbing Mistakes
Small installation oversights can severely compromise your sump pump’s efficiency, leading to motor burnout or basement flooding. Avoid these seven critical plumbing errors when setting up your system.
- Installing the Check Valve Backwards: Reversing the directional arrow traps water and stops the pump from expelling liquid.
- Forgetting the Weep Hole: Omitting the air relief hole causes air-locking around the impeller.
- Using Loose PVC Joints: Failing to use primer and cement creates leaks under high water pressure.
- Choosing Wrong Pipe Sizes: Restricting a 1-1/2 inch pump down to smaller piping overworks the motor.
- Poor Discharge Slope: Flat exterior lines cause water pooling, freezing, and severe backflow risks.
- Lack of Pipe Support: Unsupported vertical risers stress rubber couplings and loosen connections over time.
- Blocked Outdoor Terminus: Allowing leaves, debris, or snow to cover the outlet chokes off water flow.
Pump Runs but No Water Comes Out
If your pump motor hums and runs continuously but expels no water, you are likely dealing with an air-lock or a stuck check valve. This frustrating issue prevents fluid movement entirely and requires immediate correction.
- Air-Lock Causes: Trapped air bubbles surround the impeller, preventing water from reaching the pump housing.
- Clearing Air-Locks: Verify or drill your 1/8-inch weep hole in the discharge pipe to release trapped air pressure.
- Check Valve Jamming: Inspect the internal flapper or spring to ensure it swings freely upward under water pressure.
Pump Keeps Cycling On and Off
Short-cycling—where the pump rapid-fires on and off repeatedly—is usually caused by a faulty check valve allowing discharged water to fall right back into the basin. This constant activation overheats the motor and shortens its operating lifespan.
- Leaking Check Valve: A worn-out valve leaks water backward, refilling the pit and triggering the float switch again.
- Stuck Float Switch: Obstructions inside the basin force the float to bounce erratically against the pump housing.
- Oversized Pump: Installing a massive pump in an undersized basin empties the pit too quickly.
How to Know When to Repair or Replace a Pump
Determining whether to service or replace your sump pump depends on the unit’s age, motor condition, and repair frequency. Most residential sump pumps last between 7 to 10 years before requiring full replacement.
- Age Threshold: Units older than 8 years experiencing recurring failures should be replaced rather than repaired.
- Motor Burnout: A burning electrical smell or tripped breakers indicate winding failure inside the sealed motor.
- Grinding Noises: Loud metallic grinding suggests worn bearings or damaged impellers requiring immediate replacement.How to Replace an Existing Sump Pump
Replacing an aging or failing sump pump before it breaks down completely protects your basement from sudden flooding. Swapping out an old unit is a manageable project when you follow safe disconnection procedures and inspect your existing plumbing lines.
Signs Your Pump Needs Replacing
Recognizing early warning signs of mechanical failure helps you swap out your sump pump before severe weather hits. Watch for strange operational behaviors that indicate the motor or internal components are wearing out.
- Advanced Age: Units that have been operating continuously for more than 7 to 10 years are prime candidates for preventive replacement.
- Frequent Tripping: A pump that repeatedly trips the circuit breaker signals internal motor winding failure or electrical shorts.
- Strange Noises: Loud grinding, rattling, or humming sounds indicate worn-out motor bearings or a damaged impeller.
Removing the Old Pump Safely
Always unplug the old pump from the electrical outlet before reaching into the basin to avoid severe shock hazards. Disconnect the discharge piping at the rubber coupling or union joint to lift the heavy unit out smoothly.
- Power Isolation: Unplug the unit completely and turn off its dedicated circuit breaker before touching any wiring.
- Drain Residual Water: Lift the pump slightly and let trapped water drain back into the basin before hauling it up.
- Basin Cleanup: Scoop out built-up silt, sludge, and debris from the bottom of the pit before installing your new unit.
Reusing vs Replacing the Old Check Valve and Piping
Deciding whether to reuse your existing check valve and PVC piping depends entirely on their current condition and age. While rigid Schedule 40 PVC pipes can often stay in place, worn rubber couplings and aging check valves should always be replaced.
- Check Valve Wear: Old plastic check valves often crack or lose seal integrity, making total replacement a smart precaution.
- Pipe Inspection: Check existing PVC lines for mineral buildup, hairline cracks, or loose fittings before connecting a new pump.
- New Gaskets: Always install fresh rubber couplings and stainless steel hose clamps to guarantee a watertight seal.
Reinstall Checklist
Review this fast checklist to ensure your sump pump replacement is executed securely from start to finish.
- Verify the new submersible pump matches your basin size and required horsepower ratings.
- Inspect and secure the vertical PVC discharge pipe alignment and check valve arrow direction.
- Confirm the 1/8-inch weep hole is clear to prevent air-locking around the new impeller.
- Plug the power cord into a tested GFCI outlet and run a water test to confirm proper automatic activation.
Sump Pump Plumbing FAQs
Explore concise answers to the most frequently asked questions about sump pump plumbing, installation requirements, component placement, and system maintenance. These expert insights help you optimize your basement waterproofing setup.
What is a sump pit and sump pump?
A sump pit is a specialized basin excavated into the lowest part of a basement floor to collect subsurface groundwater. A sump pump is a submersible or pedestal motor housed inside that pit, designed to automatically expel collected water upward and away from the home.
What size PVC pipe do I need for a sump pump?
Most residential sump pumps require a 1-1/2 inch Schedule 40 PVC pipe. This specific diameter provides the ideal balance between water flow rate and backpressure. Avoid reducing the line to 1-1/4 inch unless specified by the pump manufacturer to prevent motor strain.
Where does the check valve go on a sump pump?
The check valve must be installed on the vertical discharge pipe directly above the pump outlet, typically 12 to 18 inches above the basin lid. Ensure the directional arrow printed on the valve body points straight up toward the exterior drainage exit.
Do I need a weep hole in a sump pump?
Yes, you must drill a tiny 1/8-inch weep hole into the vertical discharge pipe between the pump and the check valve. This air relief hole prevents air-locking around the impeller, ensuring water can flow freely without stalling the motor.
How far should a sump pump discharge from the house?
Your sump pump discharge line should extend at least 10 to 20 feet away from your home’s exterior foundation walls. Releasing water any closer creates soil saturation that allows hydrostatic pressure to force moisture back into your basement.
How much does a sump pump cost?
A standard DIY sump pump installation typically costs between $150 and $400 for materials and the pump unit. Professional plumbing installations generally range from $500 to $1,500, depending on labor rates, electrical upgrades, and concrete cutting requirements.
How do I drain a sump pump?
You can drain a sump pump by unplugging the unit, disconnecting the rubber coupling above the check valve, and lifting the pump out of the basin. Tilt the pump slightly to let trapped water inside the discharge housing drain back into the pit before hauling it out.
What is the best pump for a sump pit?
The best sump pump depends on your groundwater volume, basement size, and lift height. Highly reliable brands like Wayne, Everbilt, and ECO FLO offer durable 1/3 HP and 1/2 HP cast-iron submersible models tailored for heavy residential use.
Can snakes come through a sump pump?
While rare, snakes, frogs, and rodents can occasionally enter exterior discharge pipes or unsealed sump basins. Installing a sealed, airtight sump lid with proper rubber grommets and adding an outdoor grate or flap to your discharge terminus prevents pests from entering.
How do you install a Wayne sump pump?
To install a Wayne sump pump, place the unit level in the center of your basin, attach a vertical PVC pipe with a threaded adapter, and mount a check valve pointing upward. Drill an air-relief weep hole, route the discharge line outside, and plug it into a GFCI outlet.
Final Checklist & Maintenance Tips
Executing a final system inspection and committing to a routine maintenance schedule ensures your plumbing setup remains completely reliable during severe weather storms. Taking these simple steps safeguards your basement against unexpected flooding year-round.
Final Plumbing Checklist
Review this comprehensive checklist before completing your installation to ensure every single component is securely positioned and fully operational.
- Basin Clearance: Verify that the sump basin is completely free of loose gravel, dirt, and packaging debris.
- Pump Leveling: Confirm the submersible pump rests flat and level at the bottom of the pit.
- Float Switch Movement: Test the float switch manually to ensure it has completely unobstructed clearance to rise and fall.
- Check Valve Direction: Double-check that the directional arrow on the check valve points strictly upward toward the exterior outlet.
- Weep Hole Open: Ensure the 1/8-inch air relief hole is drilled properly between the pump and check valve.
- Secure PVC Joints: Confirm all Schedule 40 PVC fittings are firmly primed, glued, and cured.
- Outdoor Terminus: Verify the discharge pipe extends at least 10 to 20 feet away with a proper downward slope.
- GFCI Power Connection: Plug the unit securely into a dedicated ground-fault circuit interrupter outlet.
Monthly and Yearly Maintenance
Routine upkeep prevents unexpected mechanical failures and extends the operating lifespan of your entire waterproofing system. Schedule these simple checks throughout the year to guarantee peak performance.
- Monthly Test Pour: Pour several buckets of water into the sump basin to simulate a storm and verify automatic pump activation.
- Quarterly Pit Cleaning: Scoop out accumulated silt, debris, and mineral buildup from the bottom of the basin.
- Discharge Line Inspection: Walk your exterior drainage path regularly to ensure the outlet is clear of leaves, mulch, and ice.
- Yearly Switch Check: Inspect the mechanical float switch and check valve flapper for signs of wear or sticking.
Conclusion
Properly plumbing a sump pump is a straightforward project that delivers invaluable peace of mind during heavy storm seasons. By combining secure PVC connections, correct check valve placement, and regular maintenance, you ensure reliable foundation protection for years to come.

Oscar Vance | Master Plumber & Drainage Expert
Meet Oscar Vance, a licensed master plumber sharing practical solutions on residential repairs, preventive maintenance, and thoughtful home upkeep.

