Understanding Kitchen Faucet Replacement
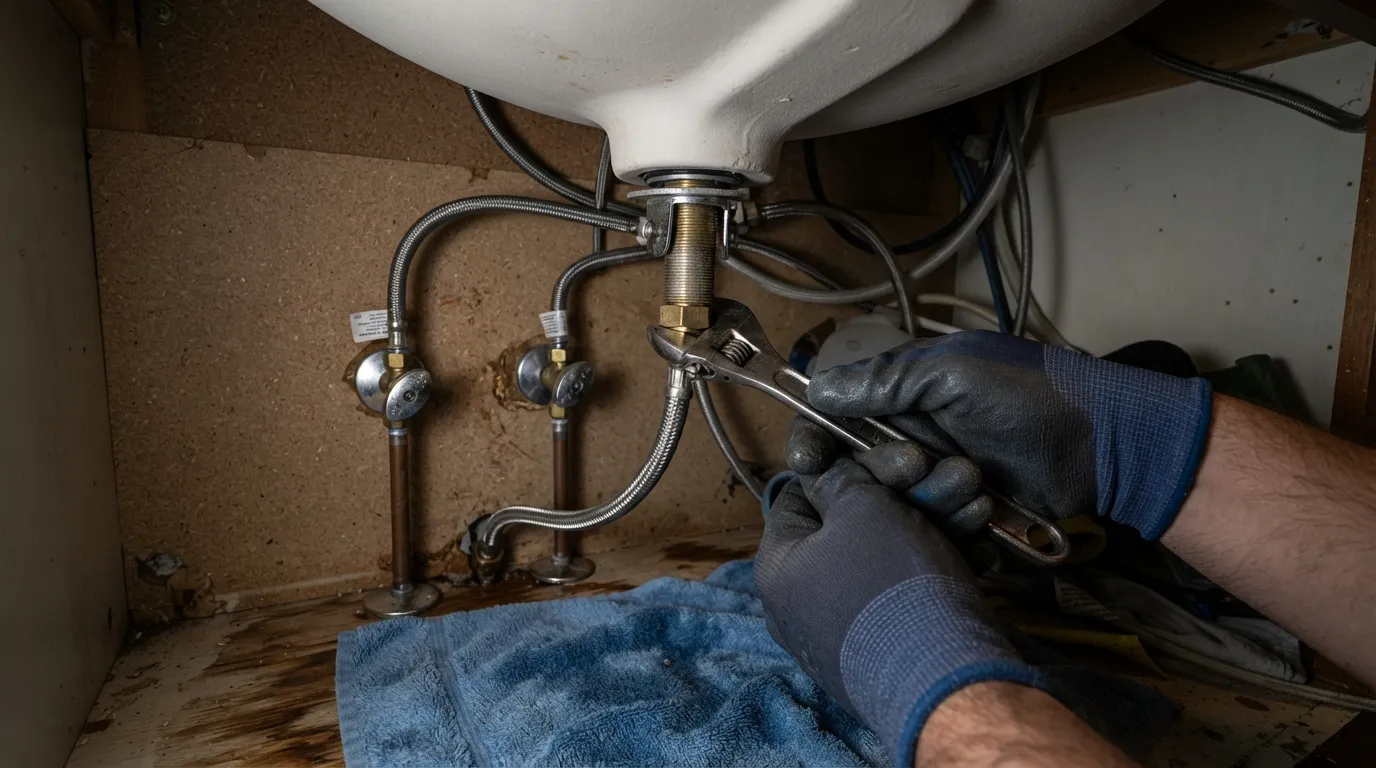
Replacing a single-handle kitchen faucet is a beginner-friendly DIY project that most homeowners can successfully complete in 30 to 90 minutes. This comprehensive guide covers everything you need to know about kitchen faucet replacement, from tools and safety precautions to step-by-step removal and installation.
Whether you are upgrading a leaky fixture or refreshing your kitchen’s aesthetic, handling this upgrade yourself saves on plumber fees while ensuring a secure, leak-free fit. You will learn how to prepare your workspace, disconnect old supply lines, and mount your new fixture efficiently.
Tools & Materials You’ll Need
Gathering the correct equipment before starting your kitchen faucet replacement ensures the job goes smoothly without unexpected trips to the hardware store. Having specialized tools on hand prevents stripped nuts and damaged water lines under tight sink cabinets.
Essential Tools
These primary instruments are non-negotiable for successfully loosening old mounting hardware and tightening new supply connections safely.
- Basin Wrench: A specialized pivoting wrench designed to reach and turn hidden mounting nuts deep behind the sink basin.
- Adjustable Wrench: Used for tightening supply line fittings, shut-off valves, and mounting bolts securely.
- Flashlight or Headlamp: Crucial for illuminating the dark, cramped workspace underneath the kitchen sink.
- Pipe/Tubing Cutter: Necessary if copper supply lines need trimming or modifying to fit your new setup.
Materials Needed
Consumables and fresh components guarantee a water-tight seal and prevent leaks from developing after installation.
- Teflon Tape (Thread Seal Tape): Wrapped around threaded pipe connections to prevent water leaks.
- Plumber’s Putty or Silicone Sealant: Used to create a waterproof barrier beneath the baseplate or deck plate of the new faucet.
- New Supply Lines: Stainless steel braided lines that connect your faucet to the hot and cold water shut-off valves.
- Bucket and Old Towels: Positioned directly under the pipes to catch residual stagnant water trapped inside the lines.
Optional but Helpful
These items make the installation process significantly easier, more comfortable, and safer for DIYers.
- Penetrating Oil (e.g., PB Blaster): Applied to rusted or corroded nuts to loosen them quickly before applying wrench force.
- Safety Glasses: Protects your eyes from falling rust flakes, debris, and old mineral buildup while working underneath.
- Knee Pad or Pillow: Cushions your knees and back during the extended time spent kneeling on hard kitchen floors.
DIY vs. Hiring a Plumber Cost & Decision Guide
Deciding whether to tackle a kitchen faucet replacement yourself or hire a professional depends on your comfort level with basic tools, the condition of your existing plumbing, and your overall budget. For most standard swaps, a DIY approach saves significant labor charges.
When You Can DIY It Safely
You can easily take on this project yourself if your current setup is relatively modern and accessible. Look for these green flags before starting:
- Functional Shutoff Valves: The hot and cold water valves under your sink turn completely off without leaking.
- Standard Configurations: You are swapping a single-handle faucet for another model with a matching deck-hole layout.
- Clear Workspace: You have unhindered physical access inside the sink cabinet to reach the mounting nuts.
When to Call a Professional Plumber
Certain structural complications and worn-out infrastructure require licensed expertise to prevent catastrophic water damage or code violations.
- Corroded Shutoff Valves: Old gate valves that haven’t been touched in decades often break or leak when forced, requiring main water line shutoffs.
- Rigid Copper Supply Lines: Older homes with soldered copper lines may need cutting, bending, or conversion adapters.
- Missing Main Shutoffs: If your home lacks functional individual sink shutoffs and your main valve fails to seal tightly, a pro is needed.
Cost Comparison Table: DIY vs. Plumber Labor Cost
How to Choose the Right Replacement Faucet
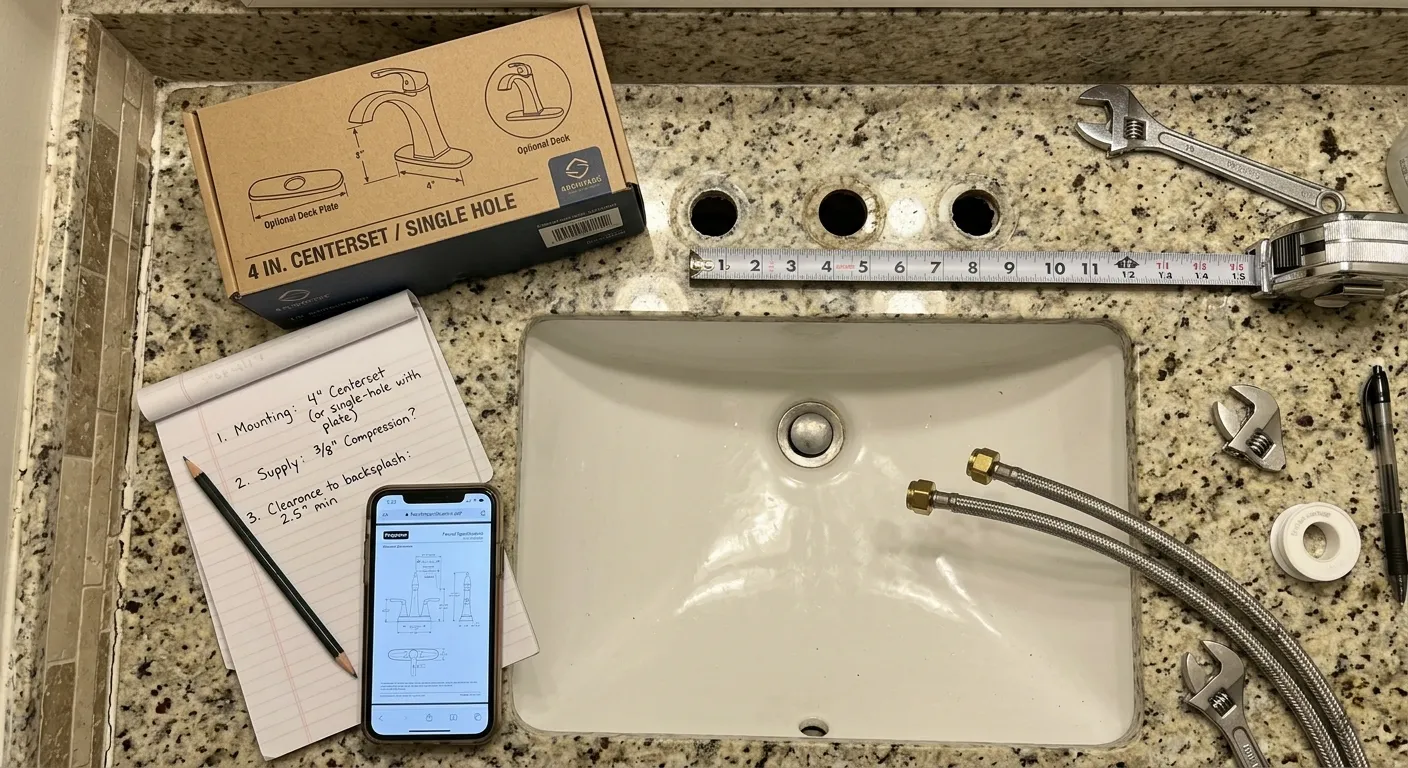
Selecting a compatible replacement faucet ensures a seamless installation without the need for drilling extra holes or dealing with awkward fitment issues. Evaluating your sink’s existing layout before purchasing prevents compatibility headaches later.
Single-Handle vs. Two-Handle Centerset Faucets
The handle configuration determines both your daily water control preference and the number of connection points required on your sink deck.
- Single-Handle Faucets: Combine water volume and temperature control into one lever, making them exceptionally space-saving, user-friendly, and easy to install.
- Two-Handle (Centerset) Faucets: Feature separate hot and cold handles integrated with the spout onto a single base unit, offering a classic aesthetic but requiring tighter maneuvering underneath.
- Widespread Faucets: Feature independent handles and spouts spaced 8 inches or more apart, requiring individual hole penetrations through the sink deck.
Understanding Sink Holes & Spread Measurement
Before buying a new fixture, check how many pre-drilled holes exist on your sink deck or countertop to match your faucet design.
- 1-Hole Sinks: Ideal for sleek single-handle pull-down faucets with no extra accessories.
- 2 to 3-Hole Sinks: Accommodates standard centerset faucets, soap dispensers, or sprayers.
- 4-Hole Sinks: Common in older setups, often requiring an escutcheon plate (deck plate) to cover unused side holes if upgrading to a 1-hole model.
- Spread Measurement: Measure the exact distance from the center of the hot water hole to the center of the cold water hole to ensure widespread models fit properly.
Easiest Faucet Types for Beginners
Choosing beginner-friendly designs drastically cuts down installation time and minimizes frustration under the sink cabinet.
- Pull-Down Faucets: Feature a high-arc spout with a flexible spray hose that locks magnetically back into place, minimizing moving parts under the sink.
- Single-Hole Centerset Faucets: Require fewer connection points and minimal wrench turning, making them the fastest style to mount and secure.
- Quick-Connect Models: Modern faucets often feature snap-together hose connections instead of threaded metal fittings, reducing tool dependency.
Step by Step Guide How to Replace a Kitchen Faucet
Replacing your kitchen faucet systematically ensures a leak-free setup and prevents accidental water damage under your sink cabinet. Following a structured procedure simplifies each phase from extraction to final testing [00:00:17].
Prep the Workspace & Turn Off Water Supply
Shut off both hot and cold water valves completely beneath the sink, then open your current faucet lever to release residual pressure and drain trapped water [00:00:50]. Disconnect any electrical power to your garbage disposal and clear out all storage items to create a clean, safe working space [00:00:52].
- Locate the shut-off valves under the sink and turn them clockwise until fully closed.
- Open the faucet handles upward to completely relieve system water pressure.
- Place a bucket directly beneath the connections to catch leftover stagnant water [00:00:59].
Disconnect the Water Supply Lines
Use an adjustable wrench to carefully loosen and disconnect your old supply lines from both the faucet shanks and the shut-off valves [00:01:04]. Keep your bucket positioned underneath to catch any remaining water dripping from the lines.
- Hold the supply line coupling nut steady with one wrench while turning with another if connections are stuck.
- Inspect the rubber washers inside the supply lines for wear and tear.
- Discard old or stiff supply lines if you are upgrading to new braided stainless steel lines.
Remove the Old Faucet Mounting Hardware
Reach behind the sink basin and use a specialized basin wrench to loosen and remove the mounting nuts securing the faucet from underneath [00:01:04]. If nuts are rusted or corroded from years of exposure, apply penetrating oil and let it sit for 10 minutes before applying force.
- Crawl under the sink with a bright flashlight or headlamp to clearly identify locking nuts.
- Turn the basin wrench counter-clockwise to loosen stubborn plastic or brass mounting nuts.
- Remove any mounting brackets, washers, or stabilization plates holding the base tightly.
Take Out the Old Faucet
Lift the old faucet body straight up and out from the top of the sink deck [00:01:12]. Scrape away old plumber’s putty, silicone residue, and mineral grime around the mounting holes using a plastic scraper to ensure a flat, clean surface for your new seal [00:01:12].
- Pull all disconnected supply lines cleanly upward through the sink deck holes.
- Thoroughly clean the surrounding deck area with a mild cleaner and dry it completely.
- Check the rim of the mounting holes for any chips or cracks before proceeding.
Position & Install the New Faucet
Assemble the new faucet components according to the manufacturer manual, apply plumber’s putty or a rubber gasket underneath the deck plate, and lower the fixture into place [00:01:18]. Feed all connected hoses and PEX tubing smoothly through the sink hole [00:01:32].
- Align the optional deck plate (escutcheon) over unused outer holes if installing a single-hole faucet [00:01:15].
- Thread the mounting studs and tighten the bracket nuts securely from underneath the basin [00:01:32].
- For pull-down models, attach the stabilization weight and snap the quick-connect spray hose securely into place [00:01:43].
Reconnect Water Lines & Tighten Mounting Nuts
Attach your new supply lines to the hot and cold water shut-off valves, wrapping Teflon tape clockwise around threaded connections if required [00:01:52]. Tighten fittings securely with an adjustable wrench, taking care not to overtighten and crack plastic threads [00:01:52].
- Connect the left supply line to the hot water valve and the right line to the cold water valve.
- Ensure rubber cone washers are properly seated inside each supply line coupling.
- Double-check that all connections under the sink are firm, straight, and properly aligned.
Turn Water Back On & Flush the Faucet
Slowly open both hot and cold shut-off valves under the sink to restore water pressure to the fixture [00:01:57]. Remove the aerator tip from the end of the faucet spout before turning on the handle to flush out any accumulated installation debris or pipe sediment [00:02:00].
- Turn on both water supply valves completely and check for sudden leaks [00:01:57].
- Let water run freely through the open spout for 60 seconds to clear out internal pipe residue [00:02:05].
- Turn off the faucet, reinstall the aerator tip tightly, and plug your garbage disposal back in [00:02:12].
Test for Leaks
Thoroughly inspect all connections beneath the sink using a dry paper towel to spot even the smallest bead of moisture [00:01:59]. Cycle the handle through hot and cold extremes multiple times to ensure internal valves function smoothly without dripping.
- Wipe down all supply line connections, mounting nuts, and shut-off valves completely dry.
- Run the water continuously for two minutes while monitoring joints underneath.
- Tighten any damp fittings slightly with an adjustable wrench if minor weeping occurs [00:01:59].
Faucet Type Specific Installation Instructions
Different faucet configurations and layouts require distinct steps to ensure proper fitment and water flow. Adapting your installation method to match your specific hardware setup prevents leaks and operational issues.
How to Replace a Kitchen Faucet with a Side Sprayer
Faucets featuring a traditional separate side sprayer require a dedicated connection through the sink deck and a functional diverter valve. Proper hose routing underneath prevents kinking during daily use.
- Insert the sprayer hose down through its designated 4th hole on the sink deck, securing the hold-down shank from underneath.
- Connect the sprayer hose directly to the diverter outlet port located on the main faucet body shank.
- Test the sprayer trigger mechanism to ensure water switches smoothly from the main spout to the side spray nozzle.
How to Replace a 3-Hole Kitchen Faucet
Three-hole sinks accommodate either centerset two-handle models or single-hole faucets paired with an aesthetic deck plate. Correct alignment ensures a watertight surface seal across all openings.
- Apply a continuous bead of plumber’s putty along the bottom rim of the deck plate (escutcheon) before placement.
- Center the plate over the three sink holes, ensuring the central shank passes smoothly through the main opening.
- Tighten the mounting nuts evenly from underneath to compress the putty and create a waterproof barrier.
How to Replace a Kitchen Faucet Without Removing the Sink
Most kitchen faucet replacements are performed entirely from above and below without disturbing the sink basin itself. Working in tight spaces requires patience and proper lighting.
- Clear out all cleaning supplies and storage items from beneath the sink to maximize your physical movement.
- Use a specialized basin wrench to reach up behind deep basin walls when standard tools cannot fit.
- Inspect the old silicone caulk line around the sink rim to ensure it remains undisturbed during hardware extraction.
Replacing a Two-Handle Kitchen Faucet
Two-handle models involve independent hot and cold valve assemblies that connect to a central tee-joint or separate supply lines. Aligning these components correctly prevents alignment strain.
- Assemble the hot and cold valve stems to the central spout tee above the sink deck before tightening the mounting hardware.
- Connect flexible supply lines to each individual valve shank rather than a single manifold.
- Check both handles for equal range of motion and smooth mixing performance before final testing.
Troubleshooting Common Problems

Even straightforward installations can run into unexpected snags due to years of mineral buildup, corrosion, or overtightened fittings. Knowing how to diagnose and resolve these common plumbing roadblocks saves time and prevents potential damage.
Stuck or Rusted Mounting Nuts
Decades of moisture exposure frequently cause brass and steel mounting nuts to rust solid against the underside of the sink basin. Applying the right technique prevents stripped threads or broken sink decks.
- Penetrating Oil Method: Spray a generous amount of penetrating oil directly onto the rusted threads, let it sit for 15 to 30 minutes to break down oxidation, then attempt to loosen with a basin wrench.
- Using a Dremel or Nut Splitter: If chemical sprays fail, use a mini hacksaw or nut-splitting tool to carefully cut through stubborn plastic or corroded metal nuts without damaging the faucet shank.
- Leverage Extension: Slip a short piece of PVC pipe over the handle of your wrench to increase torque leverage in cramped cabinet spaces.
Faucet Leaking After Installation
Discovering a drip after turning the water back on is usually caused by improperly seated washers or incorrect torque application. Identifying the exact source determines the correct fix.
- Over-tightening vs. Under-tightening: Overtightening flexible supply line nuts can crush rubber gaskets and warp plastic threads, causing leaks, while loose fittings simply need a quarter-turn adjustment.
- Thread Seal Tape: Ensure Teflon tape was wrapped clockwise around male pipe threads (3 to 4 wraps) before securing threaded adapters.
- Cartridge Alignment: If the leak comes from the handle lever itself, check that the internal ceramic cartridge is seated flush and locked tightly by its retaining nut.
Low Water Pressure After Replacement
A sudden drop in water flow right after installation is almost always caused by trapped debris dislodged from old supply lines during the pressure test.
- Aerator Clog: Unscrew the aerator tip from the end of the faucet spout and tap out any trapped sediment, scale, or solder flakes.
- Flush the Lines: Remove the aerator completely, turn both hot and cold handles fully on, and let the water run for one full minute to clear out lingering pipe blockages.
- Kinked Hoses: Check underneath the sink to ensure flexible supply lines or pull-down hoses are not bent, twisted, or pinched against cabinet walls.
Dealing with Old or Corroded Shutoff Valves Safely
Old multi-turn gate valves frequently fail to seal completely or leak around the valve stem when manipulated during a replacement project. Recognizing safety precautions protects your home from water damage.
- Main Water Shutoff: Always locate your home’s main water supply valve before starting so you can shut off water quickly if a sink valve breaks.
- Valve Replacement: If an old valve leaks from the packing nut, tighten the small packing nut gently, or plan to replace the valve entirely with a modern quarter-turn ball valve.
- Regulatory Safety: For guidance on identifying hazardous old plumbing materials or lead components in aging water supply systems, consult safety guidelines provided by the Environmental Protection Agency (EPA).
Pro Tips & Real World Insights
Drawing from hands-on installation experience helps you avoid common pitfalls and ensures your new kitchen fixture operates flawlessly for years. Implementing professional best practices guarantees both a smooth setup and long-term durability.
Common Mistakes First Timers Make
Beginners often encounter avoidable setbacks due to rushed steps or overlooked preparation details under the sink cabinet.
- Forgetting to Turn Off Supply Valves: Failing to close the shut-off valves before disconnecting lines results in unexpected indoor flooding.
- Overtightening Plastic Fittings: Forcing connection nuts past snug can crack threaded shanks and ruin new gaskets instantly.
- Skipping the Line Flush: Leaving the aerator attached during initial startup traps debris inside the screen, instantly restricting water pressure.
How Long It Actually Takes
While standard swaps are fast, accounting for unexpected obstacles like rusted hardware sets realistic expectations for your project timeline.
- Beginner Timeline (45 to 90 Minutes): Allows extra time for clearing the cabinet, reading instructions carefully, and dealing with stubborn old nuts.
- Experienced DIYer Timeline (25 to 45 Minutes): Streamlined execution using specialized tools and familiar connection layouts.
- Complicated Extraction Timeline (2 to 3 Hours): Required when cutting corroded supply lines or replacing rusted shut-off valves becomes necessary.
Maintenance Tips to Extend Your New Faucet’s Life
Routine care prevents mineral scale buildup, keeps handles operating smoothly, and preserves the exterior finish.
- Clean Aerators Annually: Unscrew the spray tip once a year and soak it in vinegar to dissolve hard water calcium deposits.
- Wipe Down the Finish: Use a soft microfiber cloth and mild soap daily to prevent water spots and soap scum accumulation.
- Inspect Under-Sink Connections: Check flexible lines and mounting nuts twice a year during routine home maintenance checks to catch minor weeping early.
Frequently Asked Questions
Clear, direct answers to common questions help resolve lingering doubts before, during, and after your kitchen faucet installation.
Can I replace a kitchen faucet myself?
Yes, replacing a kitchen faucet is a beginner-friendly DIY project that most homeowners can complete successfully with basic hand tools in under 90 minutes. Following a step-by-step procedure ensures proper alignment and prevents leaks without professional help.
Do I need a plumber to change a kitchen faucet?
You do not need a plumber for standard swaps where your existing shut-off valves and supply lines are modern and functional. However, a professional should be called if your shut-off valves are corroded, leaking, or if your home lacks individual sink shutoff valves entirely.
What tool is used to remove a kitchen faucet?
A basin wrench is the primary specialized tool used to reach and loosen the hidden mounting nuts located deep behind the sink basin. An adjustable wrench and a flashlight are also essential for completing the extraction safely.
How long does it take to change a faucet?
A standard faucet replacement takes between 30 and 90 minutes for a beginner working carefully. If you encounter rusted mounting hardware or need to replace corroded shutoff valves, the project can take up to 2 to 3 hours.
Is plumber’s putty necessary for a kitchen faucet?
Plumber’s putty or a silicone sealant is necessary when installing a faucet with a deck plate (escutcheon) to create a waterproof barrier against the sink surface. Many modern faucets also include a rubber or foam gasket that eliminates the need for putty entirely.
How do I disassemble my kitchen faucet?
To disassemble an old faucet, turn off the water supply, relieve water pressure, disconnect the supply lines, and use a basin wrench to remove the mounting nuts from underneath. Once the hardware is detached, lift the faucet straight up and out from the top of the sink deck.
Can you replace a kitchen faucet without replacing a countertop?
Yes, you can easily replace a kitchen faucet without touching or replacing your countertop. Faucets mount directly onto the sink basin itself or through pre-drilled holes in the countertop, leaving the surrounding surface completely undisturbed.
How do you replace a single-handle kitchen faucet cartridge?
To replace a cartridge, turn off the water supply, pry off the decorative index button on the handle, loosen the set screw, and remove the handle lever. Unscrew the retaining nut, pull out the old plastic or ceramic cartridge, insert the exact replacement cartridge, and reassemble the handle.
Conclusion & Final Recap
Replacing your kitchen faucet is a manageable, rewarding DIY project that saves money while instantly upgrading your kitchen’s functionality and aesthetic. By gathering the right tools, preparing your workspace, and following a systematic installation approach, you can complete the swap cleanly and securely in under 90 minutes. Take your time inspecting under-sink connections and testing for leaks to ensure your new fixture delivers reliable performance for years to come.

Oscar Vance | Master Plumber & Drainage Expert
Meet Oscar Vance, a licensed master plumber sharing practical solutions on residential repairs, preventive maintenance, and thoughtful home upkeep.

