Introduction What You’ll Learn
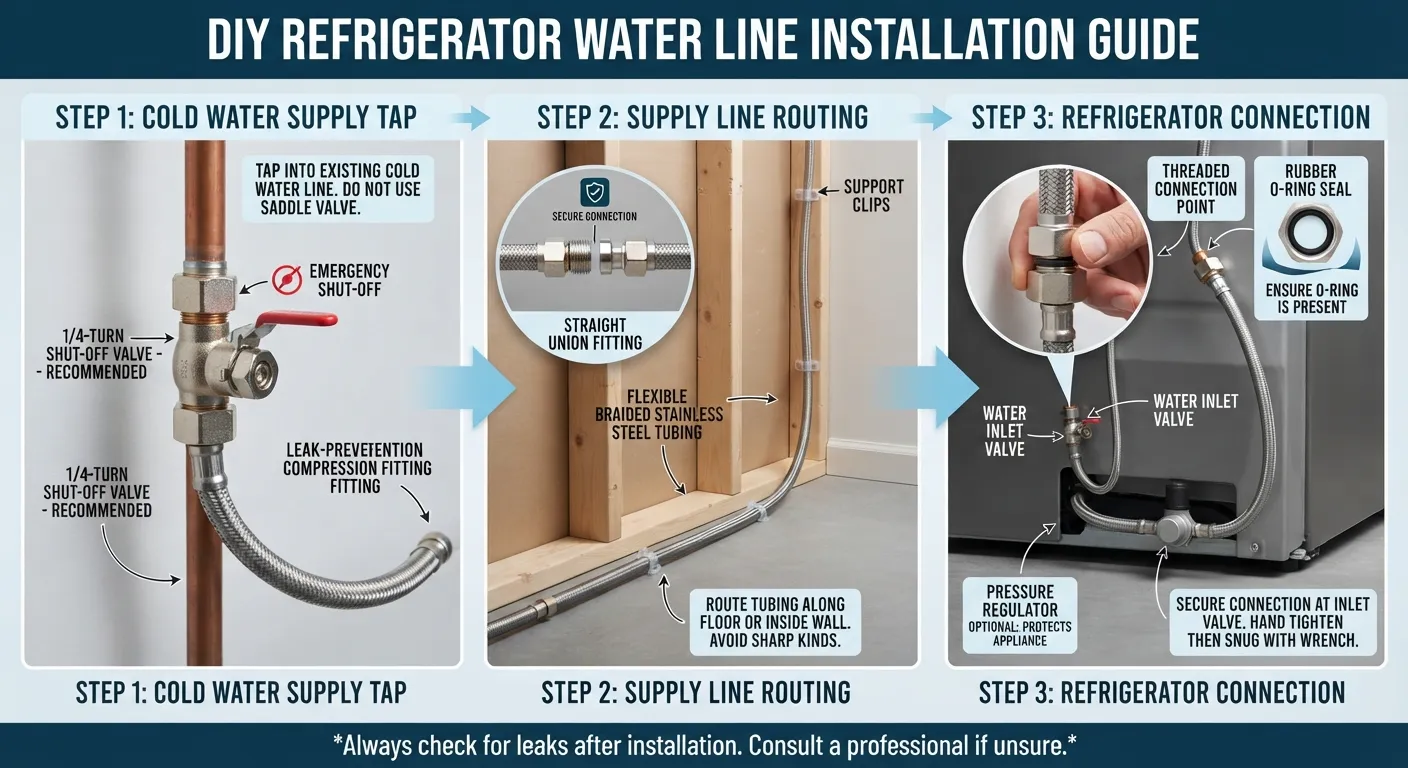
Connecting a refrigerator water line is a straightforward home improvement project that supplies your fridge with fresh drinking water and powers the automatic ice maker. By following this guide, you will master how to safely hook up a 1-inch supply line to your home’s plumbing using standard compression fittings and connect it directly to the appliance inlet valve.
Is This a DIY Friendly Project?
This project is rated as beginner-to-intermediate friendly, meaning most homeowners can successfully complete it without hiring a professional plumber. Having the right tools on hand keeps the process smooth and trouble-free.
- Estimated Time: 1 to 2 hours of active work
- Skill Level: Beginner / DIY-friendly
- Key Tools Needed: Adjustable wrench, tubing cutter, plumber’s tape, and a 1/4-inch copper or PEX supply line kit
Whether you are installing a brand new ice maker line or replacing an old, leaking tube, careful preparation prevents water damage and ensures a reliable connection. Let us dive into the tools and steps needed to get your refrigerator fully operational.
Installation Checklist
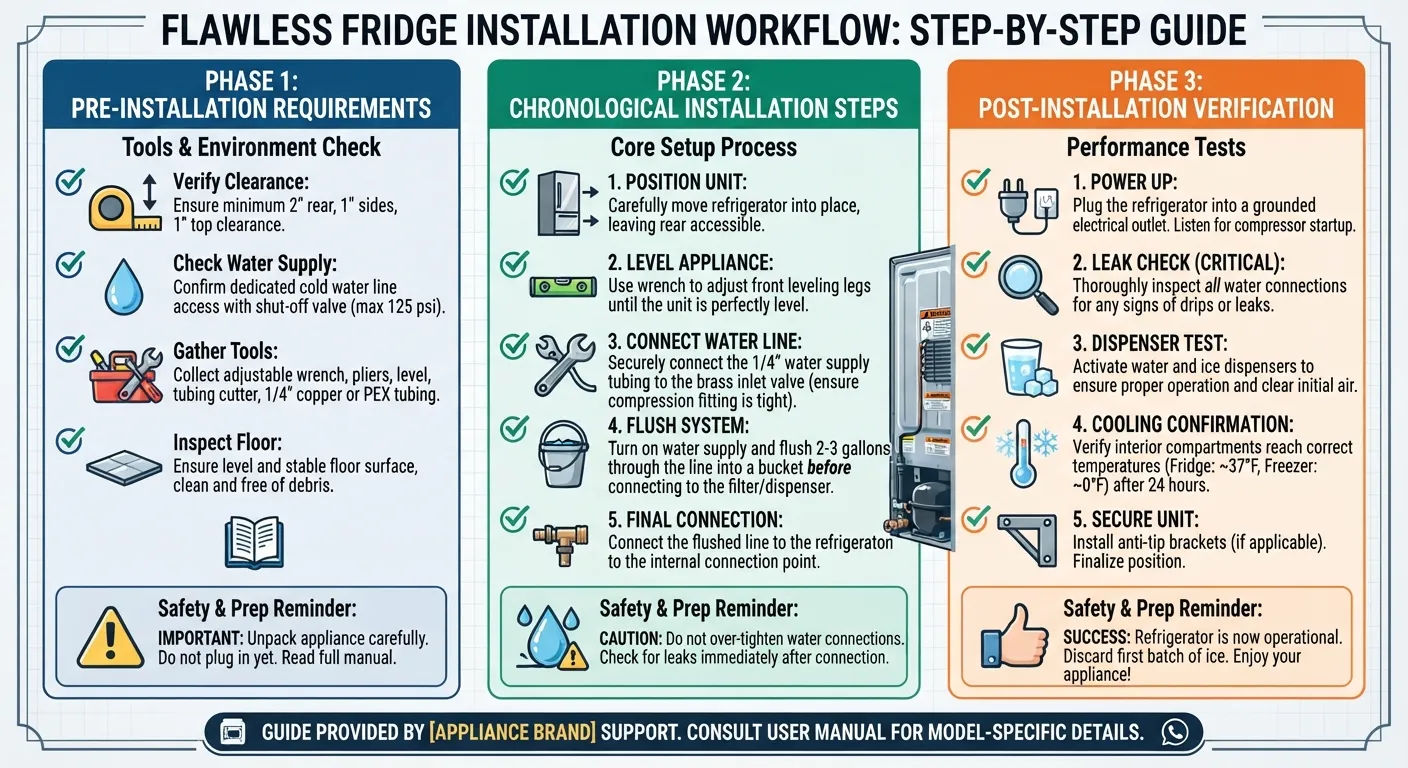
Proper preparation before handling plumbing and electrical connections protects your home from water damage and electrical hazards. Completing this pre-installation checklist ensures a seamless, risk-free DIY refrigerator water line setup.
Unplug the Refrigerator First
Electrical safety is the absolute first priority when working behind household appliances. Moving a heavy refrigerator exposes cord insulation and outlet connections to potential friction, making it vital to disconnect power entirely.
- Pull the refrigerator carefully away from the wall to access the electrical plug.
- Unplug the power cord from the wall outlet completely before touching any lines.
- Keep the plug positioned away from any potential drips or wet floors during the installation process.
Locate and Shut Off Your Main Water Supply
Stopping the water flow prevents unexpected indoor flooding while you cut or alter supply pipes. You must locate either the individual supply valve beneath your kitchen sink or the main water shut-off valve for your entire house.
- Turn the designated shut-off valve clockwise until it is completely closed.
- Verify the water is off by turning on the nearest kitchen faucet and checking that pressure drops to zero.
- Keep a towel and bucket nearby to catch any residual water trapped inside the local pipe segments.
Drain Residual Water from the Line
Even after shutting off the primary valve, pockets of water remain trapped inside existing supply lines or local plumbing configurations. Draining this residual fluid keeps your work area dry and prevents mess behind your cabinetry.
- Open a nearby faucet downstream from your work area to let trapped water escape naturally.
- Place a small bucket directly beneath the work zone if you are replacing an older valve or supply line.
- Allow the line to empty completely before loosening any compression fittings or connectors.
Common Mistake First Timers Make
Many beginners fail to completely close the main water supply valve, assuming a partial turn is enough to stop pressure. This oversight leads to sudden leaks or pressurized sprays the moment a pipe is cut or pierced.
- Always double-check that your water pressure drops to a complete zero before starting physical work.
- Inspect old valves for mineral corrosion that might prevent a proper seal when turned off.
- Take your time during this preparation phase to avoid emergency plumbing calls later.
Materials Comparison Copper vs PEX vs Plastic Braided Lines
Choosing the right refrigerator water line material is essential for preventing future leaks and ensuring clean-tasting ice and water. Different supply line options vary significantly in terms of durability, installation complexity, and overall cost, making it critical to select the best option for your home setup.
Copper Tubing: Pros & Cons
Copper tubing is the traditional gold standard for plumbing durability, offering exceptional longevity and complete resistance to rodent damage, though it is rigid and harder to route through tight spaces behind heavy kitchen appliances.
- Pros: Extremely long lifespan (decades), rodent-proof, does not impart chemical tastes to water, and maintains structural integrity under high pressure.
- Cons: Highly rigid, prone to kinking if bent too sharply, and requires specialized cutting and compression tools to install safely.
PEX Tubing: Pros & Cons
PEX tubing provides modern flexibility and freeze-resistance, making it exceptionally easy to route through complex cabinetry runs, though it requires specific connection fittings and can degrade if exposed to direct, intense UV sunlight.
- Pros: Highly flexible, resistant to scale buildup and bursting from freezing temperatures, very easy for DIYers to snake through cabinets.
- Cons: Cannot be exposed to direct sunlight, requires proprietary expansion or crimping fittings depending on the specific system type.
Plastic Braided Stainless Steel Line: Pros & Cons
Braided stainless steel lines combine flexible inner tubing with a protective metal mesh armor, delivering high burst resistance and effortless DIY installation, whereas cheap unreinforced plastic lines carry a high risk of cracking over time.
- Pros: Braided stainless steel offers great leak resistance, high burst strength, and comes pre-assembled with standard fittings for quick installation.
- Cons: Plain unreinforced plastic tubing degrades, yellows, and becomes brittle quickly, making it a high-risk choice for hidden water damage.
Which Material Should You Choose?
Tools & Materials Checklist

Gathering all necessary tools and components before starting your project eliminates frustrating mid-installation trips to the hardware store. Having the right supplies ensures secure, leak-free connections for your refrigerator water line.
Tools You’ll Need
Equipping yourself with the correct hand tools makes cutting, tightening, and securing plumbing fittings fast and accurate without damaging delicate pipes.
- Tubing Cutter: Essential for making clean, square cuts on copper or plastic lines without crushing the pipe diameter.
- Adjustable Wrench: Used to securely tighten compression nuts and fittings onto valves and inlet ports.
- Utility Knife or Scissors: Helpful for cleanly slicing open packaging or trimming excess PEX tubing.
- Bucket and Rags: Required for catching any minor drips or residual water left in old pipes.
Materials Parts You’ll Need
Quality plumbing hardware ensures your water line maintains pressure and prevents hidden leaks behind your cabinets and appliances.
- 1/4-Inch Supply Line: The industry-standard tubing size required for all residential refrigerator ice makers and water dispensers.
- Compression Nut and Ferrule (Brass Sleeve): Crucial for locking copper or plastic tubing securely into compression fittings.
- Plumber’s Tape (Teflon Tape): Wrapped around threaded connections to create a watertight seal and prevent leaks.
- Pipe Stiffener: Inserted inside plastic or PEX tubing to keep the pipe round when using compression fittings.
Refrigerator Water Line Installation Kit
If you prefer an all-in-one purchase solution, a pre-packaged refrigerator water line installation kit contains everything you need right out of the box.
- Includes a pre-measured braided stainless steel or plastic supply line in standard lengths (usually 10 to 25 feet).
- Comes complete with a saddle valve or self-tapping valve for quick connection to existing home water pipes.
- Features matching compression nuts, adapters, and rubber washers sized specifically for standard refrigerator inlet valves.
Installation Guide
Executing a systematic installation process guarantees your refrigerator ice maker and water dispenser operate smoothly without leaks. Follow this comprehensive walkthrough to connect your supply lines safely and accurately.
Step 1: Connect to the Water Source Under-Sink Method
Tapping into the cold water supply line beneath your kitchen sink is the cleanest and most common approach for modern homes. This provides a dedicated stub-out valve with easy emergency access.
- Install an approved 1/4-inch inline shut-off valve or tee adapter directly onto the cold water supply pipe under the sink.
- Drill a small, clean clearance hole through the adjoining cabinet base or floor frame to route your supply tubing outward.
Step 1B: Connect via Pre-Installed Wall Valve Alternate Scenario
Many modern kitchens feature a dedicated recessed water box valve installed directly in the wall behind where the refrigerator stands. This setup eliminates the need to drill through cabinets.
- Inspect the built-in recessed valve box to verify the internal valve is completely closed and free of dust or drywall debris.
- Remove any protective thread caps and ensure the rubber washer or internal O-ring seal is properly seated inside the connector.
Step 2: Flush the Line Before Connecting
Clearing out manufacturing residue, copper shavings, or dust particles prevents clogging your refrigerator’s sensitive internal water inlet valve filter screens.
- Direct the open end of your newly routed 1/4-inch supply line securely inside a large bucket.
- Open the main water supply valve slightly for 15 to 30 seconds to let clean water purge the interior completely.
Step 3: Prep the Tubing Ferru+ Compression Nut
Proper assembly of compression components creates a metal-on-metal or tight compression seal that withstands high residential water pressure securely.
- Slide the brass compression nut onto the end of your supply tube first, followed by the brass ferrule (sleeve) oriented with its tapered end facing outward.
- Insert a brass or plastic tubing insert (pipe stiffener) directly inside the end if you are utilizing flexible plastic or PEX tubing.
Step 4: Connect the Line to the Refrigerator Inlet Valve
Aligning the tubing precisely with the appliance’s rear solenoid water inlet valve prevents cross-threading and structural leaks behind the unit.
- Push the prepared tubing straight into the threaded water inlet valve fitting until it bottoms out completely.
- Slide the compression nut forward and thread it by hand onto the valve connector to catch the initial threads smoothly.
Step 5: Tighten Properly Hand-Tighten First Don’t Overtighten Plastic Lines
Applying exact torque prevents crushing soft tubing materials while ensuring a watertight seal that holds firm under continuous household pressure.
- Hand-tighten the compression nut as far as possible, then use an adjustable wrench to turn it an additional three-quarters turn.
- Avoid using excessive force or over-tightening, especially on plastic or PEX lines, as crushing ruins the structural seal.
Installing a Dedicated Shut Off Valve
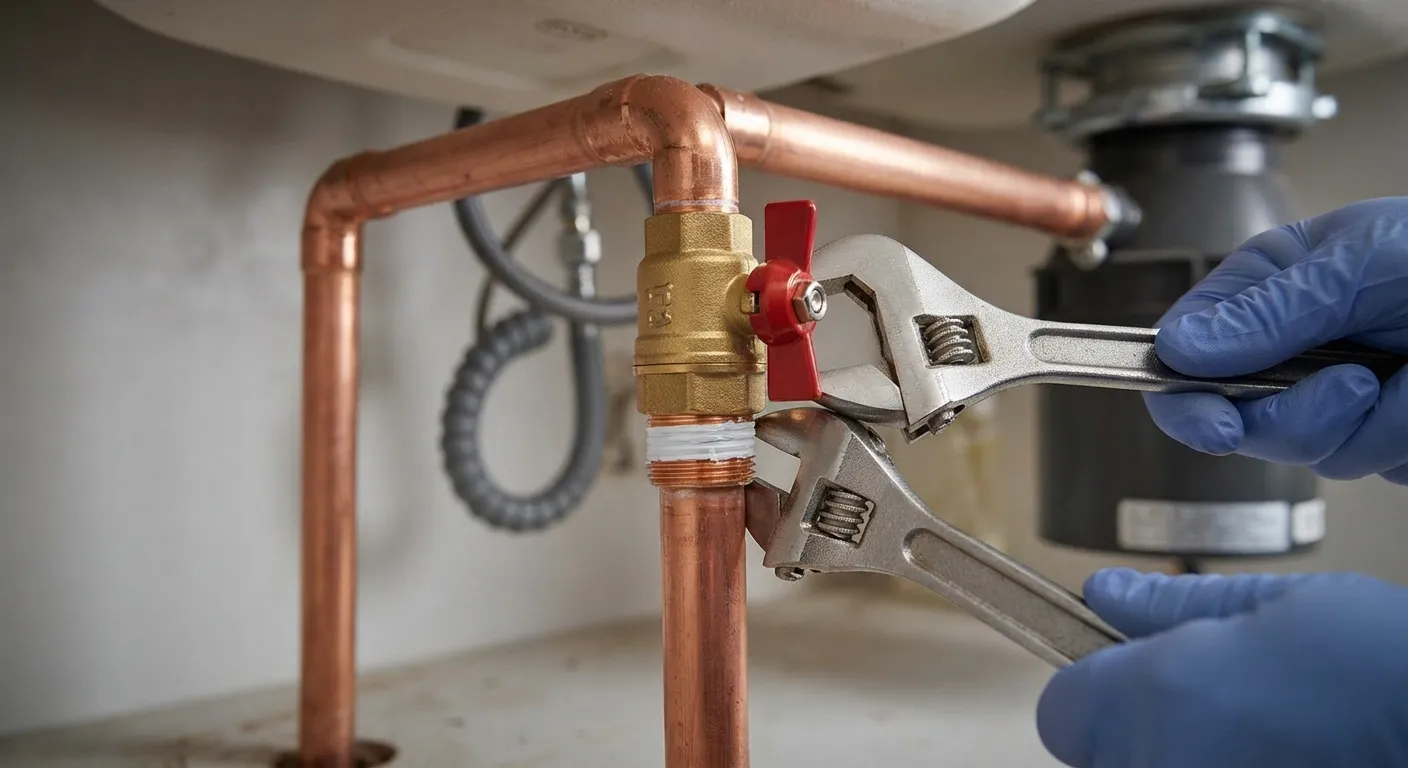
Installing a dedicated, high-quality shut-off valve gives you immediate control over your appliance’s water flow during routine maintenance or emergencies. Relying on old-style piercing components often leads to clogs, corrosion, and unexpected failure points over time.
Why a Dedicated Shut Off Valve is Better Than a Saddle Valve
Traditional saddle valves pierce a small hole into existing pipes using a needle mechanism, which frequently restricts water flow and clogs with mineral deposits. Modern plumbing best practices recommend full-port dedicated valves for reliable long-term performance.
- Provides full water pressure and volume to your refrigerator ice maker without flow restrictions.
- Significantly reduces the risk of pinhole leaks or sudden seal failures common with aging self-piercing needles.
- Allows for fast, effortless shut-offs directly adjacent to the appliance connection point.
How to Install It
Setting up a soldered, compression, or push-to-connect quarter-turn shut-off valve requires cutting a small section out of your supply pipe and securing the new fitting in place.
- Turn off your home water supply completely and drain all residual fluid from the target pipe section.
- Cut a clean section out of the copper or PEX pipe using a specialized tubing cutter and deburr the edges.
- Attach the quarter-turn shut-off valve securely according to the manufacturer’s connection style (compression or push-fit).
Local Plumbing Code Note Accessible Shut-Off Requirement
Building codes universally mandate that water shut-off valves must remain fully accessible for emergency operation without requiring tools or moving heavy built-in furniture. For comprehensive instructions and professional recommendations, consult the Home Depot Installation Guide.
- Never bury a shut-off valve deep inside permanent wall cavities or behind immovable kitchen cabinetry without an access panel.
- Ensure family members can easily locate and turn the valve off in the event of an unexpected hose rupture.
DIY vs. Hiring a Plumber
Deciding whether to install a refrigerator water line yourself or hire a professional depends on your plumbing experience, available tools, and the condition of your home’s existing water supply infrastructure. Weighing these factors helps you avoid costly mistakes and ensures safe operation.
When DIY Makes Sense
Tackling this project as a weekend DIY task is entirely feasible if your kitchen has modern PEX or copper plumbing with an accessible under-sink supply line or a pre-installed wall water box.
- Your home already has a dedicated 1/4-inch supply stub-out or an easy-to-reach cold water pipe nearby.
- You possess basic hand tools like an adjustable wrench, a tubing cutter, and a willingness to follow safety steps.
- You want to save on labor costs, which typically exceed the price of basic tubing kits and fittings.
When You Should Call a Professional Plumber
Certain plumbing red flags make hiring a licensed professional the safest and most efficient choice, protecting your home from catastrophic water damage.
- Your home features old, brittle galvanized steel pipes that risk cracking or snapping under pressure when tapped.
- You cannot locate a reliable main water shut-off valve, or your existing valves are severely corroded and stuck open.
- The installation requires running a supply line across finished ceilings or through concrete slab foundations.
st: DIY vs Professional Installation
Testing Flushing & Final Setup
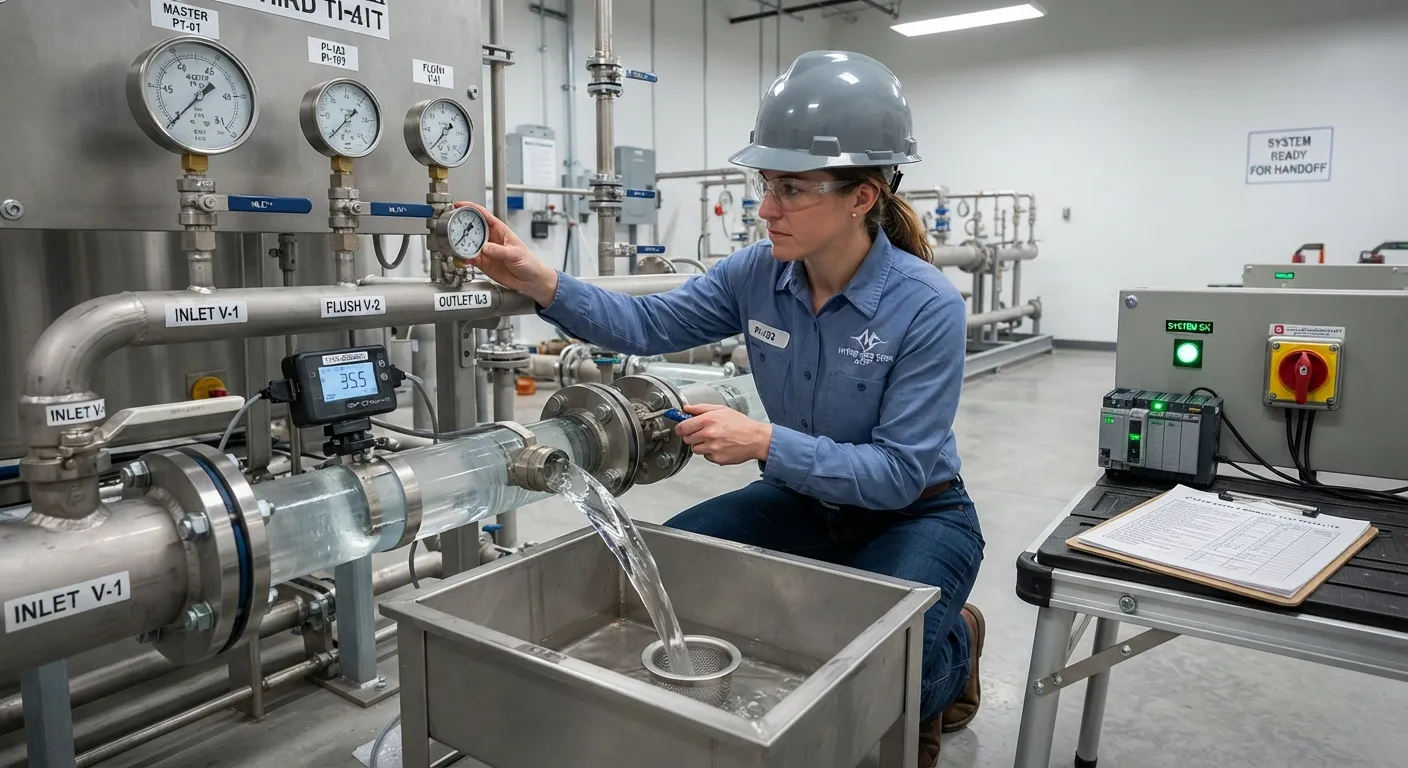
Completing rigorous post-installation checks ensures your newly installed refrigerator water line is completely secure, leak-free, and ready to dispense clean drinking water. Proper flushing also removes manufacturing residue and trapped air from internal reservoirs.
How to Check for Leaks Dry Paper Towel Method
Pinpoint minor leaks instantly by utilizing dry paper towels around every single connection point, fitting, and shut-off valve before pressurizing the system fully.
- Wrap dry paper towels tightly around each compression nut, valve joint, and the refrigerator water inlet valve connection.
- Slowly open your water supply valve to let pressure build up gradually inside the tubing.
- Inspect the paper towels after 10 to 15 minutes; any dark damp spots or drips indicate a loose fitting that requires gentle tightening.
Flushing the System Discard First Glasses of Water & Ice
New refrigerator water lines and internal carbon filters contain loose charcoal dust, manufacturing debris, and trapped air that must be completely purged before regular consumption.
- Run at least 2 to 3 gallons of water through the door water dispenser in intervals to clear out carbon fines and trapped air bubbles.
- Allow the automatic ice maker to run through its first two full batches of ice, and throw those initial batches away.
- Verify that water flow runs crystal clear and steady without sputtering or spitting air.
Positioning the Fridge Without Kinking the Line
Pushing your heavy refrigerator back into its recessed wall slot requires extreme caution to avoid pinching, crushing, or kinking the flexible water supply line.
- Leave a gentle, circular “service loop” or slack coil of extra tubing behind the unit to allow for future movement without tension.
- Guide the appliance back slowly while watching behind or underneath to ensure the line does not get trapped under the leveling rollers.
- Check one final time after positioning that the refrigerator is level and the water line remains completely uninhibited.
Troubleshooting & Maintenance
Maintaining a refrigerator water line and knowing how to handle minor issues prevents unexpected leaks and extends the lifespan of your appliance’s plumbing system. Addressing common operational hurdles proactively saves you from costly emergency repairs.
How to Fix a Leaking Refrigerator Water Line
Most water leaks around a refrigerator stem from loose compression nuts, cross-threaded fittings, or small pinhole punctures in aging plastic tubing.
- Turn off the water supply valve immediately and place towels under the affected junction.
- Gently tighten loose compression nuts with an adjustable wrench, taking care not to crush soft tubing.
- Replace any cracked, brittle, or deeply kinked sections of tubing entirely to ensure long-term structural integrity.
How to Disconnect a Water Line from Your Refrigerator
Safely disconnecting an existing water line requires releasing line pressure completely to prevent water from spraying inside your kitchen floor space.
- Shut off the water supply valve and unplug the refrigerator from the wall outlet.
- Place a small towel beneath the rear solenoid valve connection to catch residual fluid.
- Use an adjustable wrench to loosen the compression nut counter-clockwise while holding the inlet fitting steady.
How to Cap Off a Water Line If You Remove the Fridge
When removing a refrigerator during kitchen renovations or moving out, capping off the supply line prevents accidental flooding if the valve is bumped.
- Shut off the water supply and drain all remaining pressure from the active line.
- Attach a standard 1/4-inch brass compression cap and rubber gasket securely onto the open tube end.
- Tighten the cap nut snugly with a wrench and test the valve to verify zero leakage.
How to Replace a Faulty Water Line Connector
Damaged or corroded brass fittings and worn-out ferrules must be replaced promptly to maintain airtight water pressure seals.
- Cut away the damaged segment of old tubing cleanly using a sharp pipe cutter.
- Slide on a new brass compression nut and fresh ferrule before inserting a pipe stiffener.
- Reattach the assembly to the valve fitting and tighten to specification.
How to Connect Two Refrigerator Water Lines Unusual Setups
If your existing supply tubing is too short to reach the new refrigerator location safely, you can join two lines together using a specialized union fitting.
Do Refrigerator Water Lines Need Cleaning?
Mineral scale buildup, sediment, and biofilm can accumulate inside water lines and ice maker mechanisms over years of continuous use.
- Flush lines annually by running multiple gallons of fresh water through the dispenser system.
- Replace internal refrigerator water filters every 6 months to maintain optimal flow and purity.
Are Compression Fittings Safe Long Term?
Brass and stainless steel compression fittings are exceptionally safe and durable for long-term residential plumbing when installed correctly without over-tightening.
-
- Inspect all exposed connections twice a year during routine kitchen cleanings for signs of mineral crust or dampness.
Can a Refrigerator Work Without a Water Line?
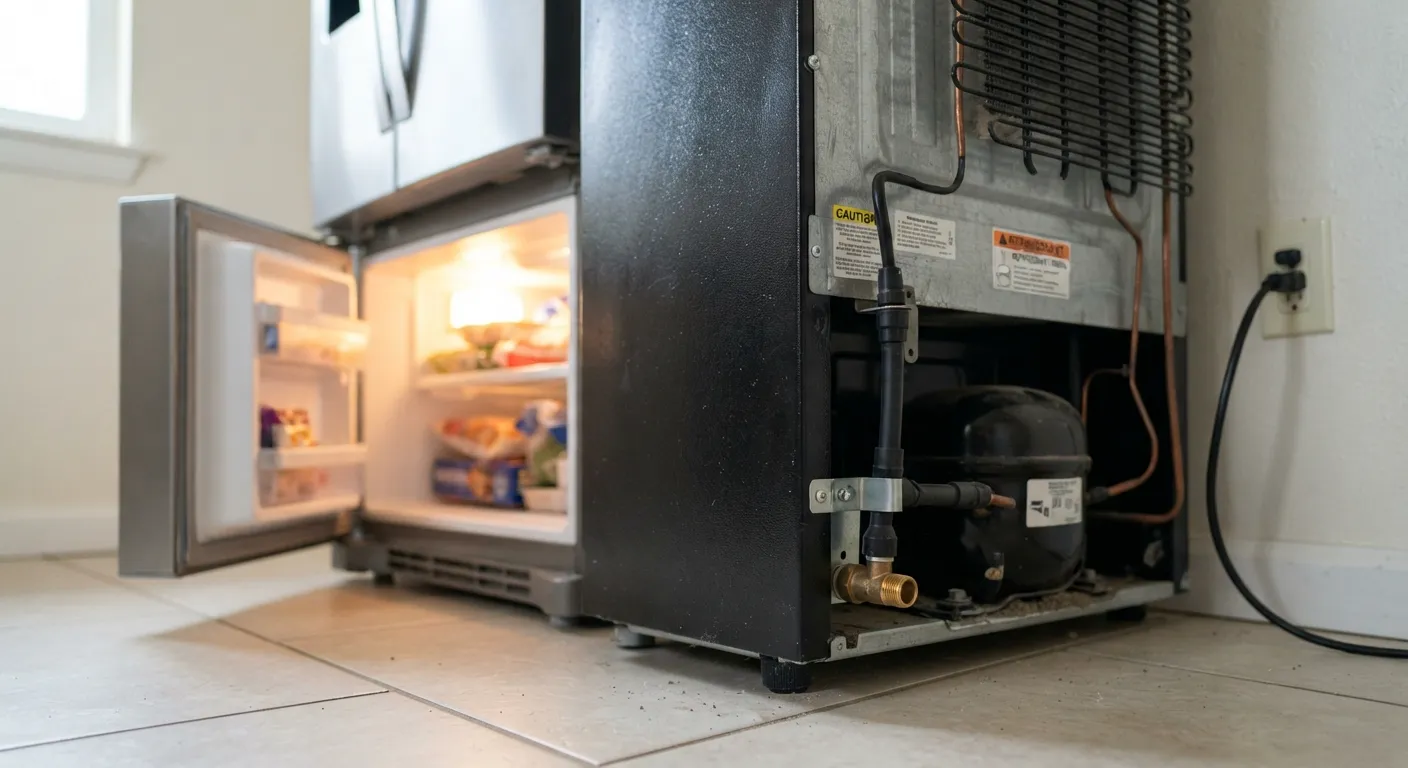
A refrigerator can operate perfectly fine without a connected water line, provided you understand which features will remain inactive. While cooling and freezing compartments function normally, any automated water dispensing or ice-making features will simply stay dry.
Refrigerators That Don’t Require a Water Line
Refrigerators without a dedicated water line connection will not experience any mechanical damage or electrical faults; they simply skip the ice-making and water-dispensing cycles.
- The compressor, evaporator fans, and cooling thermostats operate independently of water supply pressure.
- You can switch off the ice maker power arm or digital control setting to prevent the internal mechanism from cycling dry.
- Standard top-freezer models and many basic side-by-side units do not require plumbing at all if you choose not to hook them up.
Alternatives Manual Water Jug Method
If your refrigerator has a built-in water dispenser or ice maker but you prefer not to hook up a permanent plumbing line, you can utilize manual alternatives to enjoy cold water and ice.
- Fill traditional ice cube trays manually and store the cubes in a bin inside the freezer compartment.
- Keep a filtered water pitcher or insulated jug inside the refrigerator door for convenient cold drinking water.
- Some specialized aftermarket conversion kits allow manual tank filling, though manual trays remain the simplest hassle-free approach.
Frequently Asked Questions
Here are concise answers to common questions regarding refrigerator water lines, installation requirements, and troubleshooting techniques.
How do you close a refrigerator water line valve?
To close a refrigerator water line valve, turn the valve handle clockwise as far as it will go until it stops completely. For quarter-turn ball valves, rotate the lever so that it sits perpendicular (at a 90-degree angle) to the water pipe.
- Test the shut-off by running the refrigerator water dispenser until the flow stops entirely.
- If the valve is old and stuck, do not force it with excessive pressure to avoid snapping the stem.
What are common reasons refrigerators aren’t connected to water lines?
Many refrigerators remain unconnected because the kitchen lacks nearby plumbing access, or because homeowners prefer to avoid the risk of hidden leaks behind cabinetry.
- Rental properties or older homes often lack dedicated water supply lines behind the refrigerator cavity.
- Some homeowners simply prefer manual ice trays and bottled water over automated dispensers.
Can a fridge water line be connected to a water jug directly?
Standard refrigerator water inlet valves require a pressurized water supply (typically 20 to 120 PSI) to open properly and feed the internal reservoir, meaning standard gravity-fed jugs will not work without a specialized auxiliary pump system.
-
- Specialty bottled water delivery pumps (like Flowjet systems) can push water from a jug to the fridge inlet.
How do I seal a refrigerator water line properly?
Threaded connections require 2 to 3 wraps of Teflon tape applied clockwise, while compression fittings seal via tight metal-on-metal sleeve compression without any tape.
- Never use thread tape on compression ferrules or push-to-connect fittings.
- Always hand-tighten nuts first before applying a gentle final turn with an adjustable wrench.
Conclusion Key Takeaways
Installing or maintaining your refrigerator water line is an empowering DIY project that adds everyday convenience to your kitchen. By selecting the right durable materials, following precise safety steps, and thoroughly testing for leaks, you protect your home from water damage while ensuring pure, fresh ice and water.
Recap Checklist
Review this final checklist before wrapping up your installation project to ensure every step was completed correctly and safely.
- Power to the refrigerator is completely disconnected and the main water supply is shut off.
- The supply tubing (copper, PEX, or braided stainless steel) is securely connected without kinks.
- Compression fittings are hand-tightened followed by a secure three-quarter turn with an adjustable wrench.
- All joints pass the 15-minute dry paper towel leak test under full system pressure.
- Initial lines and filters are thoroughly flushed by discarding the first batches of water and ice.
Final Pro Tip
Always leave a gentle service loop of extra tubing behind your refrigerator before sliding it back into place, and make a habit of inspecting your connections and water filter every six months during regular kitchen deep cleans.

Oscar Vance | Master Plumber & Drainage Expert
Meet Oscar Vance, a licensed master plumber sharing practical solutions on residential repairs, preventive maintenance, and thoughtful home upkeep.

