How Do You Remove a Connect Plumbing Fitting?
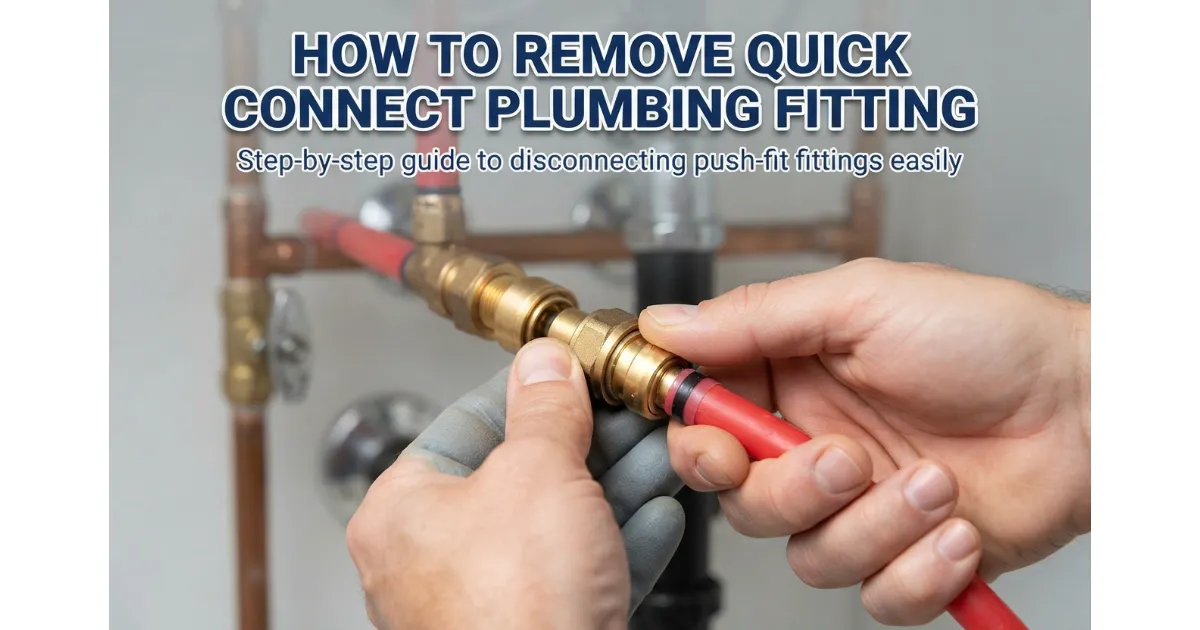 Removing a quick connect plumbing fitting requires just a few simple steps. First, turn off the water supply and open a nearby faucet to relieve any trapped pressure. Next, firmly push and hold the collet—also known as the release ring—flush against the fitting body, and pull the pipe or tubing straight out to release it.
The Core Removal Steps
- Shut off the main water supply valve to prevent leaks or flooding.
- Open a nearby faucet to release lingering water pressure from the lines.
- Locate the plastic or metal collet at the mouth of the push-to-connect fitting.
- Press and hold the collet evenly inward against the body of the fitting.
- Pull the pipe straight out while holding the collet down to disconnect the tubing securely.
Is This Guide for You?
This comprehensive removal guide specifically applies to standard push-fit and push-to-connect plumbing fittings used in home water supply lines. If you are troubleshooting specific faucet hoses, please refer to Section 6 for dedicated instructions. Please note that specialized hardware such as bicycle press-fit bottom brackets and standard garden hose connectors are not covered in this guide.
What Are Quick Connect Fittings and How Do You Identify Yours?
Understanding your specific plumbing hardware ensures a safe and successful disassembly process. Different brands and regional terminologies often describe the exact same underlying mechanical design, making correct identification essential before applying any tools or pressure.
How a Push-to-Connect Fitting Works
Push-to-connect fittings rely on an internal mechanical assembly that grips tubing securely without soldering, glue, or special crimping tools. Understanding these internal components helps clarify why pressing the release ring successfully unlocks the pipe.
- Collet / Release Ring: The visible outer collar that, when pushed inward, tilts the internal teeth away from the pipe.
- Grab Ring / Teeth: A stainless steel ring equipped with sharp bite teeth that lock down onto the inserted pipe to prevent it from pulling out under pressure.
- O-Ring / Seal: A rubber gasket positioned deeper inside the fitting body that creates a watertight seal around the circumference of the tubing.
- Pipe Insert / Stiffener: A small internal sleeve placed inside PEX tubing to keep it perfectly round and prevent collapse under the grip of the teeth.
Push-Fit vs Push-to-Connect vs Quick-Fit
Homeowners often encounter conflicting terminology across different hardware stores, plumbing manuals, and regional forums. Recognizing that these terms are interchangeable prevents unnecessary confusion during repairs.
- Push-to-Connect: The most common US industry term used by major hardware brands to describe tool-free pipe connection systems.
- Push-Fit: Frequently used in general conversation and UK plumbing markets to describe fittings that push directly onto copper, CPVC, or PEX.
- Quick-Fit / Quick Connect: Broad umbrella terms often applied to both home plumbing lines and pneumatic or fluid transfer components.
How to Tell Which Type You Have
Inspecting the exterior body of your fitting reveals brand-specific markings, color codes, and material compositions. Matching your hardware to these distinct visual identifiers determines your exact removal requirements.
- SharkBite: Typically features a brass body with a colored plastic collet ring (often dark gray, orange, or white) and brand stamps on the outer collar.
- John Guest / Speedfit: Usually constructed from durable white or gray engineered plastic with a removable locking clip or collet.
- Hep2O: Often recognized by bright demounting mechanisms and distinctive colored indicators designed for polybutylene and PEX systems.
- Watts: Features robust brass or plastic construction with clear flow direction arrows and stamped manufacturer logos.
Labeled Diagram of a Quick Connect Fitting
Refer to the structural layout below to visualize the internal mechanics of a standard push-connect fitting during maintenance or removal.
Connect vs Compression Fittings
Homeowners frequently confuse quick connect fittings with traditional compression fittings, which require entirely different disassembly techniques. Knowing the structural difference prevents damage to your plumbing lines.
- Quick Connect: Uses an internal push-and-lock collet mechanism that disengages by simply pressing a release collar by hand or with a small disconnect clip.
- Compression Fitting: Relies on a threaded nut and a brass ferrule (olive) that compresses tightly onto the pipe via wrench rotation rather than a push-to-release collar.
- Disassembly Difference: While push-to-connect fittings slide off cleanly after depressing the collet, compression nuts must be completely unscrewed, often requiring backup wrenches.
Tools You Need and Safety Steps Before You Start
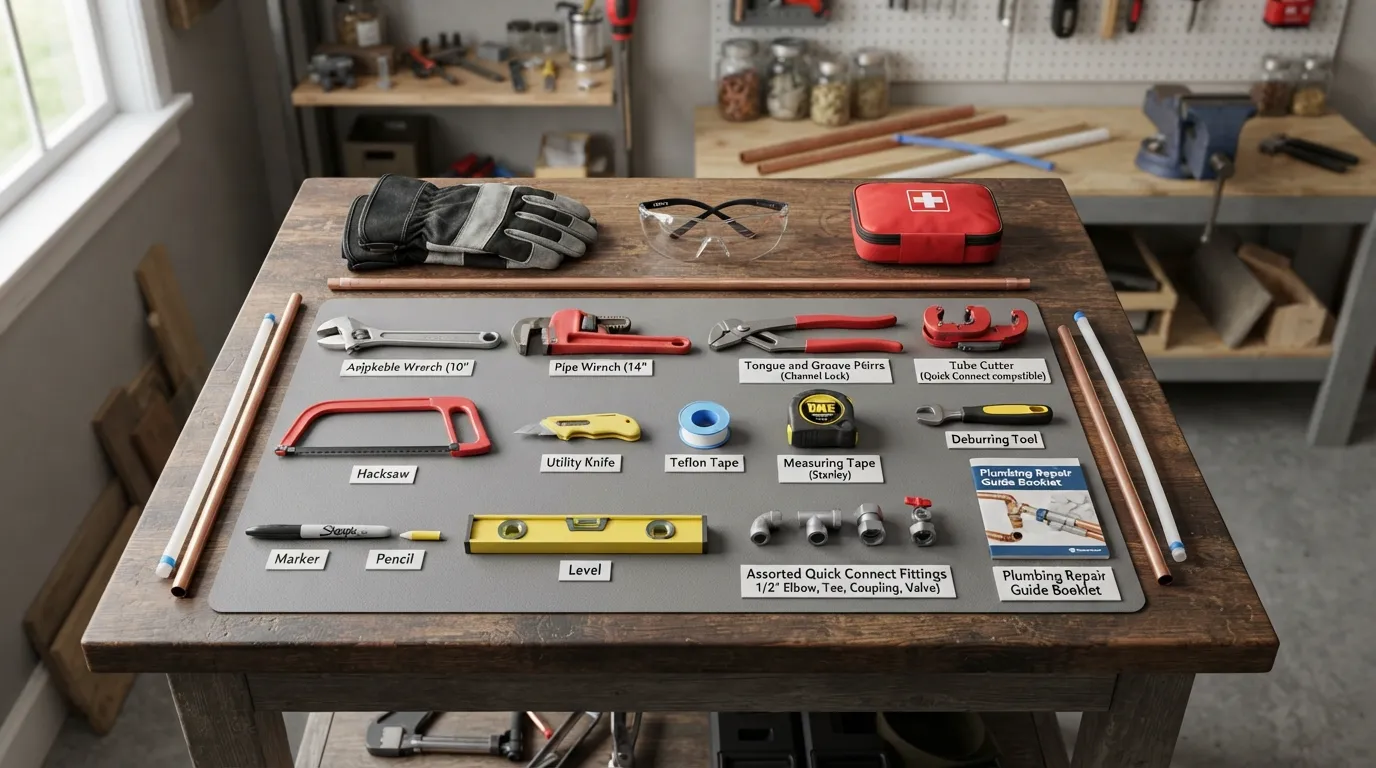 Proper preparation prevents unexpected water damage and ensures a smooth, frustration-free disassembly process. Gathering the right equipment beforehand allows you to execute each step safely and efficiently without damaging delicate plumbing components.
Tools You Need
Having the correct gear on hand ensures you can safely isolate lines, grip tight fittings, and handle minor drainage without hassle.
- Disconnect Clip or Removal Tool: Matches your specific pipe diameter (e.g., 1/2-inch or 3/4-inch) to depress the collet evenly.
- Bucket and Towels: Placed directly underneath the working area to catch any trapped residual water left in the pipes.
- Adjustable Crescent Wrench: Useful for holding nearby valve bodies or stubborn threaded adapters steady.
- Fine Grit Sandpaper or Emery Cloth: Required later to clean up any rough burrs or scratches on the pipe surface before reassembly.
Best Tool for Removing Push-to-Connect Fittings
While you can sometimes depress a collet using your bare fingers, tight spaces or aged fittings often require dedicated mechanical assistance to prevent hand fatigue and incomplete releases.
- Disconnect Tongs or Clips: Plastic or metal horseshoe-shaped clips slide around the pipe and snap down over the collet, applying uniform pressure around the entire circumference.
- Specialized Removal Tongs: Designed with leveraged handles that push the collet inward effortlessly when finger pressure is insufficient.
- Size Matching: Always use a disconnect tool that matches your exact pipe size; using an oversized or undersized tool can damage the release ring or fail to retract the internal teeth.
How to Shut Off Water and Release Pressure
Working on pressurized water lines creates dangerous sprays and flooding risks. Proper system isolation is a mandatory safety prerequisite before attempting any mechanical removal.
- Locate the Main Valve: Turn off the primary water supply valve for the house or the specific branch line feeding the target fixture.
- Drain the Line: Open the lowest faucet or a nearby valve downstream to completely drain standing water and relieve internal pipe pressure.
- Verify Dryness: Double-check that water flow has completely stopped before touching or applying pressure to the fitting.
Special Caution for Hot Water Lines
Pipes connected to water heaters, boilers, or recent dishwasher cycles retain dangerous thermal energy that can warp plastic components or cause severe skin burns.
- Allow Cooling Time: Give hot water supply lines ample time to cool down completely before starting any maintenance work.
- Thermal Expansion: Remember that hot copper and PEX lines expand slightly, making fittings tighter and more rigid until temperatures normalize.
- Wear Protective Gloves: Use heat-resistant work gloves if you must handle pipes in confined mechanical rooms near heating appliances.
Before You Pull: Inspect the Pipe
Examining the exposed exterior of the pipe ensures you won’t encounter unexpected snags or compromise future seals when sliding the tubing out of the fitting body.
- Check for Damage: Look closely for deep gouges, heavy lime scale buildup, or paint overspray on the section of pipe passing through the collet.
- Clean the Surface: Wipe away dirt and debris so foreign particles do not jam the internal grab ring or scratch the rubber O-ring seal during extraction.
- Assess Alignment: Ensure the pipe enters the fitting completely straight and is not bound under structural stress that could trap the teeth.
How to Connect Plumbing Fittings
Mastering the physical technique of disassembling push-to-connect systems saves you time, prevents component damage, and ensures a leak-free reassembly. Follow this sequential, step-by-step workflow for a smooth extraction.
Step 1: Turn Off the Water and Drain the Line
Shut off the main isolation valve upstream from your work area to eliminate line pressure. Open the closest downstream faucet or drain valve completely [00:01:36] to empty any residual water and relieve internal hydraulic tension.
Step 2: Locate the Collet
Identify the plastic or metal collet ring positioned directly at the mouth of the fitting body where the pipe enters. This moving outer collar serves as the mechanical key to unlocking the internal stainless steel grab teeth [00:01:46].
Step 3: Press the Collet Toward the Fitting Body
Use your fingertips or a matched disconnect tool to press the collet evenly inward [00:01:50] flush against the main fitting body. Applying uniform, balanced pressure around the entire circumference ensures all internal teeth retract simultaneously.
Step 4: Pull the Pipe Straight Out
While holding the collet securely depressed in place, firmly pull the pipe or tubing straight back out of the fitting body [00:01:53]. Avoid twisting or bending the tube during this motion to prevent scoring the internal rubber O-ring seal.
Step 5: Check for a Stuck Pipe Insert and Remove It
Inspect the end of the extracted PEX or polybutylene tubing to ensure the internal plastic or brass pipe stiffener insert came out with it or remains intact. If it feels loose or damaged, pull it out carefully to replace it before re-insertion.
Step 6: Dry and Inspect the Pipe End
Wipe the end of the tubing clean with a dry cloth to check for deep bite marks, scratches, or mineral scale accumulation. Clean tubing is vital for achieving a proper seal when reconnecting or installing a new fitting.
What I Noticed When Doing This
During hands-on testing with aged brass push fittings, I noticed that scale buildup around the collet can frequently jam the release mechanism. Applying a few drops of white vinegar or silicone spray to dissolve mineral deposits makes depressing the collar significantly easier, while rushing the pull without holding the collet fully flush is the most common reason pipes remain stuck.
How to a Connect Fitting Without a Tool
Many quick connect and push-to-connect plumbing fittings are specifically designed to be disassembled completely by hand without requiring specialty disconnect tools [00:00:14]. Knowing how to leverage your fingers or common household alternatives lets you perform fast emergency repairs anywhere.
Can You Remove Push-to-Connect Fittings Without a Tool?
Yes, you can easily remove most quick connect fittings without any specialized equipment. As long as your fingers can apply balanced, even inward pressure to the collet while pulling the tubing backward, the internal locking mechanism will release instantly.
Method 1: Using Your Fingers or Thumbnails
Manual release is the quickest and safest approach for standard plastic fittings found under sinks, refrigerators, or RO water filtration systems.
- Firmly pinch the outer colored collet or collar between your thumb and index finger [00:00:19].
- Push the collet completely flush inward against the main body of the fitting.
- Pull the pipe straight out with your other hand while maintaining constant pressure on the release ring [00:00:19].
Method 2: Using a Crescent Wrench or Small Spanner
If finger strength is insufficient or tight installation angles make a manual grip awkward, an adjustable wrench can provide extra leverage.
- Open a small adjustable crescent wrench until the jaws fit loosely around the pipe just behind the collet.
- Slide the flat face of the wrench jaws evenly against the outer edge of the collet ring.
- Squeeze or push the wrench gently forward to depress the collet while pulling the tubing free.
Method 3: Using a Small Screwdriver or Plastic Pry Tool
In cramped locations where fingers cannot reach, a flathead screwdriver or plastic pry tool can depress stubborn locking collars.
- Select a small flathead screwdriver with a narrow blade to avoid slipping and scratching adjacent surfaces.
- Position the tip of the screwdriver gently against one side of the collet flange.
- Lever the tool carefully to push the collet inward, taking care not to gouge the fitting body or puncture the pipe.
Risks of Skipping the Tool
Attempting improvised removal methods without proper care introduces several common hazards that can compromise your plumbing system.
- Pipe Surface Scratches: Slipping with metal screwdrivers can gouge the side of the tubing, creating leak paths past the internal O-ring seal.
- Collet Damage: Applying uneven force with sharp tools can crack or deform the delicate plastic release ring, ruining the fitting.
- Persistent Leaks: Deformed internal grab rings or damaged seals will cause slow drips when the system is re-pressurized.
When You Should Buy a Disconnect Tool Instead
Certain situations demand a proper disconnect clip rather than improvised manual pressure.
- Heavy Corrosion or Scale: Mineral buildup locks aged brass fittings in place, requiring a full-circle disconnect clip to retract all teeth simultaneously.
- Confined Spaces: Wall cavities or tight manifold boxes prevent your fingers from getting the leverage needed for a clean release.
- Frequent Maintenance: If you service reverse osmosis filters or ice maker lines regularly, investing in a durable plastic disconnect tong set saves significant time and frustration.
How to Remove Specific Brands and Types
Different plumbing manufacturers utilize proprietary locking mechanisms, proprietary release collars, and varying housing materials. Knowing the specific quirks of each brand ensures a successful removal without damaging your valves or piping.
How to Remove a SharkBite Fitting
SharkBite brass fittings are ubiquitous in modern home plumbing but require firm, uniform leverage to release their robust stainless steel bite rings.
- Snap a horseshoe-shaped SharkBite plastic disconnect clip or metal tong around the pipe right behind the colored collet.
- Push the tool firmly against the collet to retract the internal grab teeth evenly.
- Pull the copper, PEX, or CPVC pipe straight out while holding the tool in place.
How to Remove a John Guest or Speedfit Fitting
John Guest and Speedfit connections are predominantly constructed from engineering plastics and are widely used in drinking water and heating lines.
- Inspect the fitting for a small locking clip (collet clip) positioned under the collet flange and snap it off if present.
- Press and hold the colored or gray collet ring squarely into the fitting body.
- Pull the plastic or copper tubing straight out; if the tube resists, ensure the locking clip has been completely removed.
How to Remove a Hep2O Push-Fit Connector
Hep2O fittings feature distinct demounting mechanisms designed specifically for polybutylene and PEX pipe systems.
- Locate the unique SmartSleeve or integrated collar system on the Hep2O fitting.
- Use the manufacturer’s specialized demounting tool or ring to push the internal fingers open evenly.
- Slide the pipe out gently, taking care to inspect the plastic pipe stiffener for wear before re-insertion.
How to Remove Watts Quick Connect Fittings
Watts manufactures reliable push-connect fittings for residential water filtration, reverse osmosis units, and plumbing supply lines.
- Check for a locking collet ring or safety clip securing the joint.
- Remove any locking wedge or blue clip wedged beneath the collar.
- Depress the collet firmly against the fitting body and pull the tubing straight out to disconnect.
How to Disconnect a Quick Connect Faucet Hose
Modern kitchen and bathroom pull-down faucets often feature specialized quick connect adapters beneath the sink basin rather than standard pipe fittings.
- Locate the plastic quick-connect housing where the spray wand hose meets the supply line or valve adapter.
- Pinch the protruding tabs or press the colored release buttons located on the sides of the connector block.
- Pull the hose connector straight down and away from the mounting nipple; for detailed visual steps, consult Delta’s official instructions.
Quick Comparison Table
Removal by Pipe Type and Size: PEX Copper CPVC and PE
Different piping materials respond uniquely to mechanical stress, thermal expansion, and the bite of internal stainless steel teeth. Understanding how your specific pipe composition interacts with quick connect fittings ensures you can complete extraction without collapsing or scoring the tubing.
Removing Push-Fit Fittings from PEX Pipe
PEX (cross-linked polyethylene) is flexible and resilient, making it very forgiving during plumbing repairs if handled with proper care.
- Always ensure the internal pipe stiffener (insert) remains inside the PEX tube when you pull it out so the plastic does not collapse.
- Depress the collet fully and pull straight back; avoid twisting the flexible PEX tube, which can distort the rubber O-ring seal.
- Inspect the end of the PEX pipe for deep ring impressions left by the grab teeth before attempting to re-insert it into a new fitting.
Removing Push-Fit Fittings from Copper Pipe
Rigid copper tubing provides a solid surface for quick-connect fittings, but old or corroded pipes require extra preparation during disconnection.
- Clean away any external corrosion, mineral scale, or paint buildup around the mouth of the fitting before pushing the collet.
- Check the copper exterior for deep scratches or burrs left by previous installations that could compromise the O-ring.
- Use fine emery cloth or sandpaper to smooth the end of the copper pipe if you plan on reusing it in another push-fit union.
Removing Push-Fit Fittings from CPVC and Plastic Tubing
CPVC and PE (polyethylene) plastic tubing are rigid or semi-rigid materials that demand delicate handling to prevent cracking under high pressure.
- Exercise caution with aged CPVC pipe, as older plastic becomes brittle over time and can snap if bent during removal.
- Make sure water temperatures are fully cooled down, as warm CPVC softens and distorts easily inside tight fittings.
- Pull the tubing strictly along its longitudinal axis to prevent sidewall shearing against the internal metal teeth.
Pipe Size Guide and Tool Size Match Table
Using the correct disconnect tool size for your exact pipe diameter ensures even collet depression and prevents damage to the fitting body.
What to Do If Your Quick Connect Fitting Is Stuck
Encountering a stubborn push-to-connect fitting that refuses to release is one of the most frustrating plumbing hurdles. Understanding why these joints jam and knowing the correct troubleshooting steps prevents pipe damage and gets your repair back on track.
Why Quick Connect Fittings Get Stuck
Quick connect fittings typically lock up due to specific mechanical or environmental issues rather than permanent failure. Identifying the root cause dictates your next course of action.
- Mineral Scale Buildup: Hard water deposits dry out inside the collet flange, cementing the release ring in place.
- Aged or Deformed Collet: Years of thermal cycles make plastic release rings brittle and unresponsive to finger pressure.
- Uneven Pull Force: Pulling the pipe at an angle jams the stainless steel grab teeth deeper into the copper or PEX wall.
- Internal Pipe Distortion: Tubing that has ovalized or mushroomed under pressure refuses to slide past the internal O-ring seal.
Troubleshooting Table
Collet Won’t Move
If the plastic release collar refuses to depress when pushed by hand, do not force it blindly with heavy hammers.
- Spray a small amount of silicone lubricant or white vinegar around the collet rim to dissolve hidden calcium crust.
- Snap a full-circle plastic disconnect tong around the pipe to distribute equal leverage across the entire collar surface.
- Tap gently on the back of the disconnect tool with pliers if the ring is severely jammed by mineral deposits.
Pipe Won’t Come Out Even With Collet Pressed
When the release ring is fully depressed but the pipe remains locked solid, the internal stainless steel teeth are likely wedged into the tubing wall.
- Push the pipe approximately 1/8 inch deeper into the fitting body first to relieve pressure off the bite teeth.
- Ensure you are maintaining 360-degree pressure on the collet while pulling the tubing outward with a firm, straight motion.
- Rotate the pipe slightly if it is copper to help dislodge any localized corrosion biting into the metal.
Pipe Insert Stays Inside the Fitting
During PEX pipe extractions, the internal plastic or brass stiffener sleeve sometimes separates and remains lodged within the fitting core.
- Shine a flashlight into the fitting opening to verify whether the sleeve is still present.
- Take a pair of fine needle-nose pliers, grip the inner edge of the stuck insert, and pull it straight out.
- Inspect the fitting’s internal O-ring to ensure the stray insert did not nick or tear the rubber seal before installing new pipe.
When You Should Buy a Pipe Cutter or Replace the Fitting
Sometimes stubborn fittings are too damaged, corroded, or warped to salvage safely during a routine repair.
- Severe Plastic Distortion: If the fitting body or collet is cracked, deformed, or sun-damaged, cut it off entirely.
- Deep Pipe Scoring: If the section of pipe passing through the teeth is heavily gouged, cut the tubing back to a clean, smooth segment.
- Complete Replacement: When standard disassembly fails after lubrication and proper tooling, using a standard pipe cutter to remove the fitting and splicing in a fresh connector is the most reliable solution.
Real-World Example
While working on an aged kitchen water line, I encountered a 1/2-inch brass union covered in mineral scale that completely seized the collet. Applying manual pressure failed entirely. By spraying white vinegar to break down the crust and snapping a full-circle metal disconnect tong around the pipe, the uniform leverage successfully retracted the stubborn grab teeth, allowing the copper pipe to slide out cleanly without requiring a hack saw.
Can You Reuse a Quick Connect Fitting? Inspect, Reinstall and Leak Test
Reusing high-quality plumbing fittings saves time and money, provided they pass a thorough pre-installation inspection. Knowing how to properly reinstall and pressure test your fittings guarantees long-term reliability and leak-free performance.
Can You Reuse Push-to-Connect Fittings?
Yes, most commercial push-to-connect and quick-fit fittings are engineered for multiple reuses if they remain structurally undamaged. However, you must inspect the internal stainless steel grab teeth and rubber O-ring seals for signs of wear before installing them on a new section of pipe.
How to Inspect the Fitting and the Pipe End
A careful visual check prevents unexpected leaks after the system is restored to full pressure.
- Shine a bright light into the fitting body to verify that the internal grab ring teeth are intact and evenly spaced.
- Inspect the rubber O-ring seal to ensure it has not been nicked, twisted, or flattened out.
- Check the pipe end for deep bite marks or heavy scratches that could create a leak path past the seal.
How to Reinstall a Fitting Correctly
Proper re-insertion requires precision depth control and careful alignment to avoid damaging internal components [00:00:09].
- Clean and deburr the end of the tubing so it has a smooth, square edge without sharp burrs [00:00:13].
- Mark the correct insertion depth on the outside of the pipe (typically 1 inch for 3/4-inch pipe or 3/4 inch for 1/2-inch pipe).
- Push the pipe firmly straight into the fitting until it reaches the internal stop mark [00:00:15].
How to Leak Test After Reinstalling
Verifying your work under controlled pressure protects your home from hidden water damage.
- Restore the main water supply slowly while keeping a close eye on the newly reassembled fitting.
- Wipe the joint dry with a paper towel to easily spot any initial weeping or active droplets.
- Leave the system under full operating pressure for at least 15 to 30 minutes before closing up any access panels or walls.
How Long Do Push-Fit Fittings Last?
High-grade brass and engineered plastic push-to-connect fittings are built for exceptional longevity, frequently matching the lifespan of the plumbing lines themselves.
- Expected Lifespan: Most premium push-fit fittings are rated to last anywhere from 25 to 50 years under normal residential operating conditions.
- Durability Factors: Longevity depends heavily on water chemistry, operating temperatures, and whether the system experiences frequent water hammer or severe pressure spikes.
- Maintenance Tip: Inspect exposed fittings annually for mineral scale accumulation or external corrosion to ensure decades of trouble-free operation.
Common Mistakes to Avoid and When to Call a Plumber
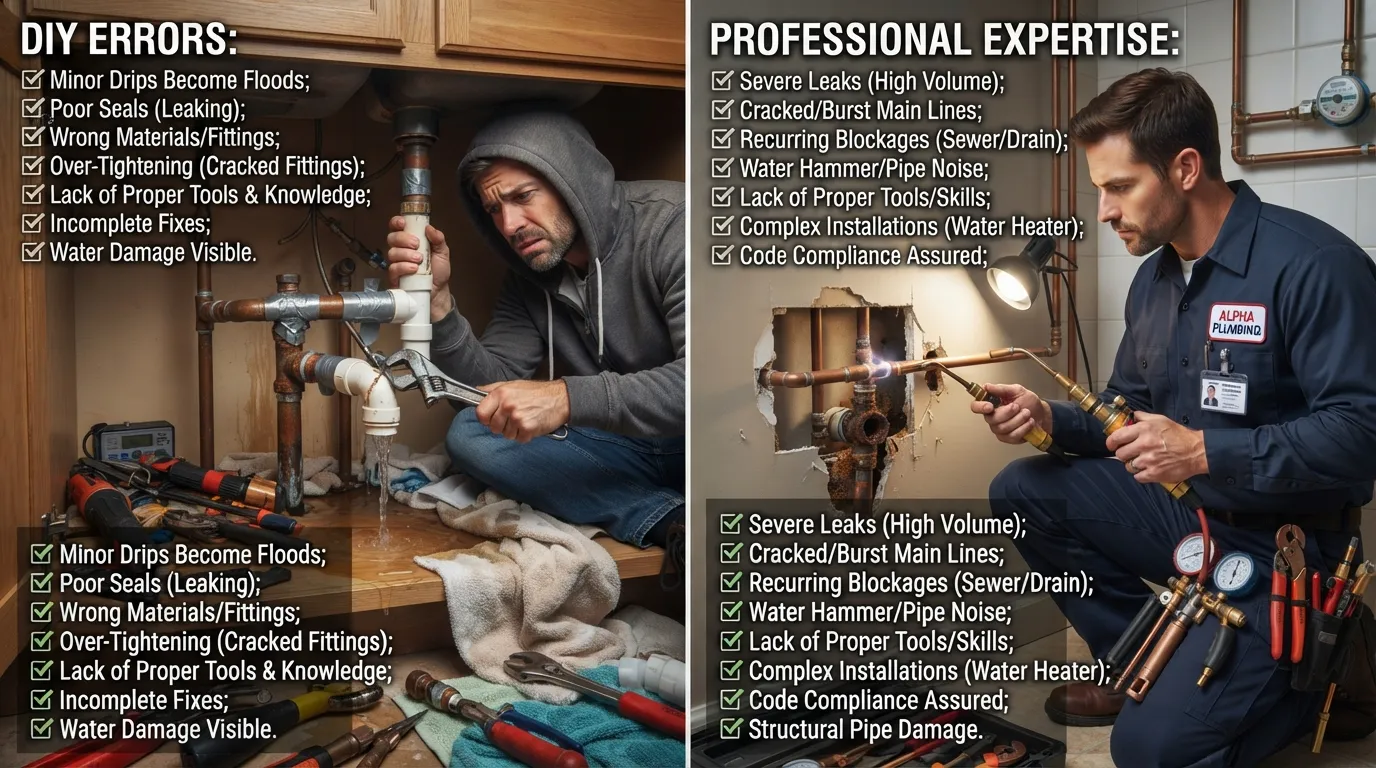 Even experienced DIYers occasionally run into unexpected roadblocks during plumbing repairs. Knowing what common pitfalls to avoid and recognizing your limits ensures your home stays safe and leak-free.
7 Common Mistakes When Removing Quick Connect Fittings
Avoiding these frequent procedural errors prevents damaged fittings, scored pipes, and frustrating water leaks.
- Forgetting to Shut Off Water: Failing to isolate the main valve results in immediate spraying and household flooding.
- Twisting the Tubing: Rotating pipes during extraction tears internal rubber O-rings and scratches sealing surfaces.
- Pressing Only One Side: Depressing the collet unevenly leaves half of the grab teeth locked tightly onto the pipe.
- Skipping Pressure Relief: Leaving trapped pressure in the line makes pulling the pipe nearly impossible and dangerous.
- Rushing the Extraction: Pulling the pipe before the collet is fully recessed gouges the tubing against the bite teeth.
- Reusing Damaged Fittings: Re-installing fittings with cracked bodies or worn-out O-rings guarantees subsequent water leaks.
- Neglecting Pipe Cleanup: Leaving burrs or scale on the pipe edge ruins the seal of any newly attached connector.
Signs You Should Call a Professional Plumber
While push-connect fittings are designed for straightforward DIY repairs, certain complex situations require licensed expertise.
- Concealed or In-Wall Leaks: If fittings behind closed drywall or under concrete slabs fail, professional detection and access equipment are required.
- Severely Damaged Piping: Pipes that are corroded, deeply scored, or structurally compromised need professional replacement.
- Persistent Joint Failure: If a fitting leaks repeatedly after proper installation, underlying water pressure issues or incorrect pipe sizing may be to blame.
- Main Water Line Shut-Off Issues: If your primary home isolation valve fails to close completely, a licensed plumber must shut off the municipal supply safely.
Frequently Asked Questions
Get quick, direct answers to the most common questions homeowners and DIYers ask about removing, troubleshooting, and reusing push-to-connect plumbing fittings.
How do you remove a quick connect fitting?
First, turn off the water supply and open a nearby faucet to relieve all pressure. Next, firmly push and hold the outer collet release ring flush against the main fitting body to retract the internal stainless steel grab teeth. Finally, pull the pipe straight back out without bending or twisting the tubing.
How to remove a quick connect without a tool?
You can remove standard push-connect fittings entirely by hand. Firmly pinch the colored outer collet ring between your thumb and index finger, push it evenly inward against the fitting body, and pull the pipe straight out. For tighter fittings, an adjustable crescent wrench can help depress the collar.
What is a good tool for removing push-to-connect fittings?
A dedicated plastic disconnect clip or metal removal tong that matches your specific pipe diameter is the best tool. These horseshoe-shaped clips snap around the pipe and apply uniform 360-degree pressure to the collet, releasing all internal bite teeth simultaneously without damaging the plastic collar.
How do you undo push-to-connect fittings?
Undoing push-to-connect fittings involves isolating the water line, relieving residual pressure, depressing the release collar fully, and pulling the tubing straight out. If the fitting is stuck due to mineral scale, applying a few drops of white vinegar or silicone spray will help loosen the mechanism.
How to remove push-fit plumbing connections?
To remove push-fit plumbing connections, ensure the system is completely depressurized first. Slide a matched disconnect tool or your fingers over the pipe, push the collet ring squarely into the fitting body to release the internal grab ring, and withdraw the pipe with a steady, straight pull.
What should I do if my quick connect fitting is stuck?
If a fitting is stuck, apply white vinegar or silicone spray to dissolve mineral scale around the collet. Use a full-circle disconnect tong to distribute even leverage. If the pipe still won’t budge, push the tubing slightly inward first to relieve tension off the bite teeth before pulling back.
How do I remove a Hep2O push-fit connector?
Removing a Hep2O connector requires utilizing the manufacturer’s specialized demounting ring or SmartSleeve tool designed for polybutylene and PEX systems. Snap the matching tool over the connector to push the internal gripping fingers open evenly, then gently slide the pipe straight out of the fitting body.
Can you reuse push-to-connect fittings?
Yes, most high-quality push-to-connect fittings can be reused multiple times if they are structurally sound. Before reinstallation, inspect the internal O-ring seal and grab teeth for wear, clean any scale buildup, and ensure the pipe end is free of deep scratches or burrs.
How reliable are SharkBite plumbing fittings?
SharkBite brass fittings are highly reliable when installed correctly according to manufacturer guidelines, offering durable performance for residential water supply lines. However, proper pipe deburring, correct insertion depth, and avoiding side-strain are crucial to preventing occasional O-ring leaks over time.
Do push-fit plumbing connections have an expected life span?
Yes, premium push-fit plumbing connections have an expected lifespan of 25 to 50 years under normal operating conditions. Their longevity closely matches traditional copper or PEX piping, provided they are protected from extreme pressure spikes, severe water hammer, and harsh chemical exposure.
Conclusion
Mastering the art of removing push-to-connect plumbing fittings transforms a frustrating maintenance chore into a quick, straightforward task. By prioritizing safety, using the correct tools, and following proper mechanical techniques, you can tackle plumbing repairs with complete confidence.
Key Takeaways
- Always Isolate the Line: Shut off the main water supply and drain downstream pressure before attempting any disassembly to prevent flooding.
- Depress the Collet Evenly: Apply balanced 360-degree pressure on the release ring using your fingers or a matched disconnect tool to retract the internal teeth.
- Pull Straight Out: Withdraw the tubing in a clean, linear motion without twisting or bending to protect the internal O-ring seal.
- Inspect Before Reusing: Always check the fitting’s internal components and the pipe end for scratches, burrs, or scale before reassembly.
Final Tip
Never rush a plumbing repair, especially when working in tight or awkward spaces. Taking an extra minute to clean mineral scale, lubricate stubborn collars, and verify your insertion depth with a marker will save you hours of troubleshooting and guarantee a 100 percent leak-free result.

Oscar Vance | Master Plumber & Drainage Expert
Meet Oscar Vance, a licensed master plumber sharing practical solutions on residential repairs, preventive maintenance, and thoughtful home upkeep.

