How Much Does It Cost to Replace Galvanized Plumbing?
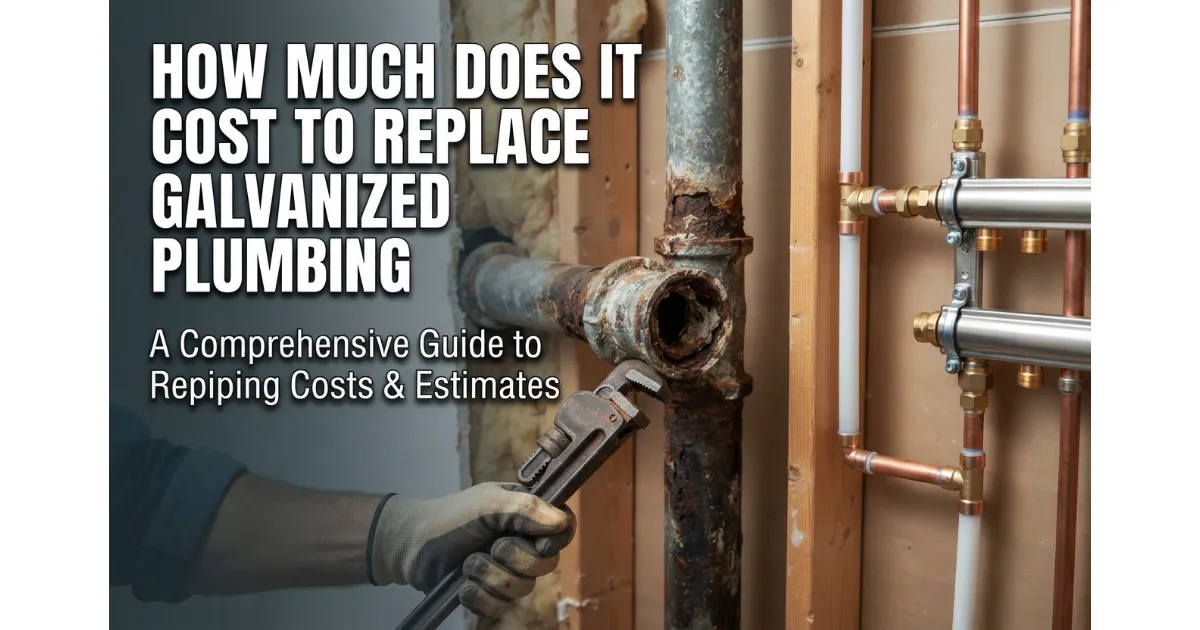 Replacing galvanized plumbing in a whole-house repipe typically costs between $4,000 and $15,000, with a national average of around $7,500. Total project investment varies significantly based on your home size, chosen pipe material (such as PEX, CPVC, or copper), and structural accessibility.
Average Cost by Home Size
Whole-house galvanized pipe replacement costs scale directly with square footage and the total number of plumbing fixtures. The zero-scrollbar mobile-optimized breakdown below outlines estimated expenses by property footprint:
Why the Cost Range Is So Wide
Project estimates fluctuate dramatically because replacing aging galvanized steel requires extensive labor to cut through structural barriers. Material selection also heavily steers the final invoice:
- Pipe Material Choice: Flexible PEX and CPVC plastics are budget-friendly ($0.50 to $4.00 per linear foot), whereas rigid copper commands a premium due to raw material expenses and soldering time.
- Accessibility Challenges: Hidden lines routing behind finished drywall, multi-story framing, or encased concrete slabs require costly cutting, trenching, and subsequent drywall repair.
- Permits and Code Upgrades: Local municipal inspection fees, mandatory seismic strapping, and bringing outdated supply lines up to current plumbing codes add nominal but necessary overhead.
Cost to Replace Galvanized Pipes by Home Size
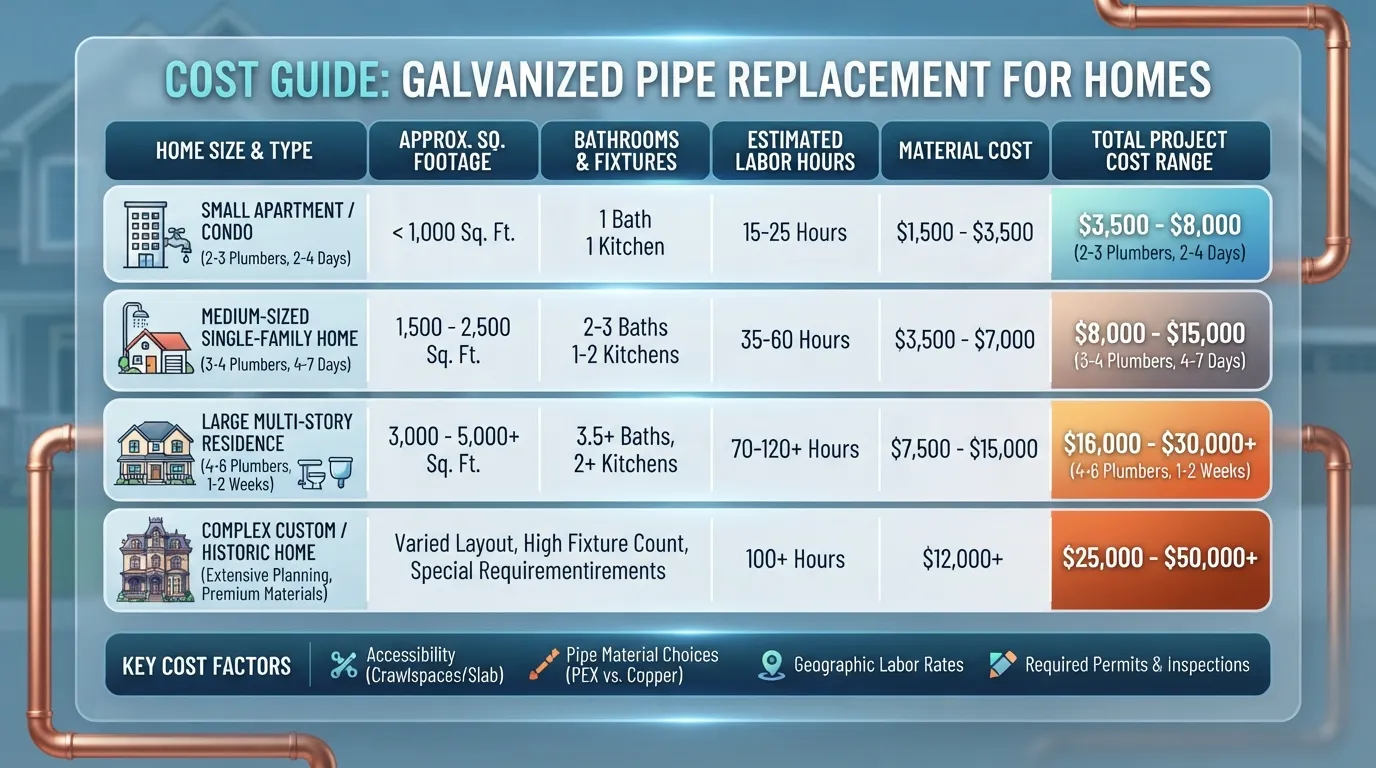 Determining your exact whole-house repipe investment depends heavily on your property footprint, fixture counts, and architectural layout. Breaking down costs by home size helps match real-world estimates to your specific scenario while clarifying why conflicting pricing numbers appear across different online sources.
Small Home 1-2 Bathrooms 850 to 1,200 sq. ft.
Replacing galvanized plumbing in a compact home, such as an 850 sq ft cottage or small bungalow, typically ranges from $3,000 to $6,000. These projects usually involve a single bathroom, a kitchen, and a laundry hookup, keeping total pipe runs and labor hours relatively low.
- Typical Fixture Count: 6 to 9 plumbing endpoints.
- Average Duration: 1 to 2 working days for an experienced crew.
Mid-Sized Home 2-3 Bathrooms 1,500 to 2,000 sq. ft.
For a standard suburban home, a full galvanized pipe replacement generally costs between $6,000 and $10,000. These properties feature expanded kitchen configurations, multiple bathrooms, and longer supply line branches running through crawlspaces or attics.
- Typical Fixture Count: 10 to 15 plumbing endpoints.
- Average Duration: 2 to 4 working days.
Large or Two-Story Home 3+ Bathrooms 2,500+ sq. ft.
Extensive multi-level homes or sprawling properties with three or more bathrooms range from $10,000 to $18,000+. Multi-story layouts require vertical risers, additional structural core penetrations, and complex balancing to maintain stable water pressure across levels.
- Typical Fixture Count: 16 to 25+ plumbing endpoints.
- Average Duration: 4 to 7 working days.
Cost per Square Foot and per Fixture
Calculating project estimates using unit metrics provides a reliable sanity check against contractor quotes before you sign an agreement. Industry standards break down as follows:
- Cost per Square Foot: Expect to pay between $4.50 and $9.00 per square foot for complete galvanized pipe removal and PEX or copper installation.
- Cost per Fixture: Plumbers frequently price work between $500 and $1,000 per fixture (including sinks, toilets, showers, and hose bibs).
Why Different Websites Quote Different Prices
Online cost guides often display conflicting ranges because individual contractor bids include vastly different project scopes. Understanding these variables prevents unexpected budget surprises:
- Inclusion of Drywall Patch-Back: Some baseline quotes cover only pipe extraction and water line installation, leaving homeowners to hire separate drywallers and painters. Comprehensive quotes include full wall repair and texturing.
- Regional Labor Rates: Plumbers in high-cost-of-living metropolitan areas command significantly higher hourly labor rates than those operating in rural regions.
- Material Grade: Flexible cross-linked polyethylene (PEX) keeps material costs manageable, whereas rigid copper or specialized manifold systems drive up upfront material totals.
PEX vs CPVC vs Copper: Which Replacement Pipe Costs What?
Choosing the right replacement material for aging galvanized plumbing involves balancing upfront costs, long-term durability, and local building code requirements. While competitors often focus solely on lifespan, evaluating the specific pros, cons, and performance limitations of each material ensures a smarter investment for your home.
Comparison Table: Cost Lifespan and Best Use
The zero-scrollbar mobile-optimized table below summarizes the key metrics for the three primary replacement piping materials:
PEX: Cost Pros and Cons
PEX (cross-linked polyethylene) has become the gold standard for modern whole-house repiping due to its exceptional cost-efficiency and ease of installation.
- Cost: $0.40 to $2.00 per linear foot for materials, lowering total labor overhead significantly.
- Pros: Highly flexible (requires fewer fittings), immune to corrosion and mineral scale, quieter water flow, and superior freeze tolerance. Available in PEX-A (most flexible), PEX-B (rigid and durable), and PEX-C.
- Cons: Can be degraded by prolonged exposure to direct UV sunlight and certain chemicals; requires specialized fittings and expansion/crimping tools.
CPVC: Cost Pros and Cons
Chlorinated polyvinyl chloride (CPVC) is a rigid, thermally resistant plastic designed specifically to handle higher temperatures than standard PVC.
- Cost: $0.50 to $3.00 per linear foot.
- Pros: Safe for potable hot and water supply lines, completely immune to rust and internal corrosion, and features straightforward solvent-cement assembly.
- Cons: Becomes brittle over extended decades of high heat exposure and can crack under physical impact or stress if improperly supported.
Copper: Cost Pros and Cons
Copper remains a time-tested, premium plumbing material favored by traditional builders and rigid structural guidelines.
- Cost: $2.00 to $12.00+ per linear foot for materials alone, driving higher overall labor costs due to soldering requirements.
- Pros: Exceptional structural longevity (50–70+ years), natural bacterial resistance, high temperature/pressure tolerance, and 100% recyclability which boosts home resale value. Type L is the standard choice for residential indoor supply lines.
- Cons: Highly sensitive to price volatility in the metals market and vulnerable to pinhole leaks if exposed to highly acidic or corrosive water chemistry.
Can You Replace Galvanized Pipe with PVC?
Standard white PVC (polyvinyl chloride) can never be used to replace indoor galvanized hot water supply lines because it warps, softens, and fails at temperatures above 140°F. However, standard PVC or Schedule 40 PVC is widely utilized and code-approved for replacing galvanized drain, waste, and vent (DWV) lines or underground main water service entries. Always verify local code requirements before selecting materials.
Which Material Should You Choose?
Select PEX if you want the best balance of fast installation, budget-friendly pricing, and freeze resistance. Opt for copper if you are making a lifetime investment and prefer rigid, highly fire-resistant metal lines. Choose CPVC if you prefer a rigid plastic system over flexible tubing while maintaining a lower budget than copper.
Galvanized drain pipe to PVC pipe replacement guid
How Plumbers Calculate Your Repipe Estimate
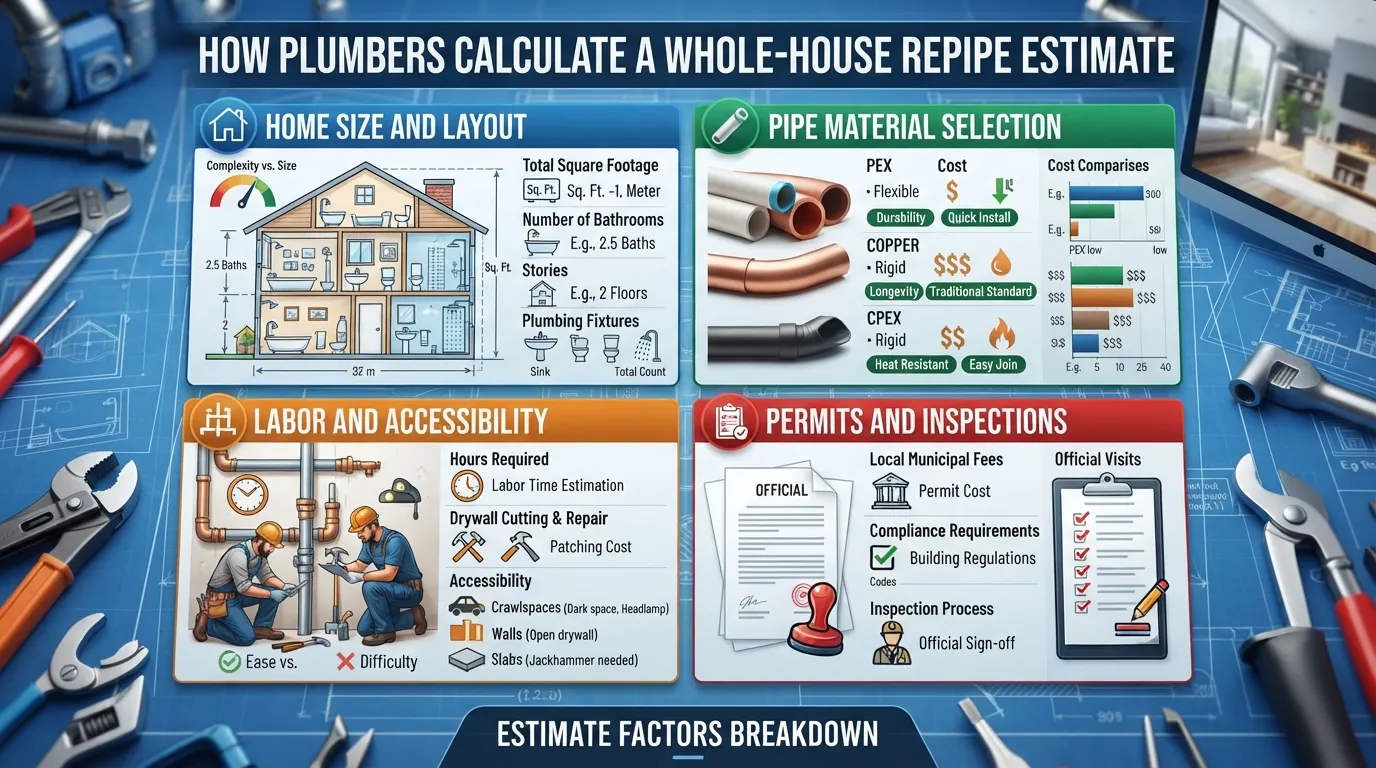 Understanding how professional plumbers build a whole-house repipe estimate helps you evaluate bids, spot hidden charges, and verify fair pricing. Contractors use structured formulas based on labor allocation, material volume, and architectural layout complexity.
Labor vs. Materials: Where the Money Goes
Unlike simple plumbing repairs where parts dominate the invoice, a whole-house repipe is heavily labor-intensive. Professional labor typically accounts for 60% to 70% of the total project investment, while raw pipes and fittings make up the remaining 30% to 40%.
- High Labor Proportion: Technicians must carefully cut through drywall, extract heavy steel lines, route flexible or rigid replacements through tight crawlspaces, and pressure-test every single joint.
- Material Efficiency: While materials like PEX are inexpensive, specialized fittings, manifolds, and shut-off valves add up quickly across an entire residence.
Hourly Rates and Crew Time
Licensed plumbing professionals typically charge between $75 and $150 per hour per technician, depending on regional cost of living and local demand. Large whole-house projects usually require a two-to-three-person crew working over several days, meaning direct labor hours easily total 40 to 80 combined hours.
- Crew Structure: A lead plumber oversees system design and critical tie-ins, while assistant technicians handle destructive extraction and physical pipe runs.
- Time Multipliers: Multi-story buildings or homes with restricted attic and crawlspace access require extra labor hours, directly increasing the total labor quote.
Per Foot Per Fixture and Per Square Foot
Contractors usually rely on one of three standardized pricing models when walking through your home to draft a formal bid:
- Per Linear Foot: Calculating total footage of hot and cold water lines required, averaging $3 to $8 per foot installed (including material and labor).
- Per Fixture: Pricing each individual connection point (sinks, showers, toilets, washing machine hookups) at $500 to $1,000 per fixture endpoint.
- Per Square Foot: Applying a flat baseline rate of $4.50 to $9.00 per square foot of conditioned home area.
Estimate Example: Sample 1,500 Sq. Ft. Home
Running a quick DIY calculation using standard industry metrics helps establish a realistic baseline before calling a contractor:
- Property Profile: A 1,500 sq. ft. home featuring 2 bathrooms, a kitchen, and a laundry room (roughly 12 total fixtures).
- Fixture Calculation: 12 fixtures multiplied by an average rate of $600 each equals $7,200.
- Estimated Total: Expect a final professional bid ranging from $6,500 to $9,500, inclusive of standard PEX materials, labor, and basic wall patching.
What Makes Replacement Cost More or Less?
 Two homes of the exact same square footage can receive wildly different whole-house repipe quotes. Final pricing is driven primarily by structural accessibility, architectural layout, and local labor markets rather than square footage alone.
Pipe Access: Attic Crawl Space and Basement
The physical location of your existing supply lines dictates how easily technicians can remove old galvanized steel and install new piping. Open architecture significantly lowers labor hours:
- Basements and Crawl Spaces: Homes with open basements or accessible crawl spaces allow plumbers to run new lines quickly with minimal cutting into finished living areas.
- Attic Runs: Running overhead supplies through the attic is efficient, but requires proper insulation protection to prevent freezing during winter months.
- Concealed Cavities: Homes with zero crawl space or attic access force technicians to open walls and ceilings extensively, increasing labor and patching expenses.
Replacing Galvanized Pipes in a Slab Foundation Home
Slab-foundation homes present unique logistical challenges because original water supply lines are often embedded directly beneath or within the concrete floor. Breaking through concrete is costly, so plumbers typically use alternative strategies:
- Overhead Re-routing: Plumbers abandon the underground lines entirely and route new PEX lines up through the walls into the attic or ceiling space, dropping down to fixtures as needed.
- Trenching or Jackhammering: If a slab leak or main line entry point requires direct under-slab access, localized concrete breaking and patching will add $1,000 to $3,000+ to the project total.
Number of Stories and Wall Openings
Multi-story layouts require vertical riser pipes that must pass through multiple floors, firebreaks, and load-bearing headers. Each additional story increases labor complexity, cutting requirements, and wall restoration needs.
Your Region and Local Labor Rates
Geographic location is a primary driver of overall contractor pricing. Plumbers in high-cost-of-living urban metropolitan areas charge significantly higher hourly labor rates compared to contractors operating in rural markets.
Home Age and Existing Pipe Condition
The overall degradation level of your existing plumbing impacts total labor time. Severely corroded galvanized pipes that snap easily during extraction or are embedded in tight, aging framing require painstaking manual removal.
Permits and Local Code Requirements
Most municipalities legally require a plumbing permit and subsequent inspection for a whole-house repipe to ensure compliance with the International Plumbing Code (IPC) or Uniform Plumbing Code (UPC). Permit fees typically range from $150 to $500, which is usually factored into professional contractor bids.
Hidden Costs Most Quotes Don’t Mention
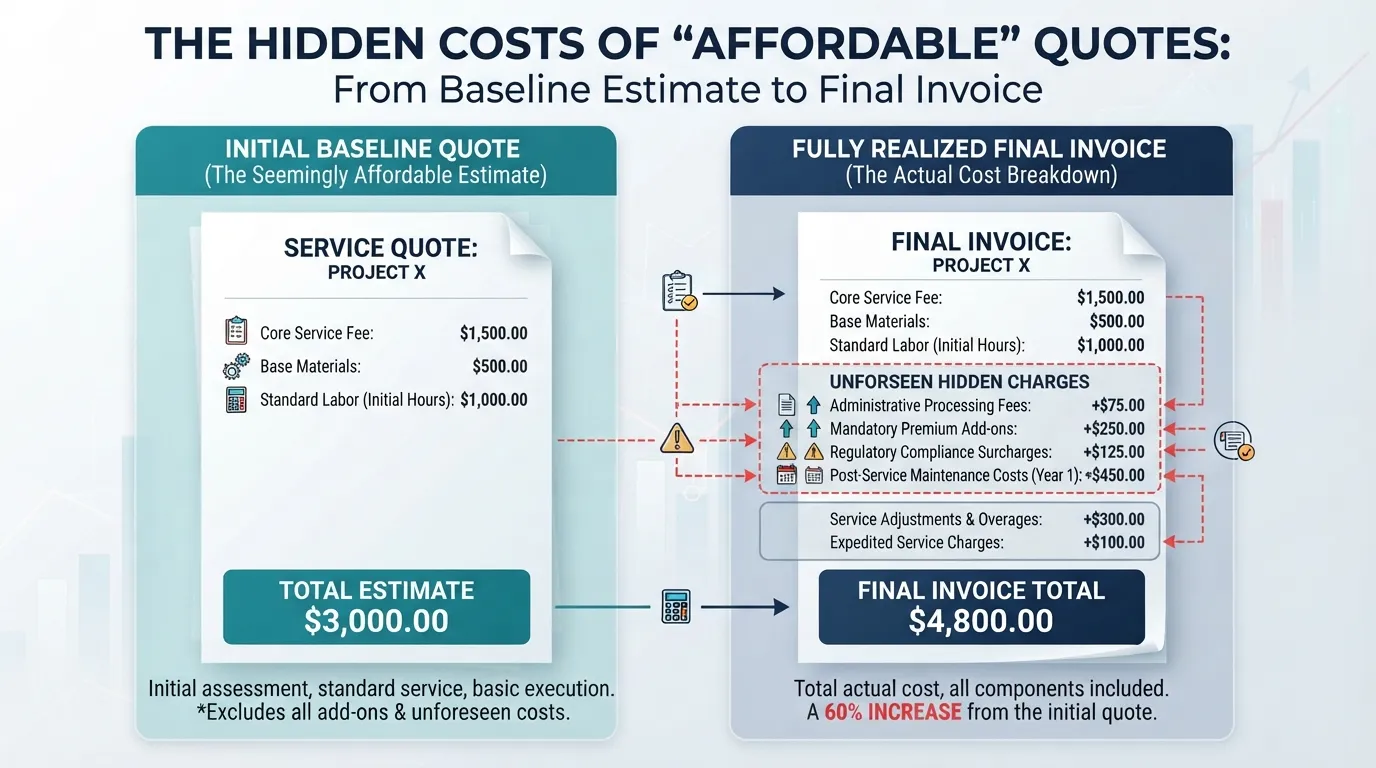 Many homeowners experience sticker shock when their final plumbing invoice exceeds the initial phone estimate. Unscrupulous or baseline bids often leave out critical incidental services, making it essential to identify these potential expenses before signing a contract.
Drywall Cutting Patching, and Paint
To pull out rigid steel lines and route new plumbing through walls, contractors must cut access holes in drywall. Unless your quote explicitly includes a “turnkey patch-back” guarantee, you will need to hire a separate drywaller and painter to patch, texture, and paint every cut.
- Spot vs. Full Repair: Basic plumbing quotes cover only rough pipe installation, leaving behind jagged holes.
- Finishing Expenses: Professional drywall patching and color-matching paint can add $500 to $2,000+ depending on the number of openings required.
Permits and Inspections
A legitimate whole-house repipe requires municipal permits and a final building inspection to protect your home’s resale value. While some contractors bundle permit costs into their flat-rate bids, others itemize these fees separately or leave them for the homeowner to secure.
Water Heater Reconnection and New Shutoff Valves
Connecting modern PEX or copper lines to an existing water heater often requires transition unions, dielectric fittings, or thermal expansion tanks to comply with modern safety codes. Additionally, replacing old, seized angle stops and main shut-off valves adds extra material and labor costs.
Fixture and Supply-Line Replacement
Old galvanized connectors under sinks and behind toilets are often too corroded to reuse safely. Upgrading toilet supply lines, faucet connectors, and shower cartridges during the repipe ensures system integrity but introduces minor component charges.
Mold Water Damage or Abatement Found Behind Walls
Opening up walls in older homes frequently reveals hidden slow leaks, wood rot, or mold colonies nurtured by decades of pipe sweating. Remediation and structural reinforcement must be addressed immediately, halting plumbing work until treated.
Hidden Costs Checklist
Review this quick checklist before approving any plumbing bid to confirm what is covered in your contract:
- Drywall Patch-Back: Is mudding, taping, and texturing included, or just patching?
- Permits & Fees: Are local municipal inspection and permit fees covered?
- Valve Replacements: Are new main shutoff valves and angle stops factored in?
- Water Heater Hookups: Are transition fittings or expansion tanks included?
- Cleanup & Debris Removal: Will the crew haul away old steel pipes and construction debris?
Don’t Forget the Water Main: Cost to Replace the Service Line
While replacing indoor galvanized plumbing eliminates interior pressure drops and discolored water, your home remains vulnerable if the underground supply line connecting your house to the municipal water main is still made of aging galvanized steel. Factoring in the service line ensures complete protection against restricted water flow.
What Is the Water Main Service Line and Why It May Be Galvanized Too
The water main—or service line—is the underground pipe that carries potable water from the city water meter or street main directly into your home’s main shutoff valve. If your home was built between the 1930s and 1960s, this exterior line is frequently made of the same corrosion-prone galvanized steel as your indoor pipes, meaning it is likely narrowed by heavy mineral buildup and internal rust.
Trenching vs. Trenchless: Cost Difference
Replacing an underground water service line typically costs between $1,500 and $5,000, heavily influenced by the replacement method utilized:
- Traditional Open-Cut Trenching: Excavating a trench from the property line to the foundation using a backhoe or manual labor. While material costs are low, landscape restoration (fixing lawns, driveways, or concrete walkways) can drive total expenses up.
- Trenchless Pipe Bursting: Pulling a new high-density polyethylene (HDPE) or copper line through the path of the old pipe while simultaneously breaking it apart underground. This minimizes yard destruction but carries slightly higher specialized equipment fees.
Who Pays for What
Property ownership boundaries dictate financial responsibility when replacing underground service lines, making it vital to check local utility policies before starting work:
- Homeowner Responsibility: In most municipalities, the homeowner is entirely responsible for the maintenance, repair, and replacement of the service line from the property line or water meter all the way into the house.
- Utility Responsibility: The city or water district typically maintains the street main and the connection up to the municipal water meter. Some cities offer lead and galvanized service line replacement programs, so always contact your local water authority to inquire about potential rebates or public-side replacement initiatives.
What Homeowners Actually Pay
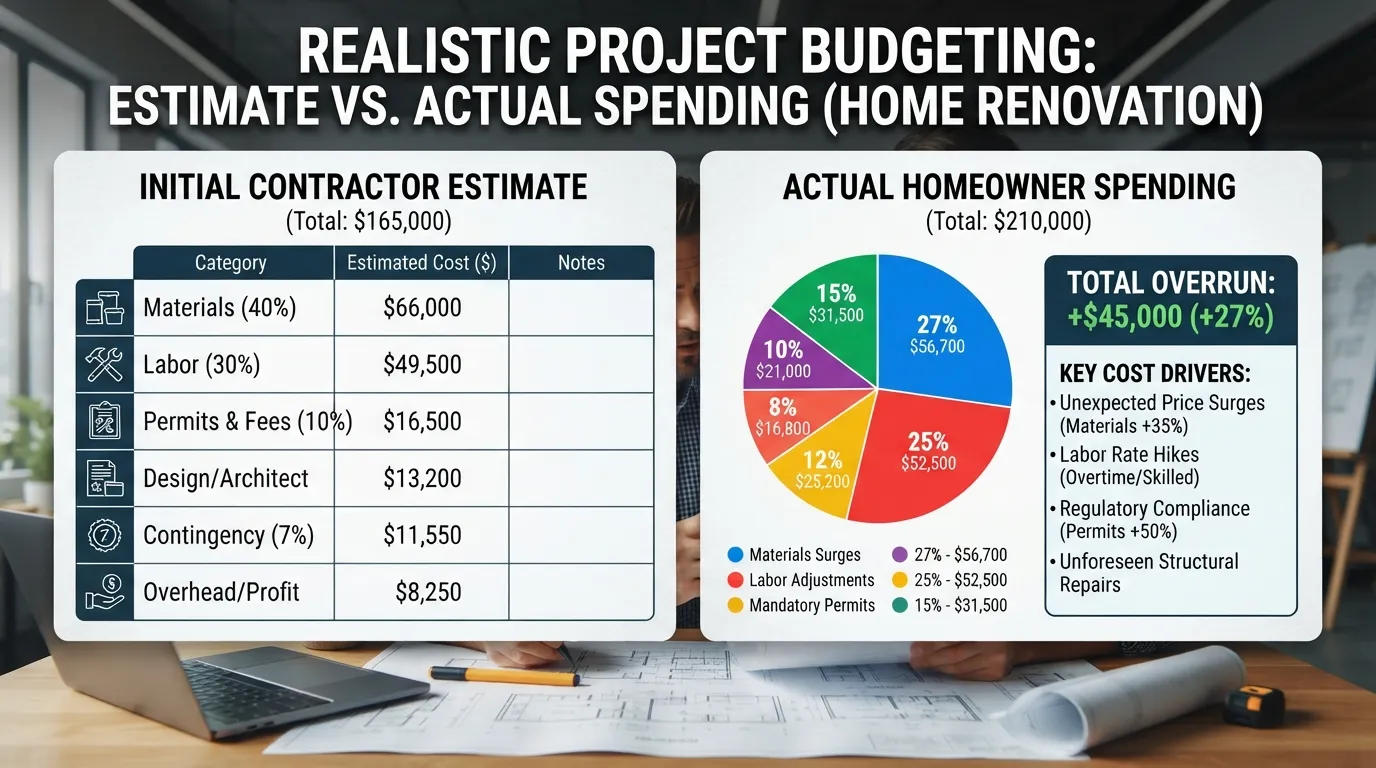 Examining anonymized contractor estimates and verified homeowner billing histories demonstrates how varying square footage, regional labor rates, and structural scopes dictate actual spending. These real-world scenarios highlight how project complexity alters the final invoice.
Example 1: Single-Story Ranch Home 1,200 Sq. Ft.
A homeowner in the Midwest with an easily accessible crawl space replaced an aging galvanized supply system with flexible PEX tubing.
- Home Profile & Scope: 3 bedrooms, 1.5 bathrooms, open crawl space foundation, zero wall cutting required in living areas.
- Material Used: PEX-B with manifold distribution.
- Final Quote & Breakdown: $4,800 total (approx. $1,400 for materials and fittings, $3,400 for 2-person crew labor over 2 days). Municipal permit and basic water heater connection included; drywall patch-back was excluded.
Example 2: Two-Story Suburban Home 2,200 Sq. Ft.
A family in a mid-cost metropolitan region upgraded a two-story home featuring complex vertical risers and finished drywall throughout.
- Home Profile & Scope: 4 bedrooms, 2.5 bathrooms, concrete slab foundation with overhead attic runs, multiple interior wall penetrations.
- Material Used: Type L Copper for main risers and PEX for branch lines.
- Final Quote & Breakdown: $11,500 total (approx. $4,000 for materials, $7,500 for a 4-day multi-technician installation). Includes permit fees, water heater thermal expansion tank upgrade, and basic drywall patch-and-repair services.
Example 3: Historic Home with Scope Creep 1,800 Sq. Ft.
A homeowner undertook a galvanized repipe on a 1940s property, running into unexpected structural obstacles during construction.
- Home Profile & Scope: 3 bedrooms, 2 bathrooms, lath-and-plaster walls, severely corroded steel lines stuck in tight framing.
- Material Used: PEX-A with expansion fittings.
- Final Quote & Breakdown: Initial estimate was $7,200, but final billing reached $9,400 due to a $2,200 change order. The increase covered specialized wall cutting for brittle plaster, rusted main shutoff valve replacement, and remediation of minor localized wood rot discovered behind the kitchen sink.
What These Examples Teach Us
Analyzing actual project disclosures reveals crucial lessons for managing your own repipe budget and avoiding financial surprises:
- Scope Variations Drive Cost: Partial repipes or homes with open crawl spaces drastically reduce labor hours, while finished multi-story walls or fragile historic materials escalate labor bills.
- Change Orders Happen: Older homes frequently harbor hidden complications like corroded valves or structural damage, making a 10% to 15% financial contingency fund essential.
- Clear Contracts Matter: Verifying whether drywall patching, municipal permits, and water heater upgrades are explicitly itemized prevents unexpected out-of-pocket expenses upon project completion.
How Do You Know When Galvanized Pipes Need to Be Replaced?
Recognizing the early warning signs of galvanized pipe failure can prevent catastrophic indoor flooding, expensive water damage, and severe structural degradation. Because these systems corrode invisibly from the inside out, identifying diagnostic indicators helps homeowners time their repipe project before total failure occurs.
7 Warning Signs
Watch closely for these critical red flags indicating that your galvanized plumbing has reached the end of its structural viability:
- Decreased Water Pressure: A noticeable drop in pressure across showers and faucets usually points to heavy mineral and rust scaling choking the pipe interior.
- Rusty or Discolored Water: Brown, yellow, or reddish tap water—especially first thing in the morning or after a vacation—signals active internal corrosion.
- Frequent Leaks and Pinholes: Recurring pinhole leaks or joint failures mean the steel wall has thinned past its structural limit.
- Discolored Plumbing Fixtures: Rust stains appearing consistently around bathtub drains, sinks, or toilet bowls indicate iron particulate shedding from supply lines.
- Metallic Taste or Odor: Drinking water that carries a distinct metallic taste or unpleasant odor is often loaded with heavy zinc and iron buildup.
- Visible Exterior Corrosion: White, chalky buildup, flaking, or bubbly rust patches visible on exposed pipes in the basement or crawl space.
- Advanced System Age: If your home was constructed more than 40 to 50 years ago and has never been repiped, the plumbing system is living on borrowed time.
How Long Do Galvanized Pipes Last?
Galvanized steel pipes typically have an expected functional lifespan of 40 to 50 years. While heavy-duty industrial grades can sometimes push past 60 years under ideal water chemistry, the vast majority of residential systems installed prior to the 1980s have exceeded their design life and suffer from advanced internal constriction.
When Did Plumbers Stop Using Galvanized Pipe?
Galvanized steel served as the standard default residential supply pipe from roughly 1900 through the late 1960s, when copper and early plastics began capturing market share. While its usage dropped significantly during the 1970s as copper became preferred, building codes permitted galvanized piping in certain applications or repairs well into the late 1980s and 1990s. Consequently, most homes featuring widespread galvanized plumbing were built before 1970.
Downsides of Galvanized Plumbing
The core structural flaw of galvanized plumbing lies in its manufacturing design: steel pipes are dipped in a protective zinc coating to prevent rust. Over decades, that zinc layer wears away completely, exposing raw steel to constant water contact. This triggers aggressive interior oxidation, creating thick layers of rust and mineral scale that narrow the internal diameter, choke water flow, and weaken pipe walls until failure occurs.
How to Check Your Own Pipes
You can perform a quick DIY assessment to determine if your home features hidden galvanized steel plumbing:
- The Magnet Test: Hold a strong refrigerator magnet against an exposed supply line near your water heater or main shutoff. If the magnet sticks firmly, the pipe is steel or iron (likely galvanized), whereas copper and PEX are non-magnetic.
- The Scratch Test: Gently scratch the surface of an unpainted pipe with a flathead screwdriver or coin. If a dull silver-gray or copper color appears underneath the outer layer, you are looking at copper or brass; if it reveals a bright, shiny metallic silver finish, it is likely galvanized steel.
- Inspect Threaded Joints: Look closely at pipe connections. Galvanized systems are assembled using threaded fittings and elbows, whereas copper is soldered and PEX uses crimp rings or expansion fittings.
Galvanized Pipes and Lead: Is There a Health Risk?
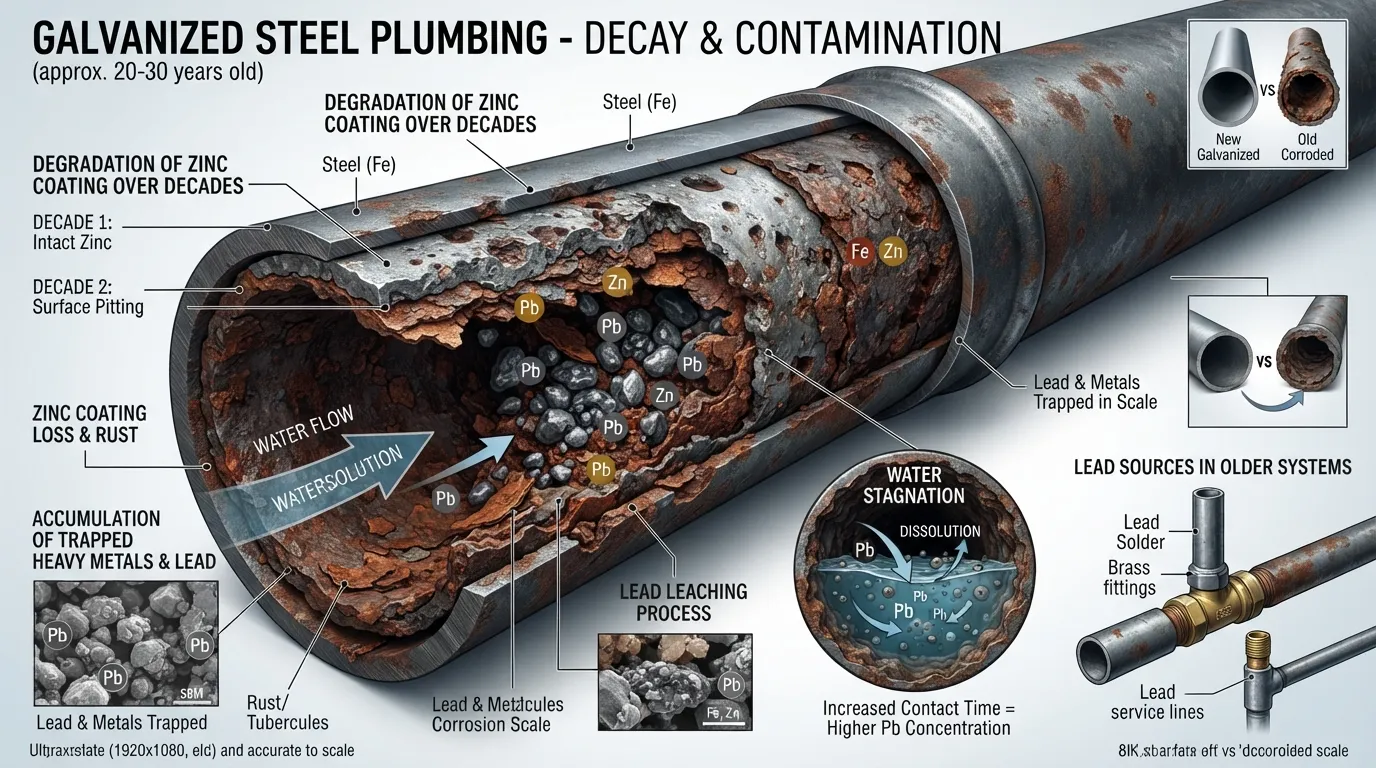 Beyond plumbing leaks and restricted water flow, aging galvanized plumbing systems can present potential health and safety concerns. Understanding how these materials interact with water chemistry helps you assess your household’s safety and determine when immediate plumbing replacement is necessary.
Can Galvanized Pipes Release Lead?
Galvanized steel pipes do not contain lead in their primary manufacturing structure; however, according to the EPA’s guidance on lead in drinking water, lead particles and heavy metals can accumulate inside galvanized lines over decades. This occurs because historical lead service lines or lead-containing brass fittings upstream frequently shed particles that become trapped within the porous zinc and rust scale of downstream galvanized pipes, creating a persistent secondary source of contamination.
Galvanized Requiring Replacement GRR: Is Your Service Line Affected?
Regulatory frameworks and water utilities categorize certain configurations as “Galvanized Requiring Replacement” (GRR). A galvanized service line or plumbing branch falls into the GRR classification if it is currently—or was historically—connected downstream from a lead service line. In these specific scenarios, water flowing through the system can absorb accumulated lead, making full material replacement an urgent public health priority.
How to Test Your Water
If you suspect your home has aging galvanized plumbing or a legacy service line, verify your water safety through systematic testing:
- Certified Laboratory Testing: Order an independent water testing kit from a state-certified laboratory to accurately measure lead, copper, and iron concentrations in parts per billion (ppb).
- Local Water Authority Inquiry: Contact your municipal water utility department to check public records regarding historical service line materials in your neighborhood or to request a complimentary utility-side water test.
Short-Term Precautions While Planning Replacement
If your water testing indicates elevated lead levels or you are currently scheduling a whole-house repipe, implement these temporary safety measures:
- Flush Your Pipes: Let your cold water tap run for 1 to 2 minutes each morning or after periods of prolonged non-use to flush out stagnant water that has sat in contact with interior pipe walls. Always use cold water for drinking and cooking.
- Install Certified Filtration: Utilize a dedicated water filter or under-sink reverse osmosis system certified by NSF International (such as NSF Standard 53 or 58) specifically rated for lead reduction.
Is It Worth Replacing? Repair vs. Partial Repipe vs.
Deciding how to tackle failing plumbing can be overwhelming, especially when weighing upfront contractor quotes against potential future water damage. Evaluating your options—from targeted spot repairs to full-scale repiping and modern trenchless lining—ensures you choose the most cost-effective path for your home.
When Spot Repairs Make Sense
A spot repair involves cutting out a single leaking or severely rusted section of pipe and splicing in a new segment of PEX or copper using compression fittings. This approach makes sense for isolated damage caused by an accidental impact or a single weak joint in an otherwise healthy system. However, spot repairs rarely work as a long-term solution for aging galvanized systems because once one section fails due to internal corrosion, neighboring pipes are typically right behind it.
Replacing Only the Worst Sections
A partial repipe targets high-use or heavily degraded zones, such as replacing galvanized lines running to a newly remodeled bathroom or updating visible basement runs. While less expensive upfront than a whole-house repipe, leaving older legacy pipes intact means you remain vulnerable to future leaks, restricted water pressure, and recurring plumbing emergencies in the unreplaced branches.
Epoxy Pipe Lining: Pros Cons and Typical Cost
In-situ epoxy lining is a trenchless alternative where existing galvanized pipes are blown out, cleaned with compressed air, and coated on the inside with a food-grade epoxy barrier.
- Cost: Typically ranges from $4,000 to $10,000+, depending on home size and pipe layout.
- Pros: Avoids major drywall destruction, preserves historic wall finishes, seals pinhole leaks, and stops rust from leaching into your drinking water.
- Cons: Not suitable for severely collapsed, heavily scaled, or structurally compromised lines; requires specialized contractors; and can be nearly as expensive as traditional repiping without providing brand-new structural pipe material.
Full Replacement: When It’s the Only Real Fix
Complete whole-house replacement involves tearing out all accessible galvanized lines and installing new PEX or copper throughout. While disruptive and costly upfront, full replacement is the only permanent solution that completely eliminates internal corrosion, restores maximum water pressure, eliminates lead and rust hazards, and maximizes long-term home resale value.
Decision Checklist
Answer these questions to determine which replacement strategy fits your situation:
- Are leaks frequent? If you have experienced more than one plumbing leak in the past year, spot repairs are no longer viable.
- How is your water pressure? Widespread pressure loss indicates advanced internal scale accumulation requiring full replacement.
- Are you planning a remodel? Opening walls for a kitchen or bathroom update is the ideal time to complete a full or partial repipe.
- What is your budget horizon? If you plan on staying in your home long-term, investing in a full repipe prevents escalating repair bills.
- Are you selling soon? Buyers and home inspectors frequently flag active galvanized plumbing, making proactive replacement a smart closing strategy.
Buying a House with Galvanized Plumbing Insurance and Resale Value
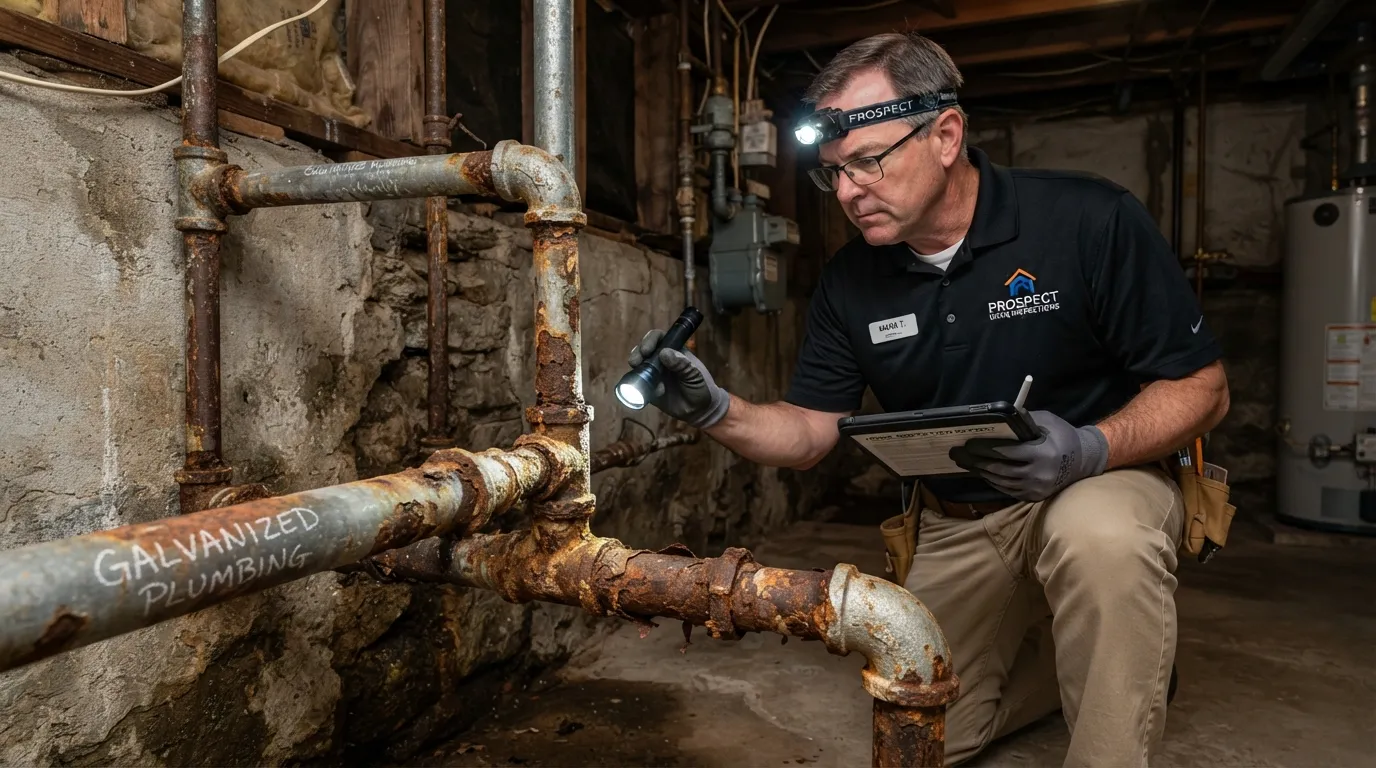 Discovering galvanized plumbing during a real estate transaction can cause significant anxiety for both buyers and sellers. Navigating insurance requirements, negotiating repair credits, and understanding long-term resale impacts ensures you make informed financial decisions when buying or selling an older home.
Should You Buy a House with Galvanized Pipes?
Buying a home with galvanized plumbing is entirely manageable, provided you factor future replacement costs into your purchase offer. While older pipes do not necessarily mean you should walk away from a great property, you must anticipate that the system will eventually require a whole-house repipe to maintain reliable water pressure and prevent water damage.
How to Use the Inspection Report to Negotiate
A professional home inspection report detailing aging galvanized pipes is a powerful tool during real estate negotiations. Instead of asking the seller to complete plumbing repairs yourself—which can lead to rushed or substandard work—utilize the inspection findings to secure financial concessions:
- Request Financial Credits: Ask for seller closing cost credits or a direct purchase price reduction equivalent to professional repipe estimates.
- Consult Licensed Plumbers: Bring in a certified plumbing contractor during your inspection contingency period to obtain an exact, formal bid for the required replacement.
Does Homeowners Insurance Cover Galvanized Pipe Replacement?
Standard homeowners insurance policies almost never cover the routine replacement of aging or corroded galvanized pipes. Insurance exists to protect against sudden, accidental water damage rather than normal wear, tear, and long-term material degradation. However, if a corroded pipe bursts unexpectedly and causes sudden structural flooding, the resulting water damage to floors and drywall may be covered, subject to your policy deductible. Always consult your insurance agent to verify exact policy exclusions.
Can Galvanized Pipes Affect Getting or Keeping Insurance?
Insurance companies are increasingly strict regarding older, high-risk plumbing systems. If a home inspection reveals severely deteriorated galvanized pipes with a history of leaks, some insurance carriers may deny coverage, charge higher premiums, or require proof of a professional repipe before issuing a standard policy.
Does Replacement Add Resale Value?
Upgrading from galvanized plumbing to modern PEX or copper significantly boosts your home’s market appeal and resale value. Real estate agents frequently highlight a brand-new whole-house repipe as a major selling point, giving prospective buyers complete peace of mind and eliminating a major negotiation hurdle during future home inspections.
How Long Does a Repipe Take and What Is It Like to Live Through?
Undergoing a whole-house repipe can sound disruptive, but knowing what to expect during the construction process helps minimize household stress. Understanding daily timelines, water availability, and contractor procedures prepares you for a smooth transition from rusted steel to modern plumbing.
Typical Timeline: 1 to 5 Days
The total duration of a whole-house repipe depends directly on your home’s square footage, architectural layout, and the number of stories:
- Small Homes (1-2 Bathrooms): Usually completed in 1 to 2 consecutive working days by an efficient crew.
- Mid-to-Large Homes (3+ Bathrooms & Multi-Story): Typically take 3 to 5 days, especially if complex wall cutting or multi-level risers are required.
Water Shutoff: What to Expect Day by Day
During a repipe, your home’s main water supply will be temporarily turned off during active working hours so plumbers can cut, connect, and pressure-test new lines. Contractors almost always restore temporary water access at the end of each workday, ensuring you have running water overnight, though specific fixtures may be isolated until final connections are completed.
How the Plumber Works
A professional whole-house repipe follows a structured, multi-phase installation process from initial system shutdown to final wall finishing:
- System Isolation and Draining: Shutting off the main water valve and draining remaining water from existing pipes.
- Strategic Wall Openings: Cutting clean access holes in drywall or plaster to reach hidden runs, risers, and fixture connections.
- New Line Routing: Installing modern PEX or copper lines through crawlspaces, attics, and wall cavities.
- Pressure Testing: Pressurizing the newly installed system with air or water to verify that every single joint and fitting is completely secure.
- Municipal Inspection: Scheduling a building inspector to sign off on the installation before walls are permanently closed.
- Patching and Cleanup: Closing access holes, hauling away old steel pipes, and restoring the work area.
Removing Old Pipes vs. Abandoning Them in the Wall
Plumbers rarely tear out every inch of old galvanized pipe if doing so requires destroying entire walls. Instead, non-accessible legacy lines are safely capped off and “abandoned in place” inside the walls, while main risers and easily reachable sections are physically extracted. Abandoning dead lines is a standard, safe industry practice that saves thousands of dollars in unnecessary drywall repair.
After the Repipe: Flushing Pressure Check and Warranty
Once installation and final inspections are complete, the contractor performs a comprehensive system flush to clear out any installation debris, solder flux, or trapped air. Make sure to review your contractor’s workmanship warranty—reputable plumbers typically offer a multi-year or lifetime guarantee on labor alongside manufacturer warranties on PEX or copper materials.
How to Get Accurate Quotes and Save Money
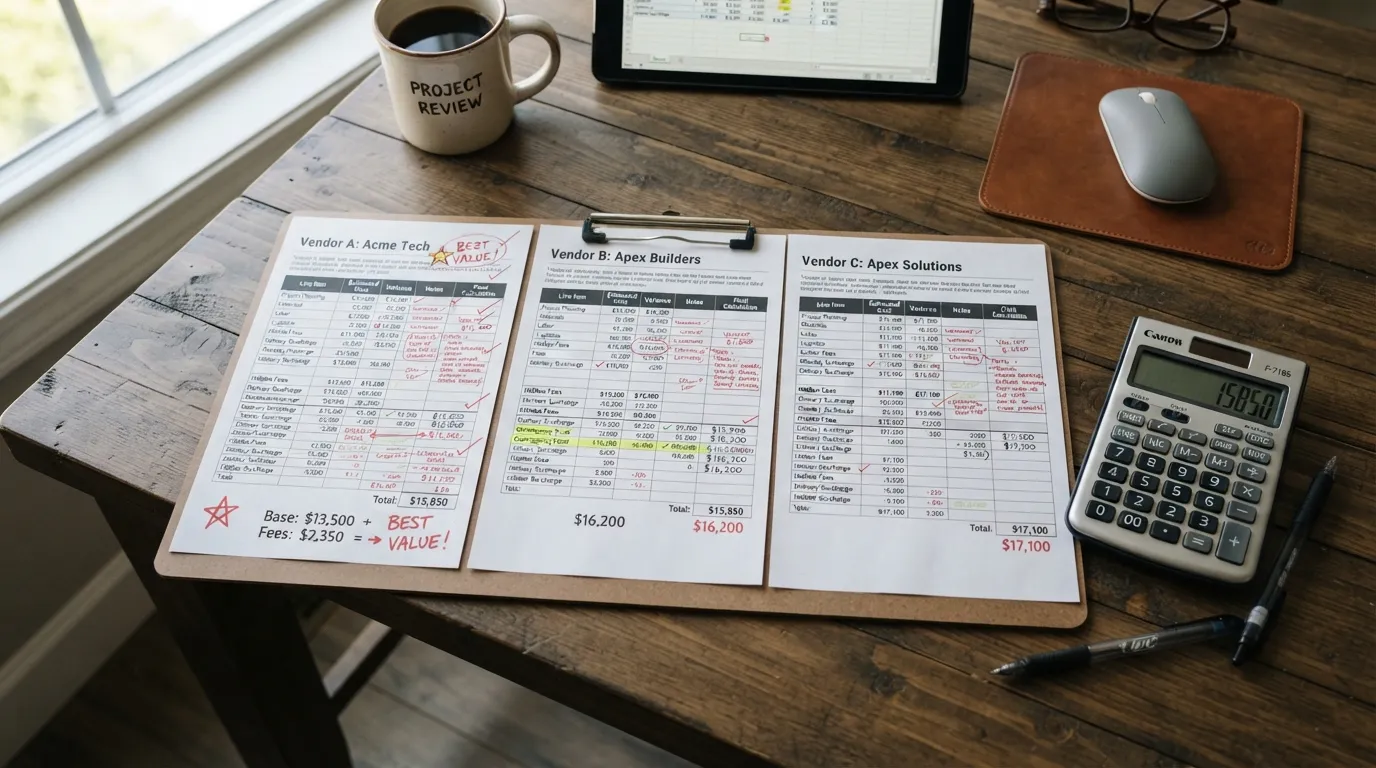 Securing a fair price and top-quality workmanship for a whole-house repipe requires careful contractor vetting, apples-to-apples quote comparisons, and strategic budgeting. Asking the right questions protects you from unexpected expenses and ensures your investment lasts for decades.
8 Questions to Ask Every Contractor
Before signing a contract with any plumbing professional, make sure to get clear, written answers to these eight essential questions:
- Are you fully licensed and insured? Verify that the contractor holds an active state plumbing license and carries comprehensive general liability and workers’ compensation insurance.
- Are municipal permits and inspections included? Confirm whether the flat bid covers pulling permits and coordinating the required local building inspections.
- Is drywall cutting, patching, and texturing included? Clarify whether the bid is “rough-in only” or a turnkey repair that restores walls to a paint-ready finish.
- What is the daily water shutoff schedule? Ask how many hours per day your water will be turned off and whether temporary bypass lines will be provided.
- Will old pipes be removed or abandoned in place? Understand which sections will be extracted and which dead lines will be capped inside walls.
- What specific brand and material of pipe will you use? Ensure they install high-grade materials (such as branded PEX-A/B or Type L copper) rather than substandard alternatives.
- What is your workmanship warranty? Look for contractors who back their labor with a multi-year or lifetime guarantee alongside manufacturer warranties.
- Can you provide local, verifiable references? Ask for contact information from recent whole-house repipe clients in your area.
How to Compare Three Quotes Fairly
Always obtain at least three itemized bids from licensed local plumbers to establish accurate regional pricing. When comparing estimates, make sure you are evaluating identical scopes of work—checking whether one quote includes drywall repair and permits while another excludes them ensures you compare true bottom-line costs.
Red Flags in a Quote
Watch out for these warning signs when evaluating contractor bids:
- Vague, Lump-Sum Pricing: A single price scribbled on a notepad without itemized breakdowns for labor, materials, permits, or wall patching.
- Pressure Tactics: Contractors demanding immediate cash payments or offering massive, expiring discounts to sign on the spot.
- Unusually Low Bids: Estimates that come in 40% below market average frequently indicate unlicensed labor, unpermitted work, or hidden change orders down the road.
Can You Replace Galvanized Pipes Yourself?
Attempting a complete whole-house galvanized pipe replacement as a DIY project is generally not recommended unless you hold professional plumbing experience. Whole-house repiping requires navigating load-bearing wall cavities, mastering complex PEX expansion or copper soldering techniques, passing strict municipal building inspections, and managing pressure testing. A mistake in a hidden wall joint can lead to catastrophic, unnoticeable leaks and severe water damage.
5 Ways to Reduce the Cost
You can lower your overall repipe investment without sacrificing quality by applying these smart money-saving strategies:
- Handle Drywall Patching Yourself: Save $500 to $1,500 by hiring the plumber for rough-in pipe installation only, then patching and painting the access holes yourself.
- Consolidate Fixture Runs: If your layout allows, ask your plumber to optimize pipe routing paths to minimize total linear footage of material required.
- Inquire About Off-Season Rates: Schedule your project during slower contracting months (such as late autumn or winter) when plumbing companies may offer promotional discounts.
- Bundle With Other Remodels: If you are already planning a kitchen or bathroom update, combine the repipe into the larger remodel to streamline labor and wall reconstruction.
- Explore Contractor Financing: Many established plumbing companies offer zero-interest or low-APR monthly financing plans to help spread out large capital investments.
Frequently Asked Questions
Reviewing concise, direct answers to the most common homeowner questions helps solidify your understanding of galvanized pipe replacement, project investments, and timeline expectations before you hire a professional contractor.
How much does it cost to replace galvanized pipes in a home?
Replacing galvanized plumbing in a whole house typically costs between $4,000 and $15,000, with a national average of around $7,500. Total expenses scale directly based on your home’s square footage, fixture count, architectural complexity, and whether drywall patch-back services are included in your contractor’s scope of work.
How much does it cost to replace galvanized pipes with PEX?
Upgrading to flexible PEX tubing generally ranges from $4,000 to $10,000 for a standard mid-sized home. Because PEX materials cost significantly less per linear foot ($0.40 to $2.00) and require fewer specialized fittings, choosing PEX reduces overall labor hours and keeps total project investment much lower than rigid metals.
How much does it cost to replace galvanized pipes with copper?
Rewiring a house with premium Type L copper piping typically costs between $8,000 and $18,000+. Raw material costs run much higher ($2.00 to $12.00+ per linear foot), and the labor-intensive soldering and structural fitting required drive up professional installation bids significantly.
How long does it take to replace galvanized pipes?
A complete whole-house repipe generally takes anywhere from 1 to 5 days to complete. Smaller single-story homes with accessible crawl spaces are usually finished in 1 to 2 days, while multi-story properties with extensive fixture counts and finished walls require 3 to 5 working days.
Is it worth it to replace galvanized pipes?
Replacing aging galvanized pipes is well worth the investment if you are experiencing low water pressure, discolored water, or frequent leaks. Proactive replacement eliminates health hazards like trapped heavy metals, protects your home from catastrophic water damage, and significantly boosts long-term property resale value.
What are the downsides of galvanized plumbing?
The primary downside of galvanized plumbing is its vulnerability to internal corrosion. Over decades, the protective zinc coating wears away, causing iron oxidation and mineral scale buildup that constricts water flow, lowers pressure, discolors tap water, and eventually leads to pinhole leaks and structural failure.

Oscar Vance | Master Plumber & Drainage Expert
Meet Oscar Vance, a licensed master plumber sharing practical solutions on residential repairs, preventive maintenance, and thoughtful home upkeep.

