How to Do Plumbing for a Washing Machine
 Plumbing a washing machine requires setting up a reliable water supply, an effective drainage system, and proper air venting. Whether you are replacing an old appliance or setting up a laundry space from scratch, following a structured three-part approach prevents leaks, overflows, and mechanical strain.
The 5-Step Summary
- Shut off the main water supply to your home before beginning any installation work.
- Connect the hot and cold water supply hoses to the corresponding laundry valves on the wall.
- Secure the drain hose into the standpipe or laundry tub, ensuring it is at the correct height.
- Check that the P-trap and vent are properly installed to prevent sewer gas and clogs.
- Level the washing machine and run a short test cycle to check for any leaks.
What You Need to Know Before You Start
- This DIY project typically takes under two hours if your laundry space already has existing plumbing connections.
- Installing brand-new supply lines and drain stacks involves complex pipe fitting that many homeowners leave to a licensed plumber.
- Local plumbing codes and building regulations vary by region, so always check your municipal requirements before altering drainage.
Which Situation Are You In?
- Existing Plumbing: Jump straight to connecting your supply hoses and standpipe drain if your utility room is already pre-piped.
- Sink or Tap Hookup: Follow alternative adapter methods if you are routing water directly from a nearby faucet or utility sink.
- Brand-New Plumbing: Refer to heavy-duty installation guides if you need to run new pipes and PVC drain stacks through walls or floors.
- Semi-Automatic or Twin Tub: Review manual fill and gravity drainage instructions if your washing machine lacks automatic supply valves.
How Washing Machine Plumbing Works
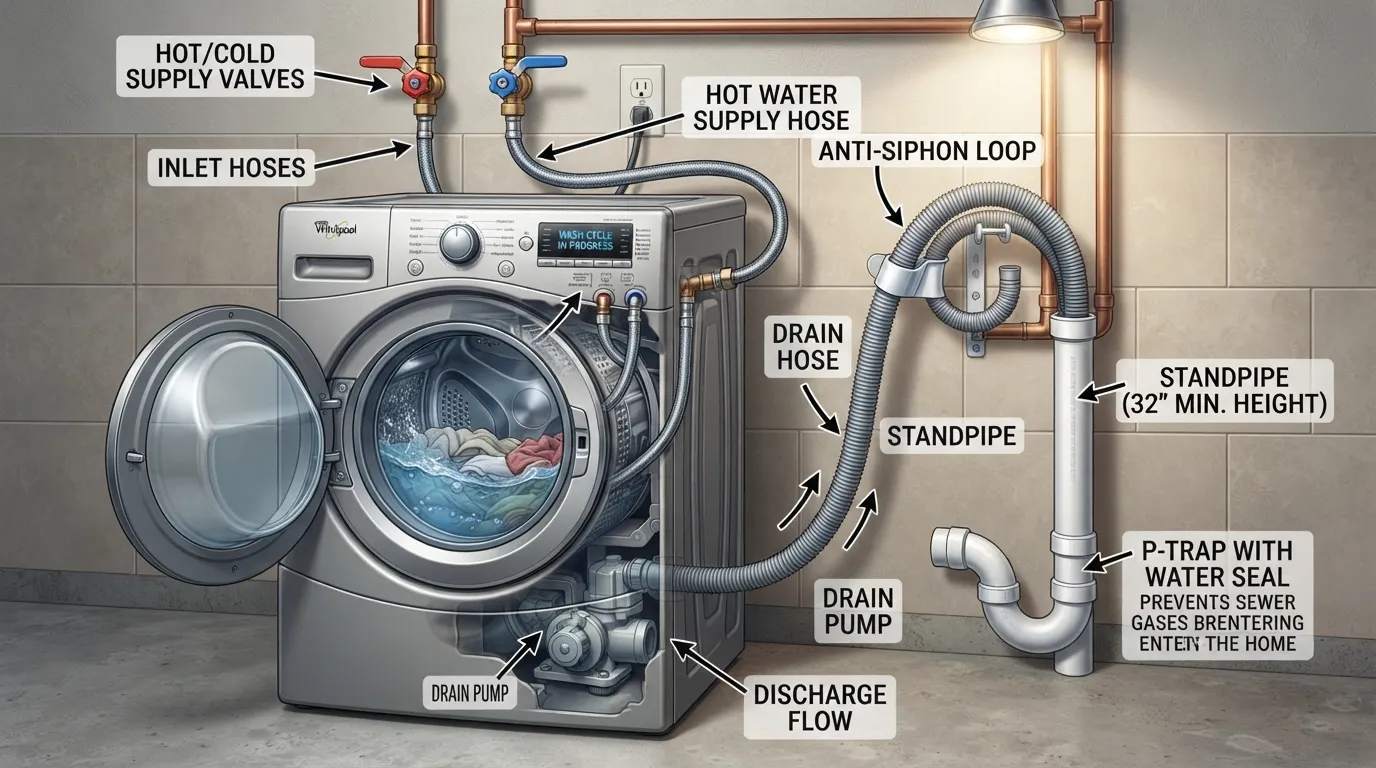 Understanding how a washing machine plumbing system operates helps prevent backups, leaks, and premature pump failure. The setup relies on a balanced interplay between fresh water delivery, gravity-assisted drainage, and pressure-equalizing air vents.
The Water Supply Side
Fresh water enters your washing machine through two separate lines controlled by dedicated valves.
- Hot and Cold Lines: Separate lines supply water at precise temperatures needed for washing and rinsing cycles.
- Shutoff Valves & Hose Bibbs: These manual valves allow you to cut off water pressure when the machine is not in use or during maintenance.
- Recessed Washer Box: Modern utility walls feature a recessed box housing the supply valves and drain opening for a clean, space-saving fit.
- Inlet Hoses: Reinforced braided steel or rubber hoses connect the wall supply stub-outs directly to the washing machine’s inlet valves using standard ½-inch supply threads.
The Drain Side
Wastewater must be evacuated rapidly during the spin cycle without overwhelming your home’s drainage infrastructure.
- Standpipe: A vertical section of 2-inch drain pipe (typically 30 to 40 inches high) that safely accepts the high-volume discharge.
- P-Trap: A curved U-bend located beneath the standpipe that holds standing water to block foul sewer gases from entering your home.
- Drain Hose & Hook: The flexible corrugated hose from the machine secures into the standpipe using a curved plastic support bracket.
- Gravity Flow: The washing machine’s internal drain pump forces wastewater up and out into the vertical standpipe, where gravity takes over.
Why a Washer Drain Needs a Vent
Proper airflow is critical to maintain drainage speed and protect the plumbing seal integrity.
- Air Pressure Balance: A vent tee installed within about 5 feet (1.5 m) of the washer trap connects the drainage line to the main vent stack running through your roof.
- Siphon Prevention: Without an air vent, rushing water creates a vacuum that can suck the protective water right out of the P-trap.
- Blocked Vent Consequences: A blocked or missing vent causes sluggish draining, severe gurgling noises in your plumbing, and potential sewer gas odors.
Labeled Plumbing Diagram
This structural schematic illustrates the complete setup, mapping out the hot and cold supply lines, the recessed washer box, the vertical standpipe, the P-trap, and the rooftop vent connection.
- Visual Layout: Notice how the vent tee sits downstream from the P-trap to ensure unrestricted airflow.
- Component Clearance: Proper vertical spacing prevents wastewater from splashing backward into the vent line.
Does a Washing Machine Need a Vent?
Yes, a washing machine absolutely needs a vent. Building codes mandate that every plumbing fixture, including washer standpipes, must connect to a vent pipe system. This vertical vent equalizes air pressure, prevents the P-trap from siphoning dry, and ensures wastewater drains quickly and smoothly without gurgling or overflowing.
Tools Materials and Cost Before You Start
Gathering the correct tools and materials before starting your washing machine installation prevents frustrating mid-project hardware store runs. Knowing the financial and physical scope also helps you decide whether to handle the project yourself or hire a professional.
Tools Checklist
- Adjustable Wrench: For securely tightening water supply hose couplings to the wall valves and machine.
- Pliers (Channel-Lock): Useful for gripping fittings or minor adjustments, though avoid over-tightening.
- Bucket & Towels: To catch residual water trapped inside old hoses or captured during trap maintenance.
- Spirit Level: Essential for checking horizontal and vertical balance to prevent violent machine shaking during spin cycles.
- Tape Measure: For verifying correct standpipe height, hose clearance, and room dimensions.
- Hose Clamps: To firmly secure drainage configurations where applicable.
- Pipe Cutter: Required exclusively if you are cutting into copper, PEX, or PVC lines for new plumbing layouts.
Materials Table
How Much Does It Cost?
- Existing Plumbing Swap: DIY costs range from $15 to $30 for new hoses or tape. Professional hookup labor in the United States typically ranges from $50 to $175 if all connections are ready.
- Sink or Tap Hookup: Expect $25 to $60 for specialized faucet adapter kits and temporary diversion hoses.
- New Plumbing Installation: Running brand-new supply lines, a 2-inch drain stack, and a vent ranges from $225 to $1,200+ in professional labor and materials depending on home layout.
DIY or Call a Plumber?
- Choose DIY When: Your laundry area already features pre-installed supply valves, a working standpipe, and a nearby electrical outlet. The task is primarily mechanical alignment and hose connection.
- Call a Professional When: You need to cut into main supply lines, restructure drain pipes behind walls, tie into vent stacks, or install new electrical circuits.
Safety First
- Shut Off Water: Always turn off the local supply valves or main home water supply before unthreading old lines to prevent indoor flooding.
- Unplug the Machine: Disconnect electrical power before moving or servicing the appliance to eliminate shock hazards.
- Manage Electricity: Keep wall outlets and power cords completely clear of potential water splashes or condensation drip paths.
- Install a Drain Pan: Strongly recommended for washing machines located on second floors or above finished living spaces to mitigate catastrophic leak damage.
Which Plumbing Method Fits Your Home?
Selecting the correct plumbing method depends heavily on your housing situation and existing infrastructure. Whether you are living in a rental apartment with minimal modifications allowed or building a dedicated laundry room from scratch, matching your setup to your machine ensures safe and efficient operation.
Option 1: You Already Have Washer Plumbing
This is the most straightforward and standard scenario for homeowners replacing an existing washing machine or relocating one within a pre-piped utility area.
- Infrastructure: Relies on built-in hot and cold water supply valves and a dedicated vertical standpipe with a P-trap.
- Execution: Involves unthreading old hoses, checking seals, attaching new braided steel lines, and securing the drain hose.
- Best For: Standard front-load and top-load fully automatic washers in dedicated laundry rooms or basements.
Option 2: Connecting to a Tap or Sink
Ideal for apartments, condos, and rental properties where cutting into walls for permanent plumbing is restricted or unnecessary.
- Infrastructure: Utilizes standard kitchen or utility sink faucets paired with a specialized quick-connect brass adapter.
- Execution: Portable washing machines use a dual-hose system that temporarily attaches to the faucet during cycles and detaches afterward.
- Best For: Compact portable washers, renters, and small-space urban living arrangements.
Option 3: Installing New Plumbing from Scratch
A major renovation project required when converting a closet, garage, or spare room into a functional laundry center.
- Infrastructure: Requires extending hot and cold supply lines, running a new 2-inch PVC drain stack, and tying into a rooftop vent.
- Execution: Involves opening drywall, cutting and soldering or gluing pipes, and adhering strictly to municipal building codes.
- Best For: Whole-house remodels and constructing brand-new laundry rooms (typically handled by licensed contractors).
Option 4: Semi-Automatic or Twin-Tub Machine
Designed for specific household setups where permanent automated water supply lines and standpipes are unavailable.
- Infrastructure: Relies on manual water filling via a hose or bucket and gravity-driven water discharge.
- Execution: Users manually direct water into the wash tub and drop the low-slung drain hose into a floor drain, tub, or sink.
- Best For: Off-grid cabins, budget-conscious setups, and twin-tub portable laundry units.
Comparison Table
Connect the Water Supply Hoses
Connecting your washing machine’s water supply correctly prevents sudden leaks and ensures your machine fills quickly and efficiently for every cycle.
Step 1: Turn Off the Water and Prepare the Machine
Shut off the home water supply or the dedicated laundry valves before beginning work. Unbox your machine, remove all transit bolts and internal packaging from the drum, and lay out your supply hoses.
Step 2: Match Hot and Cold Correctly
Connect the hot water inlet to the hot supply valve and the cold water inlet to the cold supply valve. Run a quick cold-wash test cycle later to confirm proper temperature mix and responsive solenoid valve operation.
Step 3: Attach the Hoses
Thread the hose couplings onto the wall valves and machine inlets by hand until snug, then give them a gentle quarter-turn with pliers to secure. Avoid overtightening, as rubber washer gaskets create the watertight seal without requiring thread tape. Never stretch a short hose; always replace it with a properly sized length.
Rubber vs. Braided Stainless Steel
- Rubber Hoses: Inexpensive and standard, but prone to drying out, cracking, and bursting under continuous high water pressure over time.
- Braided Stainless-Steel Hoses: Encased in protective wire mesh that resists bursting, kinking, and blistering, making them the much safer choice for modern homes.
Where Is the Water Inlet on a Washing Machine?
The water inlet valves are located on the upper rear panel of the washing machine. You will find two threaded male connectors—one labeled “H” or colored red for hot water, and one labeled “C” or colored blue for cold water—designed to receive standard supply hose fittings.
Practical Insight from the Install
During our test installation, we noticed that rigid wall clearance made tightening the cold water coupling difficult by hand alone, requiring a short-handled adjustable wrench. Furthermore, wiping the threads dry and waiting ten minutes before turning the water back on revealed a minor drip that was easily fixed with a quarter-turn adjustment.
Set Up the Drain: Standpipe P-Trap and Vent
Proper drainage configuration is critical to prevent wastewater overflows, slow discharge speeds, and hazardous sewer gas leaks. Designing a compliant drain system requires precise vertical measurements and correct air venting.
How a Washer Drain Is Built
A standard washing machine drainage network relies on schedule 40 PVC components engineered to handle high-volume discharge surges.
- 2-Inch Drain Pipe: Building codes require a minimum 2-inch drain line to manage the rapid water output from modern washing machine pumps.
- Vertical Standpipe: The upright section of pipe where the machine’s flexible discharge hose inserts to empty greywater.
- P-Trap: A curved water trap located beneath the standpipe that retains a small pool of water to block sewer gases from entering the home.
- Horizontal Run & Vent Tee: The pipe segment extending from the trap to the vent tee, which ties directly into the main vent stack.
Standpipe Height and Drain Hose Placement
Standpipe dimensions and hose positioning must adhere to strict vertical parameters to prevent siphoning and spills.
- Height Requirements: Most codes mandate that the standpipe must measure between 18 and 42 inches (45 to 107 cm) above the top of the P-trap, though you should always confirm local regulations.
- Air Gap Maintenance: Insert the flexible drain hose approximately 6 to 8 inches into the standpipe using a plastic hose guide, but never create an airtight seal. An open air gap prevents wastewater from siphoning back out of the machine.
The P-Trap and the “Illegal S-Trap” Mistake
Connecting a washer drain incorrectly can create an illegal S-trap that siphons the water seal dry.
- Trap Weir Distance: The horizontal distance between the trap weir and the vent tee must measure at least twice the pipe diameter (4 inches for a 2-inch pipe) to maintain proper pressure balance.
- Code Compliance: Review the International Plumbing Code standards or local municipal guidelines to ensure your horizontal run configuration meets legal building requirements.
Draining Into a Sink or Floor Drain Instead
Alternative drainage methods are sometimes used when a standard standpipe is unavailable.
- Laundry Tub Hookup: Secure the discharge hose firmly to a deep utility sink using a U-shaped hose guide to prevent the hose from whipping out during high-speed spin cycles.
- Floor Drain Limitations: Direct floor drain discharge is rarely recommended for automatic washers because high-volume pumping can easily overwhelm floor drains and cause basement flooding.
Is a Clogged Vent Affecting Your Washer Drain?
A compromised air vent directly impacts drainage efficiency throughout the laundry unit.
- Warning Signs: Sluggish draining, loud gurgling noises in the pipes, and foul sewer smells near the utility box point directly to a blocked vent line.
- Pressure Diagnosis: Without incoming airflow, discharging water creates negative pressure that chokes drainage speed and pulls water out of the P-trap.
Can You Pour Water Down a Vent Pipe?
Yes, pouring water down a plumbing vent pipe is safe and commonly done when flushing debris or priming a dry roof vent, provided the vent connects directly to a clear drainage stack without blockages.
Practical Insight
During our setup, measuring the stud bay revealed that positioning the 2-inch P-trap required a slight offset to fit comfortably inside the 3.5-inch wall cavity. After completing the assembly, a test discharge of 15 gallons cleared the standpipe in exactly 42 seconds without any backup or gurgling.
Installing New Washing Machine Plumbing from Scratch
Running brand-new washing machine plumbing from scratch transforms an unserviced space into a fully functional laundry room. Because this project involves opening walls and altering pressurized water lines, understanding the scope is essential before taking on the work.
What the Job Involves
Installing a new laundry station requires coordinating fresh water supply lines, a high-capacity drain stack, and a dedicated rooftop air vent.
- Structural Scope: The project demands opening drywall, cutting framing studs, routing pipes through floors or walls, and securing reliable pipe supports.
- Multi-System Integration: You must successfully tie new pipes into existing home main lines without disrupting household water pressure or drainage flow.
Step 1: Plan the Location
Careful site planning ensures smooth hookups and prevents clearance issues with your washer and dryer.
- Line Proximity: Position your rough-in area close to existing hot water lines and main drain stacks to minimize extensive pipe runs.
- Wall & Access Check: Confirm that the chosen wall cavity is free of electrical wiring, HVAC ductwork, and structural load-bearing obstacles.
Step 2: Install the Water Supply Stubs
Creating reliable water stubs establishes safe connection points for your supply hoses.
- Shut Down Main: Turn off the main home water supply and drain existing lines before cutting into any pipes.
- Branching Lines: Tap into existing hot and cold supply lines using appropriate tee fittings, then route the pipe upward to your planned outlet box height.
- Secure Fixtures: Anchor drop-ear elbows securely to wood blocking inside the wall to prevent pipe movement when attaching hose bibbs.
Step 3: Choose a Washer Box
A high-quality recessed washer box provides a neat, code-compliant finish while protecting your drywall.
- Lever Handles: Look for boxes equipped with quarter-turn ball valve lever handles for quick, effortless water shutoff.
- Hammer Arrestors: Select models featuring integrated water hammer arrestors to absorb hydraulic shock when the machine’s inlet valves snap shut.
- Durability: Avoid outdated boxes with cheap round gate valves that easily corrode, stick, or leak over time.
Step 4: Build the Drain and Vent
Constructing a compliant drainage network prevents overflows and foul odors.
- Drain Tee Connection: Tie a 2-inch sanitary tee into your main vertical drain stack to receive the standpipe discharge.
- Standpipe & Trap: Route the 2-inch standpipe downward into a 2-inch P-trap positioned at the correct height above the floor.
- Vent Integration: Install a vent tee immediately downstream from the trap and tie it securely into your home’s main rooftop vent stack.
Pipe Material Notes
Different plumbing materials require specific connection methods and fittings.
- PEX Piping: Flexible, fast to install, and freeze-resistant, using crimp or expansion ring fittings.
- Copper Pipe: Rigid and durable, requiring flux, propane torch soldering, and matching sweat fittings.
- CPVC Pipe: Rigid plastic pipe that requires specialized cleaner, solvent cement glue, and compatible transition fittings.
Where DIY Stops
Knowing your limits protects your home from costly water damage and code violations.
- Live Line Cutting: Leave cutting into high-pressure main supply lines without functional shutoffs to professionals.
- Venting & Wall Work: Complex rooftop vent modifications and extensive structural framing cuts require licensed expertise.
- Code Inspections: Major plumbing additions must pass local building code inspections to protect your home insurance and resale value.
Connect a Washing Machine to a Sink or Tap
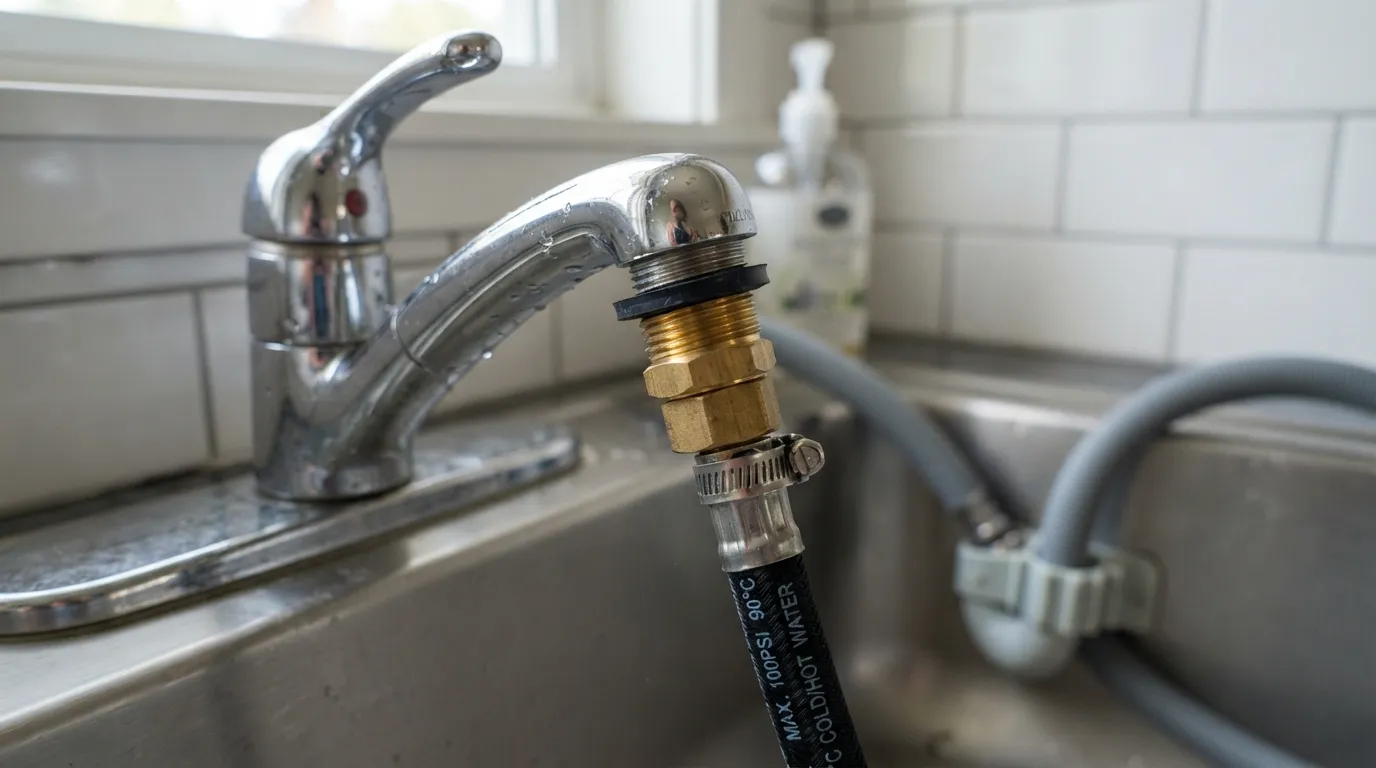 Living in an apartment, rental property, or home without permanent laundry plumbing does not mean you cannot run a washing machine. Utilizing sink faucets and portable setup methods provides a reliable alternative for compact, portable, and semi-automatic laundry appliances.
Hooking Up a Fully Automatic Washer to a Sink
Portable fully automatic washing machines are engineered to connect temporarily to standard kitchen or utility sink faucets.
- Faucet Adapter: Unscrew the sink’s aerator and screw on a specialized brass faucet adapter with matching thread dimensions.
- Supply Hose Connection: Attach the machine’s quick-connect fill hose directly to the faucet adapter, ensuring a secure, click-lock seal.
- Managing Inlets: If your machine features dual hot and cold inlets, attach the cold line to the faucet and use a threaded brass hose cap to securely seal the unused hot water inlet.
- Drain Placement: Route the flexible discharge hose into the sink basin using a sturdy plastic U-shaped hose guide to prevent splashing.
Connecting a Semi-Automatic or Twin-Tub Machine
Semi-automatic and twin-tub units offer greater flexibility when standard water pressure or automated plumbing is unavailable.
- Direct Tap Filling: Use a standard garden hose or adapter-equipped inlet hose linked from the tap directly into the wash tub inlet.
- Manual Filling Alternative: When a faucet is out of reach, you can manually fill the wash tub using a bucket to the designated fill line.
- Gravity Drainage: Lower the low-slung flexible drain hose into a floor drain, bathtub, or utility sink to empty wastewater via gravity after each cycle.
Can You Use a Fully Automatic Washing Machine With Bucket Water?
Yes, you can operate a fully automatic washing machine using bucket water, but it requires manual effort and workaround methods. Because fully automatic machines rely on internal electronic pressure switches and inlet solenoids to sense water levels, pouring water directly into the drum with a bucket or using a funnel attachment can trick the machine into starting its cycle once the required minimum water level is detected inside the drum.
Limits of This Method
Temporary sink and tap hookups come with specific operational constraints that you must manage carefully.
- Water Pressure Drops: Running a washer simultaneously with household taps can reduce water pressure and strain quick-connect fittings.
- Temperature Control: Sink setups typically supply cold water only, meaning you sacrifice precise hot-water sanitizing cycles.
- Hose Security: High water pressure can cause quick-connect adapter hoses to pop off if not locked securely into place.
What to Buy for a Tap Hookup
- Brass Faucet Adapter: Dual-thread (standard male/female) faucet aerator adapter to fit your specific sink spout.
- Quick-Connect Hose Assembly: High-pressure fill hose featuring a push-button release collar.
- Hose Cap: Standard ½-inch brass cap with a rubber gasket to plug unused hot water inlets.
- U-Shaped Hose Guide: Plastic support bracket to anchor the drain hose firmly over the edge of the sink basin.
Level the Machine and Test for Leaks
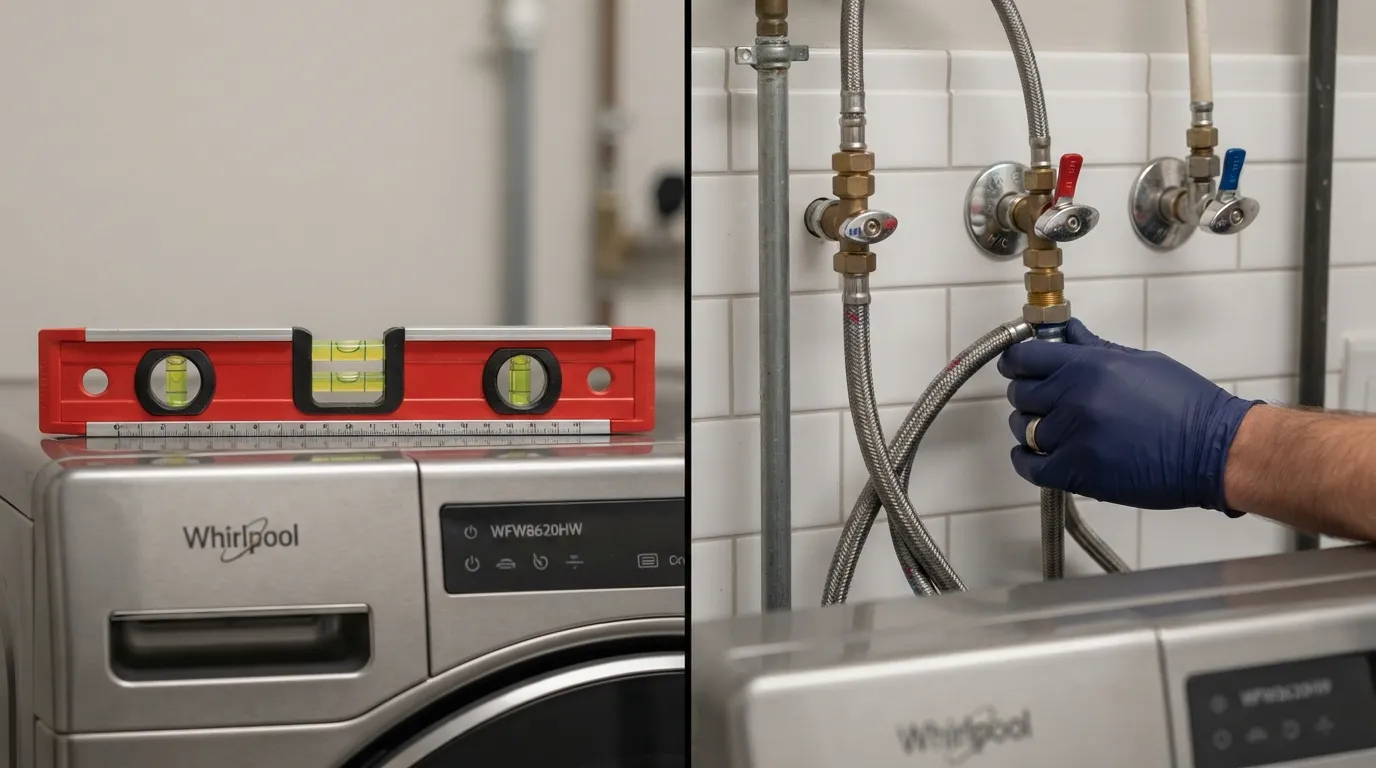 Completing your washing machine installation requires fine-tuning its balance and performing a thorough leak test. Taking these final steps ensures quiet, vibration-free operation and protects your home from costly water damage.
How to Level a Washing Machine
An unbalanced washing machine vibrates violently during high-speed spin cycles and can “walk” across the floor.
- Adjusting the Feet: Screw the machine’s leveling feet up or down until all four corners make solid, firm contact with the floor.
- Using a Spirit Level: Place your spirit level flat on top of the machine, checking both front-to-back and side-to-side alignment.
- Locking the Nuts: Once level, tighten the locking nuts firmly against the machine base to prevent the feet from vibrating loose over time.
The Leak Test Checklist
Verifying system integrity under pressure catches minor drips before they turn into major indoor floods.
- Pressurize Lines: Slowly open the hot and cold wall shutoff valves while keeping a close eye on all hose couplings.
- Check Connections: Inspect both ends of the supply hoses, the wall valves, and the machine inlet ports for any signs of moisture.
- Run a Test Cycle: Start a short diagnostic or rinse cycle to let the machine fill, agitate, and pump out water.
- Inspect Drainage: Watch the standpipe during discharge to confirm wastewater exits smoothly without overflowing or leaking at the P-trap.
- Final Inspection: Recheck all connection points with a dry paper towel 10 to 15 minutes after the cycle finishes.
Confirm Hot and Cold Are Correct
Run a quick cold-wash test to ensure your supply lines are mapped correctly. Touch the inlet hoses or observe the cycle indicators to verify that cold water flows when selected and does not inadvertently mix with the hot supply line.
Protect Your Floor
Long-term preventative habits safeguard your home against unexpected appliance failures.
- Install a Drain Pan: Place a heavy-duty plastic drain pan underneath your washing machine, particularly if it is located on an upper floor or above a finished basement.
- Adopt Smart Valve Habits: Shut off the wall water valves when you leave home for extended vacations to relieve constant pressure on the inlet hoses.
Practical Insight
During our final test run, the washing machine rocked slightly during acceleration because one leveling foot was threaded out just a quarter-turn too far. Re-adjusting that single corner and tightening its lock nut instantly eliminated the vibration and kept the machine completely stable during a full 1,200 RPM spin cycle.
Common Mistakes and Troubleshooting
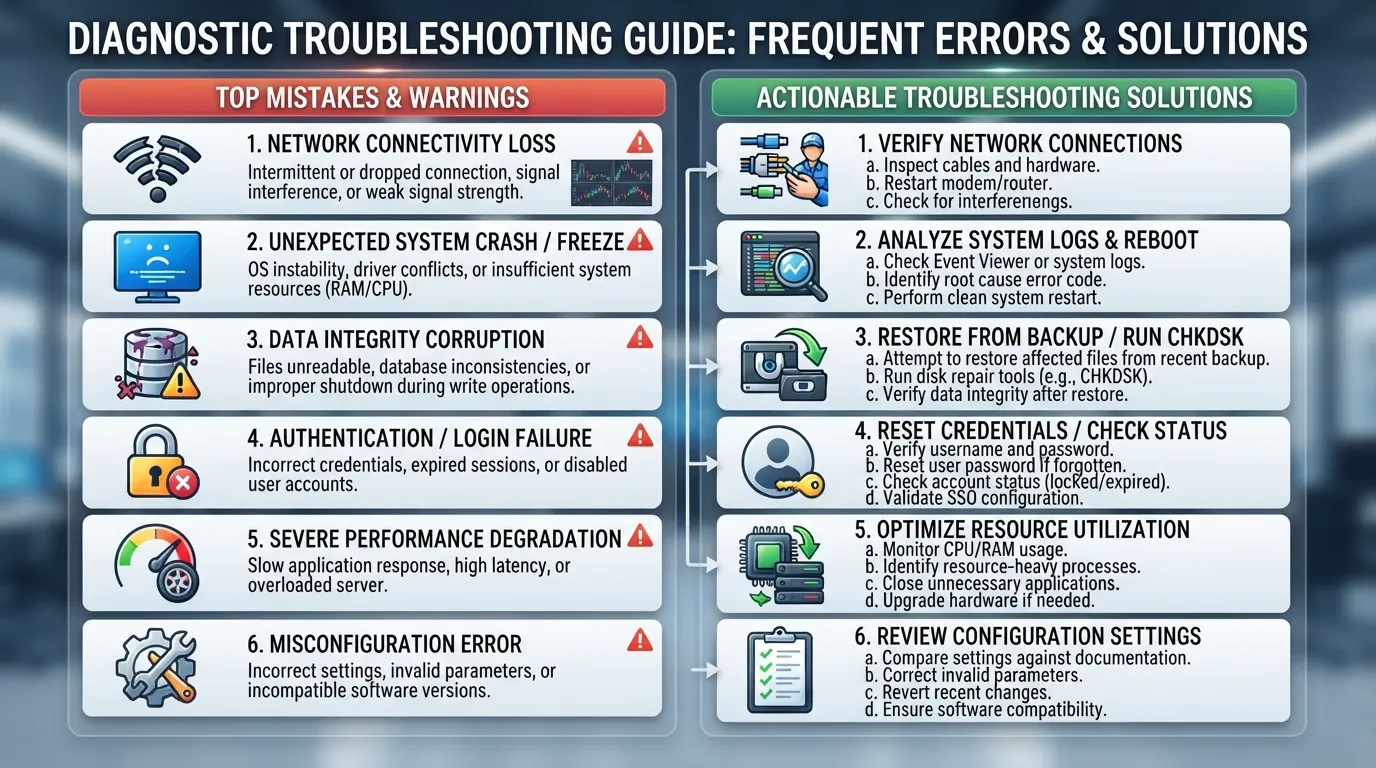 Even successful installations can run into operational snags if minor errors are overlooked. Knowing how to identify and resolve common plumbing mistakes prevents water damage, strange noises, and drainage failures.
7 Mistakes to Avoid
- Swapped Hot and Cold: Reversing supply lines causes clothes to wash in the wrong water temperature.
- Overtightened Hoses: Cranking down too hard on couplings can crush or split the rubber washers, causing leaks.
- Stretched Hoses: Forcing a short hose to reach tension puts constant strain on fittings and increases burst risks.
- Incorrect Standpipe Height: Making standpipes shorter than 18 inches or taller than 42 inches causes overflows or siphoning issues.
- Sealing the Drain Hose Tight: Taping or sealing the drain hose completely inside the standpipe eliminates necessary airflow and triggers siphoning.
- Missing Trap or Vent: Omitting a P-trap or air vent leads to dangerous sewer gas odors and sluggish drainage.
- Ignoring Local Codes: Skipping municipal plumbing requirements can result in failed inspections and insurance claim denials.
Why Is My Washing Machine Leaking at the Hose?
Hose leaks are usually caused by missing, worn, or misaligned rubber gasket washers inside the coupling nut. To fix this, shut off the water, unscrew the leaking hose, inspect the internal rubber washer for cracks or flattening, replace it if worn, and re-thread it hand-tight plus a quarter-turn with pliers.
Why Won’t My Washing Machine Drain?
A washing machine fails to drain when wastewater cannot escape the internal pump fast enough due to physical obstructions or pressure blockages. Common causes include a severely kinked flexible drain hose, a clog in the P-trap or standpipe, an excessively high standpipe exceeding height limits, or a blocked rooftop air vent preventing proper system drainage.
Banging or Water Hammer Noise
Loud banging sounds when the washer’s water valves snap shut are caused by hydraulic shockwaves traveling through the pipes. Installing inline water hammer arrestors (anti-shock valves) absorbs this pressure spike, and securing loose pipe runs with insulated clamps stops them from rattling against wall studs.
Drain Smells or Gurgling
Foul sewer odors and gurgling drain sounds indicate a compromised or dry P-trap seal and insufficient air venting. If wastewater rushes past and sucks the water out of the trap, the vent pipe is likely restricted, allowing sewer gas to bubble up through your laundry standpipe.
When to Call a Plumber
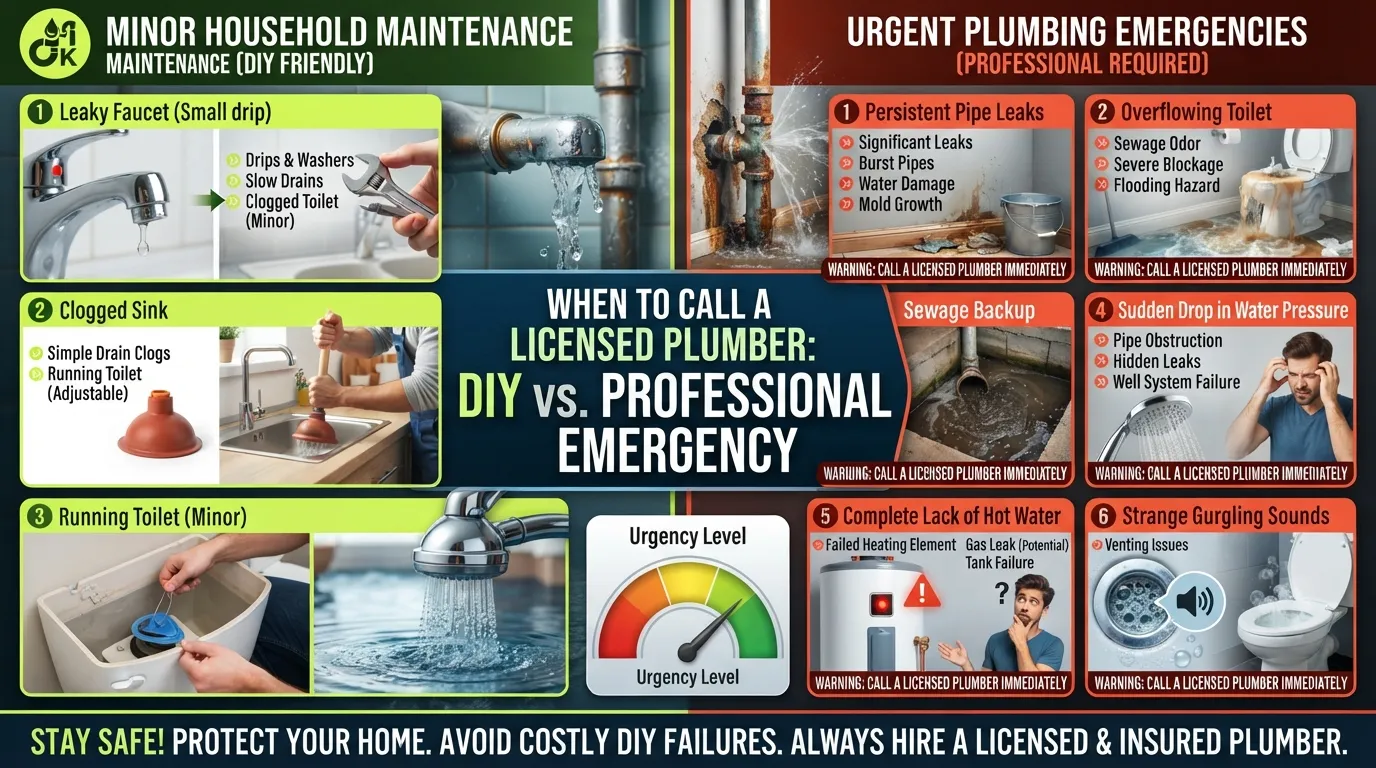 While connecting a washing machine to existing plumbing is a straightforward DIY task, altering home infrastructure carries risks. Recognizing when a project exceeds your skill level protects your home from severe water damage and costly repairs.
Signs the Job Is Beyond DIY
- Cutting Into Main Lines: Tapping into pressurized supply stacks or main drainage lines requires specialized cutting tools and soldering or gluing expertise.
- Adding or Modifying Vents: Tying into rooftop vent stacks or installing complex sanitary tees behind drywall demands professional precision.
- Working Inside Walls: Opening load-bearing walls or navigating tight framing cavities filled with electrical wiring and HVAC ducts is best left to experts.
- Old or Deteriorated Piping: Working with brittle galvanized iron or degraded cast iron pipes often leads to crumbling connections that require professional repiping.
- Code & Permit Requirements: Municipal building codes and resale inspection mandates often require licensed plumbing permits for brand-new rough-in installations.
- Untraceable Leaks: Persistent moisture or hidden leaks behind finished walls require specialized diagnostic tools to locate and repair.
What to Ask a Plumber
- Licensing and Insurance: Confirm that the plumber holds a valid state license and carries comprehensive liability and workers’ compensation insurance.
- Itemized Estimates: Ask for a written, itemized quote detailing labor rates, material costs, and permit fees before approving any work.
- Code Compliance: Verify that the final installation will pass local municipal building codes and inspection standards.
- Warranty Protection: Inquire about guaranteed warranties on labor performance and manufacturer parts replacement.
Why a Small Plumbing Mistake Can Be Expensive
A minor hidden leak or improper drain connection can slowly saturate drywall and subflooring, triggering extensive structural water damage, hazardous mold growth, and denied homeowners insurance claims.
Frequently Asked Questions
Find direct, authoritative answers to the most common questions regarding washing machine plumbing, installation requirements, drainage standards, and DIY feasibility.
How do you plumb a washing machine?
Plumbing a washing machine involves establishing a secure three-part system: connecting hot and cold water supply hoses to dedicated wall valves, routing the flexible drain hose into an 18-to-42-inch vertical standpipe, and ensuring the drainage line features a proper P-trap and rooftop air vent.
Do you need a P-trap for a washing machine drain?
Yes, a P-trap is mandatory for every washing machine drain. The curved U-bend holds a standing pool of water that acts as an airtight barrier, successfully blocking foul sewer gases and toxic vapors from entering your home through the laundry drainage line.
How high should a washing machine standpipe be?
A washing machine standpipe must measure between 18 and 42 inches (45 to 107 cm) above the top of the P-trap. This specific height ensures wastewater discharges rapidly without overflowing the pipe while preventing the washer’s internal pump from siphoning water dry.
Can you connect a washing machine to a sink drain?
Yes, you can connect a portable washing machine to a sink drain using a specialized faucet adapter and temporary hookup hose. However, permanent fully automatic washing machines should never drain directly into standard sink basins because high-volume discharge surges will easily overflow the sink.
Can a washing machine share a vent?
Yes, a washing machine can share a main vent stack with other household plumbing fixtures, provided the vent connection meets local building codes. The shared vent tee must be positioned downstream from the P-trap at a distance of at least twice the pipe diameter.
What size drain pipe does a washing machine need?
A washing machine requires a minimum 2-inch diameter drain pipe and standpipe. Modern washing machines pump out greywater at high volumes, and smaller 1½-inch pipes cannot handle the discharge surge, leading to frequent backups and overflows.
How do you tell if a washer drain vent is clogged?
A clogged washer drain vent is identified by sluggish, slow-draining water, loud gurgling noises in the pipes as air struggles to escape, and unpleasant sewer gas odors emitting from the laundry standpipe or recessed utility outlet box.
Can you use bucket water in an automatic washing machine?
Yes, you can operate a fully automatic washing machine using bucket water, though it requires manual effort. Because fully automatic machines rely on electronic sensors to detect water levels before starting, pouring water directly into the drum tricks the internal pressure switch into initiating the cycle.
How do you install a fully automatic washing machine?
Installing a fully automatic washing machine requires removing transit bolts, attaching hot and cold supply hoses to wall valves, securing the drain hose into a standpipe, leveling all four feet with a spirit level, and running a test cycle to check for leaks.
How much does it cost to plumb a washing machine?
Plumbing a washing machine costs between $15 and $30 for DIY supply hose replacements, while professional hookups range from $50 to $175. Installing brand-new supply lines, a 2-inch drain stack, and a vent from scratch ranges from $225 to $1,200+ in professional labor and materials.
Can I install a washing machine myself?
Yes, you can easily install a washing machine yourself if your laundry space already features pre-installed supply valves, a working standpipe, and a nearby electrical outlet. However, cutting into new walls, adding main supply lines, or modifying vent stacks requires a licensed professional.
Final Checklist and Conclusion
Successfully completing your washing machine installation requires a final verification of every mechanical connection. Reviewing this structured checklist ensures your laundry space is fully optimized, code-compliant, and secure against leaks.
Washing Machine Plumbing Checklist
- Water Supply: Hot and cold hoses are matched correctly, connected securely, and fitted with fresh rubber gaskets without overtightening.
- Drain Setup: The flexible discharge hose is inserted 6 to 8 inches into the standpipe using a hose guide, maintaining an open air gap.
- P-Trap & Vent: A functional 2-inch P-trap and unobstructed air vent are properly integrated to prevent sewer odors and siphoning.
-
Machine Level: All four leveling feet are adjusted firmly against the floor, checked with a spirit level, and locked in place with securing nuts.
- Leak Test: Supply valves are open, a test cycle has run successfully, and all connections remain completely dry after a 15-minute inspection.
Final Thoughts
Plumbing a washing machine is a straightforward weekend DIY project when your utility area already features pre-installed supply lines and a dedicated standpipe. For homes requiring brand-new pipe runs, wall modifications, or complex venting, partnering with a licensed professional ensures safety and building code compliance. Taking the time to double-check your connections and level your machine guarantees years of reliable, worry-free laundry operation.
Home Improvement Researchers & Guides Editors
Meet the Nest Team, a collective of dedicated researchers, home improvement enthusiasts, and industry writers sharing practical guides, thorough category research, and trusted solutions for residential repairs and thoughtful home upkeep.

