How to Plumbing a Double Kitchen Sink
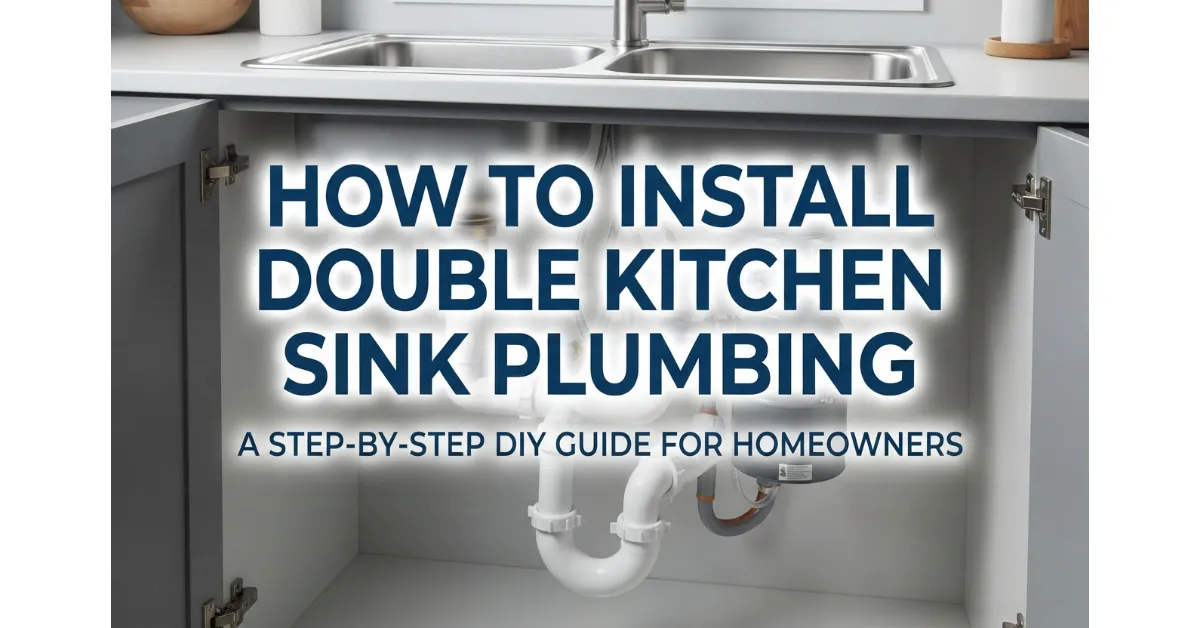 A double kitchen sink is plumbed by connecting both sink basins with individual strainers and tailpieces, merging the wastewater streams at a continuous waste tee (baffle tee), and routing the water through a single shared P-trap into the wall drain stub-out with a continuous downward slope.
The short version in 5 steps
- Install sink strainers and vertical tailpieces on both basin outlets.
- Join the tailpieces using a continuous waste tee (baffle tee) to merge the streams.
- Attach a single shared P-trap directly beneath the tee outlet to block sewer gases.
- Connect the trap arm horizontally from the P-trap to the wall drain with a steady downward slope.
- Run water through both basins to thoroughly test all slip-joint connections for leaks.
Which setup do you have?
- Plain Double Sink: Both basins feature standard strainers draining equally into a central continuous waste tee.
- With Garbage Disposal: One basin incorporates a disposal unit acting as the primary tailpiece connecting into the continuous waste assembly.
- With Dishwasher: Features a dishwasher drain hose routed through a high loop into a dedicated disposal nipple or side-inlet tailpiece.
- With Vent Concerns: Requires proper distance and height planning relative to the sanitary tee or air admittance valve to prevent slow drainage.
Before You Start: Time Cost Difficulty and Your Setup
Assessing your specific configuration before opening the toolbox prevents mid-project leaks, code violations, and costly hardware mismatches. Knowing your timeline, material requirements, and component layout keeps your kitchen sink plumbing installation straightforward and efficient.
Time, cost and difficulty at a glance
Check your setup first
DIY or hire a plumber?
Most standard slip-joint replacements and sink plumbing setups are well-suited for a confident DIYer. However, certain conditions call for a licensed professional.
- Damaged Wall Pipe: If the iron or PVC stub-out inside the wall is severely corroded, cracked, or broken off flush, professional wall opening and repiping are required.
- No Vent Access: Homes experiencing constant gurgling or slow drainage due to a missing or distant vent stack require professional vent routing to meet local building codes.
- Code or Permit Needs: Complex kitchen redesigns or major drain restructuring may trigger local code requirements and demand a certified plumbing permit.
Tools and Materials You’ll Need
Gathering your complete shopping list and hardware items before you crawl under the cabinet prevents mid-job leaks and emergency trips to the hardware store. Ensuring you have the right components for a 1½-inch kitchen drain setup makes assembly quick and secure.
Parts checklist
- Strainers: Two basket strainers that mount into the sink basin bottom outlets.
- Tailpieces: Vertical extension pipes that drop down from each basin strainer (one may include a dishwasher inlet port).
- Continuous Waste Tee: A baffle tee that connects both tailpieces together into a single unified waste stream.
- P-Trap: The U-shaped pipe section that holds standing water to block sewer gases from entering the kitchen.
- Trap Arm: The horizontal pipe piece extending from the P-trap into the wall stub-out.
- Slip-Joint Nuts and Washers: Plastic or rubber flanged washers and threaded nuts used to secure every slip-joint connection watertight.
- Plumber’s Putty or Silicone: Waterproof sealing compound applied underneath the sink basket strainer flanges.
- Supply Lines & Angle Stops: Water supply shut-off valves and braided lines (if you are also disconnecting or servicing the faucet during the swap).
Tools checklist
- Tape Measure: For checking pipe alignments and measuring cut-to-fit tailpiece lengths.
- Hacksaw or PVC Pipe Cutter: To trim plastic tailpieces and trap arms down to the exact required dimensions.
- Adjustable Pliers (Channel-locks): To snugly tighten slip-joint nuts without cracking plastic threads.
- Bucket: Placed under the work area to catch residual dirty water trapped inside the old P-trap.
- Rags or Towels: For quick cleanups of minor drips and keeping hands dry.
- Flashlight or Headlamp: Crucial for illuminating the dark workspace deep inside the base cabinet.
- Teflon (PTFE) Tape: For wrapping threaded pipe connections if working with metal or threaded adapter fittings.
Pre-made kit vs. buying parts separately
Choosing pipe size and material
Standard residential kitchen drain setups require 1½-inch piping. Choosing the right material depends on your durability preferences and budget constraints.
- Polypropylene / PVC Plastic: Highly affordable, corrosion-proof, easy to cut with a hacksaw, and forgiving for DIY installations.
- Brass and Chrome-Plated Metal: Premium aesthetic appeal, highly rigid, and extremely durable, though more expensive and less forgiving of minor alignment errors.
Preparation and Safety Steps
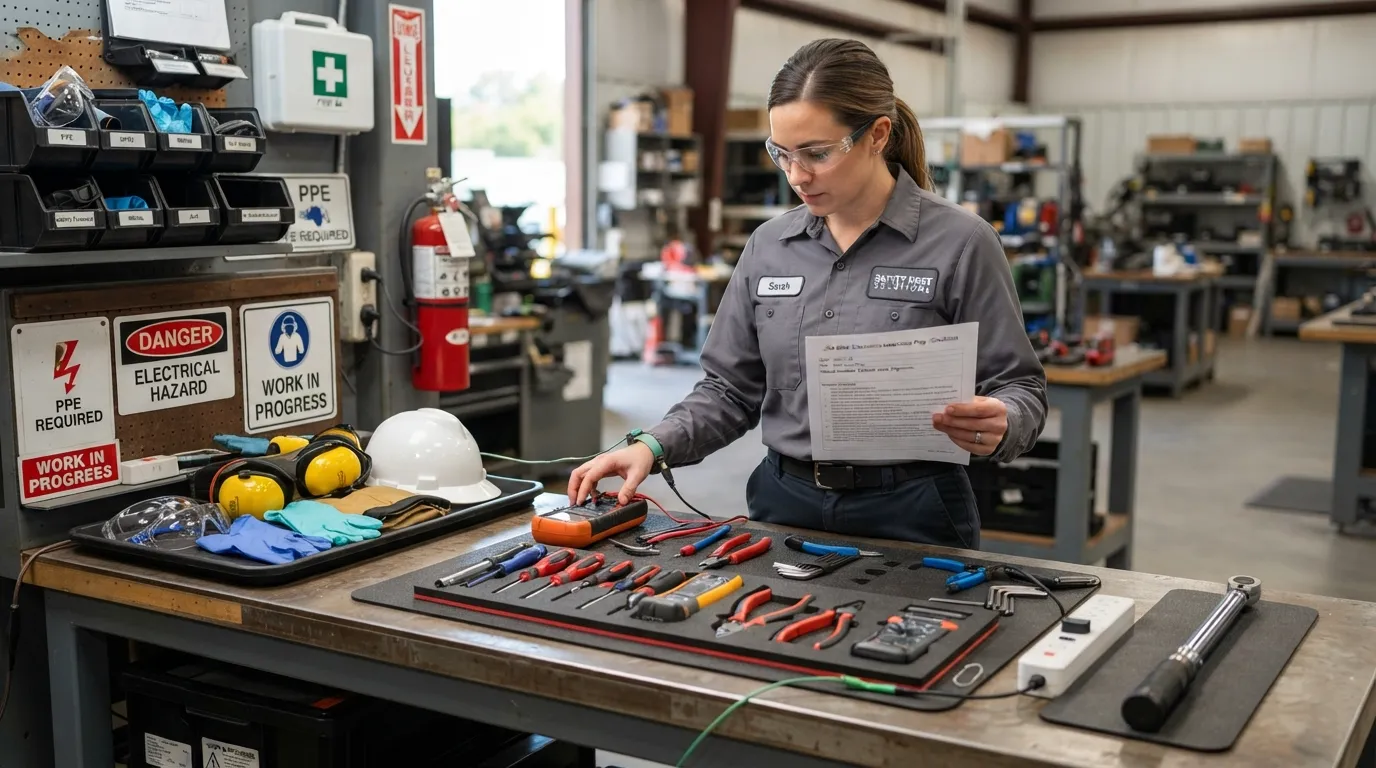 Proper preparation before tackling a double kitchen sink installation prevents unexpected floods, ruined cabinet bases, and misaligned components. Taking a few systematic steps to clear your workspace and dry-fit your hardware guarantees a seamless workflow.
Shut off the water and clear the cabinet
Before disconnecting any pipes or fixtures under your sink, close the hot and cold water supply valves completely. Empty everything out of the base cabinet so you have unhindered movement, clear sightlines, and plenty of room to maneuver tools.
Remove old plumbing if replacing
Unscrew the slip-joint nuts by hand or with adjustable pliers, starting from the P-trap and working your way up toward the strainers. Position your bucket directly beneath the old P-trap to capture trapped, stagnant water before pulling the pipes away.
- Capture Dirty Water: Always keep your bucket level until you can safely empty it down another working drain.
- Take Reference Photos: Snap a quick photo of your existing plumbing configuration before dismantling it to use as a visual guide for the new setup.
Measure your drain layout
Accurate measurements dictate whether your new drain kit will drop straight in or require specialized extensions. Measure the distance between your two basin outlets, record individual basin depths, and check the exact vertical and horizontal position of your wall stub-out.
Dry-fit before you cut or glue
Assemble your tailpieces, continuous waste tee, and P-trap entirely by hand without tightening any nuts fully or applying sealant. Dry-fitting lets you identify whether any tailpieces are too long and need trimming with a hacksaw before final assembly.
Safety notes
Working under a kitchen sink involves tight spaces and sharp components that require basic precautions. Protect your hands and eyes while handling freshly cut plastic or corroded metal.
- Handle Sharp Edges: Deburr any freshly cut PVC pipes with sandpaper or a utility knife to prevent cuts and ensure smooth slip-joint washer seating.
- Avoid Chemical Cleaners: Never mix chemical drain openers or leave harsh residues in the pipes while working, as splashing liquid can cause severe chemical burns.
How to Install Double Kitchen Sink Plumbing
Installing double kitchen sink plumbing systematically ensures a leak-free system that handles wastewater efficiently. Follow this structured, step-by-step procedure to assemble every component securely.
Step 1: Install the strainers in both basins
Roll a thick rope of plumber’s putty (or apply 100% silicone sealant) around the underside of each basket strainer flange and press it firmly into the sink basin’s bottom outlet. Secure the locking ring and mounting hardware from underneath, tightening evenly before wiping away any excess squeeze-out.
- From my own installs: I once skipped wiping away the excess silicone squeeze-out, which trapped debris and caused premature mildew growth right around the strainer rim. Always clean the metal surfaces thoroughly.
Step 2: Attach the tailpieces
Screw or slip the vertical tailpieces onto the bottom of each basket strainer assembly, remembering to slide your slip-joint nut and flanged washer onto the pipe first. Leave these slightly loose for now so you can make fine adjustments during the continuous waste alignment.
- From my own installs: A common amateur mistake is placing the flanged washer upside down (with the tapered edge facing away from the fitting), which creates an instant leak that no amount of tightening can fix.
Step 3: Measure, cut and fit the continuous waste
Measure the exact horizontal spread between your two tailpieces. Take your continuous waste arm, use a hacksaw or PVC pipe cutter to trim it down to the exact matching length, and deburr the cut edge smooth with sandpaper.
- From my own installs: Cutting a plastic tailpiece just 1/4 inch too short can cause the slip-joint nut to grab on only half of its threads, resulting in a blowout under water pressure. Always double-check your measurements before cutting.
Step 4: Install the baffle tee in the correct direction
Slide the continuous waste tee (baffle tee) onto the horizontal arm and vertical tailpieces, ensuring the internal baffle curves downward toward the main outlet. Correct orientation is critical because it directs the flow smoothly toward the drain rather than forcing water sideways into the opposite basin.
- From my own installs: I once inherited a kitchen where a DIYer installed the baffle tee backward, causing one sink’s soapy water to bubble directly up into the other basin whenever the garbage disposal ran.
Step 5: Connect the P-trap and trap arm to the wall drain
Position the U-shaped P-trap directly beneath the continuous waste outlet drop and connect the horizontal trap arm so it runs into the wall stub-out. Ensure the trap arm maintains a steady downward slope of at least 1/4 inch per foot toward the wall to guarantee proper drainage.
- From my own installs: Setting a trap arm level or sloping slightly upward is the number-one reason sinks drain slowly and accumulate standing gunk in the horizontal pipe section.
Step 6: Hand-tighten slip joints and check alignment
Tighten all plastic slip-joint nuts firmly by hand, then give them a gentle quarter-turn with channel-lock pliers if necessary. Avoid over-tightening, which can warp the plastic washers or crush the threads.
- From my own installs: Using heavy pliers to reef down on plastic slip nuts until they cracked was a costly lesson I learned early in my apprenticeship. Hand-tight plus a quarter-turn is all you need.
Step 7: Connect the faucet and supply lines
Mount your kitchen faucet on the sink deck, connect the hot water supply line to the left valve and the cold supply line to the right valve, and wrap threaded connections with Teflon tape if required. Turn on the shut-off valves slowly to test for pressure integrity.
- From my own installs: Forgetting to check the rubber cone washers inside old supply line fittings leads to sudden base-cabinet floods. Always replace old supply lines during a major plumbing overhaul.
Does a double sink need two P-traps?
No, a double kitchen sink does not need two P-traps. Standard plumbing code requires only one shared P-trap downstream of the continuous waste tee where both basins converge. Installing two traps can cause air lock and slow drainage; however, always verify local municipal codes for any unique regional amendments.
Setup Variations: Garbage Disposal Dishwasher and Odd Layouts
Real-world kitchen layouts often feature unique modifications like garbage disposals, integrated dishwashers, mixed basin depths, and offset wall connections. Adapting your standard plumbing kit to handle these configurations ensures a leak-free system tailored to your specific setup.
How to plumb a double sink with a garbage disposal
Installing a garbage disposal replaces one of the standard sink strainers and tailpieces with the disposal unit body. The disposal discharge tube then connects directly into a specialized continuous waste tee or routes straight into the P-trap assembly, depending on vertical alignment.
- From my own installs: A classic beginner trap is forgetting to knock out the internal plastic dishwasher plug inside the disposal’s side inlet nipple before hooking up the dishwasher hose. If you miss this, water will back up into your dishwasher or leak from the air gap during its first cycle.
Which side of a double sink should the disposal go on?
The garbage disposal should ideally be installed on the main washing basin side (frequently the larger or deeper bowl), provided it aligns well with your existing wall drain stub-out and leaves enough under-cabinet space for the P-trap.
Do you need a double sink for a garbage disposal?
No, a double sink is not required for a garbage disposal; they are frequently installed on single-basin sinks as well. On a single sink, the disposal connects straight down to a tailpiece and direct P-trap assembly without needing a continuous waste tee.
How to connect a dishwasher drain to a double sink
Your dishwasher drain hose connects either to the side inlet nipple on a garbage disposal or to a specialized dishwasher-branch tailpiece installed beneath the non-disposal sink basin.
- High Loop Requirement: Always secure the dishwasher hose in a “high loop” anchored to the underside of the countertop to prevent contaminated sink water from back-siphoning into your dishwasher.
What if one basin is deeper than the other?
Mixed-depth sinks (where one bowl is deeper than the other) require staggered tailpiece lengths. You will need to trim the tailpiece under the shallower basin longer (or use an extension tube) so that both meet the continuous waste tee at the correct horizontal plane.
End outlet vs. center outlet wall drain
The layout of your continuous waste kit depends on your wall stub-out position:
- Center Outlet: The tee drops wastewater directly midway between both basins, ideal when the wall drain is centered.
- End Outlet: The continuous waste arm extends all the way across to drop down near one specific side, matching an off-center wall stub-out.
Can you use a 90-degree elbow in a sink drain?
Standard 90-degree elbows should generally be avoided in horizontal drainage lines because they create sharp flow restrictions that catch grease and food particles. If a directional change is mandatory, use long-sweep elbows or smooth sanitary bends approved by plumbing code.
Can two sinks share the same drain?
Yes, two sinks (or two basins of a double kitchen sink) can safely share the same drain line. In this standard configuration, both streams merge at the continuous waste tee and exit through a single shared P-trap and wall stub-out, perfectly complying with standard residential plumbing codes.
Venting and Plumbing Code: What Actually Matters
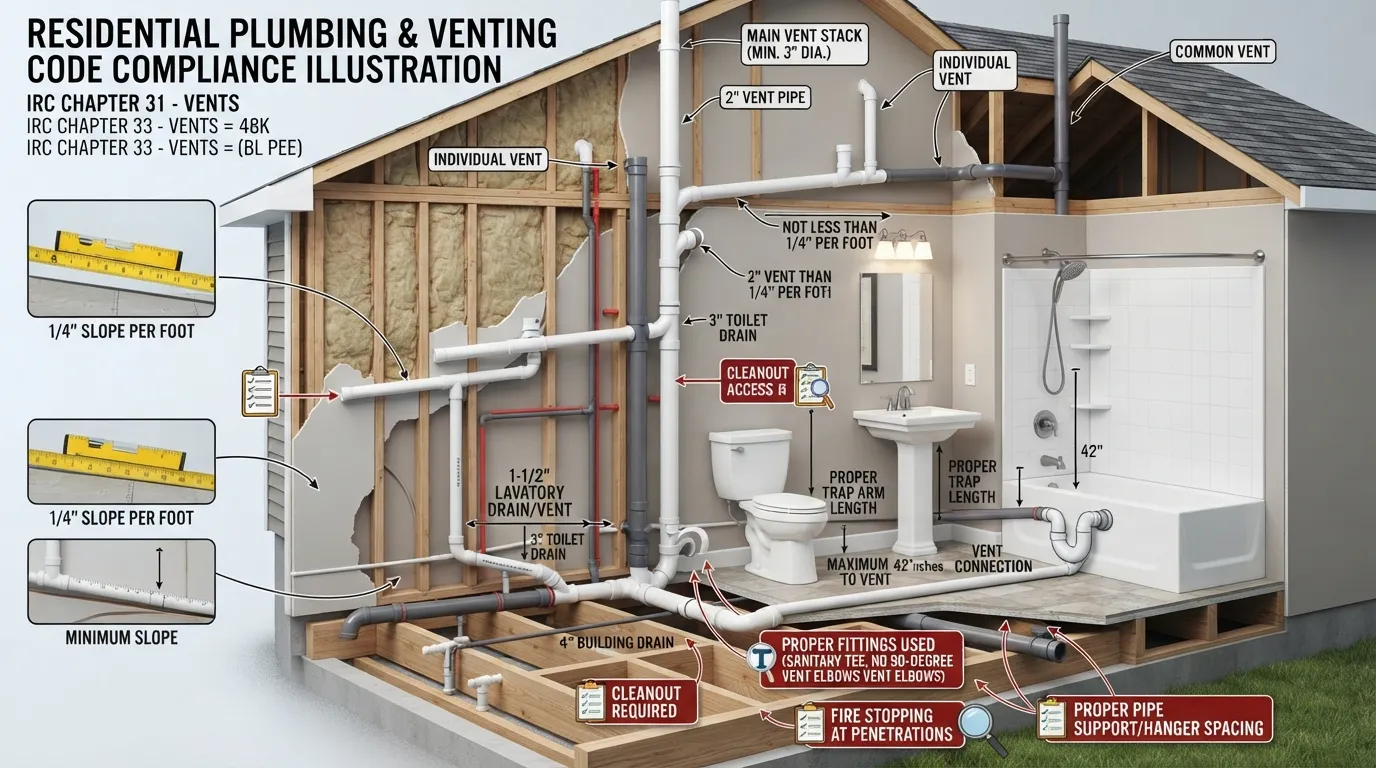 Proper venting is the hidden mechanism that keeps your double kitchen sink draining quickly and safely. Without adequate air circulation, wastewater systems create a vacuum that can siphon your P-trap dry, letting foul sewer gases back up into your home.
Why a kitchen sink drain needs a vent
As water rushes down your sink drain, it pushes air ahead of it and pulls a vacuum behind it. A dedicated vent pipe introduces atmospheric air into the system behind the trap, breaking the vacuum, preventing self-siphoning, and eliminating slow, gurgling drains.
Does a double kitchen sink need its own vent?
In a standard residential installation, a double kitchen sink does not need two separate vents. Both basins merge through the continuous waste tee and share a single P-trap, which connects to a single fixture drain (trap arm) and is served by one common vertical vent stack or sanitary tee connection.
Air admittance valve (AAV): when it’s allowed and when it isn’t
An air admittance valve (commonly called a mechanical vent or “cheater vent”) is a one-way valve that opens to let air in when water drains, but closes tightly to prevent sewer gas leaks when the sink is idle.
- When Allowed: Frequently permitted during kitchen remodels or island sink installations where running a traditional vent pipe up through the roof is structurally impossible.
- When Restricted: Some regional jurisdictions and strict local codes prohibit AAVs entirely, requiring a continuous physical vent tied into the home’s main stack. Always check your local plumbing code before relying on an AAV.
Trap arm length and slope rules
Plumbing codes enforce strict dimensional limits on the horizontal pipe (trap arm) running from your P-trap to the vertical vent connection to ensure the trap is effectively vented.
- Maximum Length: For a standard 1½-inch trap arm, maximum distance limits typically range between 5 to 6 feet depending on your governing code (UPC vs. IPC).
- Downward Slope: The trap arm must maintain a continuous downward slope of exactly 1/4 inch per foot toward the vent or wall stack.
Quick code checklist
Before buttoning up your cabinet base, review these critical compliance items:
- Permit Requirements: Determine if your municipal authority requires a plumbing permit for sink replacements or drain line modifications.
- Inspection Ready: Keep slip-joint connections accessible (do not permanently wall over slip nuts) so they can be inspected if required.
- Approved Fittings: Verify that all drainage components carry the proper UPC, IPC, or NSF certification stamps for residential DWV (Drain-Waste-Vent) use.
Test for Leaks and Check the Drain
Putting your newly installed plumbing system through a rigorous test before loading up your cabinet base guarantees a permanent, worry-free installation. Systematic leak checking identifies minor weeps before they can warp cabinet wood or cause mold growth.
Step-by-step leak test
Run a thorough, multi-stage pressure and volume test across both your water supply connections and your newly assembled drain lines.
- Basin Flood Test: Fill both sink basins to the brim with warm water, pull both stoppers simultaneously, and let the high-volume rush test your continuous waste tee and P-trap junctions.
- Dry Paper Towel Inspection: Wipe every single slip-joint nut, washer interface, and wall stub-out completely dry, then press a dry paper towel or tissue around each joint. Any hidden moisture will immediately stain the paper.
- Supply Line Pressure Test: Open your hot and cold angle stops fully, checking the faucet base, supply line connections, and shut-off valve packings under full household water pressure.
What a correct drain sounds and looks like
A properly functioning double kitchen sink drain should empty smoothly, rapidly, and quietly without pulling air backwards or creating standing pools of wastewater.
- Smooth Whirlpool Action: Water should pull down both basket strainers in a fast, even vortex.
- Silent Operation: There should be zero gurgling, bubbling, or air locks echoing back up through the opposite basin.
How to fix a leaking slip joint
If your paper towel test detects a minor drip coming from a slip-joint connection, follow these corrective steps to seal it instantly.
- Reseat the Washer: Loosen the nut, check that the flanged rubber or plastic washer is facing the correct direction (tapered edge pointing toward the receiving fitting), and retighten.
- Check Pipe Alignment: If pipes are misaligned and pushing the washer sideways, loosen adjacent nuts to let everything sit square before tightening.
- Replace Damaged Parts: If a washer is flattened, split, or cracked from age or overtightening, swap it out for a brand-new 1½-inch slip-joint washer.
Recheck after 24 hours
Even after passing your initial test, check your under-sink cabinet once more after 24 hours of normal kitchen usage.
- From my own installs: In my years of field experience, the single joint that most often weeps overnight is the slip-joint connection right beneath the continuous waste tee drop. A tiny quarter-turn with channel-locks during this 24-hour follow-up check almost always cures it permanently.
Test for Leaks and Check the Drain
Putting your newly installed plumbing system through a rigorous test before loading up your cabinet base guarantees a permanent, worry-free installation. Systematic leak checking identifies minor weeps before they can warp cabinet wood or cause mold growth.
Step-by-step leak test
Run a thorough, multi-stage pressure and volume test across both your water supply connections and your newly assembled drain lines.
- Basin Flood Test: Fill both sink basins to the brim with warm water, pull both stoppers simultaneously, and let the high-volume rush test your continuous waste tee and P-trap junctions.
- Dry Paper Towel Inspection: Wipe every single slip-joint nut, washer interface, and wall stub-out completely dry, then press a dry paper towel or tissue around each joint. Any hidden moisture will immediately stain the paper.
- Supply Line Pressure Test: Open your hot and cold angle stops fully, checking the faucet base, supply line connections, and shut-off valve packings under full household water pressure.
What a correct drain sounds and looks like
A properly functioning double kitchen sink drain should empty smoothly, rapidly, and quietly without pulling air backwards or creating standing pools of wastewater.
- Smooth Whirlpool Action: Water should pull down both basket strainers in a fast, even vortex.
- Silent Operation: There should be zero gurgling, bubbling, or air locks echoing back up through the opposite basin.
How to fix a leaking slip joint
If your paper towel test detects a minor drip coming from a slip-joint connection, follow these corrective steps to seal it instantly.
- Reseat the Washer: Loosen the nut, check that the flanged rubber or plastic washer is facing the correct direction (tapered edge pointing toward the receiving fitting), and retighten.
- Check Pipe Alignment: If pipes are misaligned and pushing the washer sideways, loosen adjacent nuts to let everything sit square before tightening.
- Replace Damaged Parts: If a washer is flattened, split, or cracked from age or overtightening, swap it out for a brand-new 1½-inch slip-joint washer.
Recheck after 24 hours
Even after passing your initial test, check your under-sink cabinet once more after 24 hours of normal kitchen usage.
- From my own installs: In my years of field experience, the single joint that most often weeps overnight is the slip-joint connection right beneath the continuous waste tee drop. A tiny quarter-turn with channel-locks during this 24-hour follow-up check almost always cures it permanently.
Cost Time and DIY vs. Professional Installation
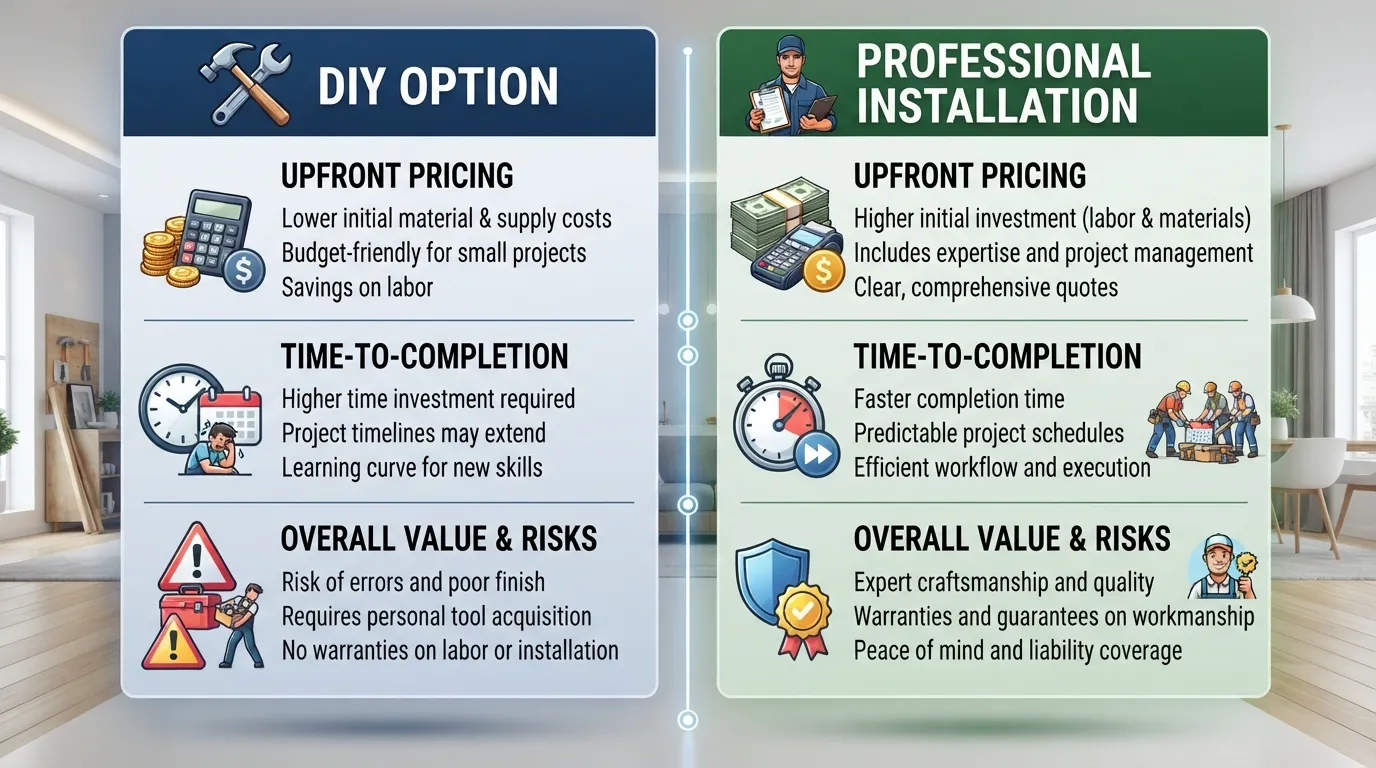 Deciding whether to tackle your double kitchen sink plumbing as a weekend DIY project or hire a professional depends on your budget, timeline, and the complexity of your existing drain setup. Evaluating costs and time commitments upfront ensures you make the right choice for your home.
How much does it cost to install double sink plumbing?
Your total expense varies depending on whether you purchase materials for a DIY installation or hire a licensed plumber for professional labor.
- Parts-Only Cost: Purchasing a standard PVC or polypropylene double sink drain kit, slip-joint washers, and plumber’s putty typically ranges between $20 and $75.
- Plumber Labor Ranges: Hiring a professional plumber for straightforward fixture and drain replacement generally ranges from $200 to $650 for labor alone, though exact totals vary significantly by region, local contractor rates, and any necessary pipe modifications.
How long does it take?
The time required to complete the installation depends heavily on your familiarity with basic plumbing tools and whether you encounter stubborn old fittings.
- Beginner DIYer: Expect to spend 2 to 4 hours, accounting for cautious measuring, dry-fitting, and multiple leak-testing phases.
- Experienced DIYer or Plumber: A straightforward swap using pre-assembled components can typically be finished in 1 to 2 hours.
When to call a plumber
While standard slip-joint replacements are ideal for confident DIYers, certain scenarios demand the expertise of a licensed plumber.
- Hidden Pipe Damage: If the wall stub-out or cast-iron drain stack inside your wall is corroded, cracked, or broken off flush, professional repiping is necessary.
- No Vent Access: Homes experiencing chronic slow drainage or gurgling due to a missing vent stack require professional drain-waste-vent routing.
- Unusual Wall Configuration: Complex offset geometries or non-standard floor-versus-wall drain exits may require custom solvent-welded PVC fabrication.
- Permit-Required Work: Major kitchen renovations involving structural drain changes often require a certified plumbing permit and code inspections.
Frequently Asked Questions
How should a double kitchen sink be plumbed?
A double kitchen sink should be plumbed by attaching strainers and tailpieces to both basins, connecting them together with a continuous waste tee (baffle tee). This unified waste stream then drops down through a single shared P-trap into the horizontal trap arm and wall stub-out with a steady downward slope.
Does a double sink need 2 P-traps?
No, a double sink does not need two P-traps. Standard residential plumbing codes require only one shared P-trap positioned downstream of the continuous waste tee where both sink basins converge. Installing multiple traps can cause air locks, backpressure, and slow, sluggish drainage.
Can two sinks share the same drain?
Yes, two sink basins can safely share the same drain line. In a standard double kitchen sink setup, wastewater from both compartments converges at the continuous waste tee and exits through a single shared P-trap and wall stub-out, fully complying with modern plumbing codes.
Can you put a 90 elbow in a sink drain?
You should generally avoid standard 90-degree elbows in horizontal drainage lines because sharp right angles catch grease and food particles, leading to clogs. If a directional change is mandatory, use smooth long-sweep elbows or approved sanitary bends that maintain proper flow velocity.
Which side of a double sink should the disposal go on?
The garbage disposal should ideally be installed on the main washing basin side, which is typically the larger or deeper bowl. This placement ensures optimal under-cabinet clearance for the P-trap while aligning neatly with your existing wall drain stub-out height.
Do you need a double sink for a garbage disposal?
No, you do not need a double sink to install a garbage disposal. Disposals are frequently installed on single-basin sinks, where the unit connects directly to a vertical tailpiece and its own dedicated P-trap assembly without requiring a continuous waste tee.
How do you connect a dishwasher to a double kitchen sink?
You connect a dishwasher drain hose either to the specialized side inlet nipple on a garbage disposal or to a dishwasher-branch tailpiece installed beneath the non-disposal basin. Always secure the hose in a high loop under the countertop to prevent back-siphoning.
Does a double kitchen sink need a vent?
Yes, a double kitchen sink drainage system requires proper venting to introduce atmospheric air behind the trap, preventing self-siphoning and gurgling. Both shared basins typically connect to a single common vertical vent stack or an approved air admittance valve.
Conclusion
Mastering double kitchen sink plumbing comes down to methodical preparation, proper component alignment, and systematic testing. By following structured installation practices, you can achieve a reliable, professional-grade result that serves your household for years to come.
Final checklist
- Strainer Seal: Verify that both basket strainers are securely locked down with watertight putty or silicone seals.
- Baffle Orientation: Ensure the continuous waste tee directs water flow smoothly downward toward the drain rather than across into the opposite basin.
- Trap Slope: Confirm that the trap arm maintains a continuous downward slope of at least 1/4 inch per foot toward the wall.
- Slip-Joint Security: Check that all slip-joint nuts are hand-tightened plus a gentle quarter-turn without overtightening or crushing washers.
- Leak-Free Test: Perform both a basin flood test and a dry paper towel inspection to guarantee absolute water tightness.

Home Improvement Researchers & Guides Editors
Meet the Nest Team, a collective of dedicated researchers, home improvement enthusiasts, and industry writers sharing practical guides, thorough category research, and trusted solutions for residential repairs and thoughtful home upkeep.

