Summary & Essential Tools
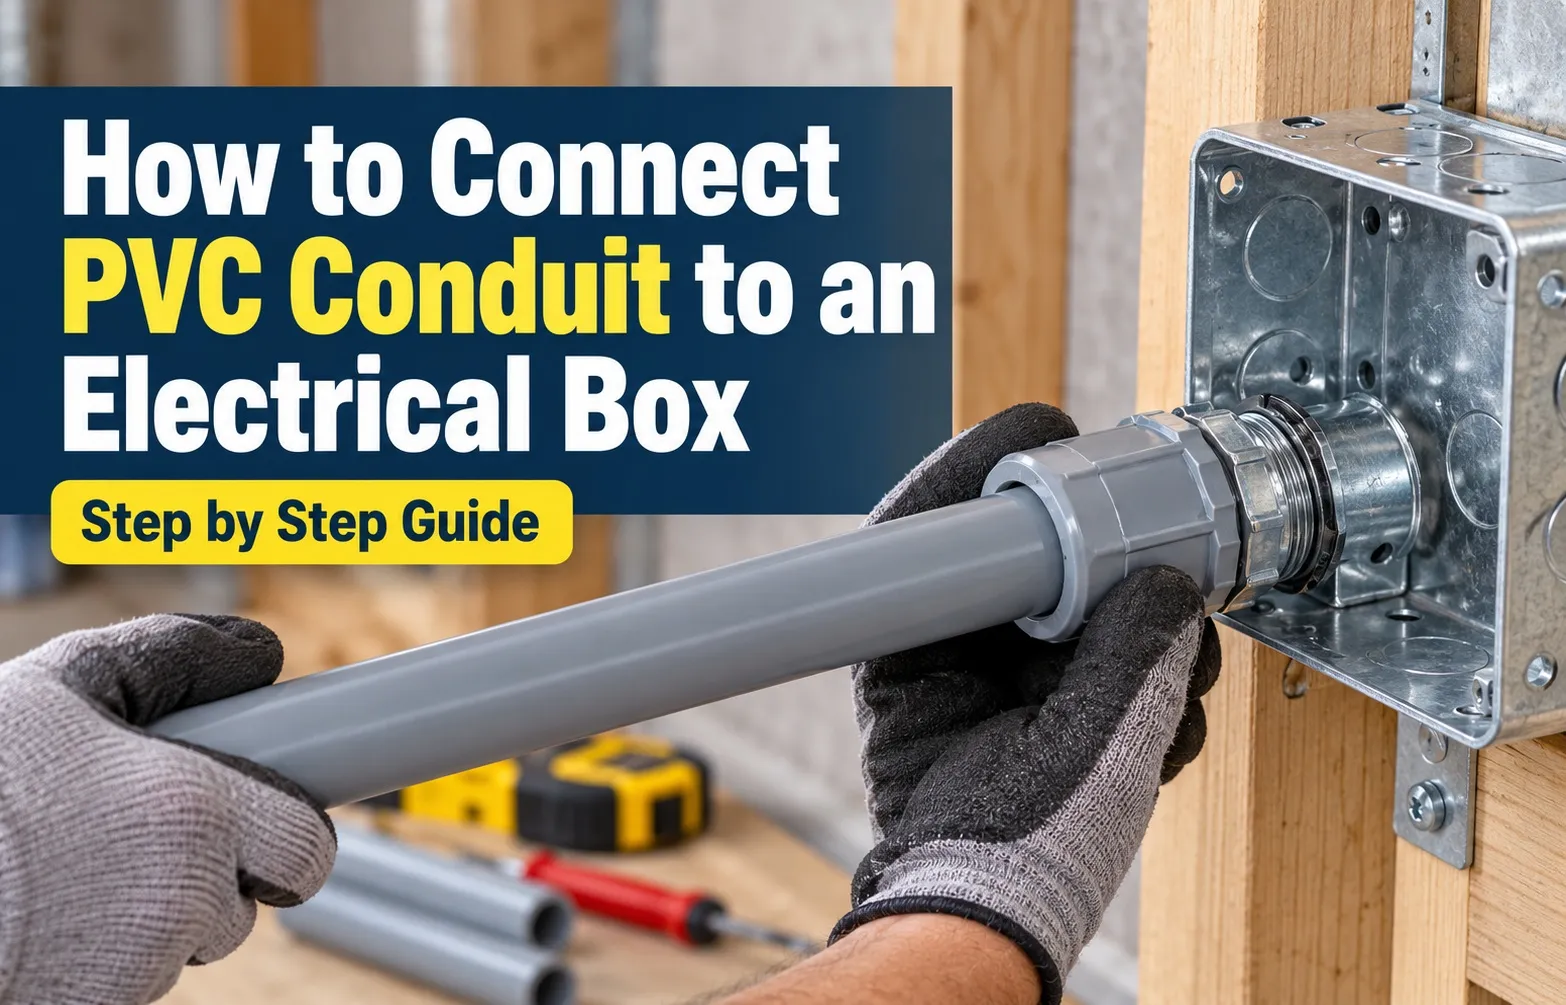 Connecting Schedule 40 or Schedule 80 PVC conduit to an electrical box requires securing a threaded PVC male adapter (terminal adapter) into the box opening with a conduit locknut, then solvent-welding the pipe into the adapter socket. This process creates a rigid, mechanically sound, and moisture-resistant raceway that protects insulated conductors from physical damage and ambient environmental exposure.
Before making any physical cuts or applying chemical cements, gathering the correct trade-specific tools and adhering to basic personal and electrical safety protocols ensures a code-compliant installation.
Required Tools and Materials Checklist
Having all components and equipment on hand prevents unnecessary delays and ensures strong solvent-welded joints and secure physical mounting.
- PVC Male Adapter (Terminal Adapter): Matched strictly to the outer diameter of your conduit (e.g., 1/2-inch, 3/4-inch, or 1-inch) with standard male pipe threads on one end and a smooth slip-socket on the other.
- Conduit Locknut: Heavy-duty electrical locknut (metallic or non-metallic PVC) used to lock the threaded male adapter securely against the inner wall of the electrical box knockout.
- Electrical-Grade Solvent Cement & Primer: Medium-bodied PVC cement specifically labeled for electrical raceways, alongside a clean PVC primer to prepare the mating surfaces.
- Fine-Tooth Saw or PVC Pipe Cutter: A ratchet-style PVC cutter, fine-tooth hacksaw, or dedicated plastic pipe saw to execute clean, perpendicular cuts across the conduit.
- Deburring Tool or Utility Knife: Used to clean plastic shavings and smooth outer and inner cut edges before assembly.
- Channel Lock Pliers or Locknut Wrench: Essential for applying sufficient leverage to tighten locknuts flat against the box enclosure wall.
- Personal Protective Equipment (PPE): Safety goggles and chemical-resistant gloves to protect eyes and skin from flying plastic chips and solvent vapors.
Safety First: Essential Electrical Precautions Before Installation
Working on or around electrical enclosures presents real safety hazards. Always confirm that all electrical circuits feeding or passing through the box are completely isolated before starting work.
- De-energize the Circuit: Locate the main breaker panel and switch off the dedicated circuit breaker supplying power to the target enclosure. If working in an unfamiliar panel, switch off the main service disconnect.
- Verify Zero Voltage: Open the electrical box and test every conductor and terminal using a calibrated non-contact voltage tester to confirm no current is present. Never assume a circuit is dead without testing.
- Maintain Clean Conditions: Keep moisture, dirt, and plastic debris out of active electrical enclosures. Wipe down the box knockouts and surrounding conduit prior to fitting components.
Material Selection & Code Compliance
Selecting the correct conduit material and adhering to national safety standards is mandatory for a safe, durable, and code-compliant electrical installation. Using improper materials or failing to support conduit runs correctly can lead to dangerous insulation breakdown, water infiltration, and failed electrical inspections.
Before installing any raceway, understanding the critical differences between electrical conduit and plumbing pipe, as well as choosing the right pipe schedule and securing intervals, ensures long-term system integrity.
Gray Electrical PVC vs. White Plumbing PVC: Why Code Prohibits White Pipe
A common question among DIYers is whether white plumbing PVC can be substituted for gray electrical PVC. The short answer is no. Using white plumbing pipe for electrical wiring is a direct violation of the National Electrical Code (NEC).
- UL Listing and Electrical Safety: Gray electrical PVC conduit is UL-listed specifically as an electrical raceway. It is formulated with flame-retardant additives designed to self-extinguish and release minimal toxic fumes if exposed to electrical arcing or fire. White plumbing pipe is designed solely for water pressure and drainage, not fire resistance.
- Sunlight and UV Resistance: Gray electrical PVC contains specialized UV stabilizers that protect the pipe from becoming brittle, cracking, or degrading under direct sunlight exposure. White plumbing PVC degrades rapidly under UV light, leading to catastrophic physical failure over time.
- Smooth Interior Wall Design: Electrical conduit features a ultra-smooth inner wall engineered to prevent wire insulation from snagging or stripping when pulling conductors over long distances. Plumbing pipe interiors do not adhere to these low-friction manufacturing tolerances.
Choosing Between Schedule 40 and Schedule 80 PVC Conduit
Both Schedule 40 and Schedule 80 PVC are code-approved electrical raceways, but their wall thicknesses determine where they can be legally installed.
- Schedule 40 PVC Conduit: The standard choice for most residential and commercial electrical installations. It features a thinner wall design that works ideally for underground direct burial, indoor surface runs, and concealed wall framing where the pipe is protected from heavy impact.
- Schedule 80 PVC Conduit: Built with significantly thicker walls to withstand severe physical damage. The NEC strictly mandates Schedule 80 PVC for exposed above-ground installations in high-traffic locations, such as driveway crossings, lawnmower-adjacent walls, utility poles, or where conduit emerges from underground burial.
NEC Rules for Supporting and Securing PVC Conduit Connections
Because rigid nonmetallic conduit expands and contracts with ambient temperature swings, proper support placement is required to keep joints from pulling apart or sagging over time.
- The 3-Foot Securing Rule: Under NEC Section 352.30, PVC conduit must be firmly secured within 3 feet (36 inches) of every electrical box, junction box, cabinet, or terminal fitting.
- Support Strap Spacing: In addition to the initial 3-foot anchor near the box, continuous runs must be supported using approved conduit support straps at maximum intervals specified by pipe diameter (e.g., every 3 feet for 1/2-inch to 1-inch trade sizes).
- Thermal Expansion Allowance: For long outdoor runs subjected to direct sunlight or extreme seasonal variations, expansion fittings must be installed to prevent the conduit from buckling or pulling out of the terminal box adapters.
Step-by-Step Installation Guide
Installing PVC conduit securely to an electrical box requires precision cutting, secure mechanical fastening, and proper chemical solvent-welding. Following this structured procedure guarantees a rigid, durable raceway that protects insulated conductors from physical damage and environmental exposure.
Step 1: Cutting and Deburring the PVC Conduit
Make a clean, perfectly square cut across the PVC pipe using a dedicated PVC cutter or fine-tooth saw, then thoroughly eliminate all plastic shavings. Leaving jagged edges or internal burrs creates sharp obstructions that can easily strip or puncture wire insulation during pulling.
- Square Cutting: Position your pipe cutter or hacksaw perpendicular to the conduit axis to ensure a flat, even mating edge.
- Internal Deburring: Use a deburring tool, reamer, or utility knife blade to scrape away both inner and outer plastic burrs.
- Surface Cleaning: Wipe away any remaining dust, moisture, or oils from the cut end with a clean dry rag.
Step 2: Attaching the Male Terminal Adapter to the Box
Fasten the male terminal adapter firmly to your electrical box, adapting your approach depending on whether you are using a threaded plastic hub or a standard knockout hole. Proper mechanical alignment ensures the raceway sits flush and tight against the enclosure wall.
- Threaded Hub Connections (Plastic Boxes): Screw the threaded end of the male terminal adapter directly into the factory-threaded box hub until hand-tight and securely seated.
- Knockout Hole Connections (Metal or Plastic Boxes): Insert the threaded male end of the adapter through the knockout hole from the outside of the box.
- Locknut Tightening: Thread a conduit locknut onto the adapter from inside the box. Tighten it securely by hand, then lock it down with an additional quarter-turn using channel lock pliers.
Step 3: Priming and Solvent-Welding the Connection
Create a permanent, watertight chemical bond by applying purple primer and electrical-grade PVC solvent cement to both mating components. Solvent welding melts the surface molecules of the pipe and adapter together into a single unified piece.
- Dry Fitting: Test-fit the conduit into the adapter slip-socket to ensure proper alignment and depth before applying any chemicals.
- Primer Application: Brush purple primer onto the outside of the conduit end and the inside of the adapter socket to soften the rigid plastic.
- Cement Application: Apply a smooth, uniform coat of electrical-grade PVC solvent cement over the primed surfaces immediately while still wet.
- Quarter-Turn Insertion: Push the conduit firmly into the adapter socket with a swift quarter-turn twist to distribute the cement evenly, holding the joint in place for 30 seconds to prevent push-out.
Step 4: Curing Time and Final Inspection
Allow the solvent-welded joint to cure completely according to manufacturer guidelines before pulling electrical wires through the completed raceway. Rushing the cure time can cause joints to pull apart under the tension of wire pulling.
- Cure Duration: Wait at least 15 to 30 minutes for initial bond strength, or longer in cold or humid conditions, before stressing the joint.
- Joint Inspection: Verify that a continuous, smooth bead of squeezed-out solvent cement forms completely around the rim of the socket.
- Rigidity Check: Confirm that the locked adapter shows no wobble or play against the electrical box enclosure before threading or pulling conductors.
Metal vs. Plastic Box Connections & Grounding Rules
Connecting non-metallic PVC conduit to a metal electrical box or panel requires specific mechanical and grounding considerations. Because PVC is an insulating, non-conductive material, it cannot serve as an equipment grounding conductor (EGC) like rigid metal conduit (RMC) or electrical metallic tubing (EMT). Proper installation procedures must be followed to maintain electrical safety and grounding continuity across the system.
Understanding how to join non-metallic raceways with metallic enclosures ensures full compliance with electrical codes while protecting equipment and occupants from fault currents.
How to Connect PVC Conduit to a Metal Box
Attaching non-metallic PVC conduit to a metal electrical box involves seating a threaded male terminal adapter through a metal knockout and locking it mechanically in place.
- Preparing the Knockout: Remove the appropriate-sized metal knockout from the box using a hammer and screwdriver, ensuring the surrounding metal rim remains smooth and undamaged.
- Positioning the Adapter: Push the male adapter’s threaded nose through the knockout hole from the exterior side of the metallic enclosure until the adapter shoulder rests flush against the box outer wall.
- Securing the Locknut: Thread a heavy-duty metallic or PVC locknut onto the adapter threads from inside the box. Tighten hand-tight, then use channel lock pliers to apply a final quarter-turn so the locknut teeth dig into the box wall for a secure fit.
Grounding and Bonding Requirements When Using PVC with Metal Enclosures
Because PVC forms a non-conductive pathway, grounding continuity cannot rely on the raceway itself. An insulated equipment grounding conductor must run inside the conduit, and all metal enclosures must be explicitly bonded.
- Insulated Grounding Wire: Always pull a dedicated copper equipment grounding conductor (green or bare) alongside circuit wires inside the PVC conduit.
- Bonding to the Metal Box: Connect the green grounding wire directly to the metallic box using an approved green grounding screw or an internal grounding bus bar.
- Grounding Bushings: When bringing circuits into a metal enclosure with concentric or eccentric knockouts, attach a grounding bushing over the male adapter threads and attach a bonding jumper wire directly to the box grounding terminal.
Connecting PVC Conduit to Breaker Panels and Disconnect Boxes
Feeding PVC raceways into main breaker panels, subpanels, or outdoor disconnect boxes requires precise alignment and proper wire termination inside the cabinet.
- Panel Enclosure Entry: Secure the male adapter into the panel knockout using a locknut rated for electrical enclosures, ensuring no filings or plastic debris fall onto live bus bars or breakers.
- Terminating the Equipment Ground: Route the internal grounding wire from the PVC conduit straight to the main neutral/grounding bus bar (in main service equipment) or the dedicated equipment grounding bar (in subpanels).
- Maintaining System Safety: Never allow ungrounded metal boxes or disconnect cabinets to float without a continuous bonding jumper connected directly back to the grounding system.
Outdoor & Weatherproof PVC Installation
Outdoor electrical installations demand rigorous weatherproofing measures to protect against moisture intrusion, rain, humidity, and extreme ambient temperature fluctuations. Utilizing proper wet-rated conduit connections, managing thermal movement, and selecting the correct conductors are vital for long-term safety and code compliance.
Watertight Connections: Using O-Rings, Gaskets, and Sealing Locknuts
Achieving a reliable NEMA 3R or NEMA 4 weatherproof seal when entering outdoor boxes, disconnect panels, or junction enclosures requires more than standard indoor fittings. Water naturally follows threads and gaps unless blocked by specialized sealing hardware designed for wet locations.
- Neoprene Sealing Washers: Place a rubber or neoprene gasket washer between the male adapter shoulder and the exterior box wall to compress tightly against the enclosure and block moisture entry.
- Sealing Locknuts: Use weather-rated sealing locknuts featuring built-in rubber O-rings on the interior side of the knockout to prevent water seepage around the threaded connector threads.
- Threaded Hubs vs. Knockouts: Whenever possible, enter outdoor enclosures through factory-threaded hubs equipped with integral O-rings rather than standard unthreaded knockouts for superior wet-location protection.
Managing Thermal Expansion in Outdoor PVC Runs
Rigid nonmetallic conduit experiences significant physical expansion and contraction when exposed to direct sunlight and extreme seasonal temperature swings. Failing to account for thermal movement can cause fittings to snap, conduit to buckle, or pipe sections to pull entirely out of box adapters.
- Thermal Movement Calculations: PVC expands roughly 4.1 inches per 100 feet of pipe for every 100 degrees Fahrenheit temperature change, requiring engineered joint allowances on long runs.
- Expansion Fittings: Install PVC expansion couplings on straight runs exceeding specific distance thresholds, allowing the conduit to slide telescopically as temperatures rise and fall.
- Secure Support Placement: Anchor the conduit securely using straps that permit longitudinal movement without pinching or binding the pipe against building surfaces.
Running NM-B (Romex) Cable vs. Individual THHN/THWN Wires in Outdoor Conduit
A frequent point of confusion among DIYers involves whether standard indoor non-metallic sheathed cable (NM-B or Romex) can be run inside outdoor conduit. Building codes and wiring standards establish strict parameters regarding wet locations and conduit fill.
- The Outdoor Wet Location Rule: The interior of any underground or outdoor conduit is legally classified by the National Electrical Code as a wet location because condensation naturally accumulates inside the pipe.
- Why NM-B Is Prohibited Outdoors: Standard indoor NM-B (Romex) cable features paper fillers and outer jackets that absorb moisture, making it a code violation for use in wet or damp conduit runs.
- Using THHN/THWN Conductors: Install individual single-conductor wires rated for wet locations (specifically dual-rated THHN/THWN-2 copper wires) inside outdoor and underground PVC conduit for complete code compliance and long-term durability.
Frequently Asked Questions
Clear answers to common questions regarding PVC conduit box connections, wiring rules, and solvent welding ensure safe, professional results and full compliance with electrical standards.
Can you connect PVC conduit directly to a metal electrical box?
Yes, you can connect PVC conduit directly to a metal electrical box by using a male terminal adapter and a conduit locknut. Insert the threaded male fitting through the metal knockout from the outside, then secure it tightly with a locknut from the interior. Because PVC is a non-conductive material, a separate equipment grounding wire must be run inside and bonded to the metal box.
What fitting connects PVC conduit to an electrical box?
A PVC male terminal adapter combined with a conduit locknut is the standard fitting used to connect PVC conduit to an electrical box. The slip-socket end of the adapter solvent-welds directly to the conduit pipe, while the threaded male end passes through the enclosure knockout or threaded hub and locks securely in place.
Is it legal to run Romex (NM-B) wire inside PVC conduit?
Running Romex (NM-B) cable inside PVC conduit is permitted only within specific NEC code allowances, as standard non-metallic sheathed cable is strictly prohibited in outdoor or underground conduit runs classified as wet locations. Individual wet-rated THHN/THWN conductors must be pulled instead while respecting strict wire fill capacity limits.
Do you need primer when gluing PVC conduit for electrical wiring?
Yes, applying a purple or clear PVC primer is strongly recommended and often required before applying solvent cement. Primer chemically cleans, etches, and softens the outer surface of the pipe and inner socket, ensuring a permanent, high-strength chemical weld.
How long should PVC electrical glue dry before pulling wires?
PVC electrical solvent cement typically requires a minimum of 15 to 30 minutes of initial cure time, but you should wait several hours or overnight before pulling wire through long or tight bends. Allowing adequate cure time ensures the joint reaches maximum strength and prevents pulling forces from fracturing fresh glue.

Oscar Vance | Master Plumber & Drainage Expert
Meet Oscar Vance, a licensed master plumber sharing practical solutions on residential repairs, preventive maintenance, and thoughtful home upkeep.