Answer & Project Overview
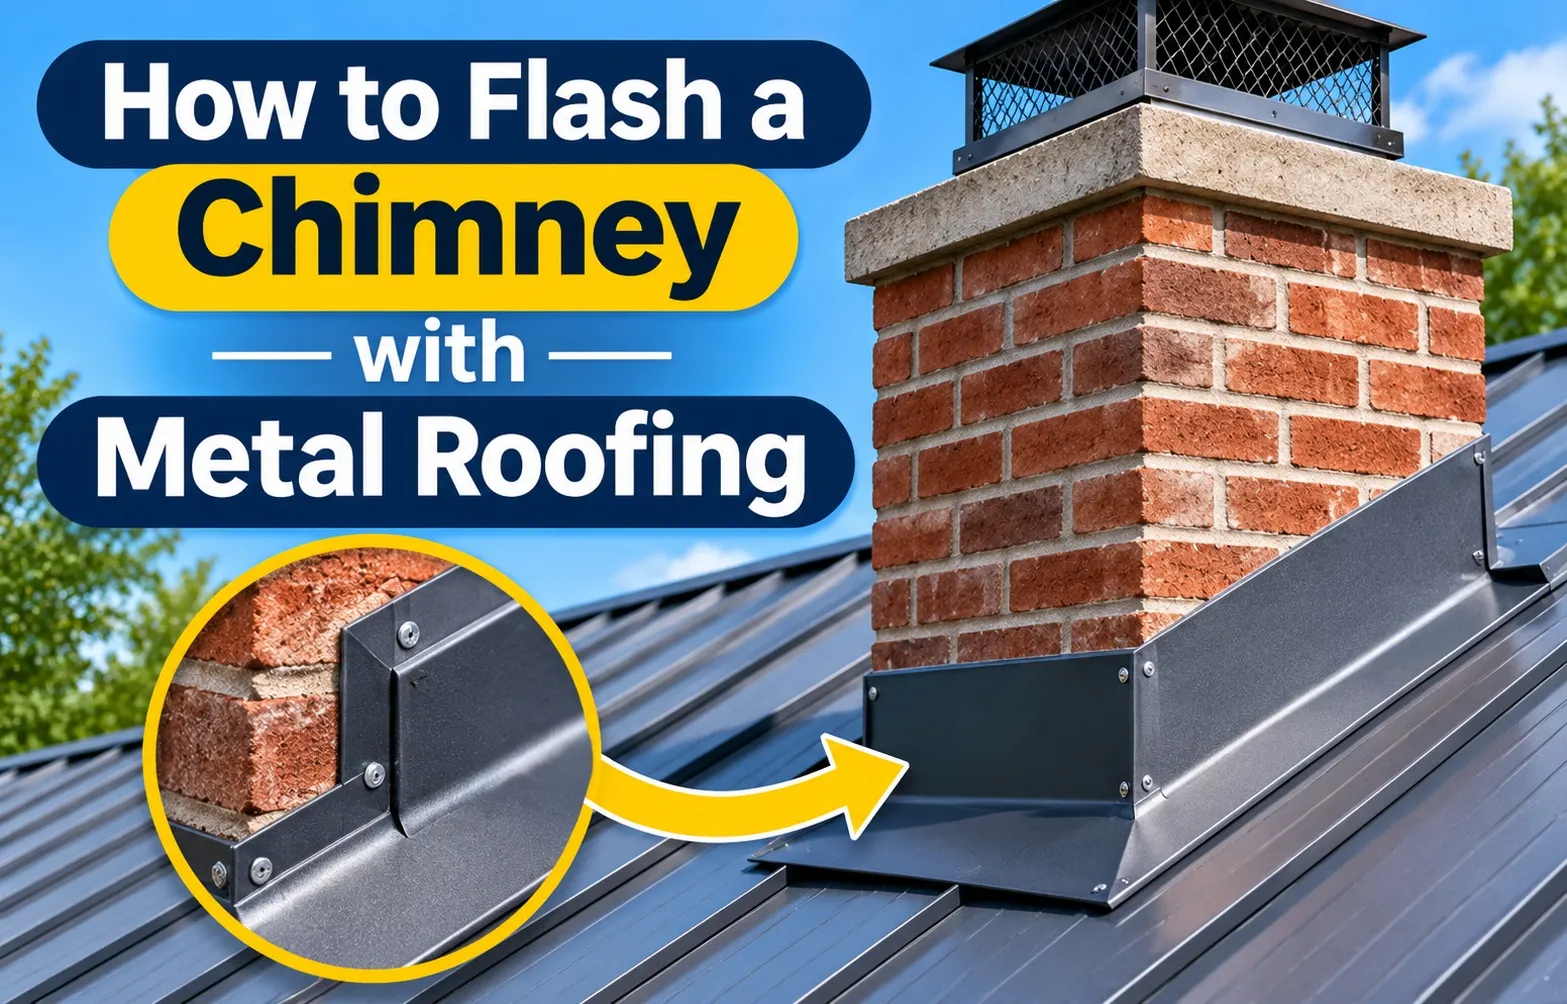 Flashing a chimney on a metal roof requires a water-tight, multi-layered metal barrier system. The lower apron flashing channels water onto the metal panels, side step flashings guide lateral runoff, an upslope cricket diverts rain around the rear masonry, and counter-flashing sealed into a mortar reglet cut prevents water from penetrating behind the system.
The Gold Standard for Metal Roof Chimney Flashing
Properly installed metal roof chimney flashing relies on mechanical water-shedding layers rather than surface caulk alone. Because metal roof panels expand and contract with temperature changes, the base flashing system must float independently beneath a fixed masonry counter-flashing.
- Apron Flashing: Secures the downslope face of the chimney, resting over the roofing panel surface.
- Side Flashing Channels: Interlock along the vertical walls to channel water past panel ribs.
- Chimney Cricket (Saddle): Diverts water and debris around the rear chimney wall on roofs wider than 30 inches.
- Masonry Counter-Flashing: Inserts into a cut mortar reglet to cover the top edges of all base flashing pieces.
Material & Tool Checklist
Having all specialized tools and materials ready before ascending the ladder ensures accurate installation and long-term weatherproofing performance.
- Angle grinder equipped with a 4.5-inch diamond masonry blade
- Custom-bent Galvalume, aluminum, or 26-gauge steel flashing pieces
- High-grade non-curing butyl tape and flexible polyurethane sealant
- Self-drilling metal roofing screws with EPDM sealing washers
- Profile closure strips (closed-cell foam matching panel geometry)
- Hand seamers, sheet metal snips, and cordless impact driver
Safety Precautions & Building Code Requirements
Metal roof surfaces present heightened slip hazards and sharp edges. Work must comply with local building codes regarding flashing heights, cricket dimensions, and structural clearance.
- Set up secure ladder tie-offs and utilize a full-body harness following OSHA Fall Protection Guidelines.
- Maintain a minimum counter-flashing extension height of 4 inches up the vertical brickwork.
- Ensure the mortar reglet groove is cut to a depth of 1 to 1.5 inches for secure anchor sealant engagement.
- Never drive rigid fasteners through both the counter-flashing and the dynamic metal panels underneath.
Understanding Chimney Flashing Components
A weather-tight chimney flashing installation relies on a multi-layered drainage system designed to divert water away from structural roof penetrations. By overlapping individual metal components from bottom to top, gravity naturally directs runoff over exterior surfaces without exposing underlying roof decking or mortar joints to moisture.
The Anatomy of a Weather-Tight Chimney Flashing System
Each flashing component performs a specific hydro-dynamic function around the chimney perimeter. Base flashing elements integrate directly with the metal roof surface, while vertical counter-flashing protects the transition zones along the masonry brickwork.
Base Flashing vs. Step Flashing vs. Counter-Flashing
Understanding the distinction between primary base layers and secondary cap layers is critical for creating a leakproof seal. Every component must overlap correctly to maintain a continuous drainage plane.
- Base Flashing & Apron Flashing: Installed directly against the bottom front face of the chimney, extending downward over the rib peaks of the lower metal panels.
- Sidewall & Step Flashing: Formed L-shaped side pans running parallel to the roof slope, interfacing with panel seams to guide water past the chimney corners.
- Counter-Flashing: The protective top layer inserted into a cut mortar reglet groove, overlapping vertical legs of base and sidewall flashings by 3 to 4 inches.
Why Metal Roofs Require Floating Flashing Systems (Thermal Expansion)
Metal roofing panels experience significant thermal movement, expanding and contracting daily in response to ambient temperature fluctuations. Rigidly pinning flashing components to both the masonry chimney and the roof panels causes structural stress, torn sealants, and oil-canning panel distortion.
Floating flashing systems resolve this movement by utilizing overlapping expansion joints and slip-joint interfaces. This allows the metal panels and base pans to slide freely underneath the fixed counter-flashing without breaking the primary seal.
- Apply a high-grade rubberized sealant inside sliding overlap joints to maintain flexibility.
- Fasten counter-flashing exclusively to the masonry wall using drive anchors.
- Never drive screws through both the counter-flashing and the base roof panel field.
Roof Type Variations Standing Seam vs. Exposed Fastener
Roof profile dictates the exact mechanical flashing strategy needed around a chimney penetration. Matching the flashing configuration to either an exposed fastener system or a standing seam profile prevents water infiltration and accommodates panel thermal movement.
Method A: Flashing a Chimney on Exposed Fastener / Corrugated Panels
Flashing an exposed fastener roof, such as MasterRib or corrugated metal panels, requires sealing over raised rib profiles using custom profile-matched closure strips. Fasteners penetrate directly through the metal panels, necessitating neoprene washers and continuous tape sealants to block wind-driven moisture.
- Cut metal panels cleanly to fit around the chimney perimeter, maintaining a consistent clearance gap for sealant beds.
- Install closed-cell foam closure strips directly beneath the front apron and upper pan to fill corrugated profile voids.
- Drive self-drilling metal roofing screws through the flat portions of the flashing into the underlying wood decking, ensuring EPDM washers compress fully without crushing the panel.
Method B: Flashing a Chimney on Standing Seam Metal Roofs
Standing seam metal roofs utilize raised vertical seams and hidden clips that allow panels to glide freely during thermal expansion. Flashing a chimney on this profile requires Z-bar transitions and floating pans that avoid puncturing the primary roof field.
- Anchor Z-bar flashing pieces horizontally across the standing seams upstream and downstream of the chimney.
- Fabricate custom floating pans that interlock with the vertical ribs using non-penetrating clamps or folded seam locks.
- Avoid driving rigid fasteners directly through the raised standing seams, which restricts normal thermal movement and triggers panel distortion.
Choosing the Right Sealant & Gaskets (Butyl Tape vs. Foam Closures)
Selecting correct gasket closures and chemical sealants ensures long-term weather resistance between dissimilar metal and masonry interfaces. Butyl tape provides superior non-curing flexibility for concealed joints, while high-density foam closures block external wind-driven rain from entering corrugated voids.
- Apply double-sided butyl tape between overlapping metal sheets to maintain a permanent water barrier under high shear stress.
- Use closed-cell foam closure strips tailored to specific rib geometries like MasterRib to seal open profile ends.
- Inspect all sealant beads annually to ensure elastomer integrity and prevent premature moisture ingress.
Step-by-Step Guide – How to Flash a Chimney on a Metal Roof
Installing chimney flashing correctly requires a strict bottom-up water-shedding sequence. By preparing the masonry joint, securing the lower apron, interweaving sidewall steps, framing a rear cricket, and sealing with counter-flashing, you create a permanent, leakproof barrier against severe weather.
Step 1: Prep the Roof Surface & Cut the Mortar Reglet
Preparing the roof perimeter and cutting a clean mortar reglet groove establishes the primary mechanical anchor point for upper counter-flashing. Clear all old debris and use an angle grinder with a diamond blade to cut a precise channel into the brickwork above the roof line.
- Clear old roofing tar, leaves, and loose mortar around the base of the chimney.
- Fit and trim the metal roofing panels cleanly around the chimney penetration, maintaining proper underlayment gaps.
- Use an angle grinder fitted with a masonry blade to cut a clean 1 to 1.5-inch deep reglet groove into the horizontal mortar joint.
Step 2: Install the Lower Apron Flashing (Downslope Side)
Installing the lower apron flashing on the downslope side channels water directly from the chimney front onto the metal roof panels below. Apply a continuous closed-cell foam or butyl tape gasket seal and fasten the metal securely using rubber-washered screws to prevent wind-driven rain intrusion.
- Apply closed-cell foam or double-sided butyl tape along the bottom edge where the apron meets the chimney face.
- Position the lower apron flashing piece to match the exact pitch of your metal roof panels.
- Fasten the apron using self-drilling metal roofing screws with neoprene washers, centering them to compress the gasket without denting the metal.
Step 3: Interweave Sidewall Flashing along the Chimney Sides
Interweaving L-shaped sidewall step flashing up the sides of the chimney prevents lateral water from leaking behind the panel ribs. Apply heavy-duty polyurethane sealant in all corner joints and ensure each flashing piece overlaps correctly as you ascend the roof slope.
- Run L-shaped sidewall flashing pieces progressively up the left and right sides of the chimney.
- Apply a generous bead of high-grade Geocel 2300 rubberized roofing sealant in all corner joints before locking pieces down.
- Maintain a floating clearance design to allow dynamic metal panels to expand and contract freely without shearing fasteners.
Step 4: Build & Waterproof a Chimney Cricket (Upslope Side)
Building a peaked chimney cricket on the upslope side diverts heavy rain, melting snow, and ice around wide chimneys rather than letting moisture pool behind the brickwork. Install a high-wall chimney pan so the upper roofing panels cleanly overlap it.
- Construct saddle fabrication techniques or frame a structural metal cricket for chimneys wider than 30 inches.
- Place the high-wall chimney pan over the upslope framing to route runoff smoothly around both sides of the chimney stack.
- Ensure the upper roofing panels overlap the rear pan flange by a minimum 6-inch overlap to block uphill water seepage.
Step 5: Mount Counter-Flashing into the Masonry Reglet & Seal
Mounting custom counter-flashing into the cut mortar reglet provides a permanent water-shedding cap over all lower flashing joints. Secure the metal into the brickwork and fill the groove entirely with a flexible, weather-resistant exterior sealant to finalize the installation.
- Slide the top bent edge of your custom counter-flashing firmly into the 1 to 1.5-inch mortar reglet groove.
- Anchor the counter-flashing securely to the masonry using appropriate masonry drive anchors spaced evenly apart.
- Fill the reglet groove completely with high-grade polyurethane sealant to create a fully waterproof barrier.
Constructing a Chimney Cricket (The Upslope Protection)
Constructing a chimney cricket, or saddle, on the upslope side of a wide chimney diverts rainwater, melting snow, and heavy debris around the masonry stack. Without this peaked diversion structure, standing water and ice damming will rapidly overwhelm standard flashing and cause interior roof leaks.
When Do You Need a Chimney Cricket? (Roof Pitch & Width Rules)
Building codes mandate a chimney cricket for any masonry chimney wider than 30 inches parallel to the roof ridge. Even on narrower chimneys, low-pitched metal roofs or high-snow regions require a cricket to eliminate structural water pooling and destructive ice dam formation behind the brickwork.
- The 30-inch width rule requires structural cricket installation for broad chimney stacks.
- Low-slope metal roofs benefit from crickets to accelerate drainage run-off.
- High-snow zones rely on saddles to prevent heavy ice accumulation behind the brickwork.
Framing and Pitch Matching the Cricket to Your Metal Roof
Framing a durable cricket requires matching the saddle’s ridge line pitch exactly to your main roof slope. Precise lumber or metal framing ensures water sheds equally down both sides of the saddle into the adjacent panel drainage channels.
- Use exterior-grade framing lumber or structural metal studs to build the saddle skeleton.
- Align the center peak of the cricket precisely with the centerline of environmental water flow on the chimney stack.
- Match the slope angle of the saddle to the primary roof pitch for balanced water velocity.
Welded Aluminum Curbs vs. Custom Metal Cricket Pans
Choosing between prefabricated welded aluminum curbs and custom metal cricket pans depends on your roof design and budget. Factory-welded units offer seamless waterproof reliability, while field-formed pans accommodate complex brick dimensions and non-standard roof profiles.
- Welded aluminum curbs provide rigid, factory-sealed protection for commercial or standing seam applications.
- Custom metal pans allow roofers to hand-brake custom dimensions for irregular residential brick layouts.
- Ensure upper roofing panels maintain a secure upper pan overlap of at least 6 inches to block uphill moisture.
Common Mistakes, Maintenance & Troubleshooting
Preventing metal roof leaks around a chimney requires avoiding critical installation errors and performing routine inspections. Selecting compatible sealants and validating water-shedding performance with targeted testing ensures the flashing assembly remains leakproof over its operational lifespan.
Top 4 Installation Mistakes That Cause Leaks
Flashing failures typically stem from improper fastening methods or incorrect material selection rather than panel defect. Identifying these structural errors early prevents moisture damage to underlayment and interior roof decking.
- Rigid Fastening Across Dynamic Joints: Screwing counter-flashing through base panels prevents natural thermal movement, causing panel distortion, sheared screws, and torn joint seals.
- Over-Reliance on Exposed Surface Caulk: Treating caulk as a primary waterproofing barrier rather than a secondary backup leads to rapid failure when UV exposure degrades the seal.
- Galvanic Corrosion from Dissimilar Metals: Direct contact between incompatible metals, such as copper flashing on Galvalume steel, triggers accelerated electrochemical deterioration.
- Omitting High-Side Water Diversion: Failing to install a chimney cricket or upper pan allows standing water and debris to collect against the rear mortar joints.
Silicone vs. Polyurethane vs. Butyl Sealants (What to Use)
Matching the sealant compound to the specific joint location determines the longevity of the weather seal. Concealed mechanical laps require non-hardening sealants, while masonry cut joints require high-adhesion elastomeric compounds.
How to Perform a Water Hose Leak Test
Conducting a controlled hose test isolates flashing joints to verify water-tight integrity before completing interior work. Isolate individual inspection points systematically from the low side of the roof upward.
- Station an observer inside the attic directly beneath the chimney penetration with a high-lumen light source.
- Apply a low-pressure water stream continuously to the front apron flashing for 5 minutes.
- Direct water along the left and right sidewall channels for 5 minutes per side.
- Spray water across the upslope cricket saddle and mortar reglet cut line for 10 minutes to verify total joint performance under heavy flow.
Frequently Asked Questions
Can you put chimney flashing over a metal roof?
Yes, base apron flashing must sit over the top of the lower metal roof panels to direct water onto the outer roof surface. However, side step flashings and rear cricket pans must tuck under adjacent metal panels to maintain a continuous, gravity-fed drainage system.
How much does it cost to flash a chimney on a metal roof?
Professional roofer cost to replace chimney flashing on a metal roof ranges between $450 and $1,200 depending on pitch, chimney width, and accessibility. DIY costs for materials, custom metal bent pieces, butyl tape, and polyurethane sealant typically total between $150 and $300.
- Professional Flashing Repair Cost: $450 – $1,200 (includes labor, custom fabrication, and reglet cutting).
- DIY Material Cost: $150 – $300 (covers metal coil, sealants, fasteners, and masonry blades).
- Cricket Addition Cost: $250 – $500 extra if high-side saddle framing is required.
Should chimney flashing go over or under metal roofing panels?
Proper underlayment layering dictates that front apron pieces go over the lower metal panels, side channels interweave with vertical ribs, and the rear upper pan slips under the upslope roofing panels feeding down from the ridge line.
Do roofers fix chimney flashing or do I need a mason?
Roofing contractors handle standard metal base installation, reglet cutting, and masonry counter-flashing attachment. However, if the chimney’s underlying brickwork or mortar joints are crumbling, hire a mason to repair the masonry structure before the roofer installs new flashing.
What is the best metal for chimney flashing (Galvalume, Aluminum, Copper)?
Galvalume steel and heavy-gauge aluminum are the best choices for metal roofs, offering long-term weather resistance and simple color matching. Copper provides maximum lifespan but requires careful isolation to prevent a destructive galvanic reaction when touching steel or aluminum panels.

Oscar Vance | Master Plumber & Drainage Expert
Meet Oscar Vance, a licensed master plumber sharing practical solutions on residential repairs, preventive maintenance, and thoughtful home upkeep.

