Which Style Works Best for Metal Roofs?
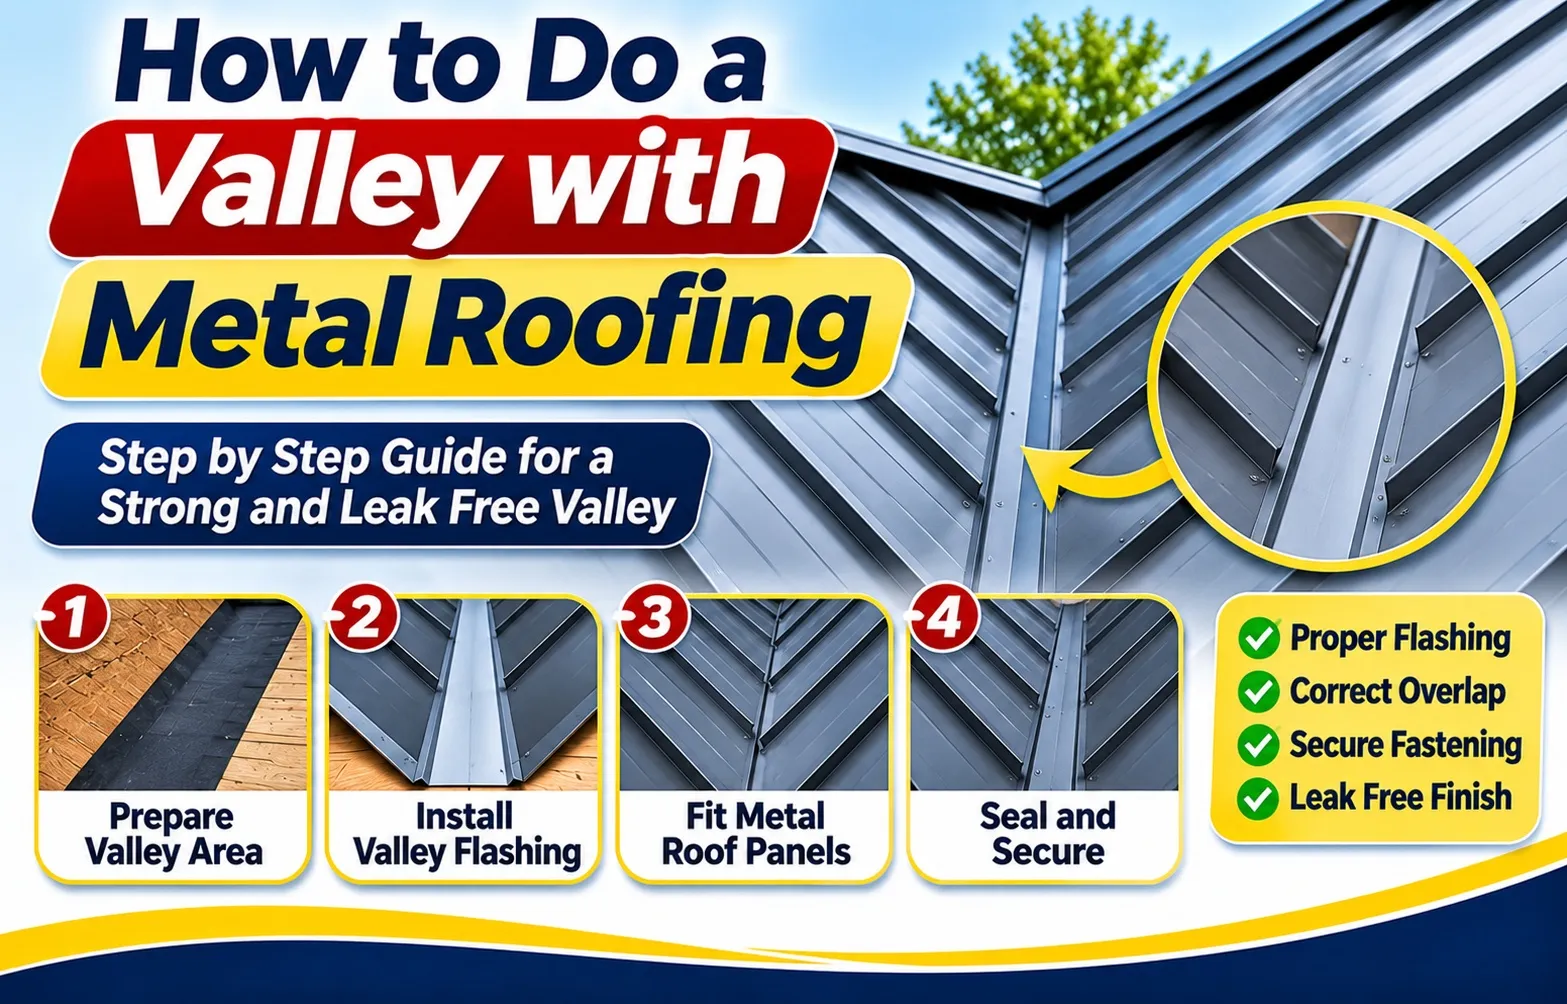 An open valley is the industry-standard design for metal roofing because it exposes a dedicated metal channel that sheds heavy water runoff, snow, and debris without obstruction. While closed valleys work well with asphalt shingles, overlapping metal panels tightly in a valley creates severe water-trapping hazards.
Why Open Valleys Are Recommended for Metal Roofing
Metal roofs shed water significantly faster than textured asphalt shingles, concentrating high volumes of runoff into roof intersections during heavy rainstorms. Leaving a 4- to 8-inch wide open metal channel gives this fast-moving water an unobstructed path straight into the gutter system.
- Rapid Water Runoff: Smooth painted or galvalume valley flashing accelerates drainage and prevents water from backing up under adjacent panel seams.
- Clean Snow and Ice Shedding: Winter snow loads slide off metal roofs in heavy sheets, and an open valley prevents packed ice from catching on jagged, overlapping panel edges.
- Effortless Debris Clearance: Leaves, pine needles, and twigs wash down the exposed metal pan rather than snagging inside tight panel seams.
- Thermal Movement Allowance: Metal panels expand and contract daily with temperature swings, and an open valley lets panel edges move freely without buckling against opposing slopes.
The Risks of Closed Valleys on Metal Panels
In a closed valley, roof panels from one slope extend across the valley centerline and overlap beneath the panels of the opposing slope. On rigid metal roofing, this configuration creates structural weak points that frequently lead to premature roof leaks.
- Severe Ice Damming and Water Backup: Tightly overlapped metal edges act like a dam during freeze-thaw cycles, forcing meltwater sideways through panel ribs and fastener holes.
- Trapped Moisture and Corrosion: Wet leaves and organic debris wedge underneath closed metal overlaps, holding moisture against cut steel edges and accelerating rust.
- Impossible Maintenance Access: Once debris or ice clogs a closed metal valley, you cannot clear the blockage without unscrewing and bending the roof panels.
Essential Tools & Materials Checklist
Installing a leak-proof metal roof valley requires standard sheet-metal cutting tools alongside specialized high-temperature waterproofing membranes. Gathering the exact gauges, sealants, and non-abrasive cutters before stepping onto the roof prevents mid-project delays and protects your steel panels from premature corrosion.
Valley Flashing & Waterproofing Materials
Standard roofing felt and asphalt-based membranes melt or bond permanently to hot steel panels, tearing the underlayment when the metal expands. Always use high-temperature synthetic barriers and non-corrosive sealants rated specifically for metal roofing assemblies.
- 24- or 26-Gauge W-Valley Flashing: Select pre-bent valley pans matching your roof panel’s metal type (galvalume or painted steel) with at least 10- to 12-inch wings on each side of the center diverter rib.
- High-Temperature Ice and Water Shield: Use a 36-inch wide, self-healing butyl or synthetic rubberized membrane rated for temperatures up to 250°F to line the full length of the valley deck.
- Expanding Foam Closure Strips: Closed-cell, UV-stabilized foam strips conform to panel ribs and block wind-driven rain, snow, and insects from entering underneath the cut panel edges.
- Double-Sided Butyl Tape Sealant: A 3/8-inch or 1/2-inch compression-grade butyl tape creates an airtight, waterproof gasket between overlapping valley pan sections and beneath closure strips.
- Non-Acetic Tripolymer or Neutral-Cure Silicone Sealant: Choose an exterior-grade sealant free of acetic acid, which otherwise eats through galvanized coatings and triggers rust along cut steel edges.
Fasteners & Cutting Tools
Cutting metal panels with the wrong blade destroys protective zinc-aluminum coatings and sprays hot steel filings across your flashing. Stick to cold-cutting shears and low-profile fasteners that hold the valley pan flat without obstructing panel installation.
- Gasketed Pancake-Head Screws: Low-profile #10 or #12 pancake screws with bonded EPDM washers secure the outer edges of the valley flashing without creating high spots under the roof panels.
- Aviation Snips (Left, Right, and Straight Cut): Offset compound-action snips allow clean hand-trimming around valley corners, hems, and eave kick-outs without distorting the metal.
- Electric Metal Shears or Nibbler: Cordless double-cut shears slice cleanly through ribbed and standing seam panels along long diagonal valley lines with zero heat buildup.
- Bevel Gauge and Chalk Line: An adjustable T-bevel transfers the exact valley angle directly onto your metal panels for accurate, repeatable diagonal cuts.
Never cut metal roofing panels or valley flashing with an abrasive cutoff wheel or standard circular saw blade. Friction heat burns away the protective galvanized coating along the cut edge and embeds hot metal shavings into the factory paint finish, causing pinpoint rust spots across your valley within months.
How to Install a Metal Roof Valley
Executing a watertight valley installation requires methodical preparation, precise sheet metal positioning, and strict adherence to fastener placement rules. Follow this step-by-step sequence to construct a durable, leak-free metal valley assembly.
Step 1: Prep the Deck and Install High-Temp Underlayment
Installing a heavy-duty, self-adhering high-temperature ice and water shield directly onto clean roof decking provides the primary waterproof barrier beneath your valley flashing, protecting the framing from wind-driven moisture and condensation rot.
- Clear all protruding nails, wood shavings, and sharp debris from the valley framing before laying any material.
- Center a 36-inch wide strip of high-temperature synthetic membrane down the entire length of the valley intersection.
- Overlap successive upper underlayment courses over lower courses by at least 6 inches, pressing the adhesive firmly with a hand roller to eliminate air pockets.
Step 2: Position and Overlap the Valley Flashing Pan
Precise placement of the W-valley pan determines whether rainwater drains cleanly or backs up under your roof panels. Align the center diverter rib exactly over the framing centerline before setting any hardware.
- Extend the bottom valley pan 1 to 1.5 inches past the eave line so runoff drips cleanly into the gutter without soaking the fascia or starter boards.
- Overlap upper valley sections over lower sections by 6 to 8 inches, embedding two continuous beads of butyl tape between the overlapping metal laps.
- Reference industry-standard open valley flashing specifications to verify correct metal roof valley flashing overlap tolerances for your specific roof pitch and eave line overhang.
Step 3: Secure the Flashing Without Creating Leak Points
Fastening valley flashing correctly requires driving screws exclusively through the outer edges of the side flanges, keeping all hardware completely away from the central water-channeling path to prevent future roof leaks.
- Use gasketed pancake-head screws to secure the flashing flanges flat against the roof deck without creating raised bumps that distort overlying panels.
- Drive fasteners along the outer 1 inch of the flashing flanges, spacing them 12 to 16 inches apart along both sides.
- Never drive screws through the middle water channel or near the center diverter rib, as outer-edge fastening is essential to accommodate thermal expansion.
Step 4: Apply Closure Strips and Sealant Lines
Installing expanding foam closure strips and butyl sealant along the outer edges of the valley pan blocks wind-driven rain, snow, and pests while maintaining proper ventilation beneath the panels.
- Position expanding foam or tape closures 3 to 5 inches off the center diverter rib to keep the inner drainage channel completely clear.
- Apply a continuous bead of non-acetic exterior sealant where panel ribs intersect the foam closures to seal microscopic gaps.
Step 5: Measure, Angle-Cut, and Fasten the Metal Roof Panels
Cutting metal roof panels at the correct valley angle creates a uniform open water channel that prevents debris accumulation and ensures unobstructed drainage during severe storms.
- Use a bevel template to measure the exact valley intersection angle before transferring your cut lines onto the metal panels.
- Execute precision cuts for angle-cut metal roofing so the panel ends stop 2 to 4 inches back from the center diverter rib, establishing a clean open water channel.
- Secure adjacent panels through their flat sections or concealed clips, ensuring no fasteners puncture the underlying valley pan.
Standing Seam vs. Ribbed Panels: Critical Valley Differences
Valley installation mechanics differ drastically depending on whether you are working with a concealed-fastener standing seam system or an exposed-fastener ribbed panel system. Understanding these structural distinctions prevents fastener-induced buckling and chronic water leaks.
Installing a Valley on Standing Seam (Concealed Fastener) Roofs
Standing seam metal roof valley installations require specialized floating components to accommodate continuous thermal expansion and contraction without buckling panels. Installers must use offset valley cleats and custom-hemmed panel edges rather than driving rigid screws through the roofing panels.
- Thermal Expansion and Contraction: Standing seam panels slide significantly as temperatures shift, requiring floating clip assemblies that let the roof move freely without tearing the valley flashings.
- Offset Valley Cleats and Clips: Securing the edge of a standing seam panel requires fastening an offset metal cleat or sliding clip to the deck, keeping all anchoring hardware hidden beneath the raised seam.
- Hemmed Panel Edge: Brake-form a custom 1/2-inch hem along the cut bottom edge of each panel so it locks tightly onto the valley cleat without requiring exposed fasteners through the finished surface.
Installing a Valley on Ribbed Corrugated (Exposed Fastener) Roofs
Exposed fastener ribbed panels create inherent air and water gaps where panel corrugations meet the flat valley pan. Sealing these complex transitions requires specialized foam closures and continuous beads of exterior-grade sealant to block wind-driven rain.
- Managing Corrugated Air Gaps: The raised ribs of agricultural or trapezoidal panels create open tunnel voids over the flat valley metal that must be tightly plugged against wind-driven moisture and pests.
- Contoured and Expanding Foam Closures: Install custom-cut, profile-matched foam closures directly into the rib openings 3 inches back from the open water channel to seal the gaps without blocking drainage.
- Continuous Sealant Beads: Apply a continuous line of non-acetic exterior sealant across every overlapping rib and closure interface to maintain a waterproof seal under high-velocity runoff.
Troubleshooting: Tricky Transitions & Common Mistakes
Real-world roof framing rarely matches clean manufacturer diagrams, especially where valleys terminate at low-slope porch roofs or sharp eave corners. Solving these complex structural transitions on the job site prevents winter ice damming, gutter overshoots, and premature valley corrosion.
How to Handle a Valley Transitioning Into a Lower Roof Slope or Eave
When a valley transitions into a lower roof plane or terminates at an eave, concentrated water velocity can shoot straight past the gutter or back up beneath upper panels. Precision trimming and custom metal diverters redirect heavy runoff safely onto the lower roof deck without damming.
- V-Notch Eave Cut (Bird’s Mouth): Trim the bottom edge of the W-valley pan into a clean V-notch or bird’s mouth profile flush with the fascia line so water drips evenly into the gutter trough rather than pooling at the corner.
- Gutter Overshoot Diverter: Install a raised sheet-metal splash guard or kick-out diverter along the outer gutter lip directly beneath the valley centerline to catch high-speed water surges during heavy downpours.
- Valley Transition Into Lower Roof: Extend the upper valley pan at least 12 inches over the top edge of the lower-pitch roof panels, setting two rows of butyl tape and contoured closure strips beneath the overlap to prevent wind-driven water backup.
4 Costly Metal Roof Valley Mistakes to Avoid
Even high-gauge steel valley flashing fails prematurely when installers overlook thermal expansion rules or contaminate the factory finish during cutting. Avoiding these four common installation errors protects your roof assembly against leaks and rust.
- Driving Panel Screws Into the Valley Pan: Fastening roof panels directly through the flat valley pan pins the metal down against thermal movement and creates guaranteed leak points inside the primary drainage path.
- Using Standard Asphalt Felt Instead of High-Temp Underlayment: Conventional asphalt felt suffers severe thermal degradation under hot metal roofs, melting onto the underside of the valley pan and tearing apart as the steel expands.
- Cutting Panels With a Circular Saw or Grinder: Friction blades spray red-hot steel filings across your flashing, causing hot metal shavings rust that pits and eats through the protective galvalume coating within a single season.
- Making the Open Channel Too Narrow: Leaving less than 2 inches of clearance on either side of the center diverter rib traps leaves, twigs, and pine needles, creating organic dams that force water sideways over the valley edges.
Frequently Asked Questions
How much should metal roof valley flashing overlap?
Metal roof valley flashing must overlap by a minimum of 6 to 8 inches, installed strictly from the bottom eave upward toward the ridge. Apply two continuous parallel beads of compression butyl tape or non-acetic sealant between the overlapping steel sheets to prevent capillary water draw during heavy storms.
How far back should metal roofing panels be cut from the center of the valley?
Cut metal roofing panels 2 to 4 inches back from the center diverter rib on both sides, creating a total open channel width of 4 to 8 inches. Maintaining this open drainage clearance prevents leaves, pine needles, and winter ice from damming while allowing high-velocity runoff to shed freely.
Can you install a metal roof valley yourself?
Yes, DIY metal roof installation is achievable on straightforward, single-story gable or hip roofs when you use proper sheet-metal shears and follow strict fastening rules. Always wear OSHA-compliant fall-arrest gear, avoid abrasive saw blades, and keep all screws along the outer valley edges.
Do you put closure strips in a metal roof valley?
Yes, install UV-stabilized expanding foam closure strips or compression butyl tape 3 to 5 inches off the center diverter rib beneath the cut panel edges. Properly placed closures provide essential wind-driven rain protection while blocking snow, insects, and debris from blowing underneath your roof panels.

Oscar Vance | Master Plumber & Drainage Expert
Meet Oscar Vance, a licensed master plumber sharing practical solutions on residential repairs, preventive maintenance, and thoughtful home upkeep.

