New Construction Electrical Cost by Home Size
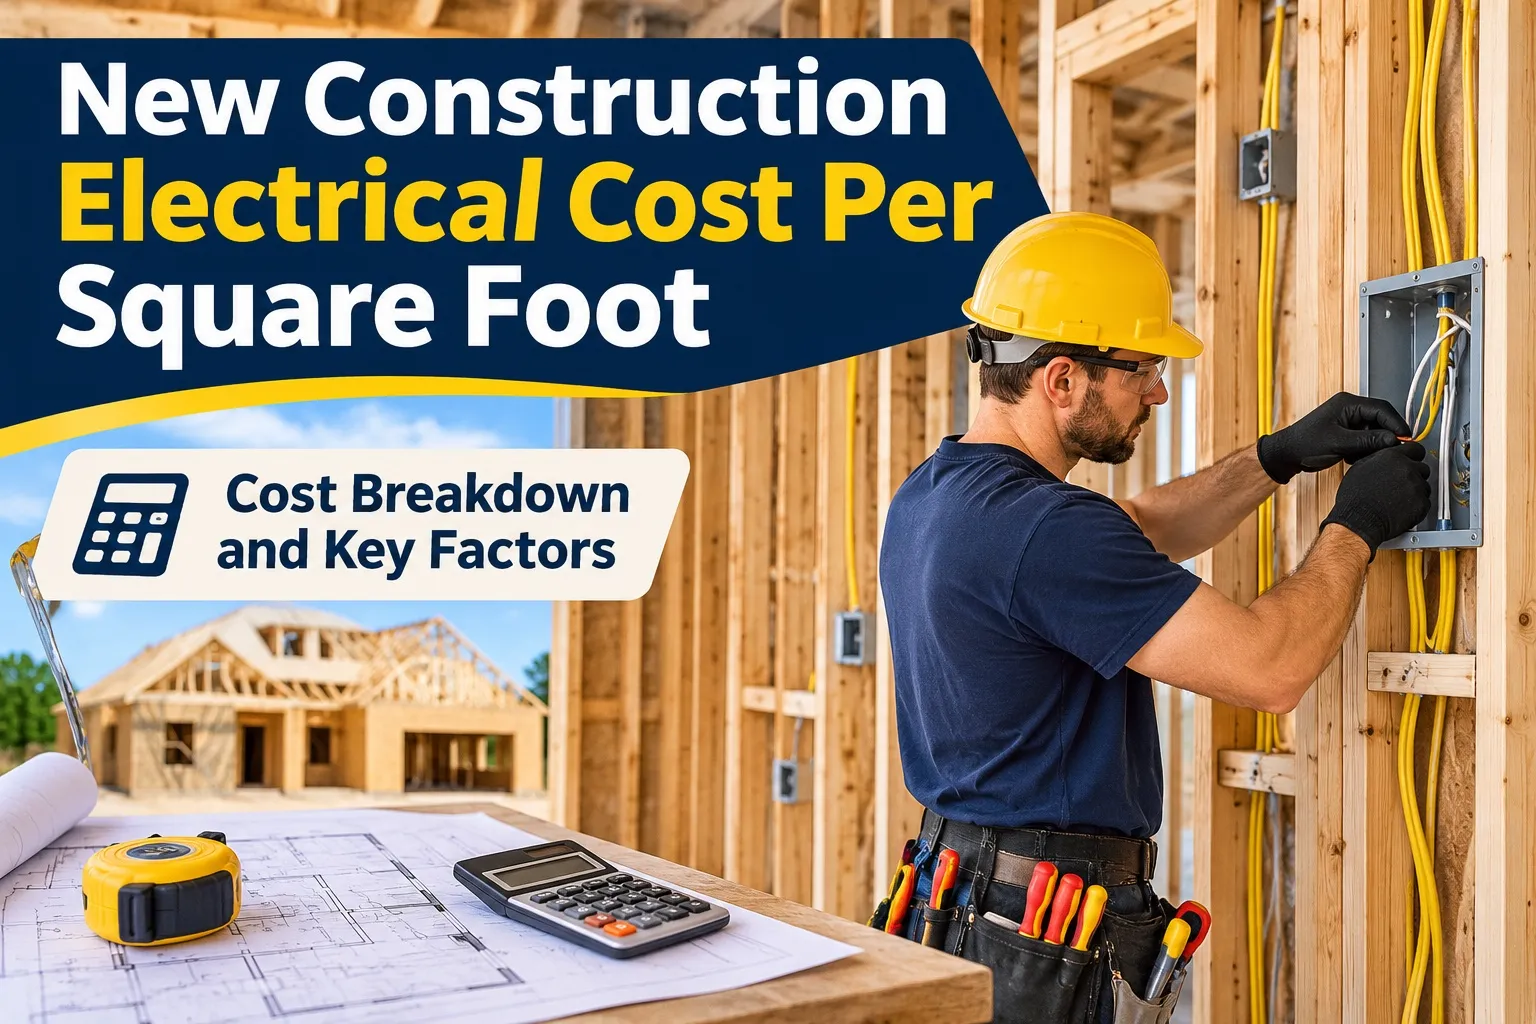 Total electrical installation expenses scale alongside your home’s total covered area, floor layout, and circuit density. While a compact single-story ranch requires shorter Romex cable runs and a standard 200-amp service panel, multi-story custom homes demand subpanels, additional AFCI/GFCI breakers, and substantially higher labor hours.
How Much Does It Cost to Wire a 1,500 Sq. Ft. House?
Wiring a new 1,500 sq. ft. house typically costs between $6,000 and $13,500, averaging around $9,750 for a standard three-bedroom, two-bathroom layout. At $4.00 to $9.00 per square foot, a 1500 sq ft house electrical cost remains relatively predictable because single-level framing allows electricians to pull wire rapidly through open attic trusses.
- Rough-In Materials & Labor ($3,800 – $8,000): Covers approximately 1,500 to 2,000 linear feet of 14/2 and 12/2 NM-B copper cable, plastic outlet boxes, and main panel mounting.
- Service Panel & Dedicated Circuits ($1,200 – $2,800): Includes a standard 200-amp main breaker box plus dedicated lines for an electric range, clothes dryer, water heater, and central HVAC condenser.
- Trim-Out & Fixtures ($1,000 – $2,700): Accounts for installing roughly 65 to 80 total outlets, standard rocker switches, smoke/carbon monoxide detectors, and basic builder-grade ceiling fixtures.
How Much Does It Cost to Wire a 2,000 to 2,500 Sq. Ft. House?
A complete 2,000 to 2,500 sq. ft. house wiring estimate ranges from $8,000 to $22,500, with mid-range builds landing near $14,500 to $16,500. Once a floor plan crosses 2,000 square feet, builders typically add a dedicated home office, an attached two-car garage, and expanded kitchen cabinetry that require specialized circuit layouts.
- 2,000 Sq. Ft. Baseline ($8,000 – $18,000): Supports 90 to 110 electrical points, two exterior weatherproof GFCI receptacles, and garage door opener drops.
- 2,500 Sq. Ft. Expanded Layout ($10,000 – $22,500): Adds extra homerun wire lengths back to the main distribution board, dual-zone HVAC disconnects, and under-cabinet LED task lighting.
- Kitchen Island & Code Mandates: Current NEC standards require dedicated 20-amp small-appliance branch circuits and specific island receptacle placements that increase copper usage in larger kitchens.
How Much Does It Cost to Wire a 3,000 to 3,500+ Sq. Ft. Custom Home?
Electrical wiring for a 3,000 to 3,500+ sq. ft. custom home commonly runs between $25,000 and $60,000+, frequently pushing past the $9.00 per square foot ceiling. Builders and homeowners regularly note on construction forums that once a home exceeds 3,000 square feet, custom architectural details—such as vaulted ceilings, steel structural beams, and multi-story layouts—dramatically slow down drilling and wire-pulling labor.
- 400-Amp Service & Subpanels ($4,500 – $8,500): Large custom homes often require dual 200-amp panels (400-amp total service) plus a 100-amp subpanel on the second floor or in a finished basement to shorten wire runs.
- High Point Density (160 – 250+ Points): Custom blueprints routinely specify 40 to 60 recessed wafer lights, three-way and four-way dimmer switches, motorized window shade pre-wiring, and heated bathroom floors.
- Luxury Exterior & Garage Loads: Wiring for a 50-amp Level 2 EV charger, outdoor kitchen circuits, pool equipment subpanels, and whole-home standby generator transfer switches easily adds $5,000 to $12,000 to the base bid.
Commercial vs. Residential Electrical Cost Per Square Foot
Commercial electrical cost per square foot averages $7.00 to $20.00+, making commercial builds roughly 50% to 120% more expensive per square foot than standard residential homes. Unlike houses that rely on wood framing and flexible non-metallic Romex cable, commercial buildings must adhere to strict fire-rating and high-voltage distribution standards.
- Conduit & Wiring Methods: Commercial electricians bend and install galvanized Electrical Metallic Tubing (EMT) or rigid steel conduit rather than stapling plastic-sheathed cable through wood studs, tripling labor time.
- Three-Phase Power Infrastructure: Retail stores, warehouses, and offices utilize 208V or 480V three-phase switchgear, step-down transformers, and heavy commercial panelboards to run rooftop HVAC units and machinery.
- Life-Safety & Occupancy Systems: Commercial code mandates battery-backed emergency egress lighting, illuminated exit signs, commercial fire alarm control panels, and automated occupancy sensors across every zone.
How Electricians Actually Bid: Cost Per Square Foot vs. Cost Per Point
While online calculators provide quick square-footage estimates, professional electrical contractors calculate new construction bids by evaluating total circuit density and individual connection drops. Understanding how electricians estimate projects through distinct rough-in and trim-out phases ensures accurate budgeting and prevents unexpected change orders.
Phase 1: Rough-In Wiring Costs
The rough-in phase represents the largest block of labor and material expense during new residential construction. Electricians install all structural support boxes, run plastic-sheathed Romex copper wire (such as 14/2 and 12/2 NM-B cable) through wood studs, and secure protective conduits where required before drywall is hung.
- Cable & Conductor Runs ($2.00 – $4.00 per sq. ft.): Bulk purchasing of copper Romex wiring, protective PVC sleeves, and metal junction boxes accounts for the foundational material expense.
- Structural Framing Interfacing: Contractors drill precisely through studs and joists to maintain National Electrical Code (NEC) clearance requirements without compromising structural integrity.
- Rough Inspection Clearance: The entire layout must pass municipal building inspections before insulation and drywall contractors are permitted to seal the walls.
Phase 2: Trim-Out / Finish Phase Costs
The trim-out or finish phase occurs after drywall installation, painting, and flooring are fully completed. Electricians return to install visible electrical devices, snap on decorative faceplates, mount ceiling fans, and energize the main distribution panel.
- Device Installation: Standard tamper-resistant receptacles, single-pole switches, dimmer controls, and GFCI outlets are wired and secured into their respective junction boxes.
- Fixture & Appliance Hookups: Crews mount light fixtures, ceiling fans, bathroom exhaust vents, and connect hardwired kitchen appliances directly to dedicated branch circuits.
- Panel Circuit Termination: Breakers are snapped into the main load center, neatly labeled, and tested for correct voltage, polarity, and fault protection.
Itemized “Cost Per Point” Pricing Table
Professional electrical contractor bids rely heavily on cost-per-point calculations to price complex or custom layouts accurately. A “point” refers to any individual outlet, switch, light box, or dedicated appliance drop terminating power throughout the home.
Labor Cost to Wire a New House
Labor constitutes roughly 50% to 60% of total electrical contractor bids for new residential construction. Contractors typically structure labor fees either as fixed-price turnkey contracts or through hourly billing rates depending on the scope and predictability of the project.
- Journeyman Electrician Hourly Rates: Licensed journeyman electricians charge between $65 and $100 per hour, while master electricians commanding specialized commercial or automation expertise bill $85 to $150 per hour.
- Fixed Contract Bids: Most residential electrical contractors prefer fixed project bids calculated from blueprints, locking in total labor and material expenses so homeowners face zero hourly creep.
- Crew Scaling & Timeline: A typical 2,000 sq. ft. home requires a two-person crew working 30 to 50 total man-hours spread across the rough-in and finish inspection milestones.
Main Electrical Panels, Service Upgrades, and Subpanels
Your main distribution board acts as the central nervous system of your new home, regulating incoming utility power and protecting every branch circuit from overloads. Selecting the right amperage capacity during the blueprint phase—determined through a formal NEC load calculation—prevents costly retrofits when adding electric vehicles, heat pumps, or secondary living spaces later.
200-Amp vs. 400-Amp Service: Which Does Your New Build Need?
A 200-amp service panel is the baseline standard for modern residential new construction up to 3,000 square feet, while a 400-amp service upgrade (typically configured as dual 200-amp panels fed from a 320-amp continuous meter base) is necessary for custom homes exceeding 3,500 square feet or featuring high-draw electric equipment. Electricians perform a formal load calculation based on total square footage, heating fuel type, and continuous appliance demand to size your service properly.
- When 200-Amp Service Suffices: Ideal for homes under 3,000 sq. ft. utilizing natural gas or propane for primary heating, water heating, and cooking, while still leaving headroom for one Level 2 EV charger.
- When 400-Amp Service Is Required: Essential for all-electric custom homes running dual central HVAC zones, electric tankless water heaters, double wall ovens, a hot tub, and dual EV charging stations simultaneously.
- Future-Proofing Capacity: Installing 400-amp service during initial construction adds roughly $1,500 to $2,500 to your rough-in budget, whereas upgrading an existing 200-amp system post-build often costs over $4,500 due to trenching and utility service cable replacements.
Cost of Installing a New Main Electrical Panel & Meter Base ($2,500 – $5,000+)
Installing a complete main electrical service entrance—including the exterior meter base, emergency exterior disconnect, grounding electrode system, and interior main distribution board—costs between $2,500 and $5,000+ in new construction. While the bare metal load center box retails for $250 to $650, specialty breakers and heavy-gauge service entrance conductors drive the bulk of material costs.
- Meter Base & Exterior Disconnect ($600 – $1,400): Modern NEC rules mandate an accessible exterior emergency disconnect beside the utility meter socket, connected via heavy 2/0 or 4/0 AWG aluminum/copper service entrance cable.
- Specialty AFCI & GFCI Breakers ($600 – $1,500): Unlike legacy standard breakers that cost $8 to $15 each, modern Arc-Fault (AFCI) and Ground-Fault (GFCI) breakers required across bedrooms, kitchens, and living areas cost $45 to $85 per circuit.
- Grounding & Bonding Infrastructure ($300 – $600): Covers driving dual 8-foot copper-clad ground rods, bonding the main water line and gas piping, and installing an NEC-mandated Type 1 or Type 2 whole-home surge protector.
Adding Electrical Subpanels for Workshops, Basements, and Detached Garages ($800 – $2,000)
Electrical subpanel installation cost ranges from $800 to $2,000 for a 60-amp to 125-amp secondary distribution board. Rather than pulling dozens of individual Romex homeruns across long distances back to the main panel, electricians run a single heavy feeder cable to a local subpanel to save copper and reduce voltage drop.
- Finished Basements & Upper Floors ($800 – $1,300): Placing a 100-amp subpanel on the opposite end of a sprawling ranch or multi-story home cuts branch wire lengths in half and simplifies future circuit additions.
- Detached Garages & Workshops ($1,200 – $2,000+): Outbuildings require underground PVC conduit trenching, heavy THHN/THWN feeder conductors, an isolated neutral-ground bus bar configuration, and a dedicated grounding rod.
- High-Draw Equipment Support: A dedicated workshop subpanel cleanly isolates 240-volt table saws, air compressors, welders, and Level 2 EV chargers from sensitive household electronics.
Key Cost Drivers & Modern Upgrades That Impact Your Budget
Two houses with identical square footage can easily exhibit a $10,000 to $20,000 discrepancy in their electrical bids. While base framing size sets a structural foundation, modern lifestyle integrations, heavy appliance demands, and regional labor rates heavily reshape total installation expenses.
Smart Home Automation & Low-Voltage Wiring
Integrating smart home automation, centralized lighting controls, and high-speed data infrastructure requires specialized low-voltage pre-wiring that standard builder packages omit. Running structured cabling during the rough-in stage ensures robust connectivity for modern smart-home ecosystems without relying on unstable Wi-Fi signals.
- Structured Cat6 & Coax Networking ($800 – $2,500): Pulling shielded Cat6 Ethernet drops to every bedroom, living area, and home office supports hardwired streaming, smart hubs, and Power-over-Ethernet (PoE) security cameras.
- Smart Switch & Keypad Integration ($1,000 – $3,000): Advanced automation systems require neutral wires at every switch box and specialized low-voltage control communication wiring during the rough-in stage.
- Security & Audio Pre-Wiring ($600 – $1,800): Smart home pre-wiring for door/window contact sensors, motion detectors, and in-ceiling architectural audio speakers before drywall installation minimizes messy retrofits.
EV Level 2 Chargers, Hot Tubs, and Dedicated Heavy Appliances
Modern residential energy demands have expanded far beyond legacy kitchen appliances. Running dedicated circuits for high-draw lifestyle equipment requires heavy-gauge copper conductors, dual-pole breakers, and meticulous load balancing to prevent main service overloads.
- Level 2 EV Charger Circuit Cost ($500 – $1,500): Installing a dedicated 40-amp or 50-amp 240V circuit in the garage for an electric vehicle charging station involves heavy 6/3 or 8/3 copper wire runs.
- Hot Tubs & Spa Subpanels ($800 – $2,000): Outdoor spas require weatherproof disconnect switches, GFCI protection, and underground conduit trenching extending from the main distribution board.
- Whole-Home Generator Transfer Switch ($1,200 – $3,500): Pre-wiring a whole-home generator transfer switch allows a standby generator to seamlessly power critical dedicated circuits during grid outages.
Regional Labor Multipliers
Geographic location is one of the most volatile factors influencing new construction electrical cost California and regional markets nationwide. Labor rates, prevailing union scales, municipal permitting fees, and local building code strictness create massive cost disparities across state lines.
- High-Cost Coastal Markets ($7.00 – $14.00+ per sq. ft.): New construction electrical cost in California, New York, and the Northeast routinely runs 30% to 50% higher due to steep living costs, strict energy mandates, and union labor requirements.
- Competitive Southern & Midwest Markets ($3.50 – $7.00 per sq. ft.): Electrical cost per square foot in Texas, the Southeast, and the Midwest remains significantly lower due to abundant labor supply, lower overhead, and flexible residential framing methods.
- Permit & Inspection Variances ($300 – $1,500): Municipalities charge vastly different fees for plan reviews, electrical permits, and mandatory rough-in inspections that factor directly into your contractor’s bottom-line bid.
Hidden Costs & NEC Code Requirements Excluded from Base Quotes
Baseline per-square-foot electrical quotes typically cover interior framing wires, standard switches, and the main panel, leaving out mandatory safety updates, utility infrastructure fees, and municipal paperwork. Accounting for these out-of-pocket charges early prevents unexpected budget overruns during construction.
Mandatory NEC Code Upgrades
Modern residential construction must adhere strictly to current National Electrical Code (NFPA 70) standards, which introduce advanced fire and shock prevention hardware. Many builders exclude these specific compliance devices from initial rough-in allowances, adding $800 to $2,500 to the final electrical bill.
- AFCI and GFCI Circuit Breakers ($600 – $1,500): Current National Electrical Code (NEC) requirements mandate Arc-Fault Circuit Interrupter (AFCI) breakers for almost all habitable living areas and Ground-Fault Circuit Interrupter (GFCI) protection across kitchens, bathrooms, garages, and outdoor outlets. Dual-function AFCI/GFCI breakers cost significantly more per unit than legacy standard breakers.
- Whole-Home Surge Protector ($250 – $700): Every new residential service panel requires a permanently installed Type 1 or Type 2 surge protective device to shield modern HVAC inverters, smart appliances, and EV chargers from grid voltage spikes.
- Tamper-Resistant & Weather-Resistant Receptacles ($150 – $400): All standard 125-volt outlets inside the home must feature internal spring-loaded shutters to prevent child shock hazards, while exterior outlets require weather-resistant ratings and extra-duty in-use covers.
Utility Connection Fees, Trenching, and Temporary Construction Power Poles
Bringing live electricity from the street grid onto a raw lot involves utility company charges and site-work expenses that sit entirely outside an interior electrician’s square-footage estimate. Rural properties or lots set far back from the road face the steepest infrastructure costs.
- Temporary Power Pole Cost ($1,000 – $2,500+): Before permanent service is energized, framing and drywall crews need a temporary construction power pole equipped with a meter base and GFCI outlets, plus monthly utility rental fees ranging from $95 to $200 during the build.
- Underground Trenching & Conduit ($4 – $15 per linear foot): Running permanent underground service cables from the street transformer to your home requires digging trenches, laying heavy-duty Schedule 40 or 80 PVC conduit, and backfilling.
- Utility Transformer Drop & Hookup Fees ($500 – $5,000+): Local power companies charge connection fees to set the permanent meter, splice overhead or underground service drops, and install or upgrade a step-down residential utility transformer if existing neighborhood capacity is maxed out.
Electrical Permits, Plan Reviews, and Municipal Inspections
Local building departments require formal electrical permits and multi-stage inspections before utility companies will legally energize a new residence. Municipal electrical permit fees typically add $200 to $1,000+ depending on your project’s total square footage and service amperage.
- Electrical Plan Review & Permit Filing ($150 – $600): Municipalities charge base filing fees alongside valuation-based surcharges to review load calculations, panel schedules, and blueprint wiring diagrams prior to construction.
- Multi-Stage Inspection Fees ($100 – $400): Jurisdictions require separate on-site sign-offs for underground trenching, rough-in framing wiring, temporary power poles, and final trim-out completion.
- Re-Inspection Penalties ($75 – $250 per visit): If an unpermitted layout change or missing code label fails an inspection, municipalities levy re-inspection fees that delay drywall installation and project timelines.
5 Proven Ways to Lower Your New Build Electrical Costs Without Cutting Corners
Building a new home involves balancing high-end customizations with strict construction budgets. By employing smart contractor negotiation tactics, planning precise layouts ahead of time, and avoiding builder markups on decorative finishes, homeowners can significantly reduce overall electrical expenses without sacrificing safety or functionality.
Lock In Your Lighting & Furniture Plan Before the Rough-In Walk-Through
Making unauthorized layout adjustments after electricians have already started drilling studs triggers expensive change order fees and wasted material costs. Finalizing your furniture placement, bed positions, and kitchen island dimensions before the initial rough-in walk-through ensures every box is placed correctly the first time.
- Eliminate Costly Change Orders ($150 – $500 per fix): Moving a switch or adding a recessed light after wires are stapled and walls are framed requires tedious drywall patching and rewiring labor.
- Optimize Switch Leg Placement: Ensuring multi-way switch locations align naturally with room entryways prevents awkward daily navigation and eliminates unnecessary switch additions later.
- Collaborative Site Walk-Throughs: Walking the framed rooms directly with your lead electrician allows you to verify outlet heights, appliance drops, and television mount locations face-to-face.
Supply Your Own Decorative Fixtures While Letting the Electrician Supply Rough Materials
General contractors and lighting showrooms often apply a 30% to 50% markup on decorative chandeliers, vanity lights, and ceiling fans. You can bypass these retail markups by purchasing your own decorative finishes online while requiring your contractor to supply all rough wiring materials and code-mandated hardware.
- Avoid Showroom & Builder Markups: Sourcing light fixtures directly from wholesale or retail distributors saves hundreds of dollars on aesthetic upgrades without altering structural labor costs.
- Guarantee Code-Compliant Rough Materials: Let your licensed electrician supply certified copper Romex cable, breaker panels, junction boxes, and tamper-resistant receptacles to ensure full insurance and inspection compliance.
- Inspect Fixture Compatibility Early: Ensure all owner-supplied fixtures include proper mounting hardware and match your electrical contractor’s box weight ratings before trim-out day.
Future-Proof with Empty Conduits (Smurf Tubes) Instead of Paying for Tech Today
Instead of paying premium rates to install complex smart-home automation and low-voltage wiring for futuristic technologies you might not use yet, have your electrician run inexpensive empty corrugated plastic conduits (often called “Smurf tubes”) from the basement to the attic or media locations.
- Inexpensive Pre-Installation ($2 – $5 per linear foot): Burying empty pull-string conduits inside wall cavities during framing costs a fraction of what full pre-wiring packages demand.
- Effortless Future Upgrades: When you decide to upgrade to fiber-optic internet, advanced security systems, or motorized shades years down the road, you can easily fish new cables through the existing tubes without cutting drywall.
- Maximum Financial Flexibility: Deferring costly smart-home upgrades until after you move in helps free up upfront construction loan capital for essential structural needs.
Frequently Asked Questions
How much electrical wire is needed for a 1,200 sq. ft. house?
Wiring a standard 1,200 sq. ft. house typically requires between 1,200 and 1,600 linear feet of copper Romex cable, averaging roughly 1 to 1.3 feet of wire per square foot of living space. Builders usually purchase two to three 250-foot rolls of 14/2 NM-B cable for general lighting and bedroom outlets alongside two rolls of heavier 12/2 cable for kitchen, bathroom, and laundry circuits.
- General Lighting & Outlets: 500 to 750 feet of 14/2 copper cable rated for 15-amp circuits.
- High-Load Receptacles: 400 to 500 feet of 12/2 copper cable rated for 20-amp branch circuits.
- Heavy 240V Appliances: 150 to 250 feet of 10/3 and 8/3 cable for electric ranges, dryers, and HVAC units.
How much does it cost to rewire a 2,200 sq. ft. house vs. new construction?
Rewiring an existing 2,200 sq. ft. house costs between $15,000 and $30,000+ ($7 to $14 per sq. ft.), making it 35% to 60% more expensive than wiring a brand-new 2,200 sq. ft. build ($8,800 to $19,800). Unlike new construction where open wooden studs allow rapid wire pulling, existing homes require fishing cables through finished walls and repairing torn drywall.
- New Construction Advantage: Exposed framing cuts rough-in labor hours in half and eliminates demolition waste.
- Existing Home Obstacles: Electricians must navigate fire-blocking, insulation, and plaster or drywall barriers.
- Post-Rewire Patching Costs: Homeowners must budget an extra $2,500 to $6,000+ for drywall patching, texture matching, and interior repainting.
How long does it take to wire or rewire a 1,000 sq. ft. house?
Wiring a brand-new 1,000 sq. ft. house takes a two-person electrical crew approximately 2 to 4 working days split between the rough-in framing stage and final trim-out. Conversely, a full rewiring timeline for an occupied 1,000 sq. ft. existing house stretches to 3 to 7 working days due to wall-fishing delays, furniture protection, and daily power restoration.
- New Build Rough-In: 1.5 to 2 days to mount boxes, pull Romex runs, and set the main panel.
- New Build Trim-Out: 1 to 1.5 days after painting to install switches, outlets, and light fixtures.
- Inspection Windows: Municipal rough-in and final inspections typically add 1 to 3 business days to the overall schedule.
At what age should an existing house be rewired?
An existing house should undergo a comprehensive electrical evaluation—and potential rewiring—once its wiring system reaches 40 to 50 years old, or immediately if the home still relies on pre-1960s knob-and-tube wiring or 1960s–1970s solid aluminum wiring replacement hazards. While modern PVC-insulated copper wire lasts 50+ years, brittle cloth sheathing and ungrounded two-prong circuits pose severe fire risks.
- Pre-1950s Homes: Cloth-wrapped knob-and-tube wiring lacks a ground wire and degrades when covered by modern attic insulation.
- 1965–1973 Homes: Single-strand aluminum branch wiring expands and contracts under load, loosening terminal screws and causing overheating.
- Immediate Warning Signs: Frequent breaker trips, flickering lights, warm wall plates, or ungrounded two-prong outlets warrant immediate replacement.

Oscar Vance | Master Plumber & Drainage Expert
Meet Oscar Vance, a licensed master plumber sharing practical solutions on residential repairs, preventive maintenance, and thoughtful home upkeep.