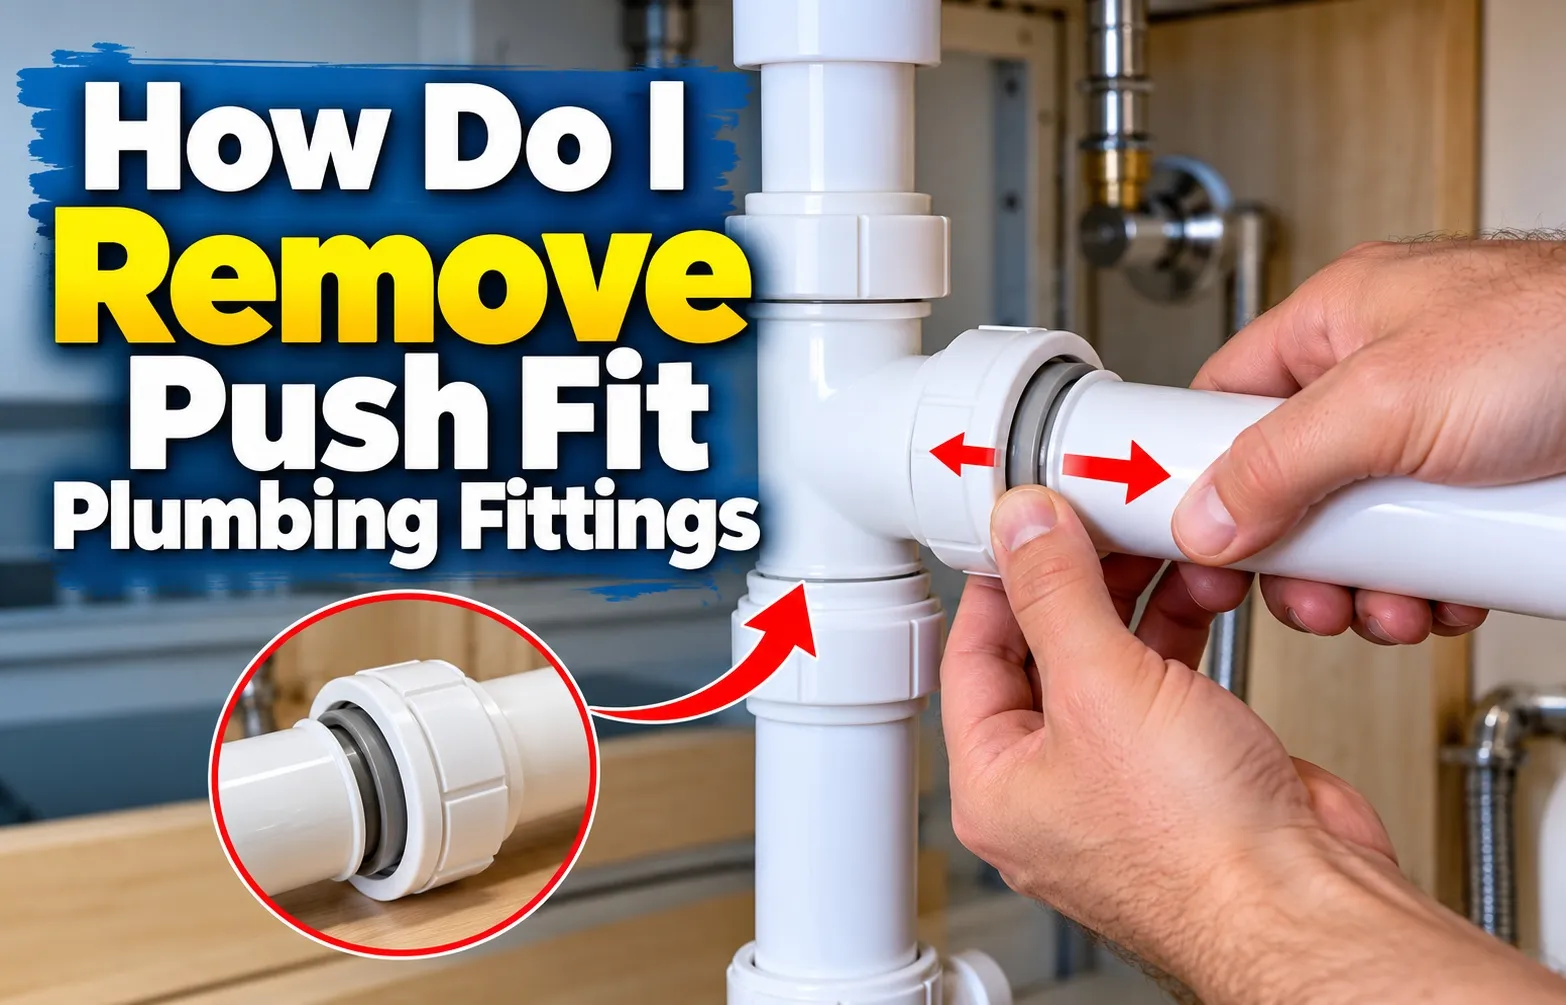
 How Do I Remove Push Fit Plumbing Fittings?
To remove push-fit plumbing fittings quickly and safely, you must firmly press the outer release collar—known as the collet—against the body of the fitting. This mechanical action retracts the internal stainless steel grip rings, allowing you to pull the pipe straight out without damaging the material.
- Locate the Collar: Find the plastic or metal ring situated right at the mouth of the connector.
- Disengage the Teeth: Push the collet evenly inward to release the bite of the internal grip ring.
- Pull the Pipe: Maintain pressure on the collar while twisting and pulling the pipe straight out.
What is a Push-Fit Plumbing Fitting?
Push-fit plumbing fittings—widely manufactured by trusted industry leaders like SharkBite and John Guest Speedfit—are modern connectors designed to join water lines instantly. They eliminate traditional soldering, glue, or heavy crimping equipment, making them ideal for rapid plumbing repairs and installations.
- Engineered for seamless compatibility with copper, PEX, and CPVC piping materials.
- Utilize robust internal o-rings to maintain a secure, watertight seal under household water pressure.
- Feature built-in mechanical retention that locks pipes tightly into place upon insertion.
The Golden Rule of Removal: Depressing the Collet
Understanding the internal physics of the connector is the secret to a hassle-free disconnection. When a pipe is inserted, angled stainless steel teeth bite into the outer surface to prevent it from backing out; therefore, depressing the release collar is the only way to flatten those teeth and free the pipe.
- The collet acts as a direct lever pressing against the internal locking mechanism.
- If the collar is only partially depressed, the metal teeth will remain wedged against the pipe wall.
- Applying uniform pressure around the entire perimeter of the collar ensures the pipe releases smoothly.
Method 1: Removing Push-Fit Fittings Using Standard Removal Tools
Using standard removal tools like a horseshoe disconnect clip is the safest and most efficient way to separate push-fit connectors from your water lines. Whether you are working with 1/2-inch or 3/4-inch PEX pipe, copper pipe, or CPVC, following a structured three-step approach ensures a leak-free and damage-free disconnection every single time.
Step 1: Shut Off the Water Supply and Drain Pressure
Before attempting to disconnect any connector, you must completely isolate the work area by turning off the main water valve and opening nearby faucets. This eliminates trapped system pressure and prevents unexpected water discharge while you work on the line.
- Locate and fully close your home or zone water shut-off valve securely.
- Open the lowest faucet in the house to drain residual water and relieve internal system pressure.
- Place a towel or small bucket underneath the target fitting to catch any residual drops left inside.
Step 2: Match and Snap the Horseshoe Disconnect Tool
Select the correct size of horseshoe disconnect clip matching your pipe diameter—typically 1/2-inch or 3/4-inch—and snap the open side securely around the pipe right behind the fitting collar. The removal tool acts as an extended lever to apply even force across the circular collar.
- Identify your exact pipe size to prevent tool slippage or incomplete collar depression.
- Snap the horseshoe-shaped plastic or metal removal tool around the pipe behind the fitting.
- Ensure the flat edge of the tool rests squarely against the outer rim of the release collar.
Step 3: Depress the Collet and Pull the Pipe Straight Out
Push the removal tool firmly against the fitting’s release collar to disengage the internal stainless steel teeth, then twist and pull the PEX pipe, copper pipe, or CPVC straight out of the connector body. Keeping the tool pressed down is essential while sliding the pipe free.
- Apply steady, even forward pressure with the tool to compress the internal collet completely.
- Gently twist the pipe back and forth while pulling backward to release any stubborn rubber seals.
- Inspect the extracted pipe end for burrs, deep scratches, or debris before attempting any reinstallation.
Method 2: The Alternative Wrench and Pliers Trick
If you find yourself in a plumbing emergency without a dedicated horseshoe removal tool, you can easily disconnect a push-to-connect fitting using common household tools. An adjustable crescent wrench or standard pliers can provide the precise lever pressure needed to depress the release collar and slide the pipe free.
- Emergency Solution: Substitute professional tools with common hardware items when working on urgent repair jobs.
- Leverage Control: Apply controlled force to avoid damaging the delicate plastic release ring or the pipe wall.
Using an Adjustable Crescent Wrench as a Release Lever
An adjustable crescent wrench serves as an effective makeshift release lever when you adjust the jaws precisely to the pipe’s outer diameter. By placing the flat jaw directly against the fitting’s release collar and applying steady pressure, you can retract the internal grip teeth uniformly.
- Open the crescent wrench jaws just wide enough to slip around the pipe right behind the fitting body.
- Position the flat side of the tool jaw flush against the plastic release collar using proper jaw positioning.
- Squeeze or press the wrench handle toward the fitting to depress the collet completely while pulling the pipe backward.
Safe Handling with Standard Pliers
Standard pliers can also be utilized for emergency disconnections, provided you exercise caution to avoid crushing or scratching the fitting and pipe surface. Careful jaw positioning and controlled lever pressure ensure you release the internal mechanism without damaging the surrounding plumbing components.
- Grip the pipe loosely with standard slip-joint or tongue-and-groove pliers right behind the connector.
- Use the edge of the plier jaw to push evenly against the plastic collar ring.
- Avoid excessive squeezing force to prevent deforming the plastic collet or scoring the metal pipe.
Method 3: Brand-Specific Removal Techniques: Hep2O, JG Speedfit, & Tectite
Different plumbing manufacturers engineer distinct internal locking mechanisms for their connectors. Understanding these brand-specific variations ensures you use the correct technique and prevents permanent damage to your water lines.
- Manufacturer Design: Each brand utilizes proprietary release collars or keys tailored to specific pipe tolerances.
- Proper Equipment: Matching the correct tool to the specific connector brand guarantees a smooth disconnection.
Hep2O Colored Release Keys & Plastic Pipe Insert Extraction
Hep2O systems rely on color-coded proprietary release keys—such as the blue key for 15mm pipes—that snap around the fitting to depress the collet uniformly. When pulling the pipe out, you may also need to extract the internal plastic pipe insert if it remains stuck inside.
- Snap the matching color-coded Hep2O release key securely around the fitting collar.
- Hold the key down firmly, then twist and pull the pipe straight out of the connector.
- Use needle-nose pliers to remove a stubborn plastic pipe insert if it stays lodged in the line.
- For further official details, consult the Wavin Hep2O removal guide.
John Guest Speedfit Twist-and-Pull & Locking Caps
JG Speedfit plastic fittings use a standard collet design that requires pushing the collet square against the fitting body while pulling the pipe free. Certain variations feature a twist-down locking cap or collet locking ring that must be unscrewed before the internal teeth can retract.
- Unscrew any secondary twist-down locking caps counter-clockwise to expose the release collet.
- Push the plastic collet squarely against the fitting body to disengage the internal grip rings.
- Pull the pipe straight out in a fluid motion while keeping the locking mechanism depressed.
Tectite Demounting Tools for Metal Fittings
Tectite fittings—frequently used with copper, brass, and carbon steel pipes—require specialized demounting clips or tongs designed for metallic bodies. These tools apply even circumferential pressure to retract the grip ring without denting the rigid pipe.
- Select the correct metal-compatible demounting clip matching your specific fitting diameter.
- Place the tool around the pipe and slide it flush against the outer release collar.
- Compress the tool firmly to release the grip teeth and pull the metal pipe smoothly out.
How to Remove Push-Fit Fittings Without Any Tool
Discovering that you need to disconnect a connector when a specialized removal tool is completely unavailable can be frustrating. Fortunately, you can successfully execute a tool-free removal by using clever everyday items to achieve proper collar depression and release the internal teeth.
- Emergency Readiness: Use smart DIY alternatives when you are stuck mid-repair without proprietary clips.
- Mechanical Principle: Any thin, firm material that can evenly push the plastic collet inward will successfully release the pipe.
The Heavy-Duty Zip Tie Improvised Release Hack
A heavy-duty zip tie serves as an ingenious DIY release hack when standard disconnect tongs are missing from your toolbox. By wrapping the thick plastic tie tightly around the pipe and sliding it into the fitting’s throat, you can press against the release collar uniformly.
- Select a wide, heavy-duty zip tie and wrap it snugly around the pipe right behind the fitting.
- Lock the zip tie loosely so it forms a continuous ring that can slide forward into the collet.
- Push the loop firmly against the plastic release collar while pulling the pipe backward to free it from the grip teeth.
Making a Custom Shim from Thin Plastic or Wire
If a zip tie is unavailable, you can fashion a custom shim from a piece of stiff plastic or pliable wire. Cutting a horseshoe shape out of a sturdy plastic bottle or bending thick wire mimics the exact function of a commercial disconnect clip.
- Cut a small crescent or horseshoe shape from a durable plastic container to match your pipe diameter.
- Slide your custom plastic shim behind the fitting collar to distribute equal pressure.
- Press the shim squarely into the collet body to retract the internal stainless steel teeth completely.
Important Warnings When Using Tool-Free Workarounds
While DIY hacks are lifesavers during plumbing emergencies, improper technique can scratch the pipe or damage the delicate fitting body. Always exercise caution and avoid using sharp metal objects that could score the tubing or cut your hands.
- Avoid using sharp screwdrivers or knives that can easily slip and puncture plastic PEX piping.
- Ensure uniform pressure around the entire collar; uneven force will keep the grip teeth locked tight.
- Stop immediately and acquire a proper tool if the fitting refuses to budge to prevent permanent plumbing damage.
Troubleshooting Tight Spaces & Hard Water Jamming
Real-world plumbing repairs often present unexpected hurdles, such as mineral buildup or restricted access behind walls. Knowing how to troubleshoot these stubborn obstacles prevents broken lines, component failures, and unnecessary frustration.
- Identify stubborn blockages caused by environmental debris, corrosion, or physical deformation.
- Apply specialized techniques for confined work areas where standard removal tools simply will not fit.
Dealing with Limescale, Mineral Crust, and Dried Paint
Hard water jamming occurs when calcium and mineral crust accumulate directly around the release collar, preventing it from depressing fully. Similarly, dried paint or drywall dust can cement the collet into a fixed position, trapping internal parts and risking O-ring damage if forced.
- Scrape away dried paint, plaster, or crust carefully using a fine tool or pick.
- Apply a safe plumbing lubricant or vinegar solution to dissolve stubborn limescale deposits around the collar rim.
- Clean the collar thoroughly until it moves freely before attempting to slide the pipe out.
Working in Cramped Under-Sink or Wall Cavities
Cramped space plumbing—such as tight gaps beneath a kitchen sink or narrow wall cavities—often prevents you from operating standard horseshoe clips or bulky wrenches. Working in these restricted areas requires alternative leverage tactics and meticulous care.
- Use miniature disconnect clips or slim zip ties designed specifically for tight, confined enclosures.
- Angle your hands or use long-reach pliers to apply balanced, even pressure on the release collar.
- Check surrounding structures to ensure you have enough clearance to pull the pipe straight back without binding.
The Flush-Cut Alternative: When a Fitting is Permanently Fused
When a connector becomes permanently fused due to severe corrosion or structural wear, attempting to force it can snap the tubing entirely. In these extreme scenarios, executing a clean flush cut is the fastest and most reliable solution to salvage the system.
- Use an oscillating multi-tool equipped with a fine metal-cutting blade for maximum precision.
- Cut the pipe flush right behind the stubborn fitting to remove the damaged hardware completely.
- Prepare the fresh pipe end by deburring the edges thoroughly before installing a brand-new replacement coupling.
Can You Reuse Push-Fit Fittings and Pipes? (Inspection & Safety)
While many modern push-fit connectors are engineered to be reusable, deciding whether to reinstall an old fitting requires careful evaluation. Following strict reusability guidelines and performing a thorough safety check is essential to guarantee long-term leak prevention.
Component Evaluation:
- Assess the physical condition of both the connector and the piping material before reassembly.
- Risk Mitigation: Replacing a compromised fitting prevents costly water damage and unexpected system failures later.
Inspecting Internal O-Rings and Stainless Steel Teeth
Before reusing any push-to-connect fitting, peer inside the body to examine the internal components for signs of wear. A damaged rubber seal or deformed grip ring will compromise the integrity of the connection immediately upon reinstallation.
- Inspect the internal O-ring for cracking, flattening, tears, or dry rot that could ruin the watertight seal.
- Verify that the stainless steel teeth are clean, springy, and free from excessive corrosion or breakage.
- Ensure no foreign debris or old pipe shards are trapped inside the housing before pushing a new pipe home.
Checking Copper Pipes for Deep Scratches and Grooves
When working with metallic water lines, you must inspect the tubing for scoring or copper pipe scratching caused during removal. Deep grooves running along the length of the pipe can create tiny channels for water to bypass the O-ring, leading to slow, hidden leaks.
- Run your fingernail along the insertion zone to feel for deep indentations or sharp gouges.
- Ensure the pipe end is clean, round, and properly deburred to protect the delicate internal rubber seals.
- Cut away and discard sections of pipe that exhibit severe surface scratching or structural distortion.
When to Discard and Replace Old Connectors
Knowing when to retire an aging component is a vital part of professional plumbing maintenance. If a fitting shows visible signs of fatigue, chemical degradation, or physical stress, throwing it away is always safer than risking a future flood.
- Discard any plastic fitting that exhibits hairline cracks, discoloration, or warping from heat exposure.
- Replace connectors that have been installed and removed multiple times, as the grip teeth lose their initial tension.
- Invest in brand-new fittings for critical or inaccessible locations—such as behind drywall or beneath concrete slabs.
Frequently Answered Questions About Push-Fit Fittings
Navigating plumbing repairs often raises specific technical questions regarding safety, compatibility, and component reusability. Here are precise answers to the most common queries surrounding quick connect fitting maintenance and removal.
- Expert Clarity: Get direct, actionable solutions to ensure safe plumbing disconnections.
- Best Practices: Learn how to handle rigid and flexible lines without risking leaks.
Can you remove copper push-fit fittings the same way as PEX?
Yes, copper push-fit fittings are removed using the exact same mechanical principle as PEX piping: depressing the outer release collar to retract the internal stainless steel grip rings. However, rigid copper requires careful handling to prevent surface scratching or bending the pipe during extraction.
- Both copper and PEX connectors rely on identical collet mechanisms and standard removal tools.
- Rigid metal pipes must be pulled straight back without lateral force to protect internal rubber seals.
- Inspecting a copper push-fit connection after removal ensures the metal surface remains smooth and undamaged.
How do you disconnect a push-connect water line under pressure?
You should never attempt to disconnect a push-connect water line while it is under active pressure. Always shut off your home water supply and open the nearest faucet to drain residual water and relieve trapped pressure before operating the release valve or collar.
- Releasing a pressurized line can cause high-velocity water discharge and potential injury.
- Draining the system ensures a clean, dry, and controlled environment for the quick connect fitting.
- Always place a towel beneath the work area to catch any trapped moisture left inside the pipe.
Do push-fit connectors get damaged during removal?
Push-fit connectors generally do not suffer structural damage during removal if you use the correct disconnect tool and apply balanced pressure. However, older fittings or those removed multiple times may exhibit worn grip teeth or degraded internal O-rings requiring replacement.
- Using proper horseshoe clips or release keys prevents warping or cracking the outer plastic body.
- Inspect internal components closely for wear and tear before deciding to reuse any old hardware.
- Replace questionable fittings immediately to guarantee long-term leak prevention in your plumbing system.

Home Improvement Researchers & Guides Editors
Meet the Nest Team, a collective of dedicated researchers, home improvement enthusiasts, and industry writers sharing practical guides, thorough category research, and trusted solutions for residential repairs and thoughtful home upkeep.

