Troubleshooting Your Gas Water Heater Why the Pilot Light Fails
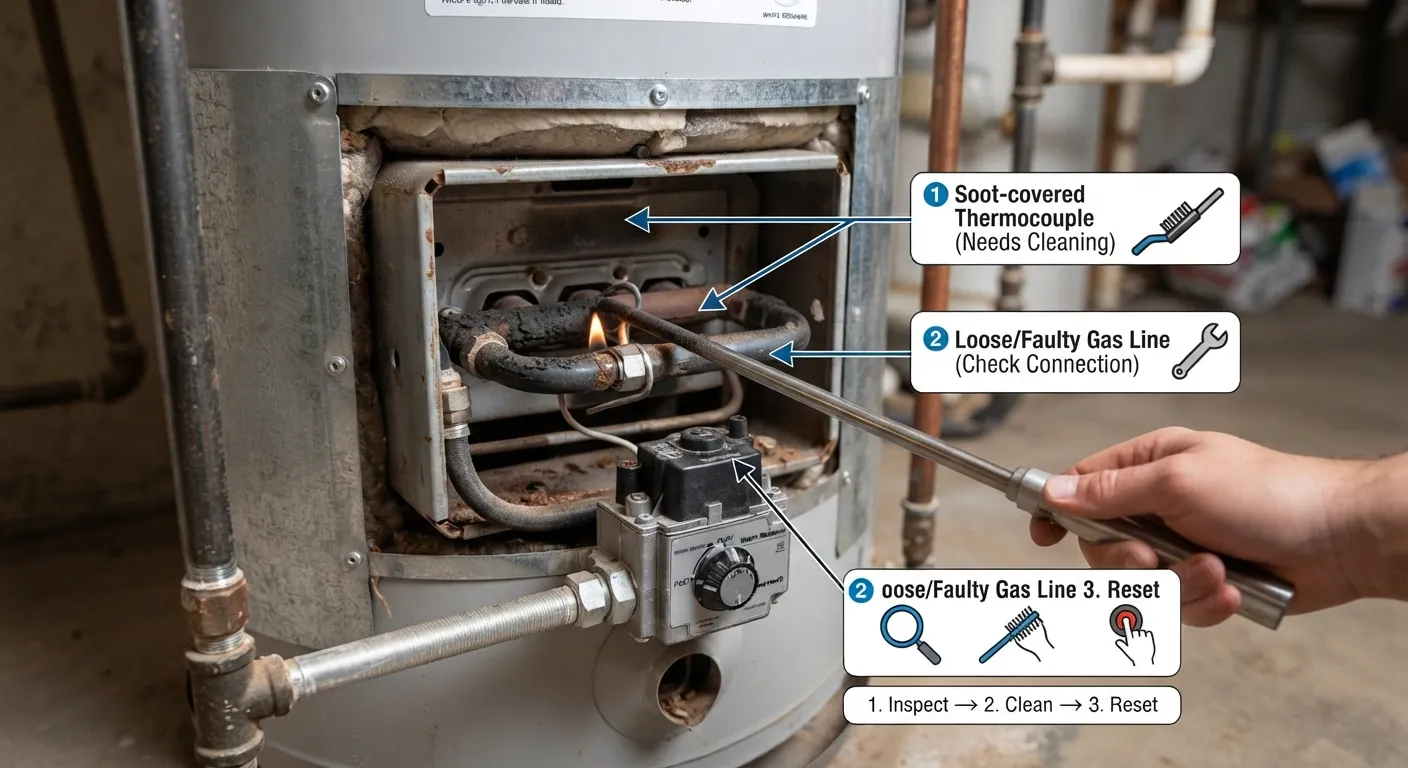
If your gas water heater pilot light won’t stay lit, the primary culprit is typically a malfunctioning thermocouple that fails to signal the gas valve to stay open. While dealing with a gas appliance requires caution, understanding these core components helps you diagnose the issue quickly and safely.
- Faulty Thermocouple: This safety device detects the flame; if it wears out or gets coated in soot, it mistakenly shuts off the gas supply.
- Gas Supply Interruptions: Fluctuations in gas pressure or a failing control valve can prevent a steady stream of fuel from reaching the pilot light.
- Environmental Drafts: External air currents from nearby vents or a blocked flue can repeatedly blow out the small flame before the sensor can heat up.
Pinpointing these initial symptoms prevents unnecessary panic and guides you toward the proper repair steps for your gas water heater system.
What Your Pilot Light’s Behavior Tells You
If your pilot light keeps going out the exact second you let go of the control knob, the issue is almost always a failed thermocouple or an incorrectly positioned flame that fails to heat the safety sensor.
- Thermocouple Misalignment: The pilot flame isn’t directly bathing the tip of the thermocouple, preventing it from generating the necessary electrical millivolt signal.
- Loose Connection: The copper line connecting the thermocouple to the gas valve is loose, corroded, or damaged, interrupting the circuit.
- Insufficient Hold Time: You may not be holding the control knob down long enough (typically 30 to 60 seconds) for the sensor to heat up fully.
Pilot Stays Lit for a While Then Goes Out Hours Days Later
When your pilot light stays on initially but then cuts out hours or days later, environmental drafts, a failing thermal switch, or intermittent gas supply fluctuations are typically the root cause of the sudden system shutdown.
- External Air Drafts: Strong drafts from nearby HVAC vents, open windows, or a deteriorating flue pipe can blow out the flame over time.
- Tripped Thermal Switch: Overheating or blocked combustion air intakes can trigger safety roll-out switches that shut down the entire system.
- Intermittent Gas Pressure: Fluctuations in the home’s natural gas or propane supply can starve the pilot assembly.
Pilot Won’t Even Light in the First Place
If you cannot get the pilot light to spark or ignite at all during the manual lighting process, you are likely dealing with a gas supply blockage, a faulty igniter, or trapped air inside the pipe.
- Trapped Air in Lines: Newly installed lines or extended periods of inactivity can cause air pockets that prevent gas from reaching the burner.
- Faulty Igniter Spark: The piezoelectric sparker or electronic igniter button is failing to produce a visible spark at the pilot head.
- Closed Gas Supply Valve: The main manual gas shut-off valve supplying the water heater is partially or fully closed.
Faulty or Dirty Thermocouple: The 1 Culprit
A thermocouple is a vital safety device that acts as a thermal switch within your water heater system. It generates a small electrical current when heated by the pilot flame, which keeps the gas valve open and supplies fuel safely.
- Safety Protection: It ensures gas automatically shuts off if the pilot light accidentally goes out, preventing hazardous fuel leaks.
- Millivolt Generation: The flame heating the metal tip creates a tiny electrical voltage (usually between 20 to 30 millivolts) to hold the internal valve open.
How to Know If Your Thermocouple Is Bad
Testing your thermocouple with a multimeter is the most accurate way to verify its health before buying replacement parts. Follow these practical testing steps to isolate the issue.
- Multimeter Setup: Set your digital multimeter to measure DC millivolts (mV) to read the low-voltage output correctly.
- Probe Placement: Connect the positive lead to the end terminal where it screws into the gas valve and the negative lead to the copper outer casing.
- Reading Evaluation: Light the pilot and hold the knob down; a healthy thermocouple should output a steady reading above 20mV, while anything dropping below 12mV under load indicates failure.
How to Clean a Thermocouple
Sometimes a thermocouple is merely covered in soot or carbon buildup rather than being completely broken. Cleaning it can restore proper electrical contact immediately.
- Shut Down Gas: Turn the gas control valve to the “OFF” position and allow the entire assembly to cool down completely.
- Gentle Abrasion: Use fine-grit sandpaper, an emery cloth, or a green scouring pad to lightly rub the metal tip until it shines.
- Wipe Clean: Wipe away any remaining residue or dust with a clean, dry cloth before re-lighting the pilot assembly.
Thermocouple Lifespan When to Replace Proactively
Understanding thermocouple lifespan helps you avoid unexpected hot water outages during peak usage seasons. Most units degrade steadily over years of continuous exposure to open flames.
- Average Operational Life: Standard thermocouples typically last between 3 to 6 years before thermal fatigue causes internal burnout.
- Visible Wear Signs: Look for heavy corrosion, a warped or pitted tip, or a frayed copper supply line as indicators for replacement.
Can You Replace a Thermocouple Yourself?
Replacing a thermocouple is a straightforward intermediate DIY project that most homeowners can accomplish safely with basic hand tools. It requires patience and adherence to safety guidelines.
- Difficulty Rating: Moderate (Beginner-friendly if you follow proper gas-safety and wrench-tightening steps).
- Required Tools: A standard wrench set, fine-grit sandpaper, a multimeter, and a flashlight to inspect the burner compartment.
Thermocouple Replacement Cost
Replacing this component is cost-effective, though prices vary significantly depending on whether you handle the labor yourself or hire a certified plumbing technician.
Correct Lighting Procedure Mastering the Pilot Button
Many homeowners struggle to relight their water heater simply because they skip critical steps in the manufacturer’s startup sequence. Follow this sequence carefully to ensure safe and successful ignition.
- Turn to Pilot: Rotate the pilot control knob from the “OFF” position to the designated “PILOT” setting [00:08:34].
- Depress and Spark: Push the control knob down firmly while simultaneously pressing the igniter button to generate a spark inside the combustion chamber [00:08:40].
- Transition to Operating Mode: Once the flame is established and the sensor maintains heat, release the button and turn the dial to “ON” or your desired temperature [00:09:43].
How Long Should You Hold the Button?
Releasing the control knob too quickly is the most common reason a newly lit pilot instantly dies. The thermocouple requires adequate thermal exposure to generate the electrical millivolts needed to hold the gas valve open.
- The 30 to 60 Seconds Rule: You must keep holding the pilot control knob down continuously for 30 to 60 seconds after the flame appears [00:08:44].
- Monitoring Status Lights: On modern electronic gas valves, keep holding until you notice the status indicator light begin to flash or flicker a steady confirmation signal [00:09:11].
Tripped Thermal Switch The Safety Cutoff Mechanism
A thermal cutoff switch is a safety device designed to protect your home by shutting down the water heater if dangerous combustion chamber temperatures occur. This prevents unvented exhaust gases or flame roll-out from damaging your property.
- Rollover Protection: It detects abnormal heat buildup escaping from the bottom of the water heater combustion chamber.
- One-Time vs. Resettable: Depending on your water heater model, the switch may be a manual reset button or a fusible link that must be replaced after tripping.
How to Find and Reset It
Locating the thermal switch requires inspecting the lower jacket area near the burner assembly where the gas line enters the unit. If your model features a manual reset button, clearing the fault is straightforward.
- Locate the Sensor: Look for a small plastic housing or reset button mounted on the outer metal casing near the base of the water heater.
- Press to Reset: Firmly press the central button until you feel or hear a distinct click, which indicates the internal electrical circuit has re-engaged.
Why It Trips
A thermal switch doesn’t trip without a reason; it indicates that the burner compartment is experiencing severe overheating or restricted airflow. Identifying the root cause stops the switch from tripping repeatedly.
- Blocked Air Intake: Dust, lint, and pet hair clogging the flame arrestor plate restrict necessary combustion airflow.
- Draft Issues: A blocked or improperly venting exhaust flue traps excessive heat around the top and sides of the tank.
- Combustion Chamber Rollover: Internal soot buildup creates a delayed ignition, forcing hot gases backward out of the access door.
Verifying that your intake screen is clean and your flue is clear ensures the thermal switch remains stable after a manual reset.
Drafts Poor Airflow and Clogged Pilot Tubes
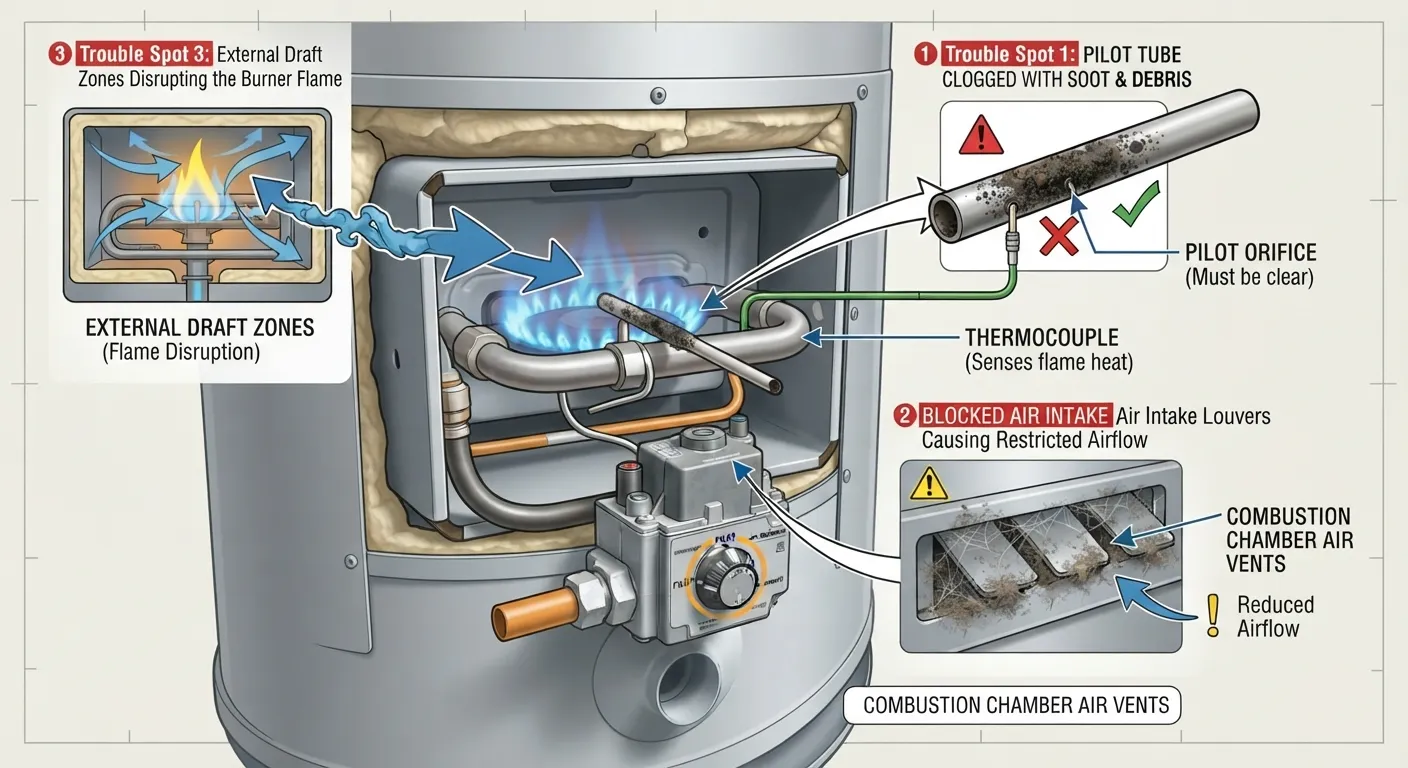
External air currents are a frequent cause of a pilot light that mysteriously extinguishes hours after you have lit it. Even a small flame can be easily destabilized by unexpected airflow around the water heater base.
- HVAC and Vent Proximity: Air forced from nearby heating and cooling vents can create turbulence that blows the delicate flame away from the sensor.
- Basement and Garage Currents: Drafts coming through open windows, crawl spaces, or exterior doors can disrupt the combustion chamber balance.
Signs of a Clogged Pilot Tube
A restricted or clogged pilot tube starves the flame of adequate fuel, resulting in a weak, yellow-tipped flame that fails to heat the thermocouple properly. Recognizing these indicators prevents ongoing ignition failures.
- Weak, Yellow Flame: A healthy pilot flame burns crisp and blue; a lazy yellow or orange flame indicates partial blockage or improper gas-to-air mix.
- Flickering Outage: The pilot lights successfully during manual holding but instantly dies because the micro-flame lacks the mass to sustain heat.
Cleaning Mineral Buildup from the Pilot Assembly
Clearing debris and mineral scale from the pilot tube restores a robust, properly directed flame. Performing this maintenance requires patience and care to avoid damaging tiny orifices.
- Shut Down and Cool: Turn off the gas supply completely and allow the entire burner assembly to cool to room temperature.
- Debris Removal: Use a specialized wire brush or compressed air to gently clear dust, spider webs, and lint from the pilot hood and surrounding burner ports.
- Inspection: Verify that the gas jet orifice is completely clear of soot or mineral crust before attempting to reassemble and relight the unit.
Pilot Is Lit But Main Burner Won’t Fire
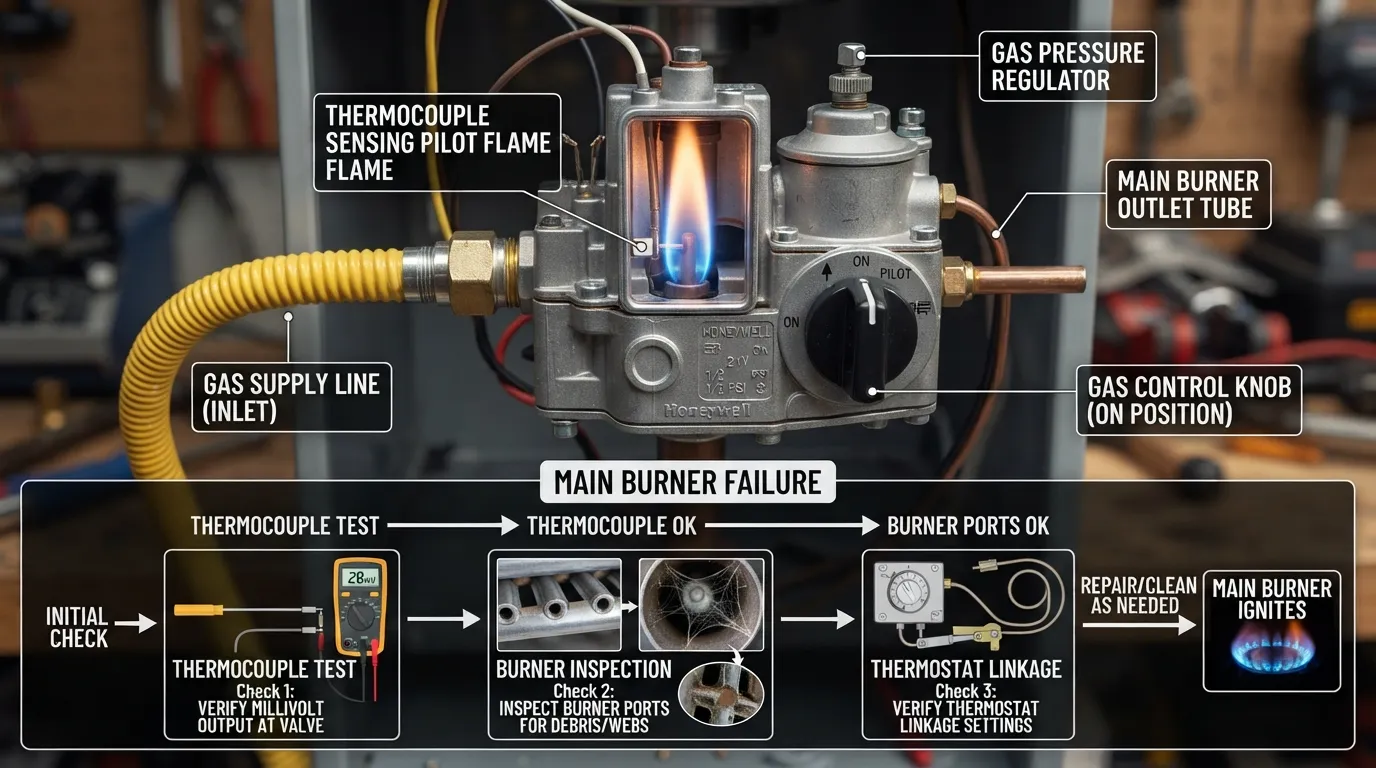
When your pilot light stays lit reliably but the main burner refuses to ignite when you turn up the thermostat, you are facing a completely different mechanical issue than a faulty thermocouple. In this scenario, the safety system is working properly, but the command to release gas to the main burner is failing.
- Control Signal Breakdown: The pilot is generating enough millivolts to keep the pilot safety valve open, but the valve’s internal main burner circuit is not engaging.
- Distinct Troubleshooting Path: Focusing on the thermocouple will not fix this issue; instead, attention must shift to the gas control valve and temperature settings.
Gas Valve & Thermostat Checks
Diagnosing why the main burner won’t fire requires inspecting the electronic or mechanical control assembly to ensure it is receiving proper signals and power. Systematic checks help isolate whether the component needs calibration or total replacement.
- Thermostat Dial Setting: Verify that the water heater’s temperature control dial is set well above the current water temperature (at least “Warm” or “Hot”) to trigger a heating cycle.
- Millivolt Output Verification: Test the power generated across the entire control circuit to confirm the generator can supply enough electrical current to open the heavy main gas valve diaphragm.
- Control Valve Replacement: If the dial clicks and power is present but the main burner never receives gas, the integrated gas control valve assembly has likely suffered an internal mechanical failure and must be replaced.
Does Your Electric Water Heater Have a Pilot Light?
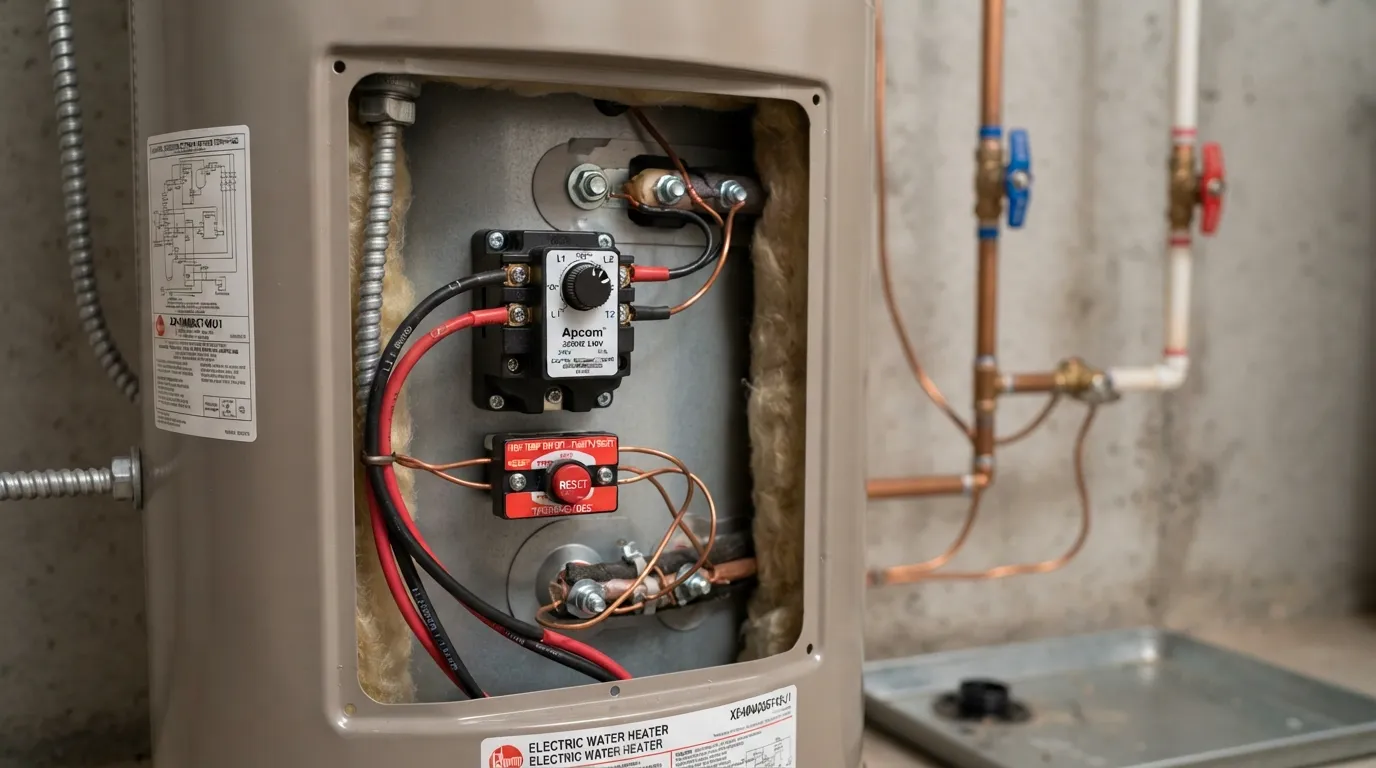
If you are trying to troubleshoot a pilot light on an electric water heater, you will not find one because electric models do not use gas, standing flames, or pilots. Understanding your specific tank type prevents wasted diagnostic time and ensures you focus on the correct electrical components.
- No Gas Required: Electric water heaters rely entirely on internal upper and lower heating elements powered by heavy-duty 240-volt electrical circuits.
- Common Electric Failures: Instead of dealing with a pilot outage, hot water issues on electric models are typically caused by a tripped circuit breaker, a faulty thermostat, or a burned-out heating element.
- Visual Identification Check: Look at the bottom of the tank for a metal gas supply pipe and a temperature control dial with a “PILOT” setting; if you only see an electrical junction box conduit, your system is electric.
Verifying your power source ensures you direct your troubleshooting efforts toward electrical continuity tests rather than gas valve adjustments.
Brand Specific Troubleshooting Rheem Whirlpool Bradford White and Richmond
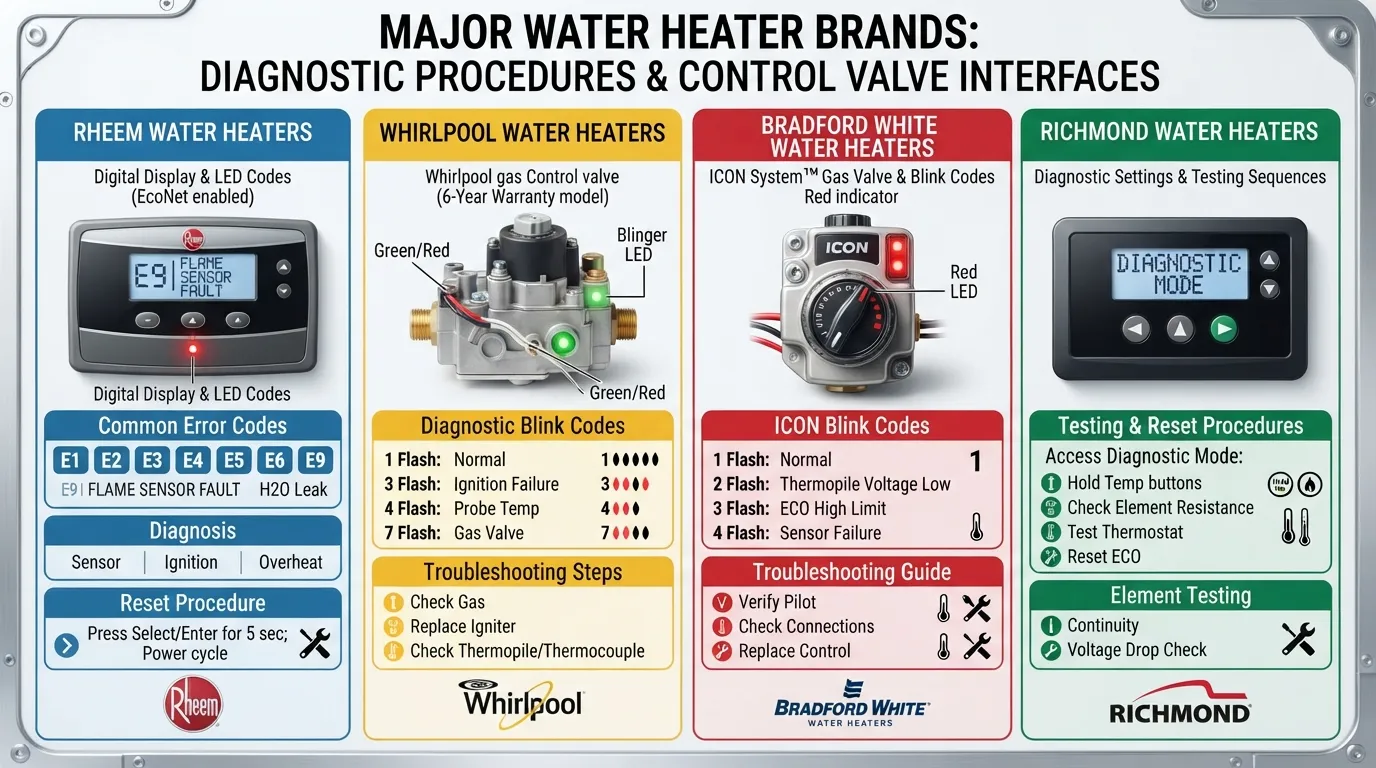
Rheem water heaters frequently feature integrated electronic control modules that use flashing LED status codes to signal specific component failures. Understanding these codes helps you troubleshoot ignition faults efficiently.
- LED Flash Code Diagnostics: Consult the manual sticker on the tank side; a specific sequence of flashes typically indicates a failed thermocouple, a wiring fault, or a tripped thermal limit switch.
- Factory Alignment Quirk: Some Rheem units suffer from factory thermocouple misalignment where the tip is positioned slightly off-center from the pilot flame, requiring minor manual adjustment.
Whirlpool Water Heater Pilot Light Issues
Whirlpool gas water heaters heavily rely on Flame Vapor Ignition Resistance (FVIR) technology, making them prone to specific airflow and lint-related shutdowns.
- Intake Screen Maintenance: The mesh screen around the base of a Whirlpool tank easily accumulates dust and pet hair, choking off combustion air and instantly extinguishing the pilot.
- Honeywell Control Valves: Many Whirlpool models use complex Honeywell gas valves that lock out entirely if multiple ignition attempts fail in a short window.
Bradford White & Richmond Models Known
Bradford White and Richmond water heaters utilize specialized safety systems and Defender safety components that require specific reset protocols after an outage.
- Defender System Thermal Reset: These units feature a thermal switch that can trip due to localized overheating, requiring you to locate and press the manual reset button.
- Model-Specific Reset Button: If your pilot refuses to stay lit despite a clean flame and good thermocouple, the internal safety switch may need a manual click-reset to restore power flow.
When to Stop and Call a Professional
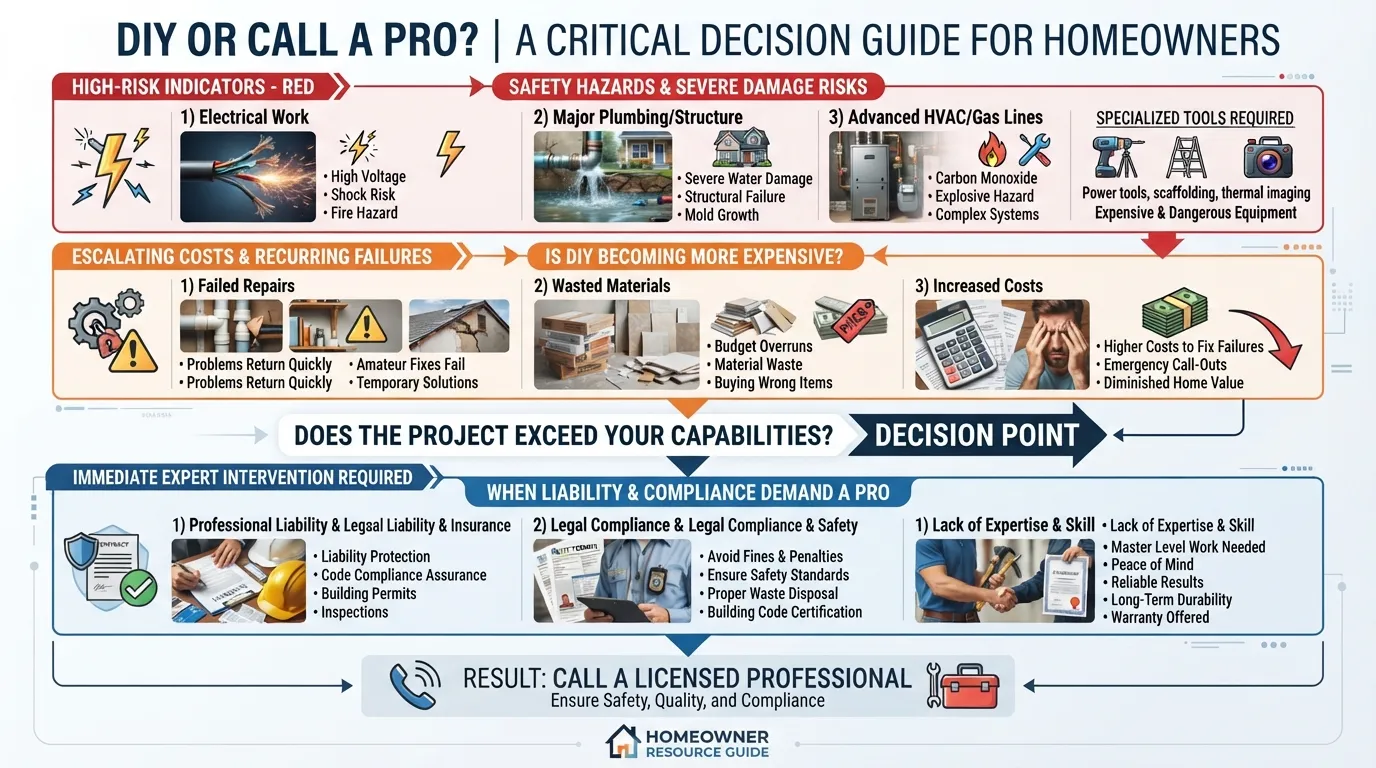
Working around gas appliances demands constant vigilance, and recognizing the immediate signs of a fuel leak can prevent catastrophic accidents. If you notice any unusual indicators, abandon DIY troubleshooting immediately, evacuate the area, and contact your utility provider.
- Distinct Odor: A strong smell resembling rotten eggs or sulfur indicates that utility-added mercaptan is escaping from a loose connection.
- Audible Hissing: A subtle hissing or whistling sound near the gas control valve, supply lines, or burner manifold points to pressurized gas escaping.
DIY vs Professional: A Clear Decision Checklist
While replacing a thermocouple or relighting a pilot is a manageable DIY project, certain complications require the expertise of a licensed technician to ensure home safety. Knowing your limits prevents costly equipment damage and hazardous mistakes.
- Handle Yourself: Replacing a standard thermocouple, cleaning pilot tube soot, and relighting following standard manufacturer procedures.
- Call a Professional: Dealing with persistent gas odors, cracked storage tanks, faulty control valve bodies, or damaged burner assemblies.
Why Repeated Thermocouple Failure After Replacement Needs a Technician
If you install a brand-new thermocouple and it fails or burns out again within a few weeks, the issue goes far beyond a simple worn-out part. A deeper system malfunction is usually starving or destroying the new component.
- Abnormal Combustion Heat: Improper fuel-to-air ratios or restricted venting can create excessive localized heat that melts or warps thermocouple tips prematurely.
- Faulty Gas Valve Circuitry: An internal electrical short or failing solenoid inside the main gas control valve can prevent the system from sustaining the pilot circuit.
For official guidance on troubleshooting repetitive pilot outages safely, review industry recommendations from resources like this source.
Frequently Asked Questions
Why does my pilot light go out as soon as I release the button?
This happens because the thermocouple is not generating enough electrical current to keep the safety valve open. When you release the control knob too early, or if the flame is misaligned and failing to heat the sensor tip, the valve instantly cuts off the gas supply.
How do I know if my thermocouple is bad on my water heater?
You can verify a bad thermocouple using a digital multimeter set to DC millivolts. If the unit outputs less than 12mV while you hold the pilot button down under a strong flame, or if the metal tip is visibly corroded or warped, the component needs to be replaced.
Will the pilot stay lit if the thermocouple is bad?
No, the pilot light will not stay lit on its own if the thermocouple is broken. The thermocouple acts as a crucial safety switch that requires constant heat from the flame to maintain the electrical signal holding the gas valve open.
What is the lifespan of a water heater thermocouple?
A standard water heater thermocouple typically lasts between 3 to 6 years. Constant exposure to open flames eventually causes internal metal fatigue, degradation, and loss of reliable millivolt output.
Can I replace a thermocouple myself?
Yes, replacing a thermocouple is a manageable intermediate DIY project for most homeowners who have basic hand tools and follow safety precautions. It involves shutting off the gas, disconnecting the old sensor, and securing the new universal replacement part.
How much does it cost to replace a thermocouple in a hot water heater?
Doing it yourself typically costs between $10 and $25 for the replacement part. Hiring a professional licensed plumber generally costs between $150 and $300, which includes the service call fee, diagnostic testing, and labor.
Why does my water heater pilot light go out every few days?
An intermittent outage that happens every few days is usually caused by environmental drafts blowing out the flame, a partially blocked burner air intake, or a failing thermal switch reacting to minor overheating.
Conclusion and Recap Checklist
Troubleshooting a pilot light outage comes down to checking a few key components in a logical order. Review this quick checklist to summarize the most effective solutions before taking action.
- Inspect the Thermocouple: Test millivolt output with a multimeter or clean soot buildup from the sensor tip if the flame goes out immediately upon release.
- Hold the Control Knob: Ensure you keep the pilot knob depressed firmly for 30 to 60 seconds to let the sensor reach proper operating temperature.
- Check the Thermal Switch: Press the manual reset button if the system shut down completely due to a localized overheating event or restricted airflow.
- Clear Drafts and Pilot Tubes: Guard against external air currents and clean any mineral scale or dust obstructing the small gas burner orifice.
- Call a Professional: Contact a licensed technician immediately if you detect a persistent gas odor or experience repeated system failures after part replacement.

Oscar Vance | Master Plumber & Drainage Expert
Meet Oscar Vance, a licensed master plumber sharing practical solutions on residential repairs, preventive maintenance, and thoughtful home upkeep.


Pingback: How to Flush a Water Heater Safely: Step-by-Step Guide