How to Clean Copper Pipes: Fast Safe and Proven Methods
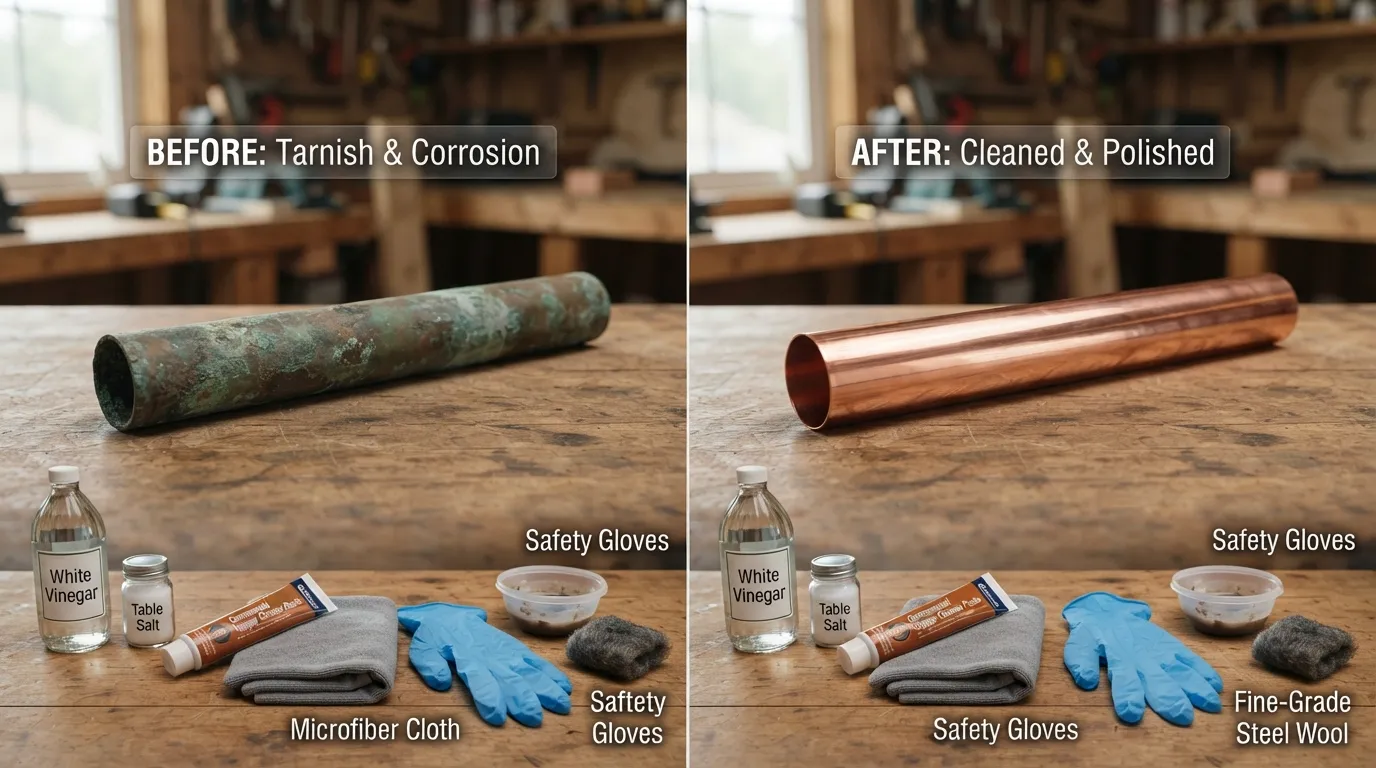
To clean exterior copper plumbing pipes quickly and safely, create a paste using equal parts white vinegar and baking soda, apply it to the tarnished surface, let it sit for 5 to 10 minutes, and gently scrub away oxidation before rinsing with warm water.
Over time, copper pipes naturally develop a layer of tarnish and oxidation due to exposure to air and moisture. While exterior green or brown discoloration is mostly cosmetic and can be restored to a bright shine, interior pipe cleaning requires specialized flushing methods to maintain safe water flow without damaging the metal.
- Exterior Tarnish: Caused by atmospheric oxidation and surface patina build-up.
- Interior Buildup: Mineral scale or corrosion that requires non-abrasive chemical or mechanical flushing.
- Safe Cleaning Agents: Mild acidic solutions like white vinegar combined with a gentle abrasive like baking soda.
Before You Start: Identify Your Situation
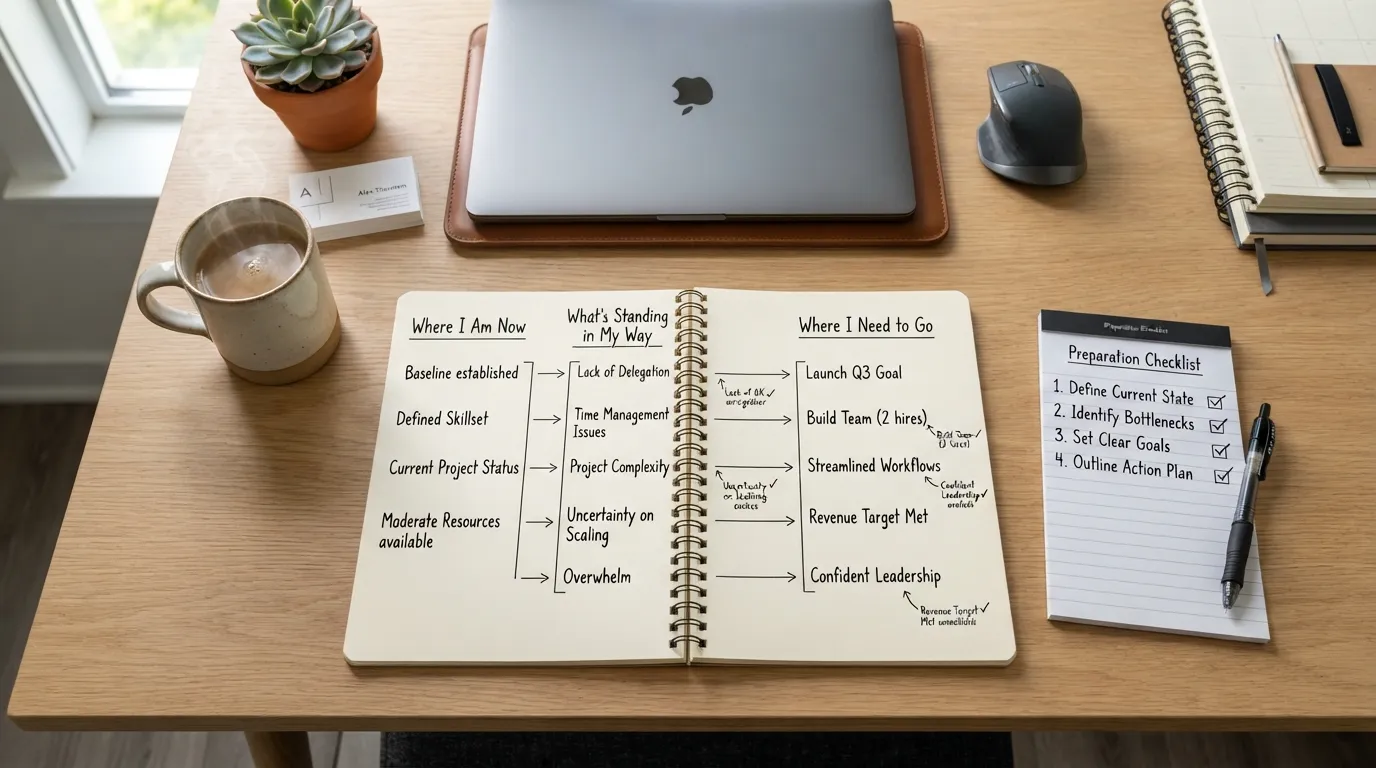
Assessing your copper plumbing setup before applying any cleaning solution prevents accidental surface damage or structural weakening. Determining whether the issue is cosmetic exterior tarnish or internal mineral restriction dictates the right tools and safety approach.
Use this evaluation framework to categorize your copper pipe condition and choose the safest, most effective remediation path.
- Surface Evaluation: Distinguish between normal aging patina and active, harmful corrosion.
- Location Check: Identify whether discoloration sits on exposed basement/wall pipes or hidden supply lines.
- Risk Analysis: Weigh simple DIY acidic polishes against high-pressure or chemical internal flushing.
Do You Want to Remove Tarnish or Preserve the Patina?
Natural copper oxidation creates a protective layer known as patina or verdigris that actually shields the underlying metal from aggressive environmental degradation. If your copper pipes are exposed for aesthetic purposes, you may want to clean off heavy grime while leaving the vintage green-blue patina intact.
Conversely, if you are preparing copper joints for soldering, retrofitting, or routine visual inspections, stripping the tarnish down to bright bare metal is mandatory. Aggressive scrubbing on decorative antique copper can strip away protective layers, so choose your abrasive strength carefully.
- Patina Preservation: Use mild soapy water and a soft microfiber cloth to lift dust without altering the color.
- Full Tarnish Removal: Apply a chemical acid solution like white vinegar or lemon juice to dissolve dark oxidation.
- Solder Prep: Use fine-grit sand cloth or a wire brush to expose clean copper for proper joint bonding.
Is the Problem on the Outside of the Pipe or Inside the Water Line?
Exterior copper discoloration is typically caused by atmospheric humidity, condensation, or minor chemical exposure, which poses no threat to your water quality. Surface tarnish only affects the outer shell of the copper plumbing pipes and can be safely polished away by hand.
Interior pipe problems manifest as reduced water pressure, discolored tap water, or unusual metallic tastes driven by hard water scale and mineral buildup. Flushing or descaling interior lines requires specialized intake interventions rather than exterior scrubbing.
- Exterior Symptoms: Dull brown, dark grey, or powdery green-blue verdigris patches on the pipe exterior.
- Interior Symptoms: Low flow rates, sputtering faucets, or white/crusty mineral deposits around aerators.
- Diagnostic Rule: Never apply harsh exterior metal polishes to components that contact drinking water lines.
When Should You Call a Professional Plumber Instead?
DIY cleaning is strictly limited to surface cosmetic maintenance and minor exterior scale removal on sound copper infrastructure. Attempting aggressive chemical treatments or mechanical scraping on compromised pipes can lead to pinhole leaks or sudden ruptures.
Call a licensed plumber immediately if you notice active green/blue corrosion flaking off deeply pitted metal, persistent dampness around joints, or widespread low water pressure across the entire household. Professional intervention ensures safe pressure testing and code-compliant pipe replacement.
- Pitting & Thinning: Deep wall erosion where the copper pipe feels soft or paper-thin under light pressure.
- Blue-Green Leaks: Active water seepage accompanied by heavy verdigris crust formation at solder elbows.
- Systemic Pressure Loss: Severe internal mineral buildup requiring hydro-jetting or targeted section replacement.
What You’ll Need to Clean Copper Pipes
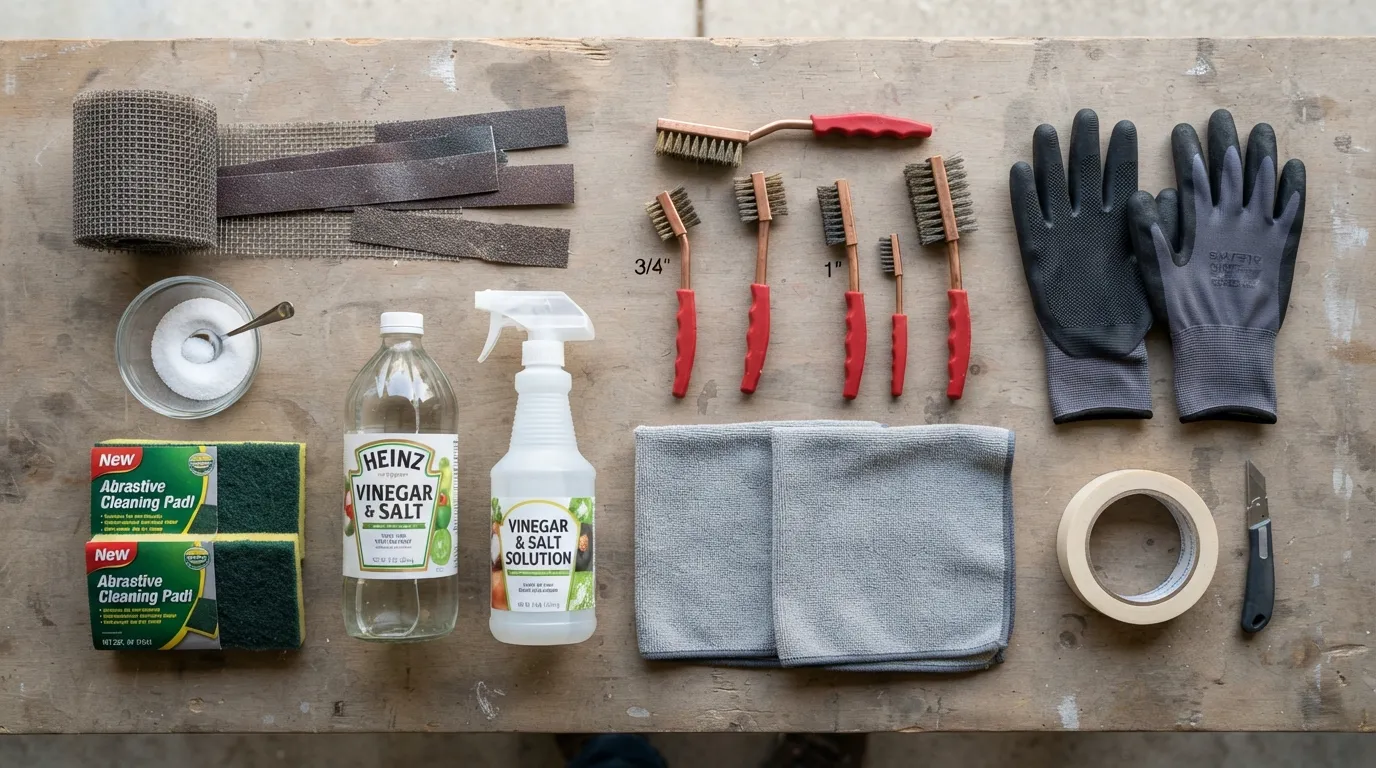
Gathering the right household agents and non-abrasive tools ensures you can break down tarnish and oxidation without scratching or thinning the copper metal. Simple pantry ingredients combined with gentle scrubbers offer the safest and most effective approach for restoring exposed plumbing.
Prepare your workspace with these everyday items before beginning the cleaning process to protect surrounding surfaces and speed up application.
- Acidic Solvents: Natural acids like vinegar or lemon juice to dissolve copper oxide and verdigris.
- Mild Abrasives: Fine-grain powders or salts to lift stubborn grime without gouging the pipe wall.
- Protective Gear: Basic rubber gloves to shield your skin from prolonged contact with mild acids.
Natural Cleaning Agents Vinegar Salt Lemon Juice Baking Soda
White vinegar and fresh lemon juice contain mild acetic and citric acids that chemically react with copper tarnish to break the bond between the metal and oxidation layer. Mixing these liquids with fine table salt or baking soda creates a gentle scrubbing paste or a fast-acting liquid bath.
For vertical or hard-to-reach pipes, blending vinegar, salt, and all-purpose flour into a thick, non-drip paste allows the solution to cling to the curved surface and work effectively. Avoid harsh commercial bleach or steel wool, which can strip away too much copper and cause premature pitting.
- White Vinegar & Salt: The gold standard for dissolving heavy tarnish and green patina quickly.
- Lemon Juice & Baking Soda: A natural, sweet-smelling alternative that gently fizzes to loosen surface grime.
- Flour & Vinegar Paste: Ideal for vertical pipe runs where liquid cleaners would instantly run off.
Tools You’ll Need Soft Cloth Soft Bristled Brush Lint Free Towel
Using the proper applicator and finishing tools prevents microscopic scratches that trap future moisture and accelerate re-tarnishing. Always opt for non-metallic or soft synthetic fibers when working on decorative or pressurized copper lines.
A soft-bristled toothbrush or nylon detailing brush helps work the cleaning paste into tight solder joints, elbows, and wall brackets. Finish with a clean lint-free towel to buff the pipe to a dry, streak-free shine.
- Soft Microfiber Cloths: Best for applying liquid vinegar solutions and initial surface wiping.
- Soft-Bristled Brush: Reaches into threaded fittings, valve handles, and tight corner joints safely.
- Lint-Free Towel: Essential for completely drying the copper to prevent water spot oxidation.
How to Clean the Outside of Copper Pipes Step by Step
Restoring oxidized copper pipes requires a controlled chemical reaction combined with gentle mechanical agitation to lift tarnish without thinning the metal wall. Following a structured step-by-step method ensures an even, bright finish across all exposed runs and solder joints.
Work in a well-ventilated area and protect surrounding flooring or drywall from acidic drips before starting the cleaning sequence.
- Preparation: Wipe away loose dust or cobwebs with a dry microfiber cloth.
- Application Control: Apply the acidic paste uniformly to prevent patchy or uneven shine.
- Rinse and Seal: Neutralize residual acids promptly to stop ongoing metal etching.
Step 1 – Mix Your Cleaning Paste
Combine equal parts white vinegar and fine table salt in a small bowl, stirring until the salt is completely dissolved into the liquid. Gradually blend in all-purpose flour or baking soda until the mixture transforms into a thick, spreadable paste that will not run off vertical surfaces.
Using a smooth, clump-free consistency ensures maximum surface contact between the natural acids and the oxidized copper layer. Mix only enough paste for your immediate project, as fresh ingredients deliver the strongest cleaning reaction.
- Vinegar-to-Salt Ratio: Mix 1/2 cup of white vinegar with 1 tablespoon of fine salt.
- Thickening Agent: Slowly fold in flour or baking soda until paste reaches toothpaste consistency.
- Chemical Reaction: The acetic acid and salt combine to break down copper oxide molecules on contact.
Step 2 – Apply the Paste to the Tarnished Areas
Gratefully scoop a generous amount of the acidic paste onto a soft cloth or gloved fingers and press it firmly against the oxidized copper pipes. Ensure every discolored patch, green verdigris spot, and hard-to-reach joint elbow is thoroughly coated.
Work systematically from the top of the pipe run downward to catch any stray drips before they dry on lower sections. Pay extra attention to manufacturer stamps and solder blobs where tarnish tends to accumulate heavily.
- Uniform Coverage: Apply a thick, opaque layer over all green, brown, or dull gray sections.
- Joint Detailing: Use a small artist brush or gloved fingertip to work paste into tight T-junctions.
- Surrounding Protection: Place a rag directly beneath the pipe to catch minor paste slippage.
Step 3 – Let It Sit and Work on the Corrosion
Allow the applied paste to dwell undisturbed on the copper surface for 5 to 10 minutes so the natural acids can chemically dissolve the oxidation bond. Avoid letting the paste dry completely into a hard crust, which makes final rinsing and buffing much more difficult.
If you are dealing with decades-old, heavy dark tarnish, you may re-dampen the paste lightly with a spray bottle filled with white vinegar rather than scrubbing prematurely. Patience during this dwell phase does the heavy lifting for you.
- Standard Dwell Time: Leave the paste in place for 5 to 10 minutes on light-to-moderate tarnish.
- Prevention of Drying: Mist with a splash of vinegar if the surface starts drying out too fast.
- Visual Check: Watch for the dark tarnish to loosen and turn a lighter shade within the paste.
Step 4 – Scrub Rinse and Dry Completely
Gently scrub the treated pipe using a soft-bristled nylon brush or soft microfiber cloth in circular motions to lift away the dissolved oxidation. Flush the entire run thoroughly with warm soapy water followed by a clean water rinse to completely remove acid residues.
Immediately dry the copper pipe from end to end using a fresh lint-free towel to eliminate water spots and prevent flash oxidation. Leaving moisture on bare copper will jumpstart the re-tarnishing process within a matter of hours.
- Gentle Agitation: Scrub lightly with nylon bristles—never use steel wool or metal scrapers.
- Acid Neutralization: Wash away all vinegar and salt traces using warm, soapy water.
- Instant Drying: Buff dry with a lint-free towel to lock in a streak-free metallic gloss.
How Long Heavy Oxidation Actually Takes to Clear
Severe green verdigris or multi-year black oxidation rarely surrenders to a single 5-minute vinegar application. In field conditions, heavily neglected basement or outdoor copper lines often require a second sequential treatment or an extended 15-minute dwell time.
Rushing the process with aggressive scouring pads will gouge the soft copper wall and strip away protective metal depth, leading to premature green spotting down the road. Letting chemistry do the work yields a cleaner and longer-lasting result.
- Multi-Pass Rule: Apply a second fresh coat for stubborn oxidation rather than scrubbing harder.
- Wall Thickness Protection: Preserving copper mass prevents pinhole leaks in pressurized supply runs.
- Long-Term Sheen: Follow up with a micro-thin coat of paste wax if exposed pipes need humidity defense.
How to Clean the Inside of Copper Water Lines
Restoring internal flow to clogged or mineral-choked copper water lines requires controlled chemical descaling rather than abrasive scraping. Safely flushing interior pipes clears accumulated calcium scale and sediment without compromising pipe wall integrity or contaminating household drinking water.
Always isolate the specific plumbing section and depressurize the system before introducing any descaling agents into your water supply lines.
- Supply Isolation: Shut off water flow completely to prevent chemical backflow or flooding.
- Safe Solvents: Utilize food-grade organic acids like citric acid or white vinegar for descaling.
- Thorough Purging: Flush lines extensively with clean water before restoring normal use.
Step 1 – Shut Off the Main Water Supply
Locate your home’s main water shutoff valve—typically found near the water meter, main entry point, or hot water heater—and turn it firmly clockwise to stop incoming pressure. Open the lowest household faucets and an upper floor tap to drain remaining water and release air locks from the copper lines.
Confirm that water pressure has dropped to zero by checking that running faucets stop completely. Disconnect specific appliance feed lines or isolate target pipe unions where the descaling solution will be introduced.
- Valve Shutoff: Turn off the primary main supply valve to isolate your plumbing network.
- Line Drainage: Open lowest-elevation taps to drain trapped water completely from the pipes.
- Safety Check: Verify zero pressure before opening any internal pipe fittings or valves.
Step 2 – Flush Mineral Buildup with a Citric Acid or Vinegar Solution
Prepare a warm food-grade citric acid solution or pure white vinegar mixture and feed it into the targeted copper water line using a portable plumbing flush pump or gravity feed funnel. Allow the acidic solution to circulate or dwell inside the pipe for 30 to 60 minutes to dissolve hard water scale and mineral buildup.
Flush the interior thoroughly with gallons of clean, potable water until all loosened sediment, calcium flakes, and residual acidity are completely washed out. Test the pH and clarity of the output water at nearby faucets before reconnecting regular appliances.
- Descaling Agent: Dissolve food-grade citric acid powder in warm water or use full-strength white vinegar.
- Dwell/Circulation Time: Let the acid sit or pump through lines for 30 to 60 minutes.
- Post-Flush Rinse: Run clean water through every fixture until the stream is crystal clear and neutral.
When Internal Contamination Needs Professional Mechanical Chemical Cleaning
Severe internal blockages caused by thick calcium-magnesium calcification, resin bead intrusion from a failing water softener, or biological biofilm cannot be safely cleared with DIY vinegar flushes. Forcing high-pressure industrial chemicals or mechanical snakes through aged copper pipes risks puncturing thin walls.
Contact a licensed plumber equipped with specialized descaling hydro-jetters, commercial-grade organic chelating agents, or localized pipe replacement tools. Professional diagnosis ensures your potable water safety standards and local plumbing codes remain intact.
- Softener Resin Failures: Plastic resin beads trapped inside copper lines require specialized extraction.
- Heavy Calcification: Rock-hard mineral blockages that restrict pipe diameter by over fifty percent.
- Water Quality Testing: Certified lab checks if discolored or metallic water persists after flushing.
What You Should Never Use to Clean Copper Pipes
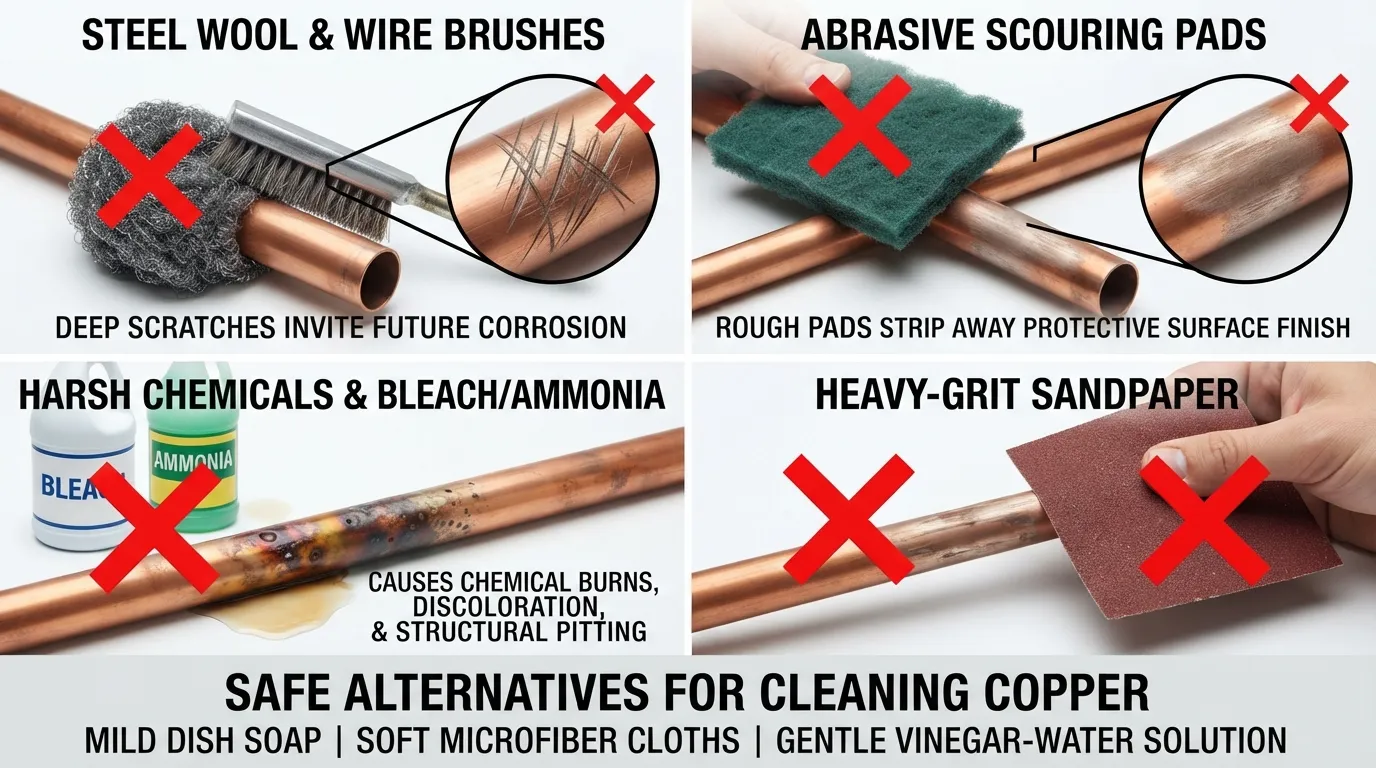
Using the wrong cleaning agents or aggressive metal scrubbers can permanently etch, pit, or thin copper pipe walls, leading to catastrophic leaks under household water pressure. Knowing which common household items to avoid protects the structural integrity of your plumbing.
Never substitute heavy-duty industrial solvents or coarse metallic abrasives when attempting to restore the finish of copper pipes.
- Abrasive Gouging: Hard metal pads strip away protective copper thickness and invite rapid corrosion.
- Chemical Reactions: Harsh alkaline or chlorine-based compounds trigger aggressive pitting in copper alloys.
- Long-Term Vulnerability: Surface micro-scratches trap moisture and accelerate green verdigris regeneration.
Why Steel Wool and Wire Wool Damage Copper
Steel wool, wire wool, and heavy-duty scouring pads are far harder than soft copper metal, meaning they physically grind away the outer surface layer with every scrub. This mechanical abrasion not only removes tarnish but also carves microscopic grooves that weaken the pipe wall over time.
Furthermore, microscopic iron fragments from steel wool can embed themselves directly into the copper surface, causing galvanic reaction rust spots and deep pitting. Always substitute metal wools with soft nylon scrubbers, microfiber cloths, or non-abrasive sponges.
- Wall Thinning: Repeated scrubbing reduces copper pipe thickness, increasing the risk of pinhole leaks.
- Iron Contamination: Trapped steel particles oxidize and accelerate localized metal degradation.
- Safe Alternative: Use fine nylon pads or soft-bristled brushes to lift grime safely.
Will Vinegar Damage Copper Pipe If Left Too Long?
White vinegar contains acetic acid, which is safe for short-duration tarnish removal, but leaving it on copper pipes for hours or days will eventually eat away at the metal. Prolonged acid exposure strips the natural protective layer and can cause surface etching or dull pitting.
To prevent acid damage, limit vinegar dwell times to 5 to 10 minutes on exterior surfaces or a maximum of 30 to 60 minutes during internal pipe flushes. Always neutralize and rinse the copper thoroughly with clean water immediately after treatment.
- Acidic Etching: Extended chemical contact dissolves copper ions and roughens the smooth finish.
- Time Limits: Keep exterior vinegar paste applications under 10 minutes before rinsing.
- Complete Neutralization: Wash with warm soapy water to stop all active acidic reactions.
Chemicals to Avoid Bleach Ammonia Based Cleaners
Chlorine bleach and ammonia-based household or glass cleaners react violently and destructively with copper plumbing. Bleach is a strong oxidizing agent that accelerates severe dark black oxidation and pitting, while ammonia compounds can cause stress corrosion cracking in copper-zinc and copper-nickel fittings.
Never mix bleach with vinegar or ammonia during cleaning, as this creates toxic chloramine or chlorine gas while simultaneously destroying your pipes. Stick strictly to mild, food-safe organic acids like vinegar or citric acid.
- Chlorine Bleach: Triggers aggressive localized pitting and rapid black-green corrosion.
- Ammonia Cleaners: Causes microscopic stress fractures in copper elbows and soldered joints.
- Toxic Fumes: Combining chemical cleaners creates hazardous indoor air quality risks.
Best Copper Cleaner Comparison: Vinegar vs Baking Soda vs Dawn vs Hydrogen Peroxide
Selecting the optimal cleaning agent for copper pipes depends on balancing chemical reactivity, surface safety, and speed of tarnish breakdown. Comparing household staples side-by-side clarifies which solution delivers maximum shine without compromising pipe metallurgy.
Use this evaluation matrix and breakdown to match your specific copper cleaning challenge with the right household compound.
- Chemical Efficacy: Acids break down copper oxide bonds, while gentle abrasives lift loosened residues.
- Safety Margins: Mild organic solutions protect drinking water lines and thin exterior pipe walls.
- Application Suitability: Certain agents excel at heavy verdigris while others only handle light grease.
Comparison Table Effectiveness Speed Safety Best Use Case
Does Hydrogen Peroxide Clean Copper?
Hydrogen peroxide is a mild oxidizing agent, meaning it does not effectively dissolve green verdigris, heavy copper oxide, or dark atmospheric tarnish. While it works well for disinfecting organic surfaces, it lacks the acidic potency required to break the chemical bond holding tarnish to copper pipes.
Attempting to clean tarnished copper with hydrogen peroxide alone will leave discoloration untouched. If you mix hydrogen peroxide with table salt and dish soap, it creates a general-purpose scrubbing foam, though white vinegar remains vastly superior for restoring bare copper.
- Oxidation Behavior: Peroxide adds oxygen rather than stripping away existing copper oxide layers.
- Stain Limitations: Ineffective against aged green-blue patina or deep mineral discoloration.
- Preferred Alternative: Swap hydrogen peroxide for white vinegar or lemon juice for real results.
Will Dawn Dish Soap Clean Copper?
Dawn dish soap will not remove copper tarnish, oxidation, or green verdigris because it is pH-neutral and formulated to cut grease and food oils rather than dissolve metal oxides. However, Dawn plays a vital supporting role in the cleaning workflow.
Washing copper pipes with warm water and Dawn dish soap removes greasy handprints, dust, and oily grime that block acidic cleaners from reaching the metal. It is also the ideal solution for neutralizing and washing away vinegar residues after descaling.
- Grease Removal: Unmatched at stripping oily residue from kitchen or basement plumbing lines.
- Tarnish Inertia: Cannot break down copper tarnish or restore a bright metallic finish on its own.
- Post-Clean Wash: Essential for washing off acidic vinegar and salt mixtures completely.
How to Polish Copper Pipe to a Mirror Finish
Transforming standard industrial copper tubing into a high-gloss, reflective architectural feature requires progressive micro-abrasion and specialized polishing compounds. Moving past basic tarnish removal brings out a deep, glass-like luster ideal for exposed shelving, pot racks, or modern plumbing accents.
Achieving a true mirror finish demands patience, working through increasingly finer grits followed by a protective micro-sealant.
- Progressive Buffing: Step through micro-fine abrasives to erase every microscopic scratch and swirl mark.
- Compound Selection: Use dedicated metal polishing pastes formulated for non-ferrous soft metals.
- Oxidation Shielding: Apply a clear protective barrier to lock out atmospheric humidity and prevent re-tarnishing.
Extra Steps for a High-Shine Decorative Finish
Start with a thoroughly cleaned and degreased copper pipe using a mild soap and vinegar wash, then dry it completely. Buff the surface with a high-grade metal polishing compound like Brasso, Simichrome, or a jeweler’s rouge applied on a clean flannel wheel or microfiber buffing pad.
Work in long, even strokes following the grain of the copper extrusion until the metal begins to reflect light sharply. Wipe away spent black residue frequently with a clean cloth to inspect your progress and avoid embedding dark grit back into the finish.
- Jeweler’s Rouge & Flannel: Buff with ultra-fine rouge paste to mirror-polish the final microscopic layer.
- Circular vs. Linear Buffing: Finish with straight strokes parallel to the pipe length for a clean architectural sheen.
- Residue Removal: Strip away oily polishing compounds using isopropyl alcohol on a soft cloth.
How to Maintain the Shine Long-Term
Exposed polished copper naturally reacts with oxygen and moisture in indoor air, meaning an unprotected mirror finish will start dulling within a few weeks. To lock in the reflective shine permanently, seal the polished pipe immediately with a clear microcrystalline wax (such as Renaissance Wax) or a spray-on clear acrylic lacquer.
Dust the decorative pipes weekly with a dry microfiber cloth and avoid harsh chemical sprays or abrasive kitchen sponges. Reapply a fresh coat of microcrystalline wax every 6 to 12 months to preserve the brilliant luster indefinitely.
- Microcrystalline Wax: Buff on a thin, protective wax barrier that guards against fingerprints and air oxidation.
- Clear Lacquer Seal: Spray a transparent metal-safe lacquer for a zero-maintenance permanent shield.
- Gentle Upkeep: Wipe clean with a dry or lightly damp microfiber cloth—never use acidic cleaners on sealed pipes.
What Plumbers Say: Expert Insight

Licensed plumbers generally endorse mild DIY acidic solutions like white vinegar and baking soda for safe exterior tarnish removal, provided they are applied briefly and rinsed thoroughly. However, professionals strongly caution against using acidic or abrasive mixtures inside pressurized drinking water pipes or leaving them to soak indefinitely.
Understanding where licensed tradespeople draw the line between safe household maintenance and structural risk helps prevent costly plumbing disasters.
- Exterior Approval: Mild vinegar-salt pastes safely lift cosmetic verdigris off external pipe surfaces.
- Internal Caution: Unmonitored chemical flushes risk damaging soldered joints and thin pipe walls.
- Prevention Focus: Long-term water quality and proper sealing matter far more than surface cosmetic shine.
Professional Opinion on DIY Acidic Cleaners
Plumbers confirm that a diluted mixture of white vinegar and baking soda works effectively for breaking down surface copper oxide and green patina without chemically destroying the metal. Because acetic acid is mild compared to industrial hydrochloric or sulfuric acid, quick applications pose zero threat to sound exterior copper surfaces.
However, master plumbers emphasize that these natural solutions are strictly for surface-level cosmetic restoration or pre-solder preparation. Introducing acids into internal water supply lines without proper circulation control and neutralization can accelerate corrosion at vulnerable solder joints.
- Controlled Acetic Action: Vinegar dissolves oxidation safely if limited to a 5-to-10-minute contact window.
- Solder Joint Vulnerability: Acidic residue trapped in joint crevices can slowly eat away at lead-free solder over time.
- Flush Mandate: Plumbers always insist on an immediate, thorough water rinse to neutralize residual acidity.
Common Mistakes Plumbers See Homeowners Make
The most frequent error service plumbers encounter is homeowners scrubbing copper pipes with steel wool, wire brushes, or harsh abrasive scouring pads that physically gouge the metal. Thinning out the copper wall under high water pressure inevitably leads to sudden pinhole leaks and water damage.
Another widespread mistake is pouring harsh chemical drain cleaners, bleach, or ammonia-based solutions onto copper fittings, triggering stress corrosion cracking. Plumbers recommend sticking exclusively to soft cloths, nylon pads, and mild food-grade organic acids.
- Aggressive Scouring: Using steel wool or metal scrapers that permanently weaken pipe wall thickness.
- Chemical Over-Soaking: Leaving acidic vinegar pastes on pipes for hours until etching and pitting occur.
- Mixing Chemicals: Combining bleach or ammonia with vinegar, creating hazardous reactions and ruining fittings.
Frequently Asked Questions
Find direct, authoritative answers to the most common questions homeowners and DIYers ask about cleaning, restoring, and maintaining copper plumbing pipes.
Review these quick insights to troubleshoot surface tarnish, protect your pipe metallurgy, and choose the right maintenance approach.
- Safe Solvents: Rely on natural food-grade acids like white vinegar and lemon juice.
- Patina Control: Choose gentle soaps over acids if you want to keep antique green finishes intact.
- Preventive Care: Apply microcrystalline wax or clear lacquer to lock out future oxidation.
What Is the Best Thing to Clean Copper Pipes With?
A paste made from equal parts white vinegar and fine table salt—thickened with a little all-purpose flour or baking soda—is the safest and most effective household remedy for cleaning copper pipes. The mild acetic acid in vinegar dissolves copper oxide and verdigris on contact, while the salt provides gentle abrasive action without scratching the metal.
For routine dusting and light grime on exposed indoor lines, warm water mixed with a few drops of Dawn dish soap and a soft microfiber cloth is all you need.
- Top Choice: White vinegar, salt, and flour paste for heavy exterior tarnish.
- Gentle Alternative: Warm soapy water and a soft cloth for everyday surface cleaning.
- What to Avoid: Harsh commercial metal strippers, bleach, or steel wool.
How Do You Remove Heavy Oxidation from Copper?
To tackle multi-year black oxidation or thick green verdigris, apply a thick layer of vinegar-salt paste and let it dwell undisturbed for 10 to 15 minutes. For stubborn vertical runs, mist the paste occasionally with a spray bottle of white vinegar to keep it active without letting it dry into a hard crust.
Gently agitate the softened oxidation using a soft-bristled nylon brush or soft cloth, then rinse thoroughly with warm water and buff completely dry with a lint-free towel.
- Extended Dwell: Allow the vinegar-salt mixture to sit for up to 15 minutes on thick buildup.
- Moisture Control: Re-wet the paste with vinegar spray if it starts to dry out prematurely.
- Soft Agitation: Use a nylon brush rather than metal tools to preserve pipe wall thickness.
What Makes Copper Look New Again?
Stripping away the outer layer of copper oxide and polishing the bare metal with a dedicated non-ferrous metal polish—such as Simichrome, Brasso, or jeweler’s rouge—restores a bright, mirror-like metallic luster. Following up with a clear microcrystalline wax seals out humidity and stops oxygen from re-tarnishing the surface.
For plumbing joints being prepared for soldering, fine sand cloth or a specialized fitting brush strips away microscopic oxides down to raw, shining copper.
- Polishing Compounds: Use non-abrasive metal polishes or jeweler’s rouge on a flannel wheel.
- Surface Buffing: Buff in straight lines parallel to the grain for an even architectural shine.
- Protective Sealant: Lock in the new look using Renaissance Wax or a clear metal lacquer.
How Do I Clean Copper Without Removing the Patina?
If you want to clean dust, cobwebs, or greasy buildup off antique or decorative copper pipes without stripping the vintage green-blue patina, skip all acidic cleaners like vinegar, lemon juice, or commercial metal polishes.
Instead, gently wipe the pipe down using a soft microfiber cloth dampened lightly with warm water and a drop of mild dish soap, then dry it immediately with a soft towel.
- Acid-Free Rule: Never apply vinegar, lemon, or chemical polishes if preserving patina.
- Mild Cleaning: Use warm water and mild dish soap on a soft cloth to lift surface dust.
- Immediate Drying: Pat dry thoroughly to prevent water spots from altering the aged finish.
How Do You Get Dirt Out of the Copper Tubing in Your House?
Removing exterior household dust, drywall mud, or construction splatters from copper tubing involves wiping the surface with a damp microfiber cloth and a mild degreaser like Dawn dish soap. For dried-on paint or adhesive, gently scrape the debris away with a plastic putty knife rather than metal blades.
If dirt or mineral scale is trapped inside the interior copper water lines, isolate the section, shut off the main supply, and flush the system with a warm citric acid or white vinegar solution.
- Exterior Dirt: Wipe down with warm soapy water and a soft nylon brush.
- Adhesive/Paint: Lift away hardened residues using a non-scratch plastic scraper.
- Internal Flushing: Cycle a food-grade citric acid solution through closed supply lines for 30–60 minutes.
Conclusion Key Takeaways
Maintaining copper pipes safely requires balancing effective tarnish and mineral removal with the protection of your metal’s structural integrity. Whether you are polishing exposed architectural tubing or addressing internal flow restrictions, choosing the right method prevents costly pinhole leaks and preserves long-term plumbing reliability.
Keep these core principles in mind for safe, effective copper pipe maintenance and long-term care across your home.
- Match the Method to the Goal: Use mild vinegar-salt pastes for exterior tarnish, citric acid flushes for internal scaling, and gentle soap-and-water solutions when preserving antique patina.
- Avoid Destructive Tools: Never use steel wool, wire brushes, bleach, or ammonia, which scratch, pit, and weaken copper walls.
- Neutralize and Seal: Always rinse away acidic cleaners completely and apply a microcrystalline wax or clear lacquer if you want to lock in a permanent, high-shine finish.

Oscar Vance | Master Plumber & Drainage Expert
Meet Oscar Vance, a licensed master plumber sharing practical solutions on residential repairs, preventive maintenance, and thoughtful home upkeep.

