How Is a Shower Drain Plumbed?
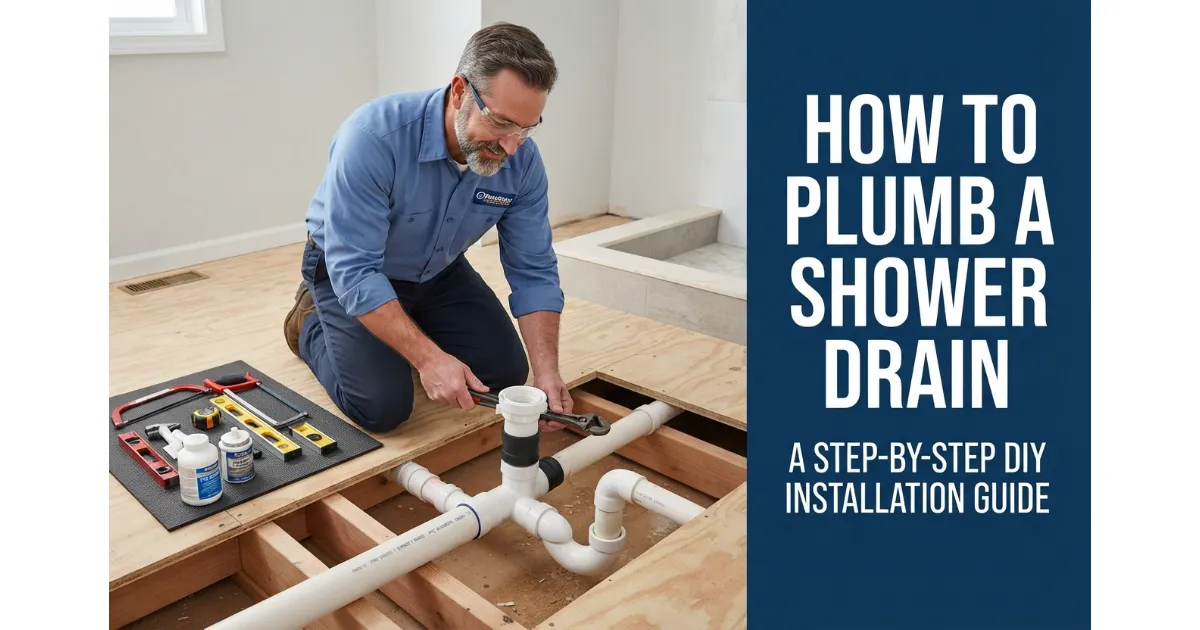
Plumbing a shower drain requires connecting a drain body to a code-compliant waste line via a P-trap, maintaining a precise downward slope of one-quarter inch per foot, and tying into an adequate vent system. This process ensures proper wastewater evacuation and blocks sewer gases from entering your home.
- Locate: Measure and mark the exact center point for the shower drain based on your shower pan or custom mud bed specifications.
- Trap: Install a 2-inch P-trap underneath the subfloor to maintain a water seal that prevents sewer gases from rising.
- Slope: Run the horizontal drain pipe downward toward the main stack at a consistent grade of 1/4 inch per foot.
- Vent: Connect the drainage system to a proper vent line to ensure smooth water flow and prevent siphonage.
- Test: Perform a mandatory water or air pressure test on the completed assembly to verify there are no leaks before closing up the floor.
What You’ll Need to Know Before You Start
Successful shower drain installation relies heavily on understanding local plumbing codes, subfloor construction types, and proper pipe sizing. While experienced DIYers can tackle this project, navigating complex subfloor obstacles or local code variations often requires hiring a licensed plumber.
- Most residential shower drains require a standard 2-inch drain pipe rather than the 1-and-a-half-inch pipe typically used for bathtubs.
- Working with concrete slab foundations involves breaking concrete and trenching, which significantly increases project complexity compared to wood subfloors.
- Reviewing municipal plumbing codes ensures your trap distance and vent placements remain fully compliant with safety standards.
How a Shower Drain System Works Parts P-Trap & Vent Explained
A properly functioning shower drain system relies on an interconnected network of components that safely route wastewater away while maintaining an airtight and watertight seal. Understanding how the drain body, P-trap, and vent pipe work together helps prevent clogs, slow drainage, and hazardous sewer gas leaks in your bathroom.
Shower Drain Plumbing Diagram Labelled
Navigating the various parts of a shower drainage system ensures you connect each component correctly according to standard plumbing requirements. Below is an overview of the key elements found in a typical shower plumbing layout.
- Drain Body & Strainer: The visible top components that catch debris and channel water into the subfloor assembly.
- Flange & Clamping Ring: Secures the shower liner or pan to the drain body to prevent subfloor leaks.
- P-Trap & Trap Arm: The curved pipe section holding standing water to block sewer gases, connected via the horizontal trap arm.
- Branch Drain & Vent: The horizontal/vertical piping that carries wastewater away while tying into the main vent stack for pressure equalization.
Does a Shower Drain Need a P-Trap?
Yes, a shower drain must have a dedicated P-trap installed on its waste line. This curved pipe section holds a small amount of residual water after every use, creating an airtight water seal that physically blocks foul sewer gases from entering your living space.
- Building codes universally mandate P-traps for all sanitary drainage fixtures to protect indoor air quality.
- Omitting a P-trap exposes your home to toxic sewer gases and unpleasant bathroom odors.
- The trap must be installed at the correct distance from the drain body to ensure proper hydraulic performance.
Why Does a Shower Drain Need a Vent?
A vent pipe is essential because it introduces fresh air into the plumbing system behind the wastewater. Without a proper vent, draining water creates a vacuum effect that can suck the water seal right out of your P-trap, leading to slow drainage, gurgling noises, and sewer gas leaks.
Drain Body vs Trap vs Trap Arm What Does Each Part Do?
Each component in your shower plumbing assembly plays a specialized role in water collection and evacuation.
- Drain Body: Collects surface water from the shower floor and transitions it downward into the waste pipe.
- P-Trap: Holds standing water to act as a barrier against harmful sewer gases.
- Trap Arm: The horizontal pipe section extending from the P-trap to the sanitary tee or vent fitting.
Center Drain vs Linear Drain: Does the Plumbing Change?
While both center and linear drains perform the same ultimate function, switching between them impacts your subfloor rough-in work and pipe positioning.
Before You Start Plumbing Code Permit & Planning
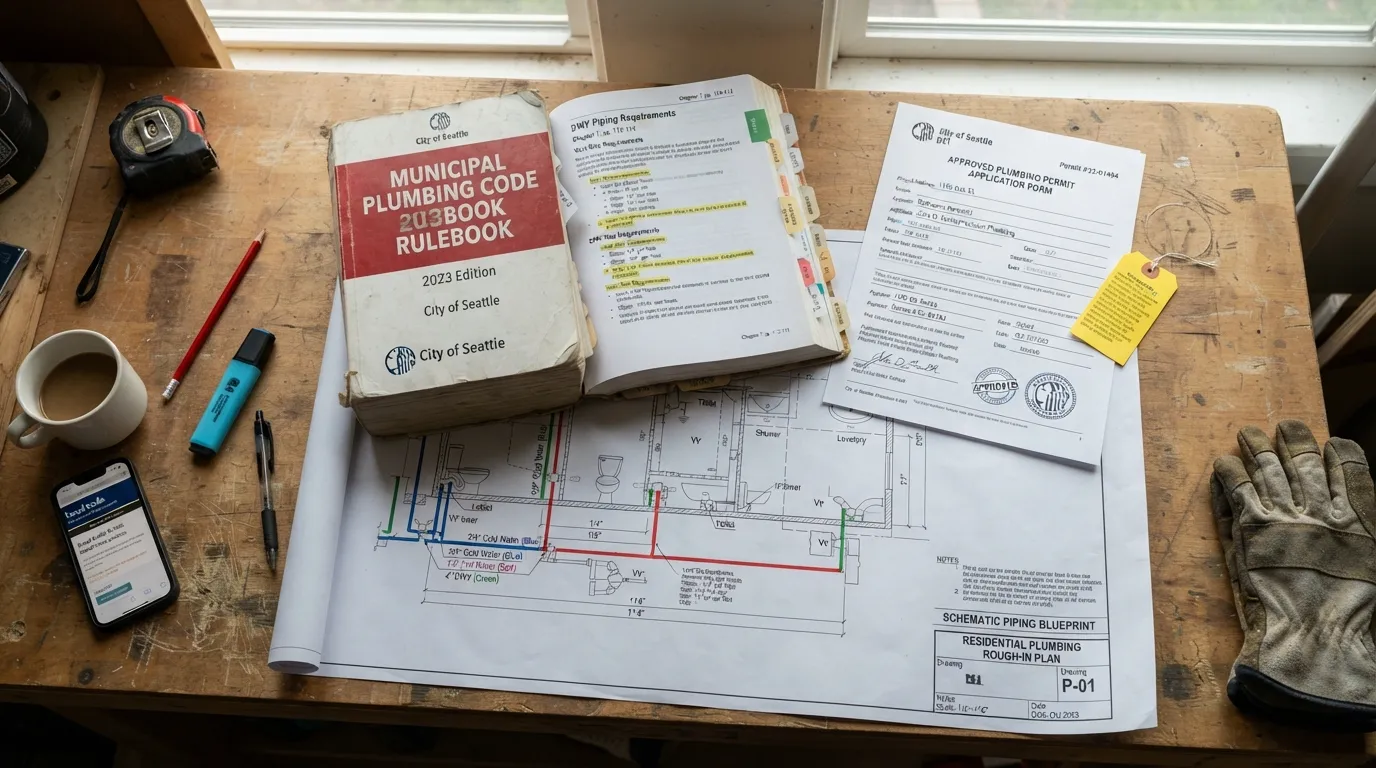
Proper planning prevents costly structural errors and code violations. Reviewing local building regulations, subfloor constraints, and material compatibility before starting your shower installation ensures your drainage system passes inspection and performs reliably for years.
Do You Need a Permit to Plumb a Shower Drain?
Whether you need a permit depends entirely on your local building authority and the scale of your renovation. Minor cosmetic updates may bypass permits, but altering structural drain lines or adding new fixtures almost always requires formal approval and a municipal inspection under guidelines like the International Code Council framework.
- Plumbing permits protect your home’s resale value and ensure compliance with municipal health and safety codes.
- Unpermitted plumbing work can create liabilities and complicate insurance claims if water damage occurs.
- Always check with your local building department before opening walls or cutting subfloors.
What Size Pipe Does a Shower Drain Need?
Building codes mandate a minimum 2-inch diameter pipe for all standard shower drains to handle heavy water flow effectively. Older homes sometimes feature 1.5-inch lines originally installed for bathtubs, which do not meet modern code requirements for standalone showers and must be upgraded.
How Much Slope Does a Drain Line Need?
It is crucial to distinguish between pipe slope and shower pan floor slope, as confusing the two leads to severe drainage failures.
- Drain Pipe Slope: Horizontal waste pipes require a consistent downward grade of 1/4 inch per foot toward the main stack to transport water and solids smoothly.
- Shower Pan Floor Slope: The surface of the shower floor must also slope downward toward the drain at 1/4 inch per foot to prevent standing puddles.
Slab Joists or Crawlspace Check Your Floor First
The layout and difficulty of your rough-in plumbing are heavily dictated by your home’s subfloor construction type.
- Concrete Slabs: Require breaking concrete and trenching to lay underground pipes, demanding heavy machinery and precise measurements.
- Wood Joists & Crawlspaces: Offer open access underneath, making it much easier to route drain lines, install P-traps, and tie into existing vents.
Choose Your Drain and Pan Type First
Your choice of shower pan directly dictates how the drain body is positioned and connected during the rough-in stage.
- Pre-Formed Pans: Feature factory-set slopes and fixed drain locations, simplifying the installation workflow.
- Custom Mortar Beds: Provide complete flexibility in layout and sizing but require meticulous hand-troweling to achieve the correct drainage pitch.
Tools & Materials You’ll Need
Gathering the correct tools and plumbing materials beforehand prevents frustrating mid-project trips to the hardware store and stops critical installation mistakes. Selecting incompatible adhesives or incorrect pipe dimensions frequently leads to catastrophic subfloor leaks.
Tools Checklist
Having precision measuring and cutting instruments ensures your drain lines maintain proper alignment and correct pitch. Below are the essential tools required for a successful installation.
- Pipe Cutter or Hacksaw: To make clean, square cuts on your ABS or PVC drain pipes.
- Torpedo Level: Essential for checking the mandatory one-quarter inch per foot slope on horizontal runs.
- Tape Measure & Marker: For precise layout positioning and measuring pipe lengths.
- Test Plug: Used to temporarily block the drain line during mandatory pressure testing.
- Deburring Tool or Utility Knife: To smooth out rough pipe edges and burrs for secure glue joints.
Materials List
Purchasing the correct pipes, fittings, and sealing compounds ensures a watertight, code-compliant assembly that will endure years of daily use.
- 2-Inch ABS or PVC Pipe: The standard diameter required for modern shower drain waste lines.
- P-Trap and Fittings: Includes a 2-inch P-trap along with 45-degree and 90-degree elbows or sanitary tees.
- Primer and Solvent Cement: Specific chemical welding agents matched to your chosen pipe material (ABS or PVC).
- Pipe Hangers and Straps: To firmly secure horizontal and vertical lines to joists or framing studs.
- Plumber’s Putty or Silicone Sealant: For creating a waterproof barrier around the drain body flange.
ABS vs PVC Don’t Mix the Wrong Cement
Choosing between ABS and PVC requires understanding their chemical differences, as using the wrong solvent cement will cause joint failure and leaks.
Compression Drain vs Glue-In Drain: Which One Do You Have?
The type of shower drain kit you purchase dictates how the physical drain body couples to the underlying waste pipe.
- Compression Drains: Use rubber gaskets and a tightening nut that compresses around the outside of the pipe, making them ideal for retrofits where vertical movement is restricted.
- Glue-In Drains: Permanently solvent-weld directly to the PVC or ABS waste pipe, offering a rigid and extremely secure connection that requires precise initial dry-fitting.
How to Plumb a Shower Drain Step by Step Rough-In
Executing a precise rough-in requires methodological patience to ensure your drainage system achieves correct hydraulic flow, meets code standards, and seals securely. Following a sequential installation workflow prevents misalignments and costly rework once subfloors are closed.
Step 1: Locate and Mark the Drain Centerline
Measure carefully from your finished wall studs to locate the exact center point of the shower drain. Double-check these dimensions against your specific shower pan or custom mud bed specifications before cutting any subfloor material.
- Account for the thickness of cement backer board and wall tiles when measuring from raw studs.
- Mark the center point clearly with a permanent marker or carpenter’s pencil.
Step 2: Open the Floor and Check What’s Below
Cut away the subfloor material or break through the concrete slab carefully to expose the cavity underneath. Inspect the workspace for hidden structural joists, electrical wires, or existing supply lines before proceeding with pipe routing.
- Avoid cutting structural joists beyond what local building codes permit for pipe penetrations.
- Clear away debris to ensure a clean working area for fitting your drainage assembly.
Step 3: Set the P-Trap and Trap Arm
Position the 2-inch P-trap directly beneath your marked centerline and connect it to the trap arm extending toward the main waste line. Ensure the trap maintains proper vertical alignment with the drain body.
- The trap arm length must fall within code-specified minimum and maximum distances from the vent.
- Keep the standing water seal level horizontal to ensure the trap functions effectively.
Step 4: Connect to the Branch Drain With the Right Slope
Route your horizontal waste pipe from the P-trap to the branch drain or main stack. Use a torpedo level to verify a consistent downward slope of one-quarter inch per foot toward the main sewer line.
- Inadequate slope leads to slow drainage and sludge buildup inside the pipe.
- Excessive slope can cause water to rush past solid waste, leaving debris behind.
Step 5: Vent the Trap
Tie your drainage configuration into an approved venting system to prevent siphoning and vacuum locks. Depending on your local code compliance, utilize an individual vent, a wet vent, or an approved air admittance valve (AAV).
- Proper venting equalizes air pressure every time a large volume of water drains away.
- Verify that AAV devices are legally permitted by your local municipal plumbing code.
Step 6: Dry-Fit, Then Prime and Cement the Joints
Assemble all pipes and fittings without glue first to verify proper alignment and fit. Once confirmed, take apart sections individually, apply primer and solvent cement, and permanently fuse the joints together.
- Dry-fitting catches alignment errors before permanent chemical welding locks them in place.
- Push pieces together with a slight quarter-turn to evenly distribute the solvent cement.
Step 7: Support the Pipes and Check Alignment
Secure all horizontal and vertical pipe runs using sturdy pipe hangers or framing straps attached to studs and joists. This prevents shifting, sagging, or joint separation over time.
- Unsecured pipes can sag under heavy water weight, destroying your required slope.
- Perform a final visual check to verify that all connections are square and stable.
Where DIYers Usually Go Wrong at This Stage
Many first-time installers overlook minor grade variations or fail to properly deburr cut pipe ends, which catches hair and soap scum. Taking extra time during the dry-fit phase eliminates these common friction points before closing the floor.
Why 45° Fittings Are Often Preferred Over Sharp 90° Turns
Using long-sweep 90-degree elbows or combining two 45-degree fittings creates a smoother directional transition for wastewater. Sharp 90-degree turns restrict smooth flow, create turbulence, and drastically increase the likelihood of hair clogs forming in the line.
Plumbing a Shower Drain in Different Situations
Specialized installation environments require unique approaches to pipe routing, depth management, and structural modification. Adapting your rough-in strategy to match your specific flooring type or spatial constraint ensures your shower drainage system operates efficiently without compromising structural integrity.
How to Install a Shower Drain in a Concrete Floor
Installing a shower drain on a concrete slab foundation involves cutting and excavating the concrete to lay underground waste lines. Because you cannot easily access pipes from underneath, precise measurement and meticulous dry-fitting are non-negotiable before pouring backfill or patching concrete.
- Use a concrete saw to cut clean lines, then carefully break out the concrete inside the trench using a hammer drill or chisel.
- Maintain the mandatory one-quarter inch per foot slope within the trench before encasing the pipes in gravel or concrete patch material.
How to Install a Shower Drain Without Access Below
Working on a second-story floor or over a finished ceiling with no crawlspace access requires careful planning from above or utilizing specialized low-profile fittings. You must verify that your P-trap and waste line can be tucked into the available joist space without cutting structural load-bearing elements.
- Specialized inline or low-profile P-trap systems are sometimes permitted by code when vertical space under the subfloor is severely restricted.
- Always consult structural span charts before modifying wood joists to accommodate new drainage pipes.
Walk-In and Linear Drain Plumbing
Curbless and walk-in showers featuring linear drains require a single-plane slope across the floor rather than a multi-directional compound slope. This design shifts the drainage mechanics and requires custom positioning of the waste line to match the linear channel body.
- Linear drains allow you to use larger format tiles because the floor slopes in only one direction toward the wall or threshold.
- Ensure the rough-in waste connection aligns precisely with the offset or center outlet of the linear channel fixture.
Upgrading an Old Shower: 2-Inch Drain vs 1.5-Inch Pipe
Many older homes feature existing 1.5-inch waste lines that were originally grandfathered in for bathtubs but fall short of modern code for standalone showers. Upgrading to a 2-inch line is typically mandatory to handle higher flow rates and prevent frequent overflows.
- Transitioning from a 1.5-inch stack to a required 2-inch shower drain often necessitates opening up walls or floors to tie into a larger branch line.
- Never bottleneck a 2-inch shower drain down to a 1.5-inch waste pipe unless explicitly authorized by local code modifications.
Basement or Second-Floor Shower: What Changes?
The structural framework of your home dictates how easily you can route vents and connect to the main building drain stack.
- Basements: Usually offer straightforward access to below-slab main lines, but may require a sewage ejector pump if the shower sits below the main sewer line grade.
- Second Floors: Require threading pipes through tight joist bays and running long vertical vent lines up through the roof or tying into an existing stack.
Installing the Drain Body and Shower Pan
Connecting the drain body to your shower pan requires absolute precision to prevent water from leaking into the subfloor. Properly sealing the flange, securing the clamping ring, and protecting the weep holes ensure long-term waterproofing success.
Pre-Formed Shower Pan Setting the Drain
Pre-formed acrylic or fiberglass shower pans feature a built-in slope and a dedicated opening designed to lock onto a specific drain assembly. Tightening the gasket and locking nut correctly ensures a watertight seal against the underside of the basin.
- Apply a generous bead of plumber’s putty or manufacturer-recommended silicone under the drain body flange before inserting it through the pan floor.
- Hand-tighten the locking nut from underneath, then gently snug it with pliers while avoiding over-tightening that can crack plastic components.
Tile Shower Pan Pre-Slope Liner and Clamping Ring
Building a custom tile shower requires a multi-layered approach to catch and redirect any moisture that penetrates the tile surface. Constructing a solid foundation guarantees that water flows toward the drain instead of pooling in the subfloor.
- Pour a pre-slope mortar bed directly over the subfloor so water reaching the waterproof liner drains safely toward the body.
- Install the flexible shower liner over the pre-slope, carefully cutting out a hole for the drain bolt pattern without tearing the material.
- Bolt the clamping ring down over the liner to secure it tightly to the lower drain body assembly.
Getting the Flange Height Right
The top of your drain assembly must sit perfectly flush with your final finished floor height. Failing to calculate the thickness of your backer board, mortar bed, and tile surface will leave your drain either sunken or protruding awkwardly.
- Measure your total build-up height—including thinset mortar and tile—before locking the final drain collar into place.
- Adjust adjustable-height drain strainers during the rough-in stage to match your precise tile dimensions.
Putty or Silicone? What to Use Around the Flange
Choosing between plumber’s putty and silicone sealant depends on the material specifications provided by your specific drain manufacturer. Using the wrong sealant can cause chemical breakdown or adhesive failure over time.
- Plumber’s putty works exceptionally well for stainless steel and brass drain flanges resting against acrylic or fiberglass pans.
- Silicone sealant is typically required for bonding waterproof membranes and adhering components to stone or porous tile surfaces.
Waterproofing Around the Drain
Integrating liquid waterproofing membranes or fabric sheets right up to the drainage collar creates an impenetrable barrier against moisture migration. Pay special attention to the transition zones where horizontal surfaces meet vertical drain edges.
- Apply liquid waterproofing or specialized collars seamlessly over the clamping ring bolts and surrounding mortar bed.
- Ensure waterproof membranes do not overlap or block the essential drainage channels within the assembly.
Field Note: A Mistake That Causes Slow Drains After Tiling
One of the most common installation errors is allowing thinset mortar or tile grout to clog the tiny weep holes on the clamping ring. Keeping these pathways open with gravel or weep protection guards ensures that trapped subfloor moisture can always escape into the waste line.
How to Test Your Shower Drain for Leaks
Verifying your drainage and waterproofing systems before closing up walls and floors prevents catastrophic water damage and expensive repairs down the road. Conducting systematic pressure tests and flood evaluations ensures your entire plumbing assembly is completely airtight and watertight.
Test the Pipes Before Closing the Floor
Perform a drain, waste, and vent (DWV) pressure test on your rough-in plumbing before patching the subfloor or pouring concrete. This initial test isolates your newly installed P-trap and waste lines to confirm there are no joint failures or unbonded connections.
- Insert an expanding test plug into the main waste line downstream and fill the system with water or air pressure as specified by local code.
- Monitor the pressure gauge or water column for at least 15 to 30 minutes to verify that levels hold steady without dropping.
How to Flood Test a Shower Pan
A flood test is the ultimate check for your shower pan liner and drain waterproofing integration before tile installation begins. This process simulates actual heavy use and forces any potential hidden gaps to reveal themselves immediately.
- Plug the drain securely using an inflatable test plug or a mechanical plug designed for your specific drain body.
- Fill the shower pan with water up to a depth of 2 inches, stopping just below the threshold or curb height.
- Mark the water line with a waterproof marker or piece of tape, and let it sit undisturbed for 24 hours in accordance with standard building code requirements.
What to Look For
Inspect the water level against your initial reference mark after the 24-hour testing period expires. Even a minor drop in water level indicates a leak that must be tracked down and resolved immediately.
- Check the ceiling or crawlspace underneath the shower area for active drips, damp drywall, or moisture staining.
- Inspect the perimeter of the clamping ring and drain flange to ensure no water is slipping past the waterproof membrane.
What to Do If It Fails
If your flood test drops water level or reveals moisture underneath, drain the pan completely and let the surfaces dry out before troubleshooting. Inspect the clamping ring bolts, verify that the test plug wasn’t leaking, and check the liner for accidental punctures or tears near corners.
Final Check After Tiling
Once your tile work, grout, and glass installation are fully completed, run a final live water test to evaluate surface drainage performance. Pour buckets of water across all corners of the shower floor to confirm that water rushes efficiently toward the drain without pooling or ponding in low spots.
Frequently Asked Questions
Clear, direct answers to common questions about shower drain plumbing help resolve final uncertainties, ensure code compliance, and guide your installation process.
What Size Drain Pipe Does a Shower Need?
Modern building codes strictly mandate a minimum 2-inch diameter drain pipe for all standalone showers. While older homes sometimes featured 1.5-inch lines originally installed for bathtubs, these smaller pipes cannot handle the higher flow rates of modern showerheads and will frequently overflow or backup.
How Much Slope Does a Shower Drain Need?
Horizontal shower drain pipes require a consistent downward grade of precisely one-quarter inch per foot toward the main waste stack. Similarly, the shower floor pan must also slope toward the drain at one-quarter inch per foot to prevent standing puddles and ensure efficient water evacuation.
How Deep Does a Shower Drain Need to Be?
The total depth of your shower drain assembly depends on the height of your P-trap and the thickness of your subfloor construction. Typically, you need roughly 6 to 10 inches of vertical clearance beneath the subfloor to properly fit a 2-inch P-trap and maintain the required downward slope.
Can I Install a Shower Drain Without a Vent?
No, you cannot legally or functionally install a shower drain without a vent. A proper vent pipe introduces air pressure behind moving water, preventing siphonage of the P-trap seal; where traditional roof venting is impossible, check if your local code permits an approved air admittance valve (AAV).
How Do I Reduce a 2-Inch Shower Drain to a 1.5-Inch ABS Pipe?
Reducing a 2-inch shower drain down to a 1.5-inch pipe is generally prohibited by modern plumbing codes for new standalone showers because it restricts required water flow. Always verify local municipal codes before attempting any size reduction during a remodel or repair.
How Do I Remove an Oatey Shower Drain?
Removing a standard Oatey compression-style shower drain involves loosening the locking screws or tightening ring from above or below, depending on the specific model. For glue-in types, you must carefully cut the waste pipe beneath the drain body using an internal pipe cutter.
How Long Does It Take to Plumb a Shower Drain?
A straightforward rough-in over an open crawlspace or wood subfloor typically takes an experienced DIYer or plumber between 2 to 4 hours. However, complex installations involving concrete slab trenching, major vent rerouting, or custom mud beds can easily span a full day or more.
Do I Need to Glue a Compression Drain?
No, compression drains do not require solvent cement on the connection point where they couple to the pipe. Instead, they rely on a rubber gasket and a mechanical compression nut that squeezes tightly around the exterior of the pipe to create a watertight seal.
Conclusion & Quick Checklist
Plumbing a shower drain successfully requires careful planning, precise measurements, strict adherence to building codes, and thorough testing. By following a methodical approach from your initial rough-in to your final flood test, you can ensure a reliable, leak-free installation that stands the test of time.
Shower Drain Plumbing Checklist
-
- Verify local municipal plumbing code requirements and secure any necessary permits before starting.
- Confirm your waste line utilizes a mandatory 2-inch pipe diameter rather than an undersized 1.5-inch line.
- Accurately measure and mark the drain centerline relative to your finished wall studs.
- Open the subfloor or trench concrete while inspecting for hidden structural joists, wires, or pipes.
- Install a 2-inch P-trap directly beneath the drain body to maintain a protective sewer gas seal.
- Ensure all horizontal waste lines maintain a consistent downward slope of one-quarter inch per foot.
- Connect an approved individual vent, wet vent, or air admittance valve to prevent trap siphoning.
- Dry-fit all ABS or PVC components first, then properly prime and solvent-weld permanent joints.
- Execute a rigorous 24-hour flood test on the shower pan and a pressure test on rough-in pipes.
- Keep weep holes clear of mortar and silicone to prevent subfloor pooling after tile installation.

Oscar Vance | Master Plumber & Drainage Expert
Meet Oscar Vance, a licensed master plumber sharing practical solutions on residential repairs, preventive maintenance, and thoughtful home upkeep.


Pingback: How to Plumb a Shower in a Basement: 12-Step Guide