Can You Really Install a Ceiling Box Without Attic Access?
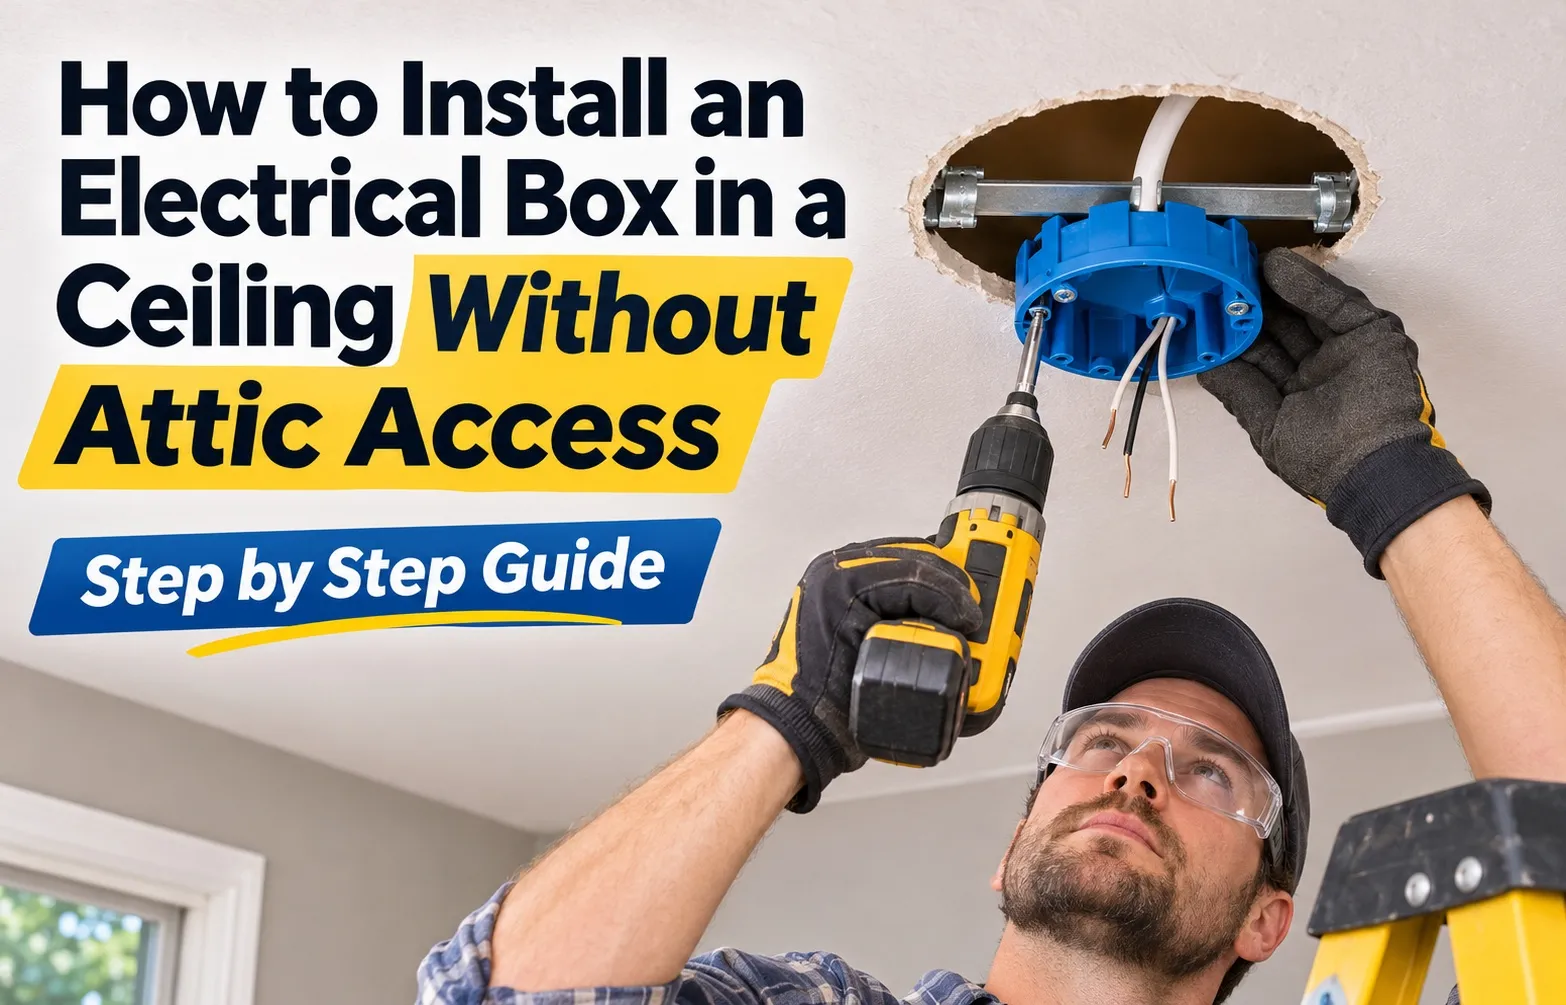 Mounting an overhead electrical fixture when you have zero attic clearance or crawlspace access above your ceiling is entirely possible. The secret lies in abandoning traditional nail-on joist boxes and utilizing specialized remodeling hardware designed specifically for finished drywall ceilings.
By cutting a small, clean opening directly into your drywall, you can pass specialized expanding brackets and remodel boxes right through the finished surface. This approach secures your fixture directly to the framing from underneath without tearing down drywall panels or crawling through cramped joist bays.
The Secret Weapon: How Remodel Braces Work Without Attic Entry
Traditional electrical boxes require nailing directly into the side of a ceiling joist before drywall goes up. When your ceiling is already fully finished, an old-work remodel box or an adjustable spanner bar solves this structural dilemma completely.
An adjustable metal spanner bar is inserted through a small hole cut into the drywall, slid between the joists, and manually twisted or threaded. As you rotate the bar, sharp steel teeth on both ends bite deeply into the adjacent ceiling joists, locking the entire metal framework firmly in place between the framing members.
- Collapses easily to slide through standard 4-inch ceiling cutouts.
- Features heavy-duty steel teeth that anchor securely into wooden joists.
- Spans variable distances between standard joist spacings (typically 16 to 24 inches).
- Distributes fixture weight evenly across the structural framing overhead.
Light Fixtures vs. Ceiling Fans: Choosing the Right Setup First
Before making any cuts into your ceiling, you must identify whether you are hanging a lightweight standard light fixture or a heavy motorized ceiling fan. Choosing the wrong hardware will cause severe structural failure and potential safety hazards.
Standard light fixtures weighing under six pounds can be supported safely using a standard plastic or metal old-work remodel box equipped with built-in flip-out wings. However, ceiling fans and heavy chandeliers generate continuous vibrational torque and require a heavy-duty fan-rated spanner brace capable of supporting dynamic loads.
- Light Fixtures (Under 6 lbs): Use an old-work remodel box with spring-loaded wings or swing-clamps that sandwich the drywall.
- Ceiling Fans & Chandeliers: Always use an expandable metal fan brace rated for 35 to 50+ pounds to handle motor vibrations.
- Critical Safety Rule: Never rely solely on drywall clamp wings to hold a ceiling fan, as continuous vibration will eventually tear the drywall and cause the fan to fall.
The Weight & Hardware Decision Matrix (Light Fixtures vs. Ceiling Fans)
Selecting the correct mounting hardware is the single most critical step when installing an electrical box without attic access. Choosing the wrong support mechanism risks structural failure, falling fixtures, and serious safety hazards.
Because finished ceilings limit your ability to screw directly into joists from above, you must match your hardware choice directly to the weight and dynamic movement of your intended overhead fixture.
Standard Light Fixtures (Under 6 lbs): When to Use an Old-Work Remodel Box
For lightweight flush-mount lights, pendants, or sconces weighing under six pounds, an old-work remodel box provides a fast and secure solution. These specialized boxes feature integrated mechanical fasteners that anchor directly to the drywall itself.
When you tighten the mounting screws from inside the box, internal flip-out wings or metal swing-clamps rotate outward and sandwich the backside of the drywall tightly, holding the enclosure firmly in place without requiring joist contact.
- Designed exclusively for static, lightweight fixtures under 6 pounds.
- Features integrated flip-out wings or screw-actuated swing-clamps.
- Installs directly into a neatly cut drywall hole with zero attic access required.
- Complies with safety standards outlined by the National Fire Protection Association for light-duty electrical enclosures.
Ceiling Fans and Chandeliers (35–50+ lbs): Why You Need a Heavy-Duty Fan Brace Bar
Ceiling fans and heavy chandeliers introduce constant rotational torque, vibration, and dynamic loads that standard drywall clips cannot handle. Attempting to hang a fan from a plastic drywall box will lead to catastrophic pull-out failure.
To support heavy fixtures safely, you must install an adjustable span brace made of heavy-duty steel. These systems span across two adjacent ceiling joists and provide up to 150 lbs of ultimate support capacity, ensuring your fan remains securely anchored during high-speed operation.
- Engineered specifically to withstand continuous motor vibration and dynamic loads.
- Provides up to 150 lbs of secure support when properly wedged between framing joists.
- Includes a heavy-gauge metal junction box bolted directly to a sliding saddle plate.
- Spans variable joist gaps without requiring any access from an attic or crawlspace.
Warning: Never Use Plastic Flange Clamps for Ceiling Fans
A dangerous misconception among DIY installers is that heavy-duty plastic remodel boxes or drywall clamp wings are strong enough to hold a ceiling fan because they feel rigid upon initial tightening.
Continuous vibrational forces from a running fan will rapidly fatigue and pulverize gypsum drywall edges around plastic clamps. Over time, the entire assembly will loosen, break free from the ceiling, and pull live electrical wiring down with it.
- Plastic flange clamps lack the structural framing connection required for moving weights.
- Vibration friction degrades drywall integrity within weeks of fan operation.
- Always verify that your ceiling box is mechanically bolted to a steel joist brace if a fan will ever be attached.
Essential Tools, Safety Gear, and NEC Box Fill Rules
Gathering the proper tools before cutting into your ceiling prevents mid-project delays and ensures a safe, code-compliant installation. Installing an electrical box without attic access requires specific cutting, testing, and wire-fishing equipment designed for tight, enclosed spaces.
By preparing your workspace correctly and calculating wire volume limits upfront, you eliminate guesswork and protect your home’s electrical system from overloads.
The Complete DIY Toolkit Checklist
Having specialized tools on hand makes the difference between a clean installation and a messy drywall repair. Make sure your workspace is stocked with professional-grade gear before making your first cut.
- Stud Finder: Essential for locating ceiling joists and ensuring your cut lands safely in the open cavity between framing members.
- Non-Contact Voltage Tester: A crucial safety device to verify absolute zero voltage before touching any wires.
- Jab Saw or Oscillating Multi-Tool: Used for making precise, clean circular or rectangular drywall cutouts matching your box dimensions.
- Fiberglass Fish Rods or Fish Tape: Necessary for pulling 14/2 Romex cable through insulated or obstructed ceiling cavities.
- Wire Strippers & Lineman’s Pliers: For cleanly prepping conductor ends and securing tight twists.
Step Zero: Safety First & Non-Contact Voltage Testing
Electricity demands absolute caution. Never skip shutting off power at your main breaker panel, even if you are only working on a single wall switch or light fixture box.
After flipping the breaker, always double-check the circuit using a non-contact voltage tester against every wire and switch box involved in the run. Testing confirms that rogue circuits or back-fed power lines are not active.
- Turn off the corresponding breaker at the main service panel before touching drywall.
- Wave your non-contact voltage tester directly over the switch and existing wires to confirm zero electrical field.
- Double-test with a handheld digital multimeter if you suspect shared neutrals or multi-wire branch circuits.
The NEC Box Fill Rule: Preventing Electrical Overload in Remodel Boxes
The National Electrical Code (NEC) enforces strict box fill capacity rules to prevent overcrowding, overheating, and short circuits inside electrical boxes. Cramming too many wires into a small remodel box violates electrical code and creates a serious fire hazard.
Every conductor, wire connector, internal clamp, and switch device takes up a specific volume allowance measured in cubic inches. You must ensure your chosen remodel box provides enough total volume for all incoming and outgoing cables.
- Each 14 AWG conductor counts as 2.0 cubic inches of required box space.
- All ground wires combined count as a single conductor deduction (2.0 cubic inches for 14 AWG).
- Wire nuts, internal cable clamps, and switches each count as additional volume allowances according to NEC tables.
- Always select a remodel box volume rating that comfortably exceeds your total calculated wire fill requirement.
Step-by-Step Installation Guide (Remodel Brace & Box Mounting)
Installing an electrical box and heavy-duty spanner brace into a finished ceiling without attic access requires precision, patience, and correct mechanical sequencing. Because you are working entirely from underneath the drywall, following each step ensures structural integrity and a clean fit.
Whether you are preparing for a ceiling fan or a heavy light fixture, executing these sequential steps guarantees your bracket bites securely into the structural framing.
Step 1: Locating Ceiling Joists and Drilling Test Pilot Holes
Before cutting a large hole in your ceiling, you must accurately locate the adjacent ceiling joists to ensure your spanner bar has proper wood to bite into. Use a reliable stud finder or small rare-earth magnet to map out the joist edges.
Once you estimate the center of the bay, drill a small pilot test hole into the drywall. Drilling a tiny test hole is vital because it is infinitely easier to patch a minor drill mark than to patch an incorrect 4-inch electrical box cutout if you accidentally hit framing lumber.
- Scan the ceiling perpendicular to the joist direction using a high-grade stud finder.
- Drill a 1/8-inch pilot test hole midway between the detected joist boundaries.
- Insert a bent piece of wire or a thin Allen wrench into the pilot hole to feel for adjacent joist walls on both sides.
Step 2: Cutting the Precise Ceiling Opening
With your joist bay verified and centered, place your electrical box template or metal saddle plate outline directly against the drywall around your pilot hole. Trace the exact shape using a pencil.
Carefully cut along your trace line using a manual jab saw or an oscillating multi-tool. An oscillating tool is highly recommended because it produces clean, splinter-free edges and minimizes gypsum dust falling into your face.
- Align your cutting template precisely over the pilot hole location.
- Use an oscillating multi-tool or jab saw to cut cleanly along the pencil markings.
- Support the drywall cutout with your hand as the final cut completes to prevent it from cracking and dropping unexpectedly.
Step 3: Inserting and Twisting the Spanner Fan Brace Bar
Collapse your adjustable metal bar to its shortest length and insert it upward through the newly cut ceiling opening. Once inside the cavity, orient the bar so it runs perpendicular across the top of the two adjacent ceiling joists.
Reach inside the hole and rotate the bar by hand or using an open-ended wrench. As you twist, the spiked feet on both ends of the adjustable metal bar will dig aggressively into the wood of the ceiling joists, locking the entire assembly into place.
- Slide the collapsed spanner bar completely through the ceiling cutout into the joist space.
- Twist the shaft clockwise to expand the bar until the spiked feet bite firmly into the framing lumber.
- Verify that the bar cannot shift or slide side-to-side once fully torqued down.
Step 4: Securing the Electrical Box and Adjusting the Saddle Plate
With the spanner bar firmly anchored between the joists, slide the metal saddle plate and attached electrical box along the bar until it centers perfectly inside your drywall cutout.
Tighten the saddle plate locking mechanism completely to prevent any lateral movement. Ensure the open face of the electrical box is flush and even with the finished surface of the ceiling drywall.
- Slide the saddle plate along the mounted bar to center the box within your drywall opening.
- Lock down the secure locking mechanism bolts tightly with a wrench or screwdriver.
- Confirm that the front edge of the electrical box aligns flush with the ceiling plane.
Running Electrical Wire & Fish Tape Tactics Without an Attic
Routing new electrical cable through a finished ceiling without attic access requires patience and strategic wire-fishing techniques. Because you cannot walk across ceiling joists from above, you must thread your cables horizontally through enclosed framing cavities from wall to ceiling.
Mastering the use of fish tape and fiberglass rods allows you to bridge the gap between your power source and your newly mounted ceiling box smoothly and safely.
How to Route 14/2 Romex Wire From a Switch to the Ceiling Box
To power your new ceiling fixture, you need to run a fresh length of 14/2 Romex cable from an existing wall switch or a nearby live junction box up to your ceiling opening. Planning your path carefully ensures you avoid drilling into hidden wall studs or plumbing lines.
Start by cutting a small access hole behind the wall switch box if necessary, then fish your cable upward through the wall cavity into the ceiling space. Always leave plenty of extra slack at both ends to make wiring manageable.
- Turn off power at the main breaker panel before opening any wall switch boxes.
- Plan a direct route that minimizes obstructions and stays within accessible framing bays.
- Feed the Romex cable from the wall switch up into the ceiling cavity toward your new box location.
Pro Fish Tape Tactics: Navigating Hidden Ceiling Cavities
Fishing wire across a finished ceiling where joists run perpendicular to your cable path can be challenging. Fiberglass rods and steel fish tape are your primary tools for bridging these hidden gaps.
Feed your fish tape through the ceiling cutout toward the wall opening until it emerges. Securely tape your Romex cable to the end of the fish tape using electrical tape, and pull it smoothly back through the cavity.
- Push your fiberglass rods or steel fish tape through the ceiling box opening toward your target wall.
- Tape the end of your 14/2 Romex cable securely to the fish tape loop using heavy-duty electrical tape.
- Pull the fish tape back slowly while having an assistant guide the cable to prevent snagging on insulation or framing.
Making Code-Compliant Wire Connections Inside the Box
Once your Romex cable is successfully pulled through the ceiling box knockouts, you must prepare and connect your conductors safely. Leaving enough slack conductor length is vital for safe terminations.
Strip the outer plastic sheath to reveal your hot, neutral, and ground wires. Secure all connections using approved wire nuts or push-in connectors, and ensure zero bare copper is exposed before tucking the wires neatly inside the enclosure.
- Pull at least 6 inches of slack conductor length past the edge of the electrical box.
- Strip 1/2 inch of insulation from each hot, neutral, and ground wire end.
- Twist wires securely with wire nuts or insert them firmly into push-in connectors according to code.
- Tuck all connected wires neatly into the back of the box to leave room for your fixture mount.
Advanced Troubleshooting & Hidden Obstacles
While standard installations go smoothly, real-world remodeling often presents unexpected challenges that basic DIY guides overlook. Encountering hidden obstacles like blown-in insulation or non-standard framing can quickly halt your project if you do not know how to adapt.
Knowing how to navigate these hurdles ensures your installation remains secure, professional, and fully code-compliant from start to finish.
What to Do If Blown-In Insulation Blocks Your Fish Tape
Reaching into an enclosed ceiling cavity often reveals dense, loose-fill cellulose or fiberglass blown-in insulation that blocks your fish tape. When you push your fish tape forward, it catches the insulation, curls up inside the wall, and refuses to cross the span.
To bypass this obstacle, replace your flexible fish tape with a rigid yet bendable tool like a length of flexible PVC conduit or a straightened coat hanger taped to your fiberglass rod. This rigid guide punches straight through loose insulation without bunching up.
- Stiffen your leading edge by taping a flexible PVC guide rod to your fish tape.
- Rotate the rod slightly as you push forward to part the dense cellulose or fiberglass insulation.
- Work slowly across the joist bay to establish a clear tunnel before pulling your Romex cable through.
Handling Non-Standard Joist Spacing (Too Wide or Too Narrow)
Standard adjustable spanner bars are engineered to fit typical joist spacings of 16 to 24 inches on center. However, older homes or custom construction often feature non-standard framing gaps that render a standard bar too long or too short.
If your joists are spaced wider than your span bar allows, you must source an extended heavy-duty fan brace or sister a short framing piece into the bay. If spacing is too narrow, check manufacturer specifications to ensure the bar can collapse sufficiently without bottoming out.
- Measure your exact joist distance prior to purchasing your spanner brace hardware.
- Purchase an extended-reach span bar if your framing exceeds standard 24-inch spacing limits.
- Never modify or cut a structural fan brace bar to force an improper fit, as this compromises its load rating.
Clean Drywall Patching: Fixing Overcuts and Edge Gaps Around Remodel Flanges
Accidents happen during cutting, and an oscillating multi-tool or jab saw can occasionally slip, creating an unsightly gap or overcut around your electrical box flange. Leaving these gaps exposed looks sloppy and weakens the box’s surrounding support.
Fixing overcuts requires applying a fast-setting joint compound or mesh tape reinforcement to build a clean drywall margin right up against the box edge. Once dry, sand it smooth and paint it to match your ceiling.
- Fill minor overcut gaps around the box flange using a fast-drying interior joint compound.
- Embed self-adhesive fiberglass mesh tape into the wet compound if the gap is wider than a quarter-inch.
- Sand the dried patch flat with fine-grit sandpaper to create a seamless, professional finish against the box rim.
Cost Breakdown, Hiring vs. DIY, and Frequently Asked Questions
Deciding whether to tackle your ceiling box installation as a weekend DIY project or hire a licensed professional depends on your comfort level with electrical wiring and your available budget. Understanding current market pricing helps you weigh the financial investment against your time and safety.
Evaluating professional service fees versus purchasing your own hardware ensures you make an informed choice for your home renovation.
Cost Comparison: DIY vs. Hiring an Electrician or Retail Installation Services
Taking on this project yourself is remarkably cost-effective. Buying an old-work remodel box or heavy-duty spanner brace, along with basic tools like a non-contact voltage tester and fish tape, typically totals between $25 and $70 in materials.
Conversely, hiring a licensed professional electrician or utilizing retail installation services from home improvement centers incurs labor fees. Professional electrician costs generally range from $150 to $350 depending on wiring complexity, while Home Depot or Lowe’s installation service pricing typically ranges from $120 to $250 for standard fan mounting.
- DIY Material Cost: $25 to $70 for hardware, braces, and wiring supplies.
- Professional Electrician Cost: $150 to $350 for labor and safety compliance checks.
- Retail Installation Services: $120 to $250 standard service fees through major home improvement providers.
Frequently Asked Questions
How do I know if my existing electrical box can hold a ceiling fan?
You can verify your box’s capacity by looking inside the enclosure for a stamped metal rating or manufacturer label explicitly stating “Acceptable for Fan Support”. If the box is plastic, lacks metal reinforcement, or is only attached to drywall clips, it cannot hold a ceiling fan and requires immediate ceiling fan box replacement.
- Look for embossed or stamped weight ratings inside the metal housing.
- Check if the box is bolted directly to a structural metal spanner brace rather than plastic wings.
- Schedule a professional safety evaluation if you are uncertain about your existing framing setup.
How do you run wire through a ceiling without an attic?
Running wire without an attic involves fishing 14/2 Romex cable horizontally through enclosed ceiling and wall cavities. Using fiberglass fish rods or steel fish tape, you bridge the gap from a wall switch box up to your newly cut ceiling opening, guiding the cable safely around insulation and framing.
- Access the wall cavity by opening a small space near the existing light switch.
- Push fish tape or fiberglass rods from the ceiling box opening down toward the wall.
- Secure the Romex cable to the fish tape and pull it smoothly back through the cavity.
How much does an electrician charge to install a ceiling fan?
An electrician typically charges between $150 and $350 to install a ceiling fan, assuming standard wiring is already present in the ceiling. If the technician must also install a heavy-duty support brace and run brand-new wiring from a switch without attic access, total labor and material costs can range from $300 to $600+.
- Standard replacement labor runs $150 to $250 when an approved fan box already exists.
- Complex installations requiring brace retrofitting and new wiring push costs higher.
- Always request an upfront quote to account for hidden wiring challenges in finished ceilings.

Oscar Vance | Master Plumber & Drainage Expert
Meet Oscar Vance, a licensed master plumber sharing practical solutions on residential repairs, preventive maintenance, and thoughtful home upkeep.