3-Minute Symptom-to-Cause Diagnostic Matrix
 Pinpointing why your cooling system is failing starts with observing its exact operating pattern. Use this diagnostic matrix to match your system’s behavior with the underlying mechanical cause and determine whether you can fix it yourself.
- Continuous Warm Airflow: Indicates the indoor blower motor is circulating air normally, but the heat-exchange loop is failing due to blocked airflow or refrigerant loss.
- Rapid On-Off Cycling: Signals an active safety cutoff protecting your compressor from high pressure or water overflow.
- Outdoor Silence: Confirms that the indoor air handler has power while the outdoor condensing unit has lost electrical continuity.
DIY Checks You Can Do Right Now
Most common cooling failures originate from simple restriction or power interruptions that you can safely resolve without professional tools. Work through these five diagnostic checks in order to restore cold airflow quickly.
1. Verify Thermostat Calibration & Fan Settings (AUTO vs. ON)
An incorrect fan switch position is the single most common reason an HVAC system blows air that feels warm. If your thermostat fan setting is locked to ON instead of AUTO, the indoor blower runs continuously even when the compressor is resting.
- The Warm Air Problem: When the blower runs constantly, it evaporates moisture sitting on the indoor coil back into your ductwork, raising home humidity and pushing uncooled air through the registers.
- The Fix: Switch your fan setting to AUTO so the blower operates only while the cooling cycle is actively running. Verify that your target temperature is set at least 3 degrees below current room temperature.
2. Inspect and Replace a Clogged Air Filter
A severely neglected air filter chokes your system of necessary airflow, causing indoor temperatures to rise while putting your compressor at risk. When airflow drops, excessive static pressure builds up inside the air handler.
- The Coil Threat: Restricted airflow drops the temperature of your evaporator coils below freezing, turning moisture into solid ice and halting all heat transfer.
- The Fix: Pull out your filter and check for heavy dust blankets. Replace it with a standard pleated filter matching your system’s recommended MERV rating (typically MERV 8 to 11) to restore proper airflow balance.
3. Reset a Tripped AC Circuit Breaker or Outdoor Disconnect
Power surges, compressor overloads, or brief electrical shorts can trip high-voltage breakers without damaging the internal wiring permanently. If your indoor fan works but the outdoor unit is completely silent, an electrical trip is the likely culprit.
- Locating the Switches: Go to your main electrical panel and locate the heavy double-pole 220-240V breaker labeled for your air conditioner. Next, inspect the plastic or metal outdoor disconnect box mounted on the wall near your condenser unit.
- The Reset Procedure: Firmly push the tripped double-pole breaker all the way to the OFF position, wait 30 seconds, and push it firmly back to the ON position. Check that the pull-out block or switch inside the outdoor disconnect box is securely engaged.
4. Clear Debris and Wash Dirty Outdoor Condenser Coils
Your outdoor unit must release heat absorbed from inside your home into the outside air. When grass clippings, leaves, cottonwood seeds, and dirt coat your condenser fins, heat rejection fails and cooling efficiency plummets.
- Clear the Perimeter: Remove all vegetation, bushes, and stored items maintaining a minimum of two feet of clear airflow clearance around the entire cabinet.
- Gentle Rinsing: Turn your system off at the thermostat, attach a standard garden hose (never a high-pressure power washer, which bends delicate aluminum fins), and gently spray water from the inside out to push trapped dirt away.
5. Flush a Clogged Condensate Drain Line (Float Switch Reset)
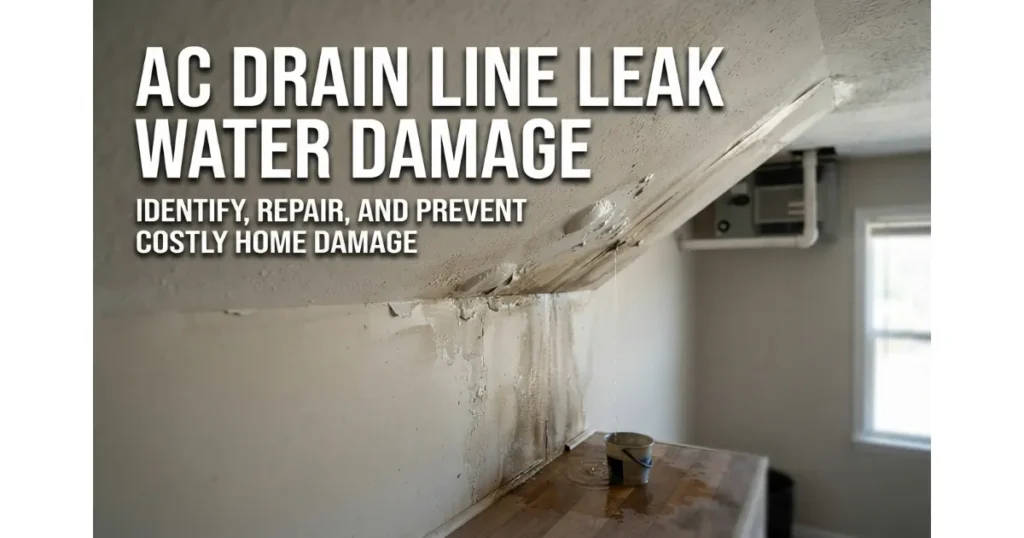
Modern HVAC systems feature a safety mechanism that automatically shuts down cooling when condensation water backs up due to algae or sludge buildup. This is the primary driver behind short-cycling (when your AC runs for 10 minutes, abruptly shuts off, and repeats).
- Locating the Drain Line: Find the PVC condensation pipe exiting near your indoor air handler or leading outside your foundation.
- Executing a Vinegar Flush: Locate the T-shaped vent opening on the indoor drain line, remove the cap, and pour a cup of distilled white vinegar down the pipe to dissolve organic blockages and clear the safety float switch.
The Delta-T Reality Check: Is Your AC Actually Broken?
Before assuming a major component has failed, verify whether your system is operating within its mechanical limits. Residential air conditioners do not manufacture cold air from scratch; they remove heat from indoor air at a fixed rate measured by Delta-T (the exact temperature difference between air entering and leaving the system).
How to Test Your AC’s Temperature Split (The 15°F–20°F Rule)
A properly functioning central air conditioner should drop the air temperature by 15°F to 20°F as it passes over the indoor evaporator coil. You can perform this exact technician field test in five minutes using a basic digital probe or kitchen meat thermometer.
- Run the System: Let your air conditioner run continuously for at least 15 minutes so pressures and coil temperatures stabilize.
- Measure Return Air: Hold the thermometer probe directly against your main indoor return air grille (where warm household air is pulled into the system) and record the temperature.
- Measure Supply Air: Walk to the nearest supply register (where cooled air blows into the room), insert the probe just past the louvers, and wait 60 seconds for the reading to settle.
- Calculate Your Temperature Split: Subtract the supply temperature from the return temperature to find your temperature split.
- 15°F to 20°F Difference: Your cooling equipment is working properly; your home is simply experiencing high external heat gain or insulation loss.
- Under 14°F Difference: Indicates restricted airflow, dirty coils, low refrigerant charge, or a weak compressor.
- Over 21°F Difference: Signals severely restricted airflow (such as a clogged filter or closed dampers) that risks freezing your evaporator coil.
Understanding Ambient Heat Load Limits
How cool should your house be if it is 100°F outside? Most residential HVAC systems are engineered around a regional design temperature—typically 90°F to 95°F—meaning they are sized to maintain an indoor temperature of roughly 72°F to 75°F under those specific outdoor conditions.
- Extreme Heatwave Physics: When outdoor temperatures spike to 100°F or 105°F, the ambient heat load pushing through your roof, windows, and walls exceeds the system’s rated BTU capacity.
- Normal Struggle vs. Failure: If your thermostat is set to 70°F during a 102°F afternoon and your house holds steady at 77°F or 78°F while blowing air 18°F cooler than room air, your AC is not broken—it is running at 100% capacity against extreme outdoor heat.
How to Spot and Thaw Frozen Evaporator Coils Safely
When an airflow restriction chokes your cooling system, the liquid refrigerant inside your evaporator coil absorbs far less heat than normal. This drop in thermal exchange causes moisture condensing on the metal fins to freeze solid, triggering a dangerous ice blockage that completely halts cold airflow.
Never attempt to scrape ice off copper coils with screwdrivers or blast them with a hair dryer, as puncturing the metal or overheating plastic components will cause catastrophic system damage.
Warning Signs of Ice Buildup on Copper Refrigerant Lines
Recognizing the early indicators of a freezing cycle allows you to shut down the equipment before melting ice overflows your drain pan and floods your utility room or ceiling.
- Frost on the Suction Line: Inspect the larger insulated copper pipe running from your outdoor unit to your indoor air handler; if it is coated in frost or solid ice, your coil is frozen.
- Sudden Drop in Vented Airflow: Vents that previously blew strong air begin producing a weak, lukewarm whisper or stop blowing entirely.
- Water Pooling Near the Unit: As exterior ice melts rapidly inside the air handler cabinet, it overwhelms the condensate pan and leaks onto the floor.
The Safe 3-Step Thawing Protocol
Thawing a frozen air conditioning system safely requires patience and proper airflow restoration to prevent the ice from reforming immediately upon restart.
- Shut Off Cooling: Switch your thermostat mode to OFF while leaving your system power breaker engaged.
- Force the Fan On: Switch your thermostat fan setting from AUTO to ON; this forces the indoor blower to push room-temperature air across the coils, melting the ice completely over a period of 2 to 4 hours.
- Replace Filter and Dry Pan: Once all ice has melted and the drain pan is dry, install a clean air filter before switching your thermostat back to COOL mode.
Mechanical & Electrical Failures Requiring an HVAC Technician
If you have verified your thermostat settings, installed a clean air filter, reset tripped breakers, and confirmed your coils are free of ice, your cooling loss stems from an internal electrical or sealed-system component failure. These repairs require specialized diagnostic gauges, high-voltage testing meters, and certified handling.
Low Refrigerant Levels & Hidden Leaks (Why You Can’t DIY a Recharge)
Your air conditioner operates as a sealed, closed-loop pressure vessel that never consumes or burns up refrigerant during normal cooling cycles. If your system is low on R-410A or older R-22 refrigerant, a physical pinhole leak exists somewhere in the copper tubing, evaporator coil, or brazed joints.
- Why DIY Refills Are Illegal and Impractical: Under federal U.S. EPA Section 608 refrigerant regulations, only certified technicians holding valid EPA Section 608 certification are legally permitted to purchase or handle central air conditioning refrigerants.
- Precision Charging Requirements: Simply topping off gas without sealing the leak wastes hundreds of dollars and risks damaging your compressor. Technicians use digital manifold gauges to calculate exact superheat and subcooling values, ensuring the refrigerant charge matches manufacturer specifications to the ounce.
Failed Run Capacitor or Contactor
Electrical starting components endure intense heat stress during peak summer temperatures and rank among the most frequent mechanical failures. When a dual run capacitor or electrical contactor relay burns out, your indoor air handler continues blowing air while the outdoor condensing unit fails to engage.
- Classic Symptom: You hear a distinct electrical clicking sound or low humming noise coming from the outdoor cabinet, but the top fan blade remains stationary and the compressor never starts.
- Safety Hazard: Capacitors store lethal high-voltage electrical charges even after the main breaker is switched off, making professional replacement mandatory.
Faulty Compressor or Reversing Valve (Heat Pumps)
The outdoor compressor acts as the mechanical heart of your cooling system, pressurizing refrigerant gas so it can release heat outdoors. If the compressor motor burns out internally, your indoor blower will circulate warm room air indefinitely.
- Heat Pump Reversing Valve Failure: If you own a heat pump rather than a straight-cool air conditioner, a jammed heat pump reversing valve or failed solenoid coil can lock the unit into heating mode, actively pumping hot air through your vents during summer.
Leaky or Disconnected Attic Ductwork
Your HVAC equipment may be generating ice-cold air properly, only for that conditioned air to escape before ever reaching your living spaces. Severe ductwork leakage in unconditioned attics or crawlspaces frequently mimics a broken air conditioner.
- How Duct Leaks Steal Cooling: Torn flex ducts, disconnected plenum collars, or crushed trunk lines dump chilled air into your hot attic while creating negative pressure that pulls humid, 120°F attic air into your rooms through wall gaps.
- Professional Sealing: Technicians inspect attic runs using thermal imaging and pressure testing before sealing joints permanently with mastic paste and foil tape.
Mini-Splits, Apartments & Window Units
Standard central air conditioning troubleshooting does not always apply to specialized equipment configurations. Unique heating and cooling setups in apartments, multi-zone rooms, or compact spaces require tailored diagnostic checks to restore cold airflow quickly.
Ductless Mini-Split Systems
A ductless mini-split usually fails to cool because fine mesh indoor filters are clogged with dust or because the infrared remote control was accidentally switched from cooling mode to heating mode.
- Check Remote Control Icons: Confirm your handheld remote displays the snowflake symbol rather than the sun, water droplet, or fan-only icon, and lower the temperature setpoint.
- Clean the Indoor Cassette Filters: Lift the front plastic panel of the wall-mounted indoor unit, slide out the washable nylon mesh filters, rinse them under warm water, let them dry completely, and reinstall them.
Verification: Airflow through the front louvers feels strong and instantly crisp within two minutes of restarting the unit.
Apartment & Condo HVAC Systems
Multi-unit residential buildings often utilize compact vertical heat pumps or hidden ceiling air handlers that shut down completely when secondary safety floats trigger due to slow drainage.
- Inspect the Closet Air Handler Pan: Locate your indoor unit (usually in a hallway utility closet) and check if the auxiliary drain pan underneath is holding standing water.
- Verify Building Chilled Water Status: If you live in a high-rise utilizing a central building water loop, ask your property manager whether the central chiller plant is undergoing maintenance or seasonal switchover.
Verification: The emergency condensate overflow sensor switch is clicked upright, and the unit resumes normal compressor cycles.
Window & Portable AC Units
Self-contained window and portable room air conditioners blow lukewarm air when restricted outdoor airflow causes the compressor to overheat or when exhaust seals leak.
- Clean Rear Condenser Grilles: Unplug the unit, slide the outer cabinet off if accessible, and gently brush dust or lint off the exterior window unit condenser fins using a soft-bristled brush.
- Seal Portable Exhaust Hoses: If using a dual-hose or single-hose portable unit, ensure the plastic window slider kit is tightly sealed and that the flexible exhaust hose is unkinked and venting straight out the window.
Frequently Asked Questions
How can I tell if my AC is low on refrigerant?
You can spot low refrigerant by listening for a faint hissing noise near the copper tubing, checking for ice on the refrigerant line, or noticing lukewarm air blowing continuously from your vents. Because air conditioners are closed-loop systems, low refrigerant always signals an active leak that requires professional pressure testing.
- Visual Check: Frost accumulating on the larger insulated copper pipe entering your indoor air handler.
- Performance Check: Extended cooling cycles that fail to lower indoor humidity or reach your thermostat target.
How much does it cost to refill refrigerant in an AC unit?
A professional refrigerant recharge cost typically ranges from $200 to $700 depending on your system’s capacity, local labor rates, and whether your unit uses R-410A or older R-22 gas. Keep in mind that technicians must locate and repair the physical leak before adding new refrigerant to your system.
- R-410A Recharge: Generally averages $75 to $150 per pound plus diagnostic service fees.
- Leak Repair Extra: Brazing copper pinhole leaks or replacing a leaking evaporator coil adds separate parts and labor charges.
Why is my AC blowing air but the room isn’t getting colder?
When your AC blows air without cooling the room, your indoor blower fan is running normally, but the heat-transfer cycle is blocked by a clogged filter, dirty outdoor coils, or a wide thermostat differential during extreme outdoor heat. Restricted airflow prevents the evaporator coil from absorbing indoor heat effectively.
- Quick Setting Check: Ensure your thermostat fan is switched to AUTO rather than ON so uncooled air stops circulating between cycles.
- Airflow Check: Replace dusty filters and clear debris blocking your outdoor condenser fins.
Should I turn off my AC if it’s blowing warm air?
Yes, turn your thermostat to the OFF position immediately if your vents continue blowing warm air after checking basic settings and filters. Running a compromised cooling cycle starves the outdoor unit of cool returning refrigerant gas, causing severe overheating and permanent compressor burnout.
- Prevent Ice Damage: Shutting down cooling early prevents frozen coils from melting and overflowing your indoor drain pan.
- Protect Electrical Parts: Turning the system off stops failing capacitors or contactors from tripping main household breakers repeatedly.

Oscar Vance | Master Plumber & Drainage Expert
Meet Oscar Vance, a licensed master plumber sharing practical solutions on residential repairs, preventive maintenance, and thoughtful home upkeep.