How to Clean a Bathroom Fan Vent
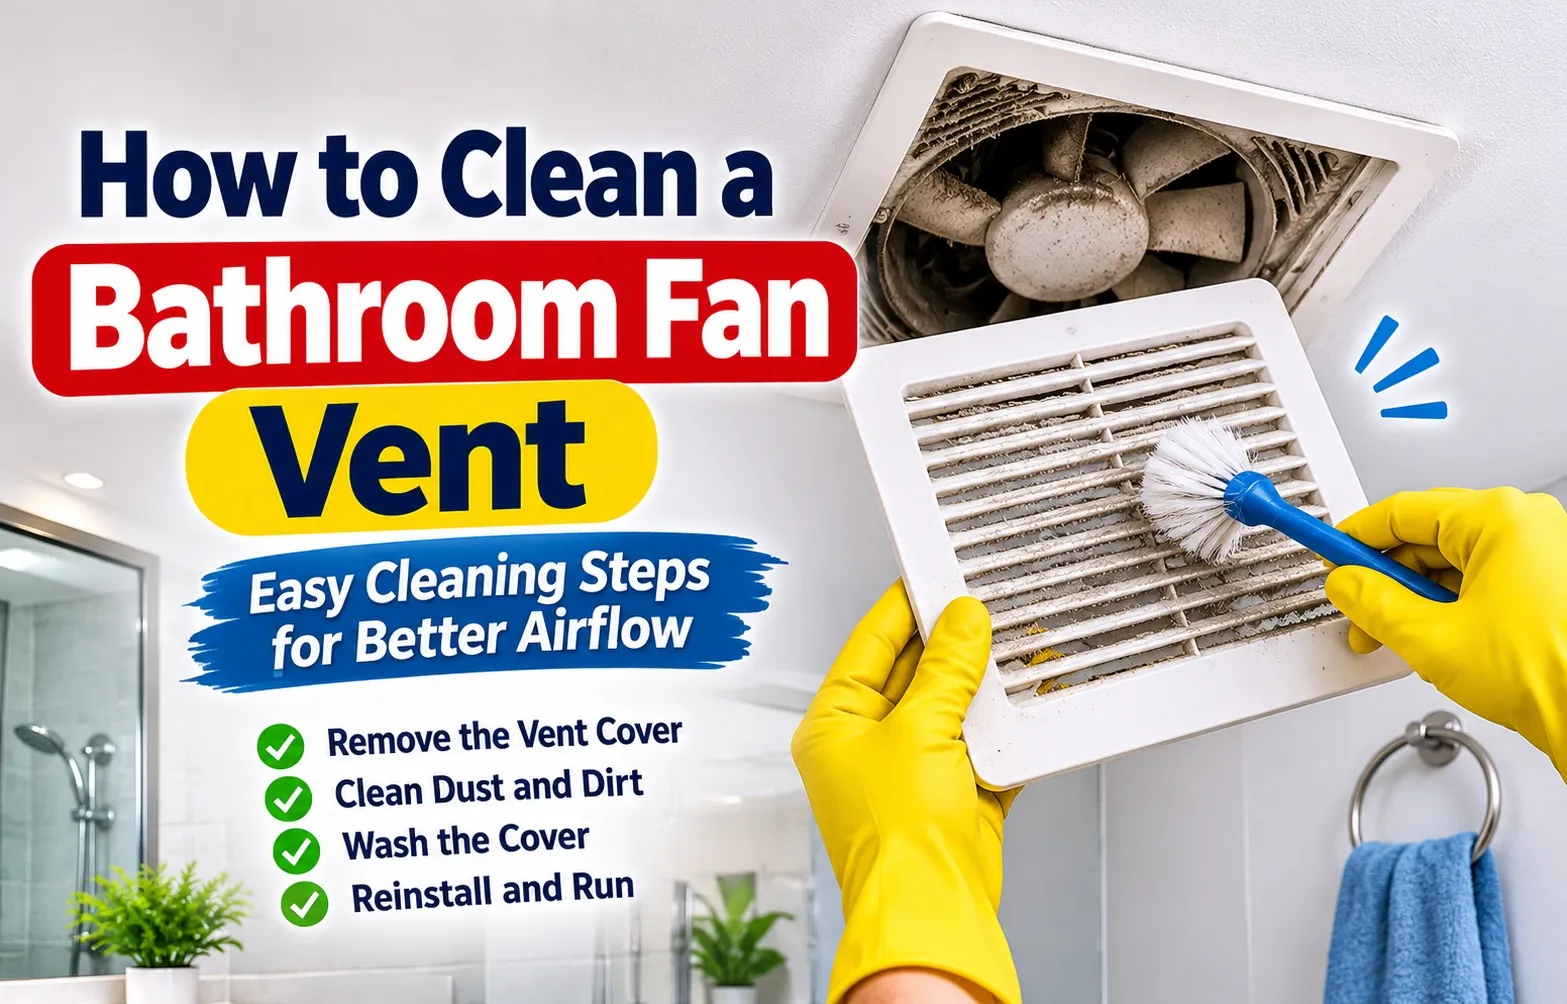 Cleaning a bathroom exhaust fan vent requires turning off the main electrical power, removing the vent cover, and thoroughly vacuuming dust accumulation from the fan housing and motor assembly. Soaking the plastic grille in warm soapy water while scrubbing the fan blades with a damp microfiber cloth restores maximum airflow, eliminates excess moisture buildup, and stops loud rattling noises instantly.
To safely deep clean your bathroom ventilation fan and prevent mold growth, gather the following essential tools before starting your maintenance routine:
Quick Summary & Essential Tools Checklist
- Phillips Head Screwdriver: For removing housing fasteners or light cover mounting screws safely.
- Vacuum Cleaner with Attachments: A soft brush attachment and crevice tool to extract heavy lint and dust buildup from inside the housing.
- Soft-Bristled Scrub Brush or Old Toothbrush: Perfect for detailing narrow fan blades, fins, and tight motor crevices.
- Warm Soapy Water: A mix of warm tap water and mild dish soap (or Dawn Powerwash for stubborn, sticky hairspray buildup).
- Microfiber Cloths: Non-abrasive towels to wipe down damp fan components and dry the ceiling grille thoroughly.
- Safety Access: A stable step stool or ladder, protective eyewear, and a dust mask for overhead cleaning.
Performing this simple 15-minute maintenance process twice a year keeps your bathroom exhaust fan running quietly, lowers indoor humidity, and prevents costly moisture damage to ceiling drywall.
Essential Safety Protocols & Pre-Cleaning Prep
Working on an electrical ceiling unit requires strict safety protocols to eliminate the risk of electrical shock and physical injury. Disconnecting power completely at the source and securing your work area ensures a safe, hassle-free cleaning process.
Step 1: Cutting Power at the Wall and Circuit Breaker
Turn off the wall switch controlling the fan, then immediately locate your main breaker panel to switch off the dedicated circuit breaker for the bathroom. Never rely solely on a wall switch, as smart switches or timer controls can leave live current running to internal fan wiring.
- Locate the Breaker: Check your home breaker panel door for the index label marked “Bathroom,” “Lighting,” or “Exhaust Fan.”
- Flip the Switch: Move the corresponding breaker switch completely to the “Off” position.
- Verify Power Termination: Return to the bathroom and flip the wall switch on and off multiple times to confirm the fan motor, integrated light, or heater receives zero power.
Mandatory Safety Precautions Before Opening the Housing
Overhead vent cleaning releases concentrated clouds of trapped dust, mold spores, and drywall fragments directly over your face. Utilizing proper protective gear and stable footing prevents personal injury and eye contamination during grille removal.
- Equip Personal Protective Gear: Put on protective eyewear to shield your eyes from falling debris and wear a tight-fitting N95 or dust mask to avoid inhaling airborne mold spores and lint.
- Set Up Ladder Safety: Position a sturdy step stool or ladder directly under the fan assembly on a flat, non-slip surface. Never overreach or balance on the edges of the bathtub or toilet seat.
- Clear the Area Below: Remove bath mats, towels, and countertop items beneath the vent to keep your workspace clear and prevent debris from dirtying clean surfaces.
Standard 5-Step Deep Cleaning Guide
Executing a proper deep clean restores your ventilation unit’s original airflow efficiency and eliminates trapped lint. Following a structured procedure ensures every component is safely detached, washed, and reinstalled without damaging the wiring or ceiling drywall.
Step 2: Removing the Ceiling Grille (Spring Clips vs. Screws)
Gently pull the plastic ceiling cover down a few inches to inspect how it is attached to the housing. Most modern bathroom fans use flexible metal spring clips, while older units rely on center mounting screws.
- Spring Clip System: Reach underneath the plastic ceiling cover and pull it down slightly on one side. Pinch the V-shaped metal mounting wires together and slide them out of their housing slots to release the cover completely.
- Screw-Attached System: Locate the central screw holding the grille in place. Use a Phillips head screwdriver to loosen and remove the screw while supporting the cover with your free hand.
- Light/Heater Harnesses: If your fan includes an integrated nightlight or heating unit, carefully unplug the small electrical wire harness before pulling the cover entirely free.
Step 3: Soaking & Scrubbing the Plastic Grille
Bathroom grilles collect a heavy mix of dust, humidity grime, and aerosol residue over time. Submerging the plastic cover in soapy water breaks down this buildup quickly without scratching the surface.
- Prepare a Soapy Bath: Fill a clean bucket or your kitchen sink with warm tap water and a generous squirt of mild dish soap or a dedicated grease-cutting cleanser like Dawn Powerwash.
- Soak the Grille: Submerge the plastic ceiling cover completely and let it soak for 10 to 15 minutes to loosen stubborn film and trapped lint buildup.
- Scrub and Rinse: Use a non-abrasive sponge or soft-bristled brush to wipe down all corners and vents. Rinse thoroughly with clean water and set it aside to air-dry completely.
Step 4: Vacuuming Dust & Lint from the Motor Housing
The interior motor housing and ventilation cavity accumulate thick layers of flammable lint and airborne dust. Cleaning this zone prevents motor overheating and improves overall exhaust performance.
- Attach Hose Tools: Equip your vacuum cleaner with a long crevice tool and a soft-bristled brush attachment to reach deep inside the metal housing cavity.
- Extract Loose Debris: Vacuum all interior walls, the top of the motor assembly, and the surrounding framing to pull out accumulated lint buildup.
- Wipe Internal Surfaces: Take a damp microfiber cloth to wipe away any remaining fine dust film adhering to the metal housing walls. Never spray water directly into electrical motor components.
Step 5: Cleaning Fan Blades & Reassembling the Unit
Dust-coated fan blades lose aerodynamic efficiency and cause loud motor humming. Detailing the individual fins and reassembling the clean parts restores quiet, powerful airflow.
- Scrub Fan Fins: Use an old toothbrush or a soft brush dipped in mild soapy water to clean dust off each individual fan blade and fin. Wipe them dry with a clean microfiber cloth.
- Reattach Motor and Grille: Secure any lowered motor assemblies back into position, plug in light harnesses, pinch the metal mounting wires, and push the clean ceiling cover flush against the drywall.
Testing Air Suction (The Toilet Paper Square Test)
Restoring power at the circuit breaker allows you to verify that your exhaust fan is pulling air properly. Testing the static pressure ensures the ductwork is clear and the fan is operating at peak capacity.
- Restore Power: Switch the main circuit breaker back on and flip the bathroom wall switch to start the fan motor.
- Perform the Paper Test: Hold a single square of lightweight toilet paper directly against the running ceiling grille.
- Verify Suction: If the suction holds the toilet paper securely against the vents without falling, your fan vent is fully cleaned, balanced, and operating efficiently.
Clean Method No Removal Required
Cleaning a bathroom fan vent without taking off the cover is an ideal solution for rental property maintenance, fragile vintage units, or routine touch-ups. This low-risk technique allows you to perform surface dust removal safely without unscrewing components or handling delicate spring clips.
How to Clean a Vent Cover Without Pulling it Down
To clean your exhaust fan while keeping the ceiling cover mounted, use targeted airflow and flexible tools to clear blockage from the outer slats. This quick approach restores basic ventilation efficiency in under five minutes.
- Blast Slats with Canned Air: Angle a straw-tipped canned air duster into the grille slots to dislodge caked-on lint clinging to internal fan blades.
- Sweep Dry Surfaces: Run an extended duster or microfiber wand over the face of the vent to catch falling dust particles before they spread across the room.
- Detail Vent Openings: Wrap a damp microfiber cloth around the tip of a flat tool to slide between narrow grille openings and wipe away stubborn surface grime.
Vacuum Attachments and Microfiber Tricks for Surface Dust
Using a vacuum cleaner equipped with specialized hose extensions removes loose dust particles safely without loosening the vent housing from the ceiling drywall.
- Use a Vacuum Crevice Tool: Press a narrow vacuum crevice tool directly into the grille slots to draw out deep-seated lint clumps resting behind the cover.
- Agitate with a Brush Attachment: Run a soft-bristled vacuum brush attachment across the face of the cover to dislodge static dust clinging to the plastic ribs.
- Finish with Static Microfiber Cloths: Wipe down the entire exterior surface using a dry microfiber cloth to trap any remaining fine dust film left behind by the vacuuming process.
Removing Mold, Mildew, and Sticky Hairspray Residue
High humidity combined with airborne aerosols creates an environment where mold spores thrive and dust glues itself to internal fan components. Treating organic growth correctly eliminates indoor health risks while dissolving heavy aerosol hairspray sludge restores proper fan performance.
How to Safely Kill Black Mold Spores in Bathroom Vents
Eliminating black mold spores from a bathroom exhaust vent requires targeted treatment rather than simple surface wiping. Mold roots embed deep into plastic porous structures and ceiling cutouts, spreading spores across your home whenever the fan runs.
- Wear Protection: Always equip a tight-fitting N95 dust mask and protective eyewear before agitating areas with visible mildew growth.
- Isolate and Treat: Spray affected non-electrical components thoroughly using a dedicated anti-fungal spray bottle solution outdoors or in a well-ventilated area.
- Sanitize Housing Surfaces: Dampen a cloth with an anti-mold solution to wipe down the interior metal housing walls without saturating electrical wire channels.
- Ensure Complete Drying: Allow all treated components to dry completely before reassembly, as trapped moisture promotes rapid mold recurrence.
White Vinegar vs. Bleach: Which Solution is Safe for Plastic?
Choosing the correct cleaning agent prevents damage to plastic housing and ensures permanent eradication of mildew spores without emitting harmful chemical fumes into your home.
- Distilled White Vinegar Solution (Recommended): Undiluted distilled white vinegar kills up to 82% of mold species and penetrates porous plastic materials to destroy roots without weakening or yellowing the grille material.
- Diluted Bleach Solution: Chlorine bleach sanitizes hard non-porous surfaces but can degrade plastic polymer chains over time, making fan covers brittle. Bleach also fails to penetrate porous surfaces, allowing underlying mold roots to survive.
Proper bathroom ventilation and regular maintenance are critical components for indoor air quality and mold prevention, as outlined in the PNNL Building America Solution Center bath fan guide.
Removing Sticky, Dust-Glued Hairspray Residue
Aerosol hairspray residue leaves a tacky, resinous film across fan blades and vents that acts as a magnet for airborne dust, turning into a thick sludge that stalls motor rotation.
- Apply a Dedicated Degreaser: Spray sticky plastic components with a specialized kitchen degreaser or Dawn Powerwash spray to break down the chemical polymers found in hairspray.
- Let the Cleaner Dwell: Allow the degreasing agent to sit on the affected fan blades and grille for 5 to 10 minutes to dissolve the hardened resin.
- Scrub and Rinse: Scrub the surfaces with a soft-bristled brush using warm water to lift the sticky sludge, then wipe completely clean with a fresh microfiber cloth.
Model & Brand Specific Instructions: Broan, NuTone, & Light Combos
Cleaning major ventilation brands like Broan and NuTone or units with integrated light and heater fixtures requires specific handling to protect internal wiring. Following manufacturer-specific disconnection steps prevents accidental wire damage during maintenance.
How to Clean a Broan or NuTone Exhaust Fan
Broan and NuTone ventilation units typically utilize proprietary metal mounting brackets and specialized plug-in motor receptacles that require careful detachment during deep cleaning.
- Release the Grille Springs: Squeeze the heavy metal torsion springs on your Broan bathroom fan cover and pull downward to access the inner housing chamber.
- Unplug the Motor Assembly: Locate the two-prong electrical plug supplying current to the NuTone ventilation unit motor and pull it straight out of its housing socket before lowering the metal plate.
- Release Housing Latches: Unlatch or unscrew the internal metal plate holding the blower wheel, then slide the entire motor assembly down for thorough dust extraction.
Cleaning Bathroom Fans with Built-In Lights or Heaters
Exhaust fans featuring built-in lighting arrays or ceiling heaters contain delicate wiring harnesses, glass covers, and heating elements that must never be exposed to moisture.
- Remove the Glass Lens Cover: Twist or unclip the plastic or glass lens cover protecting the light bulbs, and wash it separately using warm soapy water.
- Disconnect Light Plugs: Unplug the integrated light plug and nightlight wiring harness completely before attempting to lower any metal component assemblies.
- Protect Integrated Heaters: Never submerge an integrated heater assembly in water; instead, use a dry microfiber cloth and a vacuum crevice tool to clear dust away safely from heating coils.
Noise & Suction Troubleshooting
If your bathroom exhaust fan continues to emit high noise levels or fails to pull steam out of the room after a deep clean, mechanical alignment issues or component wear are usually to blame. Diagnosing specific auditory symptoms helps identify whether your fan requires simple hardware adjustments, shaft lubrication, or component replacement.
Why Is My Bathroom Fan Still Loud After Cleaning?
A bathroom fan that remains noisy after dust removal often suffers from physical vibration transfer, misalignment of the blower wheel, or worn-out motor bearings. When dust buildup is cleared, underlying mechanical issues become more pronounced due to changes in weight distribution across moving parts.
- Vibration Against Drywall: Loose housing screws allow the fan unit to vibrate against ceiling joists or drywall, producing a loud buzzing noise throughout the room.
- Imbalanced Blower Wheel: If fan fins are chipped, bent, or unevenly cleaned, the rotating assembly wobbles at high speeds, hitting the internal housing wall.
- Stuck Damper Flap: The backdraft damper flap located at the duct connection can stick halfway, creating air turbulence and a persistent fluttering sound.
Fixing Rattling Motors and Lubrication Rules (Can You Use WD-40?)
Properly securing loose hardware and applying non-flammable lubricant to rotating shafts restores quiet operation and prevents premature motor burnout.
- Tighten Loose Mounting Screws: Use a screwdriver to snug down all motor bracket fasteners and ceiling mounting screws to eliminate structural rattling.
- Never Use Standard WD-40: Avoid using standard multi-use WD-40 on fan motors. Standard WD-40 is a solvent that strips factory grease, dries out quickly, collects dust, and presents a potential fire hazard inside electrical motor housings.
- Apply Synthetic Lubricant correctly: Place 2 to 3 drops of 3-In-One Electric Motor Oil or a non-flammable silicone lubricant directly onto the rotating motor shaft bearings near the motor housing. Turn the shaft manually to work the oil into the assembly before turning power back on.
Diagnostic Table: Symptoms, Causes, and Quick Fixes
Use this diagnostic reference to quickly identify and solve common operational issues with your ventilation fan:
Maintenance Schedule & FAQ Section
Establishing a regular maintenance schedule ensures optimal ventilation, protects indoor air quality, and prevents premature motor failure. Addressing common operational questions helps extend the lifespan of your exhaust fan while keeping energy consumption low.
How Often Should You Clean a Bathroom Fan Vent?
Perform a light surface clean every three months and commit to a full deep clean at least twice a year. High-use family bathrooms or rooms prone to high humidity may require more frequent attention to maintain proper air volume exchange.
- Bi-Annual Maintenance: Schedule deep cleaning twice a year—ideally during spring and autumn—to remove internal lint buildup and wash the ceiling cover thoroughly.
- Seasonal Surface Clean: Vacuum the outer grille every 3 months during routine house cleaning to prevent heavy dust accumulation from settling on fan blades.
- High-Humidity Environments: Increase cleaning frequency to every 2 to 3 months if your bathroom lacks windows, experiences heavy daily shower use, or shows early signs of mildew growth.
Does Cleaning Dust Out of a Fan Make it Work Better?
Removing dust buildup directly improves fan performance by restoring designed CFM (Cubic Feet per Minute) airflow rates, lowering operating noise, and stabilizing motor temperatures.
- Restores Full CFM Performance: Clearing clogged vents allows the blower wheel to pull maximum steam and moisture out of the room, preventing foggy mirrors and wall condensation.
- Prevents Motor Overheating Risk: Dust acts as an insulating blanket on motor housings. Cleaning it away ensures proper heat dissipation, extending the motor’s operational lifespan.
- Improves Energy Efficiency: A clean fan motor rotates smoothly without extra friction, consuming less electricity while running more quietly.
Is it Safe to Leave a Bathroom Exhaust Fan Running Overnight?
Leaving a bathroom exhaust fan running continuously overnight is not recommended, as prolonged operation without supervision poses a potential fire hazard prevention risk if motor bearings fail or overheat.
- Overheating Hazard: Older fan motors lacking thermal overload protection can overheat if run continuously for hours, escalating fire risks if lint is present inside the housing.
- Optimal Run Time: Run your exhaust fan for 20 to 30 minutes after a shower—long enough to clear moisture completely without straining the motor assembly.
- Use a Countdown Timer: Replace standard toggle switches with an automated countdown timer switch to shut off power automatically after 30 minutes, ensuring safety and energy savings.

Oscar Vance | Master Plumber & Drainage Expert
Meet Oscar Vance, a licensed master plumber sharing practical solutions on residential repairs, preventive maintenance, and thoughtful home upkeep.