The Diagnosis Matrix & Immediate Triage
 When electrical outlets stop working in one room, the problem almost always stems from a tripped circuit breaker, an activated GFCI outlet, or a loose wire connection on the circuit loop. Identifying the exact symptom pattern instantly narrows down whether you are dealing with a simple switch reset or a localized wiring issue.
Match Your Symptoms
Use this diagnostic reference to pinpoint the root cause based on what is currently functioning in the affected area:
Scenario A: Outlets Dead, but Room Lights Work Normally
If the ceiling lights and wall fixtures turn on fine, the main branch circuit breaker feeding the room is active. Modern home wiring routes lighting circuits separately or places receptacle outlets downstream from a protective safety device.
Check for these common causes when lights function but receptacles remain dead:
- Upstream GFCI Activation: A ground fault circuit interrupter outlet located in an adjacent bathroom, garage, or hallway may be feeding power to the non-working bedroom or living room outlets. Pressing “RESET” on that upstream unit restores the entire chain.
- Switched Outlet Control: Half or all of an outlet receptacle may be connected to a wall switch intended for floor lamps. Ensure all wall switches in the room are turned to the “ON” position.
- Loose Receptacle Connection: A back-stabbed wire or loose terminal screw at the first outlet in the daisy-chain loop cuts off electrical current to every outlet wired downstream from it.
Scenario B: Both Outlets and Lights Are Completely Dead
A complete room power outage indicates that the primary branch feed supplying the entire zone has been interrupted at the source. This typically occurs directly inside your main electrical panel due to an overload or short circuit.
Perform these steps to triage a total room shutdown safely:
- Locate the Main Electrical Panel: Open the breaker box and scan the column of switches corresponding to the dead room’s label.
- Identify a Half-Tripped Breaker: A tripped circuit breaker does not always flip entirely to “OFF.” It often rests in a spring-loaded middle position between “ON” and “OFF.”
- Execute a Full Manual Reset: Firmly push the switch handle all the way to the “OFF” position until it clicks, then push it back to “ON.”
- Clear Circuit Overloads: Unplug high-draw appliances like space heaters, vacuums, or air conditioners before resetting to prevent the breaker from tripping instantly upon reactivation.
Safety First: Essential Precautions Before You Touch Anything
Electrical troubleshooting carries inherent risks of severe shock, thermal burns, or arc flashes if basic safety protocols are ignored. Before removing any outlet covers or inspecting internal wiring, you must verify that power is fully isolated and equip yourself with proper diagnostic tools to prevent accidental injury.
When to Stop DIY and Call a Licensed Electrician Immediately
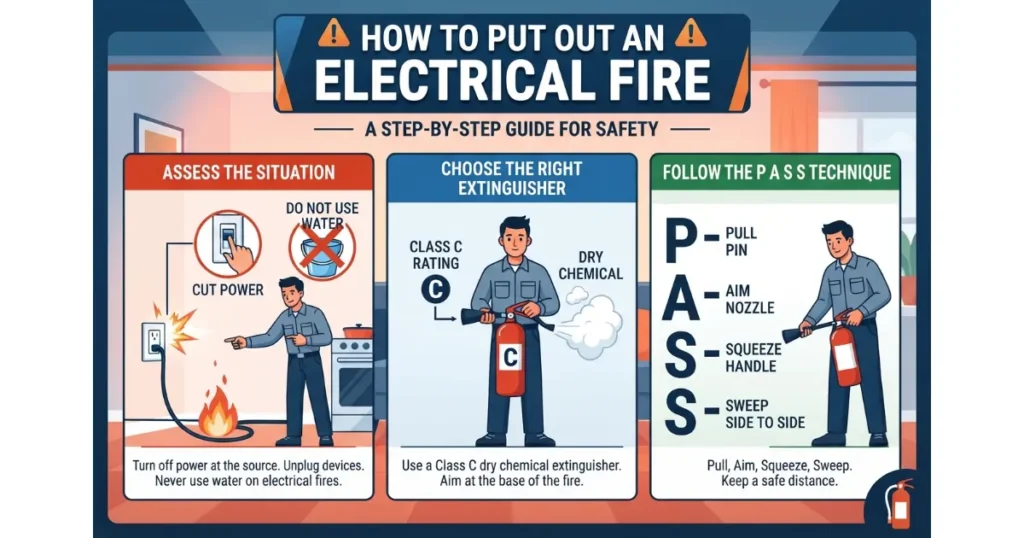
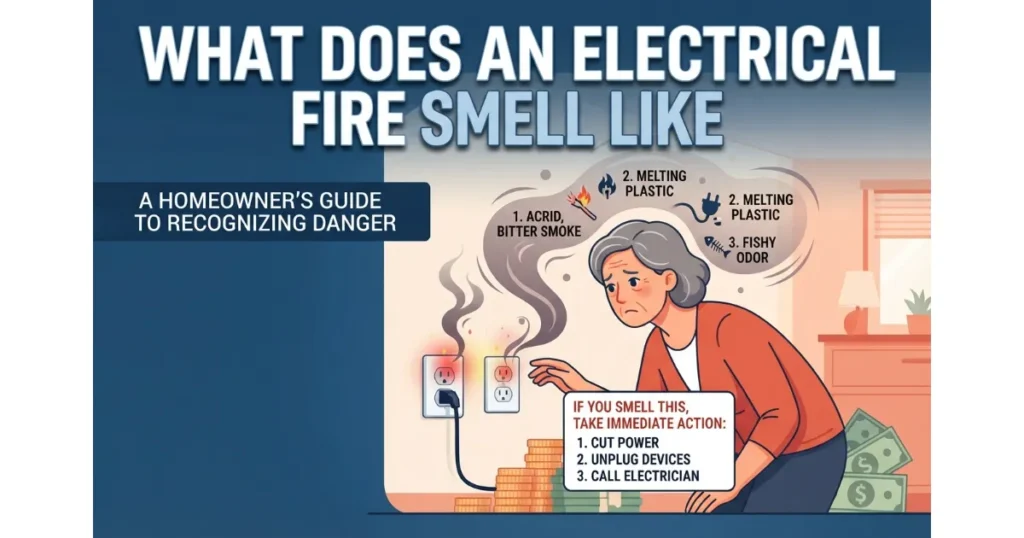
Knowing your limits prevents dangerous electrical fires, severe shocks, and code violations. You must stop DIY troubleshooting and call a professional electrician immediately if you encounter persistent burning odors, visible charring, or breakers that trip repeatedly under load.
- Burning Smells or Discoloration: A faint plastic odor or dark scorch marks on a faceplate indicate active overheating behind the drywall.
- Sparking or Audible Crackling: Any buzzing sound or visible spark when plugging in devices signals a dangerous short circuit.
- Aluminum Branch Wiring: Homes built between the mid-1960s and mid-1970s often feature aluminum wiring, which requires specialized anti-oxidant paste and professional mitigation.
- Unresponsive Breakers: If a circuit breaker trips instantly upon being reset, do not force it back on, as a permanent fault exists in the line.
Essential Safety Gear: Non-Contact Voltage Testers and Multimeters
Never rely solely on a tripped breaker indicator or assumed switch positions; always verify zero electrical energy using specialized test equipment. A non-contact voltage tester and a digital multimeter provide absolute proof that a circuit is safe to touch.
- Non-Contact Voltage Tester: Hold the sensor tip against the wire or outlet slot. A flashing LED and audible alarm instantly signal live AC voltage without requiring direct metal contact.
- Digital Multimeter: Set the selector dial to AC voltage mode to measure precise voltage differentials between hot, neutral, and ground wires inside the electrical box.
- Insulated Hand Tools: Always use screwdrivers and pliers featuring handles rated and tested for electrical insulation to guard against accidental slips.
The 3 Main Culprits When Outlets Fail in a Single Room
When all outlets in a single room stop working unexpectedly, the root cause is almost always rooted in one of three common electrical issues. Identifying these specific failures allows you to restore power safely without unnecessary troubleshooting.
Culprit 1: The “Invisible” Half-Tripped Breaker
A circuit breaker can be fully tripped and cut power to a room even when its toggle switch looks like it is still in the “ON” position. Internal spring mechanisms frequently trip into a neutral or middle state, making visual inspection deceptive at your main electrical panel.
According to safety standards outlined by the Electrical Safety Foundation International (ESFI), overloaded residential circuits account for a vast percentage of sudden residential power failures. To correct an invisible half-tripped switch, perform these manual steps:
- Locate the Panel: Open your breaker box and find the labeled switch corresponding to the affected room.
- Force the Toggle: Push the switch firmly all the way to the “OFF” position until you feel and hear a distinct mechanical click.
- Reset to On: Flip the switch firmly back to the “ON” position to re-engage internal contacts.
Culprit 2: The Hidden Ghost GFCI Outlet (Garage, Bathroom, or Exterior Loops)
Many homeowners assume a dead room means a local wiring failure, but power is frequently routed through a remote ground fault circuit interrupter located elsewhere in the house. Daisy-chained outlets in bedrooms and living rooms are often wired downstream from wet-area safety devices.
When a remote GFCI trips, it instantly kills power to standard outlets connected to its load terminal. Check these common locations for a tripped GFCI reset button:
- Bathrooms and Kitchens: Countertop receptacles near water sources frequently trip due to minor moisture or appliance surges.
- Garages and Basements: Outlets exposed to humidity or fluctuating temperatures often share circuits with interior rooms.
- Exterior Walls: Outdoor patio or porch receptacles are prime candidates for tripping during rainstorms, cutting indoor downstream power.
Culprit 3: Tripped Appliance Short-Circuits
An internal electrical fault in a plugged-in appliance, frayed cord, or damaged power strip can cause an immediate short circuit that disables a room’s power feed. When current bypasses its normal path, safety protection systems instantly cut the circuit.
Isolate and test for appliance-driven short circuits using these steps:
- Unplug Everything: Remove all lamps, chargers, space heaters, and electronic devices from every dead outlet in the room.
- Reset the Protection: Go to the breaker panel or upstream GFCI and reset the circuit.
- Isolate the Culprit: Plug devices back in one by one to identify which specific unit causes the power to drop again.
Advanced Troubleshooting: Fixing Loose Wires & Daisy-Chain Breaks
When breakers and GFCIs check out fine, the failure usually hides inside the electrical box as a loose connection or broken continuity along a daisy-chain loop. Physical wiring degradation—specifically involving loose terminal screws or failed back-stabbed connections—breaks the electrical path, instantly killing downstream power in a room.
Inspecting Outlet Receptacles for Loose Terminal Screws
Thermal expansion and constant mechanical vibration from plugging and unplugging heavy devices can cause terminal screws on a receptacle to back out over time. When a hot or neutral terminal screw loosens, it interrupts circuit continuity, resulting in dead outlets further down the line.
- Turn off Main Power: Always shut off the corresponding circuit breaker and verify zero voltage with a tester before opening any electrical box.
- Extract the Receptacle: Carefully unscrew the outlet faceplate and pull the receptacle out of the wall box without touching exposed metal components.
- Check and Tighten Screws: Inspect every brass and silver terminal screw, tightening any loose connections firmly down onto the copper wire loops.
Back-Stabbed Wires vs. Side-Wired Connections: Why They Fail Over Time
Many residential outlets utilize push-in wire connectors on the back—commonly called back-stabbing—which rely on a weak internal spring clip instead of a solid screw clamp. These spring clips degrade rapidly under normal thermal cycling and electrical loads, leading to intermittent power failures or burned insulation.
- The Flaw of Push-In Terminals: Spring tension diminishes under continuous current load, causing high resistance, arcing, and complete loss of connection.
- Upgrading to Side-Wiring: Snip the old straight wire ends, strip a fresh half-inch of insulation, and loop the solid copper clockwise around the side terminal screws.
- Securing Mechanical Clamps: Tightening the side screws creates a permanent mechanical bond that withstands years of thermal expansion without slipping.
Tracing the First Outlet in the Daisy-Chain Loop
Residential branch circuits are typically wired in a daisy-chain configuration, meaning power flows from the breaker panel into the first receptacle before jumping to subsequent units. If the very first outlet in the sequence experiences a broken neutral wire or severed hot connection, every outlet wired downstream will completely stop working.
- Identify the Power Feed: Locate which receptacle serves as the primary entry point for the circuit cables coming directly from the breaker panel.
- Inspect Wire Nuts: Open the electrical box and check all wire nuts where black or white wires are bundled; a loose twist breaks the entire upstream loop.
- Resecure Splices: Strip damaged conductor ends, twist them tightly together with lineman’s pliers, and twist on a fresh, properly sized wire nut.
Complex Edge Cases: Storm Surges, AFCI Breakers, and Shared Neutrals
When standard troubleshooting fails to locate a tripped breaker or a loose terminal, complex circuit anomalies may be responsible for the loss of power. Understanding how voltage spikes, sensitive protection devices, and shared neutral paths function allows you to resolve persistent or unusual room-wide outages.
Power Outages Following Lightning Storms or Surge Events
High-voltage line transients from lightning strikes or grid utility spikes can permanently damage sensitive internal components in circuit interrupters without tripping the main breaker switch. Internal sense circuits inside GFCIs and electronic devices are particularly vulnerable to sudden voltage surges.
- Internal Component Failure: A severe power surge can fry the internal PCB or solenoid inside a GFCI outlet, locking it in a permanently tripped condition where the “RESET” button fails to engage.
- Latent Insulation Damage: Sudden voltage spikes can breach conductor insulation inside junction boxes, creating an intermittent ground fault that disables downstream receptacles.
- Replacing Protection Devices: If a GFCI outlet refuses to reset after a storm despite receiving full line voltage at its input terminals, the internal module has failed and requires replacement.
Understanding AFCI (Arc-Fault Circuit Interrupter) Breakers
Modern electrical codes require arc-fault circuit interrupter (AFCI) breakers to detect dangerous electrical arcing—sparking across loose or damaged wires that could ignite nearby building materials. Unlike standard thermal-magnetic breakers, AFCI units use advanced microprocessors to continuously monitor wave frequencies.
- Detecting Parallel and Series Arcs: AFCI breakers trip when they detect irregular current signatures caused by damaged cord insulation, loose wire connections, or pierced wires behind drywall.
- Nuisance Tripping from Electronic Loads: Certain appliances with brushed motors (like older vacuums or power tools) or malfunctioning electronic power supplies can trigger false arc-fault trips.
- Diagnostic LED Indicators: Modern AFCI breakers feature built-in diagnostic LEDs that flash specific fault codes upon tripping, helping identify whether the issue is a arc fault or a standard overload.
Multi-Wire Branch Circuits and Lost Neutrals
A multi-wire branch circuit (MWBC) uses two hot wires sharing a single neutral conductor to supply two separate 120V circuits. If the shared neutral connection opens or breaks anywhere along the line, erratic voltage conditions develop across both circuits, causing partial room outages and severe equipment hazards.
- The Lost Neutral Phenomenon: When a shared neutral opens, connected 120V circuits fall in series across 240V lines, causing light fixtures to glow dimly while outlets lose functional operating voltage.
- Simultaneous Power Disruption: A single broken neutral in an MWBC can cause half the outlets in a bedroom to die while simultaneously causing fixtures on the shared phase to fluctuate wildly.
- Identifying Open Neutrals: Using a digital multimeter, check voltage across hot and neutral slots; a floating or fluctuating reading below 120V confirms a compromised neutral return path.
Frequently Answered Questions
Addressing specific questions regarding non-tripped breakers, partial room outages, and expected repair expenses helps pinpoint the underlying issue and plan for any necessary professional repairs.
Can a circuit breaker go bad without tripping?
Yes, a circuit breaker can fail internally without ever flipping into a tripped or middle position. Electrical components inside older or overloaded breaker switches can degrade over time, leading to mechanical failure or loss of electrical continuity.
- Internal Mechanical Failure: The internal spring or contact mechanism can wear out, causing the breaker to remain stuck in the “ON” position while refusing to pass electrical current through to the circuit.
- Thermal Degradation: Repeated overheating can burn or corrode the internal contacts, creating high electrical resistance that blocks voltage transfer entirely.
- Testing for Output Voltage: A professional electrician tests for a faulty breaker by checking if voltage is present at the terminal lug on the breaker panel when the switch is set to “ON.”
What does it mean when only two outlets in a bedroom stop working?
When only two outlets in a room fail while the remaining outlets and lights continue working normally, the circuit breaker and main power supply are functioning fine. The issue is localized specifically to those two receptacles or the connection feeding them.
- Broken Daisy-Chain Connection: The wire carrying power from the last working outlet to the first dead outlet has come loose, disconnected from a terminal screw, or slipped out of a wire nut.
- Failed Receptacle Component: An internal contact inside the last working outlet in the sequence may have burned out, breaking the feed to the downstream units.
- Damaged Back-Stabbed Wire: Pushed-in wires on the back of the receptacle can slip out due to thermal expansion, isolating the subsequent outlets on that loop.
How much does it cost to replace a faulty breaker or outlet?
The total expense for resolving dead outlet issues depends heavily on whether the repair involves a basic receptacle replacement or panel-level work performed by a licensed professional electrician.
- DIY Outlet Replacement: Replacing a standard outlet or GFCI receptacle yourself costs between $3 and $30 for parts, plus basic diagnostic tools if needed.
- Professional Electrician Service Call: Hiring a licensed electrician typically involves a base service call fee ranging from $75 to $150, with hourly labor rates averaging $50 to $120 per hour.
- Circuit Breaker Replacement Cost: Replacing a standard single-pole breaker generally costs between $150 and $250 total, while specialized AFCI or double-pole breakers can cost $200 to $350 including parts and professional labor.

Oscar Vance | Master Plumber & Drainage Expert
Meet Oscar Vance, a licensed master plumber sharing practical solutions on residential repairs, preventive maintenance, and thoughtful home upkeep.