Diagnosis & Immediate Cause
 When an electrical outlet stops working but the circuit breaker isn’t tripped, the issue is usually a tripped upstream GFCI outlet, a loose wire connection behind the receptacle, or an internal breaker trip. Restoring power requires checking nearby GFCIs and inspecting connections safely.
Why Your Outlet Stopped Working When the Breaker Isn’t Tripped
A dead outlet with a non-tripped circuit breaker almost always stems from a localized circuit interruption rather than a total panel failure. The most common cause is a tripped Ground Fault Circuit Interrupter (GFCI) located earlier in the same electrical chain.
Because multiple standard receptacles often connect to a single GFCI for safety, a ground fault in one area will cut power to every downstream receptacle on that branch.
- Upstream GFCI Interruption: A tripped GFCI outlet in a bathroom, kitchen, garage, or outdoor location can shut off standard outlets in adjacent rooms.
- Internal Breaker Shift: A circuit breaker can trip internally without the plastic handle noticeably shifting to the “OFF” position.
- Wiring Disconnection: Physical wire terminal movement or push-in connector failures can sever the electrical path directly at the outlet box.
The Top 3 Culprits Behind a Dead Receptacle
Troubleshooting a non-functioning electrical receptacle requires systematically evaluating the three primary points of failure within a residential branch circuit.
Identifying whether the problem originates from a protective device, physical wiring, or the breaker panel ensures targeted and safe electrical repairs.
- Tripped Upstream GFCI Outlet:GFCI outlets protect against current leaks. When triggered, the internal mechanism cuts power to its own sockets and all downstream outlets connected to its load terminals. Pressing the “RESET” button on any tripped GFCI in your home often restores power immediately.
- Loose or “Backstabbed” Wire Connections:Outlets wired using push-in terminals (backstabbing) on the back of the receptacle frequently fail over time due to thermal expansion and contraction. A loose hot or neutral wire breaks the circuit continuity, disabling that specific dead outlet and any outlets further down the line.
- Half-Tripped Circuit Breaker or Failed Receptacle:Some circuit breakers trip internally while the lever remains in the “ON” position, appearing fully operational upon visual inspection. Additionally, internal mechanical wear or arcing damage inside the receptacle housing can permanently disable the outlet.
The Hidden GFCI Chain Reaction
When an electrical outlet stops working unexpectedly, the root cause is rarely the outlet itself or the breaker panel. Instead, a tripped Ground Fault Circuit Interrupter (GFCI) located elsewhere in the house frequently interrupts power to a daisy-chained branch of downstream receptacles.
Understanding Upstream vs. Downstream Outlets (The Daisy-Chain Effect)
Residential wiring relies on a daisy-chain configuration where electrical current flows from one receptacle box to the next along a single branch circuit. A GFCI receptacle placed at the beginning of this chain acts as a master guardian for all standard outlets wired after it.
Understanding how power travels through line and load terminals explains why a tripped GFCI in one space renders completely unrelated outlets dead:
- Line Terminals: Incoming power from the circuit breaker panel connects directly to the “LINE” screw terminals on the GFCI receptacle, supplying it with live voltage.
- Load Terminals: Outgoing cables connected to the “LOAD” terminals carry protected power from the GFCI to subsequent standard outlets on the circuit.
- The Chain Reaction: When a ground fault occurs—even from a plugged-in appliance miles away on the load side—the GFCI internal sensor trips, cutting off current to its load terminals and instantly killing power to every downstream receptacle.
How to Locate Hidden or Forgotten GFCI Outlets in Your Home
Finding a tripped GFCI can be frustrating because building codes historically allowed a single bathroom or garage GFCI to protect receptacles in entirely separate rooms. To restore power to a dead outlet, you must hunt down every hidden master receptacle in your living space.
Systematically checking unconventional zones where moisture or outdoor exposure triggers GFCIs quickly uncovers the hidden culprit:
- Bathrooms & Powder Rooms: Check behind towels, toiletries, or lower cabinets near sinks where GFCIs are frequently installed at low heights.
- Kitchens & Wet Bars: Inspect receptacles located near countertops, under sinks (for dishwashers or garbage disposals), and pantry walls.
- Garages & Basements: Look behind stored boxes, holiday decorations, or workbenches where garage outlets often feed exterior patio receptacles or outdoor landscape circuits.
- Utility Rooms: Check near washing machines, water heaters, and unfinished utility walls.
Testing and Resetting the Master GFCI Outlet
Once you locate the master GFCI receptacle controlling your dead outlet branch, clearing the internal fault and resetting the mechanism requires a specific physical sequence to ensure full continuity restoration.
- Inspect the Face of the Receptacle:Locate the two rectangular buttons positioned between the plug slots. A tripped GFCI will show the “TEST” button pushed inward or flush, while the “RESET” button remains extended outward.
- Execute the Manual Reset Sequence:Firmly press the “TEST” button first until you hear a distinct clicking sound, which confirms the internal mechanical latch releases completely. Then, push the “RESET” button inward until it locks firmly into place with another audible click.
- Verify Circuit Continuity:Return to your previously dead standard outlet and test it with a lamp or voltage tester. If the reset button immediately pops back out or fails to latch, a persistent ground fault or short circuit exists somewhere along the daisy-chain circuit.
Inspection & Troubleshooting the Breaker Panel
A circuit breaker that looks completely normal can still be the reason an outlet has lost power. Circuit panels often mask internal electrical trips or mechanical spring failures, requiring specific diagnostic steps to confirm whether power is actually leaving the breaker.
The “Half-Tripped” Breaker Illusion: How to Properly Cycle a Circuit Breaker
Modern circuit breakers feature an internal trip mechanism designed to disconnect power rapidly during an overload or short circuit. However, the external breaker handle does not always flip entirely to the “OFF” position when this safety trigger activates.
Instead, the switch handle often remains in a middle position or stays aligned with live switches while resting completely limp. To ensure a circuit breaker is fully engaged, follow this precise reset procedure:
- Locate the Suspect Breaker: Identify the single-pole breaker or double-pole breaker associated with the dead outlet’s branch circuit.
- Firmly Switch to OFF: Push the breaker handle firmly toward the “OFF” position until you feel a distinct mechanical click and the spring mechanism resets.
- Switch Back to ON: Flip the handle firmly back to the “ON” position. If it immediately snaps back to the center or feels spongy, an active short circuit remains on the line.
Can a Circuit Breaker Fail Without Visually Tripping?
Yes, a circuit breaker can fail internally while its physical switch handle remains firmly in the “ON” position. Over time, heat buildup, contact pitting, or mechanical spring fatigue inside the panel can prevent electrical current from passing through to the outlet wire.
Understanding the internal failure points helps distinguish between a bad breaker and a bad outlet:
- Internal Contact Wear: Arc erosion on internal metal contacts creates high resistance, completely blocking power transfer even though the handle looks engaged.
- Mechanical Latch Failure: The mechanical spring assembly inside the housing can snap or seize, leaving the external handle stuck while internal contacts remain open.
- Panel Bus Bar Corrosion: Oxidation or looseness where the breaker clips onto the live panel bus bar prevents 120 volts AC from entering the breaker itself.
Testing Breaker Voltage with a Multimeter (Safety First)
Verifying whether voltage is leaving a breaker requires careful diagnostic testing inside an open electrical panel. Always review safety guidelines from the Electrical Safety Foundation International (ESFI) before attempting any panel-level troubleshooting.
To safely determine if a breaker is supplying power using a digital multimeter or non-contact voltage tester, follow these steps:
- Safety Preparation:Stand on a clean, dry surface, wear safety glasses, and remove the outer dead-front panel cover to expose the breaker terminal screws. Do not touch the main panel bus bar or incoming service lugs with exposed hands or uninsulated tools.
- Set Up Your Multimeter:Turn the multimeter dial to measure AC Voltage (ACV or V~), ensuring the meter is set to a range higher than 120 volts AC (typically the 200V or 600V setting).
- Measure Terminal Voltage:Place the black probe lead on the grounded metal panel enclosure or neutral bus bar. Touch the red probe lead to the wire connection screw on the single-pole breaker being tested. A functional breaker will read approximately 120 volts AC; a zero reading confirms the breaker has failed or tripped internally.
Investigating Outlet Wiring & Physical Failures
When upstream GFCIs and breaker panels check out fine, the fault usually lies directly inside the outlet box. Inspecting the receptacle requires careful adherence to safety protocols, identifying improper installation techniques like backstabbing, and recognizing signs of thermal degradation.
Safety Precaution: Isolating Power Before Box Removal
Working on live electrical wiring presents severe electrocution and arc-flash hazards. Before touching any screws, wires, or tools inside a wall box, you must completely isolate power to that specific circuit.
Following a strict verification routine guarantees a hazard-free work environment during hands-on electrical repairs:
- Turn Off the Breaker: Flip the corresponding single-pole circuit breaker in your electrical panel to the “OFF” position and secure it with tape if working in a shared space.
- Verify Zero Energy: Test the outlet slots and faceplate with a non-contact voltage tester to confirm zero voltage before removing the wall plate.
- Double-Check with a Multimeter: Touch multimeter probes across the hot and neutral terminals to verify the circuit is completely dead.
The Danger of Push-In (“Backstabbed”) Wire Connections
Many builder-grade electrical outlets utilize push-in wire holes on the rear of the receptacle—commonly known as “backstabbing.” Instead of wrapping wire around side screws, solid copper conductors are simply shoved into spring-loaded internal clips.
Over time, these push-in connections frequently fail and interrupt power distribution across the branch circuit due to inherent structural flaws:
- Insufficient Surface Contact: A tiny spring clip holds backstabbed wires with minimal pressure compared to the high-torque grip of a side-screw terminal.
- Vibration and Pullout: Normal household activity, plugging in heavy appliances, or thermal movement can easily pull solid wires loose from spring grips.
- Intermittent Power Loss: A loosened backstabbed wire creates high electrical resistance, causing the outlet and all downstream receptacles to cut out intermittently.
How Thermal Expansion Loosens Screw Terminals Over Time
Even receptacles wired properly using side-screw terminals can lose connectivity after years of continuous use. Electrical current generates microscopic heat inside the receptacle housing during high-draw appliance operation.
This repeating thermal cycle of heating and cooling causes copper conductors and steel terminal screws to expand and contract at different rates, gradually working connections loose.
- Metal Creep: Constant thermal expansion pushes wires outward, reducing clamp pressure against the side-screw plate.
- Increased Resistance: Loose side screws create air gaps, generating concentrated heat that accelerates terminal oxidation.
- Permanent Fix: Stripping fresh insulation with a wire stripper and securely looping the hot wire (black), neutral wire (white), and ground wire (bare copper) clockwise around side-screw terminals prevents future loosening.
Identifying Melted Terminals, Burn Marks, and Arcing Signs
A dead outlet is frequently the result of severe electrical arcing or localized short circuits that melt internal components. Ignoring these physical damage signs creates a major fire hazard.
Inspecting the receptacle housing and surrounding wall structure requires looking for specific indicators of thermal failure:
- Discoloration and Melting: Brown or black scorch marks around the faceplate, plug slots, or side plastic housing indicate active electrical arcing.
- Damaged Wire Nuts: Check wire nuts inside the electrical box for melted wire insulation, soot, or charred copper conductors.
- Receptacle Replacement: If terminal burnouts or melted plastic are present, do not attempt to reuse the receptacle; replace it immediately with a heavy-duty commercial-grade outlet.
People Also Ask & Frequently Asked Questions
Addressing common troubleshooting questions clarifies complex electrical symptoms, helps identify hidden residential wiring faults, and provides safe guidance for resolving recurring receptacle problems.
Why are my electrical outlets suddenly not working in one room?
When outlets suddenly stop working in just one room while the breaker remains functional, the issue is typically a severed branch circuit connection, a tripped upstream GFCI device hidden in another area, or a broken wire splice inside a junction box.
Understanding these localized failures prevents unnecessary panel replacements and targets the exact point of interruption:
- Branch Circuit Failure: A broken wire nut or loose wire connection upstream stops current from reaching subsequent outlets on the same line.
- Hidden GFCI Protection: Builders often wire outlets across multiple bedrooms or living areas through a single shared bathroom or garage GFCI.
- Localized Overload: Excessive current draw can cause a temporary disruption or compromise wire splices within a single room’s wall boxes.
What would cause an outlet to have power but not work?
An outlet can test positive for voltage yet fail to power plugged-in appliances due to an open neutral connection, poor contact tension within the receptacle slots, or a wiring fault like reverse polarity that disrupts the complete electrical path.
Recognizing these hidden circuit anomalies explains why a multimeter might show 120 volts while devices refuse to turn on:
- Open Neutral Connection: A detached neutral wire breaks the return path, leaving voltage present without a closed loop to carry current.
- Worn Contact Springs: Aged metal receptacle clips lose tension, preventing proper physical contact with appliance plug blades.
- Reverse Polarity: Miswired hot and neutral terminals can create confusing voltage readings while disrupting proper device operation.
Can an outlet fail without tripping the breaker?
Yes, an electrical outlet frequently fails locally without tripping the circuit breaker when internal metal contacts burn out, terminal screws loosen from thermal expansion, or backstabbed wire connections pull free from their spring-loaded release clips.
These localized failures isolate the problem strictly to the receptacle device rather than the whole circuit:
- Terminal Burnouts: High-resistance arcing creates localized heat that melts internal metal paths without drawing enough total current to trip the breaker.
- Backstabbed Wire Detachment: Push-in wire connectors slip out easily under minimal stress, instantly cutting power to that specific outlet.
- Internal Mechanical Wear: Receptacle internal components wear out over decades of use, blocking continuity even with an active power supply.
Can a bad outlet start an electrical fire?
A faulty electrical outlet poses a serious electrical fire risk when loose terminal connections, continuous arcing, or thermal degradation generate extreme heat that melts surrounding plastic insulation, wire nuts, and nearby wooden framing materials.
Because these failures happen inside enclosed wall boxes, recognizing the dangers prevents catastrophic property damage:
- High-Resistance Arcing: Poor connections create continuous micro-arcs that burn at extremely high temperatures, igniting surrounding dust and paper backing.
- Melted Wire Insulation: Excessive heat strips protective jacketing off Romex cables, exposing bare copper to grounded metal boxes or wood studs.
- Prolonged Branch Stress: Damaged receptacles under heavy appliance loads accelerate thermal breakdown until a flame ignites.
What are the early warning signs of a faulty outlet?
Early warning signs of a failing electrical outlet include a warm or hot wall plate, a faint buzzing or crackling sound, visible scorch marks or discoloration, and plugs that easily slip or fall out of the receptacle slots.
Catching these symptoms early allows you to replace a dangerous receptacle before it fails completely or causes a fire:
- Warm Wall Plates: A receptacle faceplate that feels warm or hot to the touch indicates dangerous internal resistance or overloading.
- Buzzing or Crackling Sounds: Audible electrical noise signals active arcing or loose terminal connections inside the box.
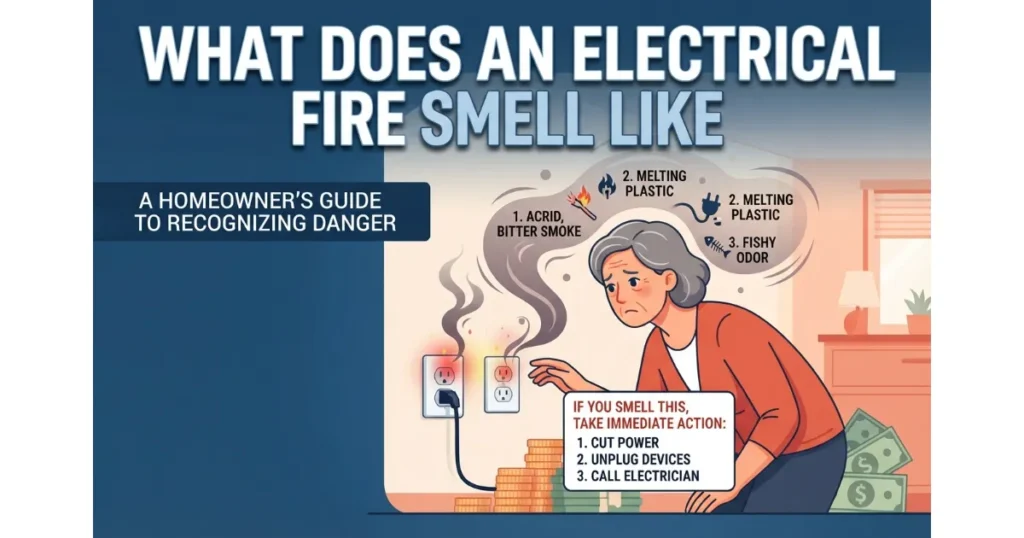
- Discoloration and Odors: Brown scorch marks, melted plastic, or a faint burning smell near the outlet require immediate power disconnection and replacement.

Oscar Vance | Master Plumber & Drainage Expert
Meet Oscar Vance, a licensed master plumber sharing practical solutions on residential repairs, preventive maintenance, and thoughtful home upkeep.