Can You Connect PVC to Copper Pipe?
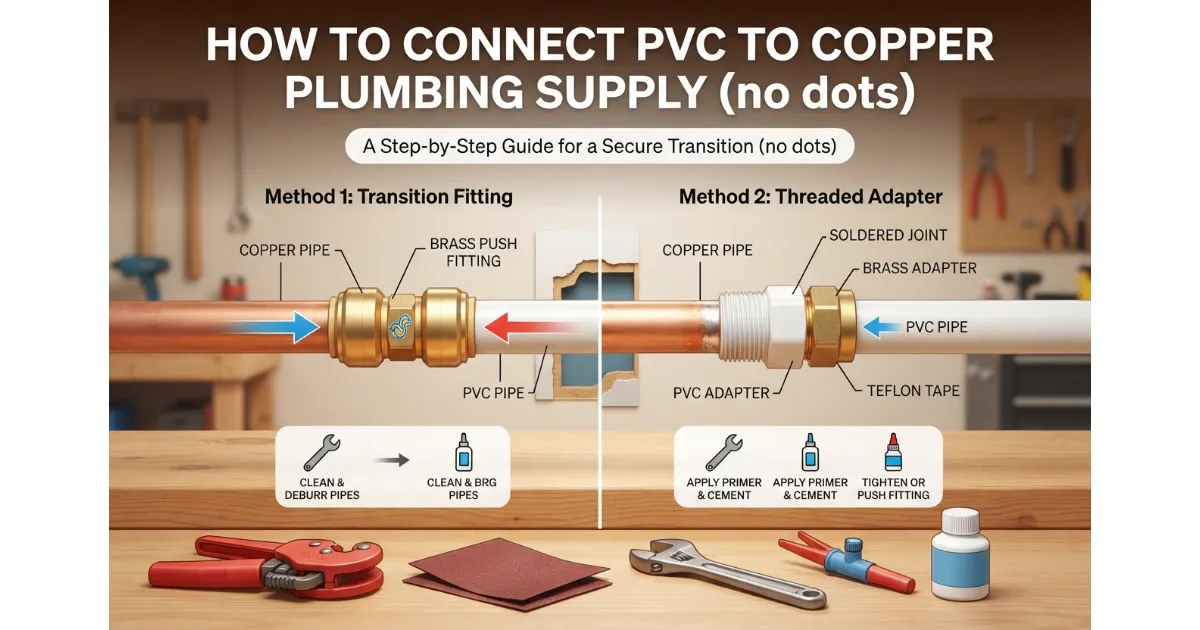 Connecting PVC directly to copper pipe using standard plumbing glue or solder is completely impossible because plastic and metal do not bond chemically or thermally. To join these two disparate materials successfully, you must always rely on a mechanical transition fitting or specialized adapter.
The 3 Safe Ways at a Glance
- Threaded Transition Adapter: Uses a male or female threaded PVC adapter connected to a matching copper or brass threaded fitting, sealed securely with PTFE tape and pipe compound.
- Push-to-Connect Fittings: Leverages modern push-to-fit connectors (such as SharkBite) with appropriate transition adapters built specifically for bridging copper and PVC supply pipes.
- Rubber/Compression Couplings: Employs heavy-duty shielded rubber couplings (like Fernco clamps) tightened with stainless steel bands, best suited for non-pressurized drain lines.
What This Guide Covers
- Supply vs. Drain Lines: Critical distinctions between high-pressure domestic water supply systems and gravity-fed DWV (drain, waste, and vent) configurations.
- Sizing and Dimensions: Methods for matching nominal copper tube sizes accurately with Schedule 40 PVC pipe outer diameters.
- Common Mistakes: Guarding against alignment errors, chemical degradation, and over-tightening that compromise structural integrity.
- Leak Prevention: Best practices for long-term maintenance, pressure testing, and troubleshooting unexpected joint weeping.
Before You Start: 5 Things to Check First
 Determining whether your project involves a pressurized domestic water supply or a gravity-fed drain, waste, and vent (DWV) system dictates the entire joining method. Supply lines handle high pressure and require threaded or push-to-connect adapters, whereas drain lines can utilize flexible rubber shielded couplings.
Hot Water or Cold Water?
Standard PVC pipe is strictly rated for cold water applications and will deform or fail under high temperatures. If your copper pipe carries hot water, you must use CPVC or another high-temperature rated material, always verifying manufacturer temperature limits before installation.
Check Pipe Size: Copper vs PVC Nominal Sizing
Copper tubing size (CTS) and iron pipe size (IPS) used for PVC do not share identical outer diameters, even when nominal sizes look the same. Always measure the actual outer dimensions of both pipes to ensure your transition fittings create a watertight seal without pinching or gaps.
Is the Joint Accessible?
Hidden or buried joints require permanent, code-compliant connection methods that will not fail over time behind drywall or underground. If a joint remains accessible in an open utility room or crawlspace, serviceable options like push-to-connect fittings or mechanical couplings become viable choices.
Check Your Local Plumbing Code
Building regulations governed by the International Plumbing Code (IPC) or Uniform Plumbing Code (UPC) dictate which transition materials are legal for specific applications. Consult your local plumbing inspector or municipal codes before starting to prevent failed inspections or costly rework.
Which Method Should You Choose?
Fast Decision Guide
Selecting the right approach depends entirely on your specific plumbing layout, available workspace, and system constraints. Review these targeted scenarios to lock in the correct installation path.
- Agar drain line hai, to: Use a shielded rubber coupling or a specialized no-hub coupling to easily bridge PVC and copper pipes without worrying about high-pressure sealing.
- Agar tight space hai, to: Opt for a push-fit adapter like a SharkBite fitting, which requires zero soldering and snaps securely onto both materials in seconds.
- Agar aapko zero soldering chahiye, to: Choose a mechanical compression fitting or push-fit connector to eliminate open flames entirely from your workspace.
- Agar long-term permanent supply fix chahiye, to: Install a threaded transition adapter backed by correct thread sealants for maximum reliability under high domestic water pressure.
Tools Materials & Approximate Cost
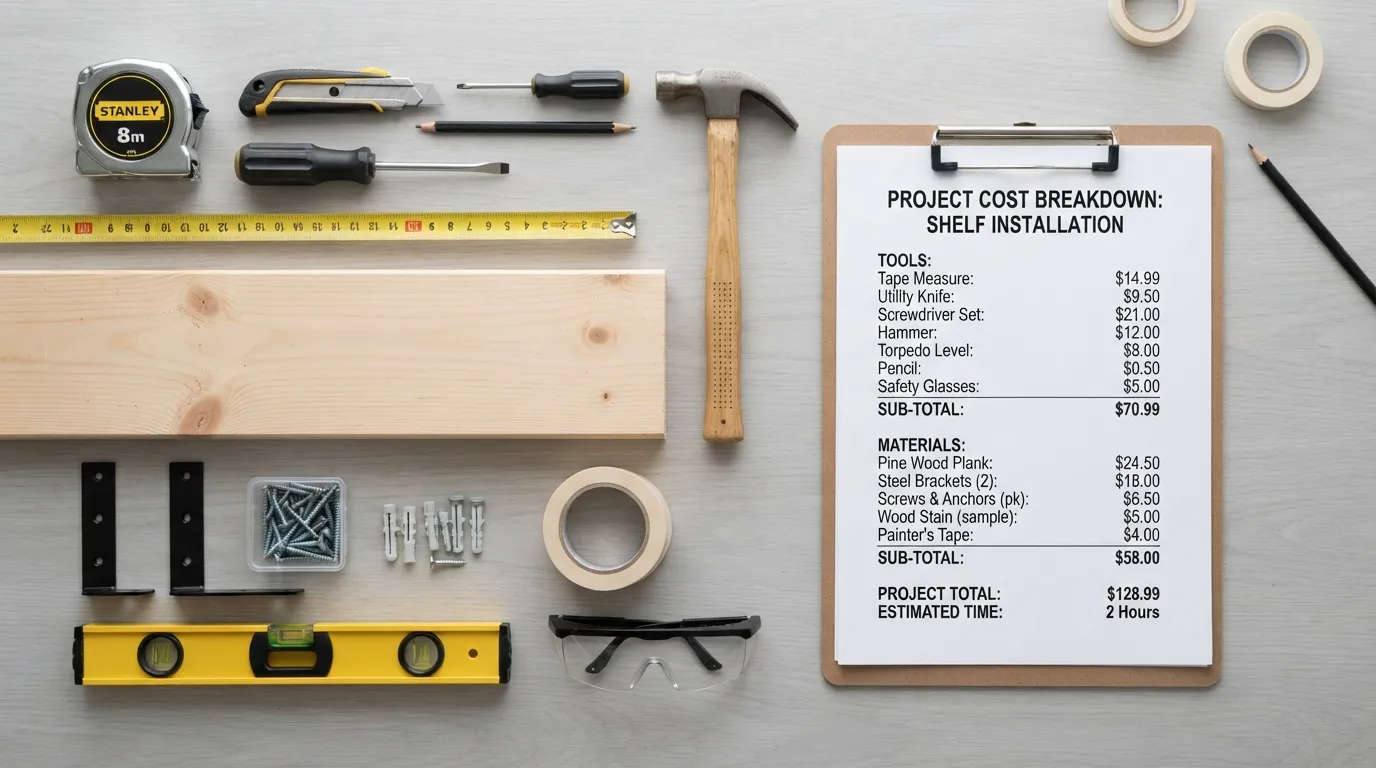 Having the correct tools on hand ensures clean cuts, proper deburring, and secure mechanical connections without damaging the pipe walls.
- Pipe Cutter: Essential for making clean, square cuts on both rigid copper tubing and plastic PVC lines.
- Deburring Tool: Removes sharp burrs and interior ridges from cut pipes to prevent turbulence and seal damage.
- Torch, Solder & Flux: Required if your chosen transition method involves soldering a copper adapter onto the metal pipe section.
- Channel Locks: Heavy-duty tongue-and-groove pliers for tightening threaded adapters and mechanical coupling bands securely.
- Tape Measure & Marker: Used for precise measuring and marking insertion depths prior to joining fittings.
Materials Checklist
Selecting the right chemical sealants and transition hardware ensures a leak-free junction that withstands operational pressures.
- Transition Adapters: Specific fittings such as female copper adapters, male PVC adapters, or push-to-fit connectors designed to bridge metal and plastic.
- PTFE Tape: Thread seal tape wrapped tightly around male pipe threads to lubricate and seal threaded joints.
- Plastic-Safe Thread Sealant: Pipe dope compatible with plastics to prevent chemical degradation and cracking on threaded plastic interfaces.
- PVC Primer and Cement: Chemical agents required to chemically weld PVC pipes and fittings permanently together.
Cost Range by Method
Plumbing repair costs vary based on the complexity of the transition method and whether you need to buy specialty tools or hardware components.
- Push-Fit Method: $15 to $35 total, driven primarily by the cost of specialized transition fittings.
- Threaded Adapter Method: $10 to $25, utilizing standard fittings, tape, and cement.
- Shielded Rubber Coupling Method: $12 to $30 for heavy-duty stainless steel banded couplings used on drains.
Threaded Transition Adapter
This is the gold standard for high-pressure domestic water supply lines where a permanent, rigid connection is required. Use a threaded transition adapter when joining pressurized copper supply pipes to PVC or CPVC lines in open spaces, water heater lines, or main shutoff assemblies.
The Golden Rule: Male Plastic Thread into Female Metal Fitting
Always screw a male plastic (PVC/CPVC) thread into a female metal (brass or copper) fitting, never the other way around. Metal male threads exert immense outward pressure on plastic female sockets, easily splitting or cracking the softer plastic under torque.
Step 1: Cut and Deburr the Copper Pipe
Use a wheel-type tubing cutter to make a clean, square cut on the copper pipe section. Thoroughly ream and deburr both the inside and outside edges using a deburring tool to remove metal shavings that could cause turbulence or catch debris.
Step 2: Solder the Female Copper Adapter First
Clean the copper pipe end and the female adapter socket with emery cloth, apply plumbing flux, and slide them together. Solder the joint securely using a propane torch, then allow the metal assembly to cool completely before bringing any plastic components nearby to avoid heat distortion.
Step 3: Wrap PTFE Tape on the Male Threads
Wrap PTFE thread seal tape 3 to 4 times tightly around the male plastic threads in a clockwise direction following the thread spiral. This lubricates the connection and fills microscopic gaps to prevent high-pressure leaks.
Step 4: Hand-Tighten Then Snug with a Wrench
Thread the plastic adapter into the cooled female copper fitting by hand until resistance is met. Use channel locks or an open-end wrench to snug it an additional 1 to 1.5 turns past hand-tight, stopping immediately if you feel excessive resistance to prevent cracking.
Step 5: Glue the PVC Side
Apply purple or clear PVC primer to the outside of the PVC pipe and the inside of the fitting socket to soften the plastic. Immediately coat both surfaces with PVC cement, push the pipe fully into the fitting with a quarter-turn twist, and hold firmly for 30 seconds while allowing the manufacturer’s recommended cure time before turning water back on.
Real-World Tip from Experience
Over-tightening plastic threads is the #1 cause of catastrophic joint failure during initial pressure tests. If you see white stress marks starting to turn white or bulge around the base of the plastic hex nut, you have gone too far; back it out, inspect for micro-fractures, and re-wrap with fresh tape.
Push-to-Connect SharkBite Fittings: What Works and What Doesn’t
Yes, modern universal push-to-connect fittings like SharkBite are officially certified to connect copper and PVC pipe together. However, the pipes must match exact nominal sizing standards and remain completely free of surface scratches or debris to allow the internal O-ring to form a watertight seal.
The Safe Way: Push-Fit to Threaded Adapter Then PVC
Many professional installers prefer using a push-fit copper-to-PEX/thread adapter combined with a threaded plastic adapter rather than relying on direct push-fit plastic insertion for rigid lines. This hybrid approach leverages the metal grip of the push-fit collar on the copper side while maintaining a robust mechanical screw joint on the plastic side.
Step by Step Installation
Correct installation procedures eliminate guesswork and ensure your push-fit connection remains secure under normal domestic water pressures.
- Clean: Wipe both the copper and PVC pipe ends completely clean of dirt, paint, grease, or oxidation.
- Deburr: Use a deburring tool to smooth out any sharp edges or outer ridges on the copper pipe so they won’t tear the internal O-ring.
- Depth Mark: Use a depth gauge tool or ruler to measure and mark the exact required insertion depth on the outer wall of both pipes.
- Push: Firmly push the fitting straight onto each pipe until it reaches the internal tube stop.
- Check: Verify that your depth mark aligns perfectly with the edge of the fitting, confirming the internal teeth have locked completely.
Why Do Some Plumbers Avoid SharkBite?
While push-fit connectors offer unmatched speed and convenience, traditional plumbers sometimes express hesitation regarding long-term reliability compared to soldered or solvent-welded joints. Critics point out that rubber O-rings can degrade over decades, and fittings left unsupported in high-stress or vibrating environments run a higher risk of unexpected slippage.
Do Push-Fit Fittings Eventually Leak? How Long Do They Last?
Certified push-to-connect fittings are engineered and rated to last upwards of 25 to 50 years under standard operating conditions, matching the lifespan of traditional plumbing systems. They do not automatically leak over time, provided they were installed with correct depth insertion, supported properly with pipe brackets, and kept free from structural twisting forces.
When Push-Fit Is a Good Idea and When It Isn’t
Knowing the operational boundaries of push-fit connectors saves you from future emergency plumbing repairs behind finished walls.
- Good Idea: Ideal for fast emergency repairs, wet lines that cannot be completely dried for soldering, awkward tight spaces, and temporary remodeling configurations.
- Isn’t a Good Idea: Avoid using them in inaccessible buried locations, behind permanent drywall without an access panel, or on high-stress lines subject to intense water hammer without proper expansion arrestors.
Compression Fittings
Compression fittings provide a reliable, mechanical method to join pipes completely without soldering, gluing, or open flames. They make sense when you are working in tight spots, tying into existing metallic lines, or working on systems that may need disassembly later for maintenance.
How to Install a Compression Fitting Step by Step
Correct assembly sequence ensures the brass ring creates a permanent, watertight bite onto the outer wall of the tubing.
- Slide the Nut: Slip the compression nut over the end of the pipe first, followed by the brass ferrule (compression ring) with its tapered end facing the fitting body.
- Position the Pipe: Push the pipe firmly into the body of the compression fitting until it bottoms out against the internal shoulder.
- Slide and Hand-Tighten: Slide the ferrule and nut down into the fitting threads, then turn the nut by hand until it engages smoothly.
- Torque Down: Hold the body steady with an open-end wrench and tighten the nut an additional 1 to 1.25 turns with a second wrench to crush the ferrule securely onto the pipe.
Limitations with Plastic Pipe
When using compression fittings involving softer plastic lines like PVC or PEX, you must always insert a brass or stainless steel pipe insert stiffener inside the inner diameter of the plastic. Without this structural insert, the outward pressure from the tightening ferrule will crush and collapse the flexible plastic wall, causing immediate leaks.
Compression vs Threaded vs Push-Fit
Compression fittings rely on a crushed brass ring for mechanical grip, making them ideal for serviceable intermediate joints. Threaded fittings offer permanent high-pressure security via tapered threads, while push-fit connectors trade permanence for maximum installation speed in tight quarters.
Connecting PVC to Copper Drain Pipes DWV
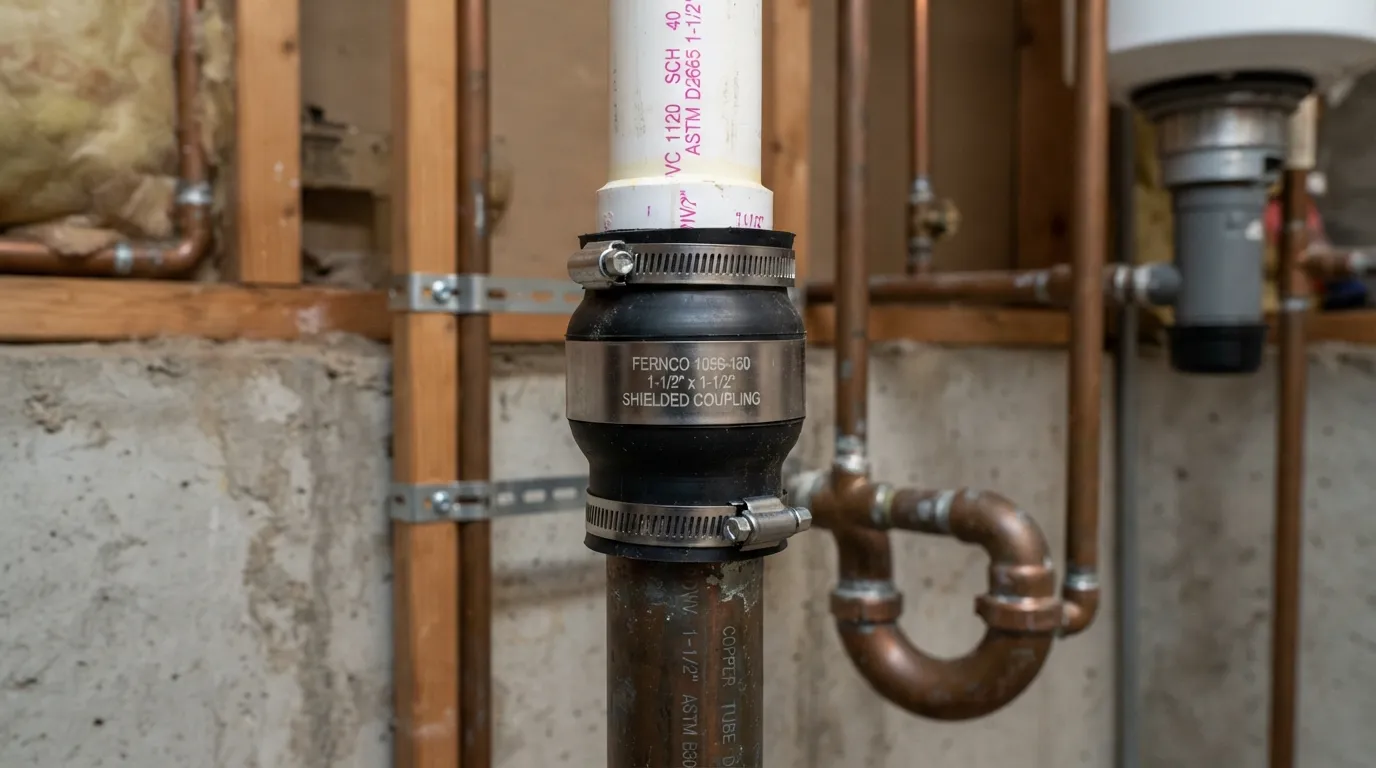 Drain, waste, and vent (DWV) systems operate under gravity flow rather than high internal pressure, completely changing how you join dissimilar pipes. Because drain pipes do not handle pressurized water, you do not need solvent welds or high-torque threaded adaptors, allowing for flexible mechanical connections that absorb minor shifts.
Using a Shielded Rubber Coupling
Shielded couplings (such as Fernco-style heavy-duty connectors) feature a thick elastomeric rubber sleeve encased in a stainless steel outer shell secured by adjustable hose clamps.
- Clean and Align: Cut both the copper and PVC drain pipes squarely and wipe away all grease, scale, or debris from the ends.
- Position the Sleeve: Slide the rubber coupling halfway onto the copper pipe, then slide the matching PVC pipe into the other end until nearly touching.
- Tighten Clamps: Use a nut driver or torque wrench to tighten the stainless steel hose clamps evenly to the manufacturer’s recommended inch-pounds specification.
Using a No-Hub Coupling
No-hub couplings are heavy-duty mechanical connectors engineered specifically to join cast iron, copper, and plastic pipes of similar outer dimensions in commercial or residential drain stacks. They provide superior structural rigidity and shear resistance compared to unshielded rubber sleeves, keeping the pipe alignment perfectly straight.
Copper-to-PVC DWV Adapters
If you prefer a rigid, solvent-welded connection on the plastic side, you can use a specialized copper-to-PVC DWV transition adapter. These fittings typically feature a solder-cup end that solders directly onto the copper drain pipe, transitioning to a hub or spigot connection where you can glue your PVC drain line.
Support and Alignment Tips
Drain lines rely entirely on correct physical grading and robust structural support to prevent joint sagging and clogs over time.
- Maintain Slope: Always ensure a downward slope of at least one-quarter inch per foot toward the main sewer or septic stack.
- Install Pipe Hangers: Securely clamp both the copper and PVC sections with sturdy pipe hangers within two feet of the transition coupling to eliminate dead weight strain.
PVC to Copper Size Guide: 1 2 3 4 1-1 2 2 3
Nominal pipe sizes do not reflect the actual outer diameter (OD) of the pipe, which frequently causes sizing confusion during transition installations. For instance, a 1/2-inch copper pipe has an actual outer diameter of 5/8 inch, whereas 1/2-inch PVC has an entirely different outer dimension, requiring specialized sizing adaptors to bridge the gap.
Size Reference Table
How to Connect 1-1 2 and 2 Copper to PVC
Medium-diameter connections like 1-1/2 inch and 2 inch are almost exclusively found in residential drain, waste, and vent systems. Because these lines handle gravity flow rather than high pressure, use a heavy-duty shielded rubber coupling or a compression-style DWV adapter to accommodate minor outer diameter variations between old copper and modern plastic pipes.
How to Connect 3 Copper to PVC
Larger 3-inch pipes carry heavy waste volumes and require maximum structural integrity to prevent sagging or joint separation under load. Always use a rigid, stainless-steel-banded transition coupling specifically engineered for large-diameter DWV applications, ensuring both pipe ends are supported securely with framing clamps on either side of the joint.
8 Common Mistakes to Avoid
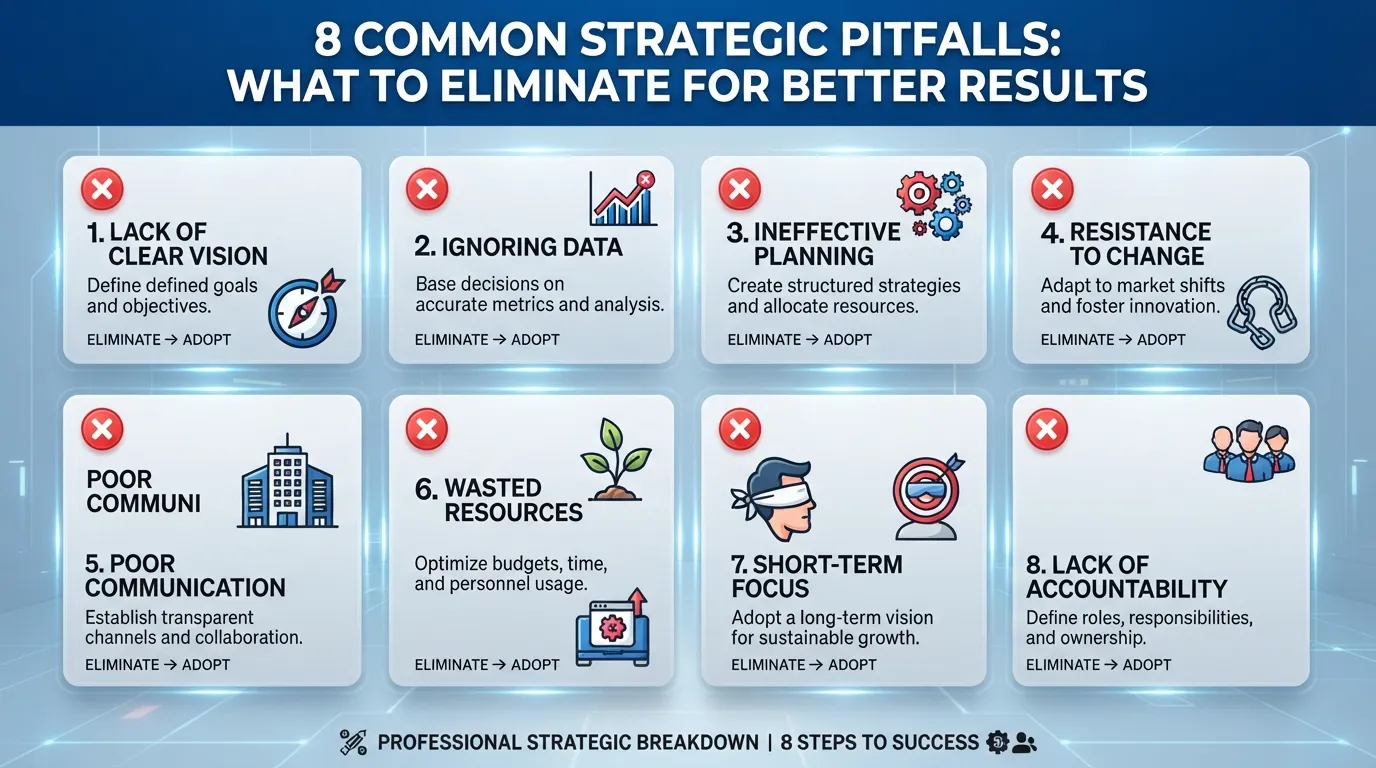 The Mistake: Threading a metal male adapter directly into a plastic female socket.
The Risk: Metal threads exert outward radial pressure that splits softer plastic sockets.
The Fix: Always thread a male plastic adapter into a female metal fitting.
Mistake 2: Over-Tightening Threaded Fittings
The Mistake: Forcing threaded connections past recommended turns using excessive wrench force.
The Risk: Cracking the fitting and causing hidden slow leaks.
The Fix: Hand-tighten plus 1 to 1.5 turns with a wrench maximum.
Mistake 3: Soldering Too Close to Plastic Components
The Mistake: Applying torch heat to a copper adapter while it is already connected to PVC.
The Risk: Melting, warping, and destroying the plastic pipe or rubber seals.
The Fix: Solder the copper adapter completely, let it cool, then attach the plastic line.
Mistake 4: Skipping the Pipe Deburring Step
The Mistake: Leaving jagged metal burrs or sharp plastic edges on freshly cut pipe ends.
The Risk: Puncturing internal O-rings or catching debris to cause clogs and turbulence.
The Fix: Always use a deburring tool to smooth inner and outer edges.
Mistake 5: Leaving Pipe Ends Dirty or Greasy
The Mistake: Gluing or pushing fittings onto pipes covered in oil, scale, or moisture.
The Risk: Preventing cement bonding and push-fit O-ring seals.
The Fix: Thoroughly clean and dry all pipe surfaces before joining.
Mistake 6: Using the Wrong Thread Sealant
The Mistake: Applying petroleum-based pipe dopes incompatible with plastic.
The Risk: Chemical degradation that causes plastic threads to become brittle and shatter.
The Fix: Use high-quality PTFE tape paired with a plastic-safe thread sealant.
Mistake 7: Using Standard PVC for Hot Water Lines
The Mistake: Installing regular PVC pipe on domestic hot water supply lines.
The Risk: Pipe softening, deformation, and catastrophic high-pressure bursting.
The Fix: Use CPVC or copper for hot water applications.
Mistake 8: Ignoring Pipe Size and OD Mismatches
The Mistake: Assuming nominal pipe sizes share identical outer diameters between copper and PVC.
The Risk: Creating loose, leaky joints that fail under pressure.
The Fix: Verify actual outer dimensions and use proper transition adapters.
How to Test the Connection and Fix Leaks
Testing your new transition joint carefully prevents hidden water damage before walls or utility areas are closed up. Always wait for solvent cement or thread sealants to fully cure according to manufacturer instructions before introducing water pressure. Slowly open the main water supply valve partway to let the pipes fill gently, preventing sudden water hammer shock. Wrap a dry paper towel around every new joint and inspect closely for any dampness or weeping droplets.
Why Is My PVC-to-Copper Joint Leaking?
Can PVC Fittings Be Removed?
Glued PVC fittings cannot be unscrewed or disassembled because solvent cement chemically melts and fuses the plastic components together into a single solid piece. To change a glued joint, you must cut the pipe using a hacksaw or cable saw just outside the fitting. Threaded and push-fit connections, however, are completely mechanical and can be unbolted or released easily for maintenance or replacement.
How to Redo a Bad Connection
If a joint fails your pressure test, follow these steps to correct the assembly safely:
- Shut Off and Drain: Turn off the main water supply valve and open nearby low-level faucets to completely drain trapped water from the lines.
- Remove the Faulty Part: Disassemble threaded fittings or cut out damaged glued sections using a clean pipe cutter.
- Clean and Prep: Scrape away old thread tape, dried cement, or pipe debris from remaining pipe sections, ensuring clean mating surfaces.
- Rebuild: Install new replacement fittings or adapters using correct installation protocols, proper sealants, and adequate cure times before retesting.
Plumbing Code Safety & When to Call a Professional
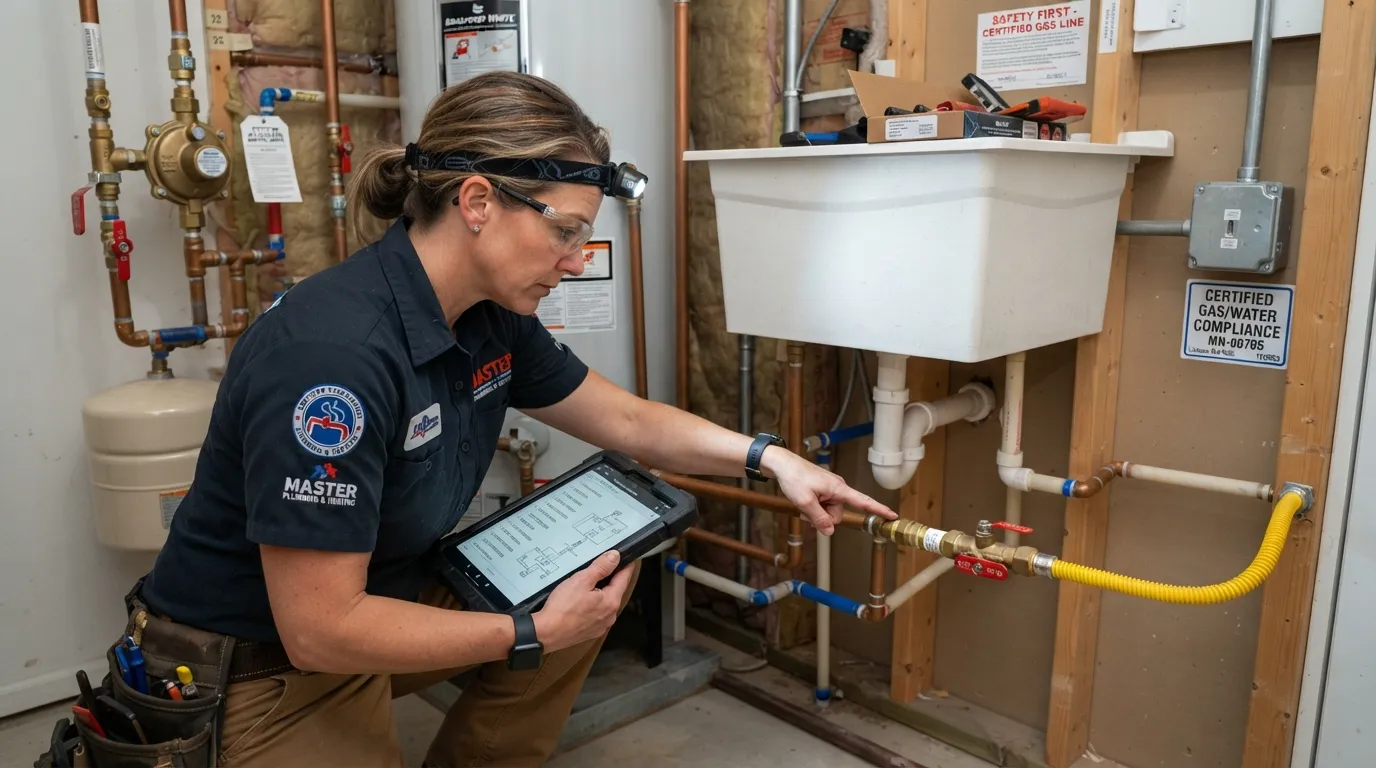 Transitioning from PVC to copper is fully code-compliant as long as you use approved mechanical fittings, proper sizing, and materials rated for the specific application. Building regulations governed by the International Plumbing Code (IPC) and Uniform Plumbing Code (UPC) dictate that transition joints must remain accessible or use certified permanent fittings if concealed. Always verify local municipal codes or check with your regional building department before starting major plumbing modifications.
Water Heater and Hot Lines: Special Caution
Never connect standard PVC pipe directly to water heater outlets or domestic hot water supply lines. Water heater outputs routinely exceed standard PVC temperature limits, which can cause the plastic pipe to soften, deform, and rupture under pressure. Always utilize copper, CPVC, or approved flexible water heater connector lines for hot water applications.
Gas Lines Are Different
This guide is exclusively designed for water supply and drain, waste, and vent (DWV) systems. Never attempt to use PVC, standard copper, or household plumbing transition fittings for gas lines. Gas systems require specialized yellow brass, black iron, or corrugated stainless steel tubing (CSST) installed under rigorous safety codes to prevent catastrophic leaks or explosions.
When to Hire a Licensed Plumber
While DIY plumbing repairs are manageable for confident homeowners, certain complex situations require professional expertise. Call a licensed plumber if you encounter main shutoff valves that fail to seal completely, intricate multi-material stack repairs behind finished walls, sewage line leaks, or situations where local permits and licensed inspections are legally required.
FAQs
Can you connect PVC to metal plumbing?
Yes, you can connect PVC to metal plumbing like copper or steel, but you cannot join them directly with glue or solder. You must always use a mechanical transition fitting, such as a threaded adapter, push-to-connect fitting, or shielded coupling, to bridge the two dissimilar materials safely.
What type of coupling connects copper pipe to PVC?
The correct coupling depends entirely on whether your project involves a water supply line or a drain line. For pressurized supply lines, use a threaded transition adapter or a push-fit fitting. For non-pressurized drain lines, a heavy-duty shielded rubber coupling (Fernco-style) is standard.
How do I connect plastic pipe to copper?
Connecting plastic pipe to copper requires a mechanical transition fitting designed for the specific pipe type. For threaded setups, screw a male plastic adapter into a female brass or copper fitting sealed with PTFE tape, or use a certified push-to-fit connector for tool-free assembly.
What is the best way to connect PVC to copper?
The best and most reliable method for permanent water supply lines is a threaded brass-to-plastic transition adapter. This provides a rigid, high-pressure-rated connection that withstands household water pressure without relying on rubber O-rings or temporary seals.
Do professional plumbers use SharkBite?
Yes, professional plumbers frequently use push-to-connect fittings (like SharkBite) for emergency repairs, wet tie-ins, and tight spaces. While traditional soldered or glued joints remain preferred for long-term permanent installations, push-fit fittings offer unmatched speed and convenience.
Do SharkBite fittings eventually leak?
Certified push-fit fittings do not automatically leak over time if installed correctly and rated for a 25-to-50-year lifespan. However, they can fail if the pipe wasn’t deburred, wasn’t inserted to the full depth mark, or if the joint is subjected to excessive physical stress and vibration.
Is a dielectric union needed between PVC and copper?
No, a dielectric union is not needed between PVC and copper because plastic and copper do not undergo galvanic corrosion. Dielectric unions are specifically required to prevent electrochemical corrosion when joining two different metals, such as steel and copper.
Can I use PVC for hot water?
No, standard PVC pipe is strictly rated for cold water applications and will warp, soften, or rupture under hot water temperatures. If your copper line carries hot water, you must use CPVC, PEX, or a high-temperature-rated material instead.
Can I connect PVC to copper without soldering?
Yes, you can connect PVC to copper entirely without soldering by using push-to-connect fittings, compression fittings, or threaded mechanical adapters. These options eliminate the need for torches, open flames, and flux in your workspace.
Can PVC fittings be removed?
Glued PVC fittings cannot be removed or unscrewed because solvent cement permanently welds the plastic together. To change a glued joint, you must cut the pipe. However, threaded or push-fit transition fittings are fully mechanical and can be disassembled easily.
Conclusion
- Choose the Right Method: Always match your transition approach to the application, using threaded adapters or push-fit connectors for supply lines and shielded rubber couplings for drains.
- The Golden Thread Rule: Always screw a male plastic thread into a female metal fitting to prevent cracking the plastic under outward radial pressure.
- Supply vs. Drain: Understand that pressurized water supply lines require rigid mechanical or threaded joints, while gravity-fed drain lines can use flexible mechanical sleeves.
- Temperature Limits: Never use standard PVC on hot water lines; always substitute with CPVC, copper, or high-temperature rated materials.
- Check Local Codes: Always verify municipal building regulations and plumbing codes before starting your installation to ensure full compliance.
Final Tip
Successful plumbing repairs come down to patience, proper preparation, and meticulous measurement. Never rush the dry-fitting phase or skip deburring your pipe ends, as taking these extra few minutes guarantees a leak-free system that will last for decades.

Oscar Vance | Master Plumber & Drainage Expert
Meet Oscar Vance, a licensed master plumber sharing practical solutions on residential repairs, preventive maintenance, and thoughtful home upkeep.

