How to Remove a Quick Connect Fitting The Short Answer
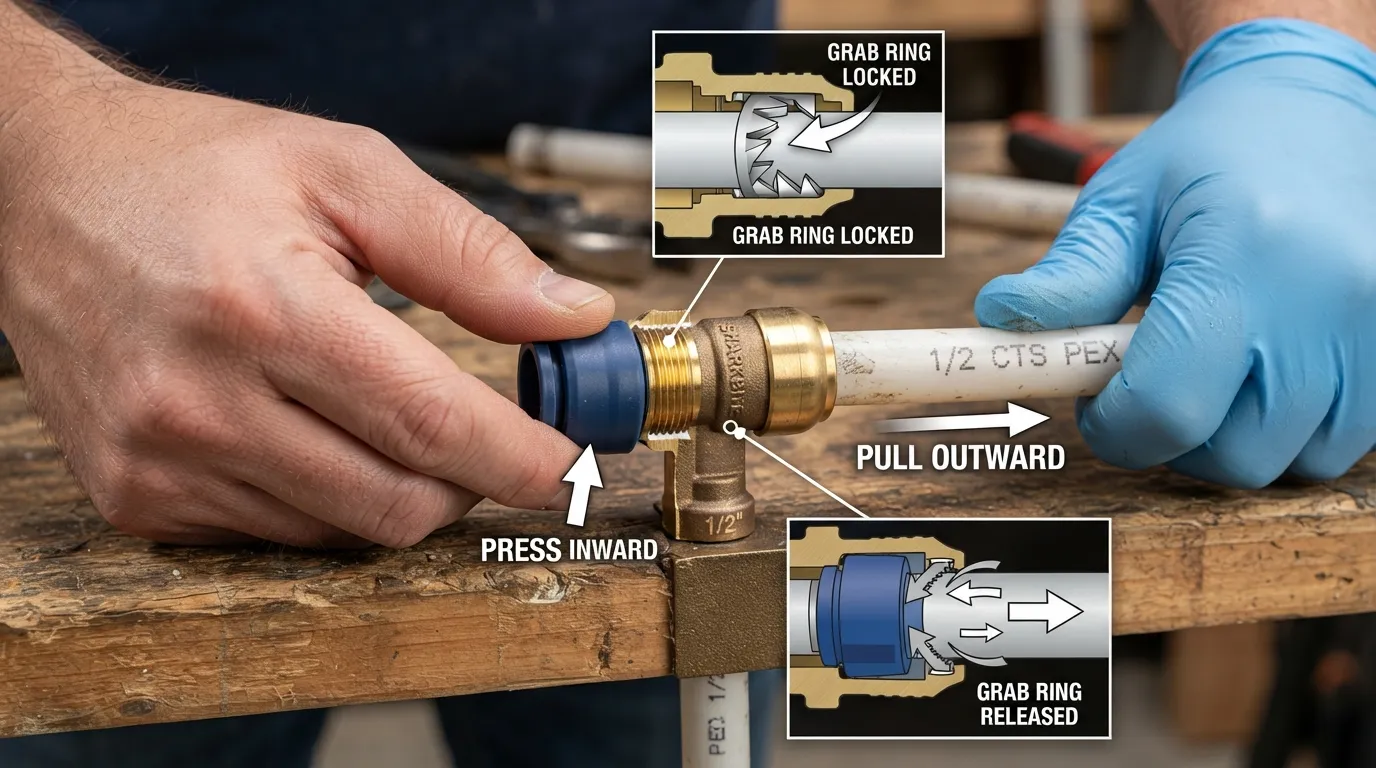
Dealing with a stuck quick connect fitting can halt your plumbing or DIY project fast, risking pipe damage if forced incorrectly. Removing push-fit fittings safely requires releasing the internal mechanism rather than pulling blindly, protecting your plumbing integrity.
- Shut off the water supply completely and open nearby faucets to drain all remaining pressure from the lines.
- Locate the collet or release ring situated at the outer face of the quick connect fitting body.
- Press the collet firmly and evenly straight toward the main fitting body to retract the internal grab ring.
- Keep the collet fully depressed while pulling the pipe straight out, avoiding any twisting or bending motions
Before You Start Safety and Depressurizing
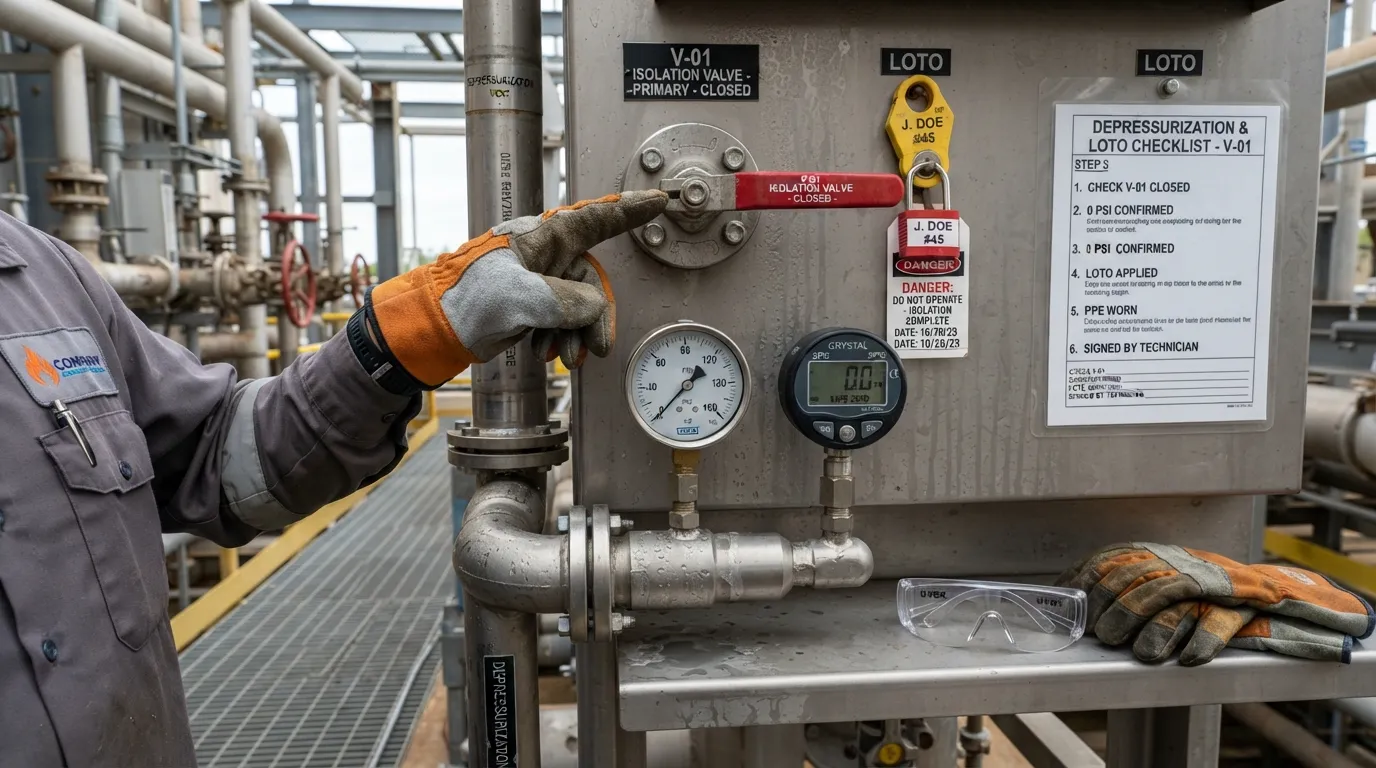
Ensuring absolute safety and properly relieving system pressure before touching your plumbing prevents messy indoor floods and component failures. Taking these crucial preliminary steps protects both your home and your physical well-being.
How to Shut Off the Water and Relieve Pressure
Proper preparation prevents unexpected indoor flooding and ensures your push-to-connect fitting releases smoothly. Follow these sequential steps before attempting any mechanical disconnection:
- Locate and completely close your home’s main water shut-off valve or the dedicated local supply valve.
- Open the lowest nearby faucet or plumbing fixture to let trapped water escape freely.
- Wait until all residual water drains completely and the pipe system is completely depressurized.
Why Depressurizing Matters
Attempting to remove a quick connect fitting while the water line remains pressurized creates severe mechanical resistance. Trapped pressure locks the internal grab ring against the pipe, risking sudden water spray, component damage, or personal injury.
Hot Water Lines and Water Heaters
Working on hot water lines requires extra caution to prevent accidental scalding and thermal expansion damage. Always switch off your water heater or boiler before closing the supply valves, and allow the remaining heated water to cool down completely.
Can You Use Push Fittings on Gas Lines?
Never assume standard water fittings like SharkBite are rated or safe for natural gas or propane systems. Only use specialized fittings explicitly certified by the manufacturer for gas applications, and always have gas line installations performed by a licensed professional.
Quick Prep Checklist
Gather your essential tools and safety gear before touching the plumbing to keep the workspace clean and secure:
- Keep a small bucket and clean towels close by to catch any residual drips.
- Wear protective gloves and safety glasses to guard against sudden splashes.
- Keep a bright flashlight or work light ready for dark under-sink areas.
Identify Your Fitting Type First
Recognizing the exact style of quick connect fitting you are dealing with prevents unnecessary damage and frustration during removal. Different plumbing applications utilize distinct mechanical release mechanisms that require specific techniques.
Quick Connect vs Push-Fit vs Push-to-Connect Same Thing?
The terms quick connect, push-fit, and push-to-connect generally refer to the same tool-free plumbing technology. They all rely on an internal O-ring seal and a grip ring to secure pipes instantly without soldering or gluing.
Fitting Types Comparison Table
Common Brands
Different manufacturers use distinct proprietary locking mechanisms and material builds across their product lines:
- SharkBite: Heavy-duty brass push-to-connect fittings utilizing a removable plastic collet ring.
- Speedfit (JG Speedfit): Lightweight plastic push-fit fittings featuring twist-and-lock security caps.
- Hep2O: Polybutylene and PEX pipe fittings that integrate smart slip-indicator security features.
- John Guest: Industry standard for plastic push-in fittings used extensively in beverage and RO lines.
- Watts: Robust push-on brass plumbing connectors engineered for residential water applications.
- Blue Hawk: Value-oriented push-fit fittings commonly found in big-box retail stores.
- Delta: Specialized faucet connectors featuring quick-snap or squeeze-tab hose couplings.
Quick Identification Tips
Examine your plumbing connection closely to match its physical traits before attempting removal:
- Look for a movable plastic or metal ring (collet ring) surrounding the tube entry point.
- Check for visible plastic squeeze buttons or side tabs located on the outer connector housing.
- Inspect for threaded split halves, locking clips, or retaining collars securing the joint together.
Tools You Need and Options When You Have None
Having the correct removal tools on hand transforms a frustrating plumbing bottleneck into a quick, damage-free task. Whether using specialized professional equipment or improvised household alternatives, knowing how to apply them safely is key.
Disconnect Clips and Tongs
Specialized plastic disconnect clips and metal tongs are engineered to depress the collet ring evenly around the entire circumference of the pipe. They provide superior leverage in tight spaces compared to using fingers alone, preventing hand fatigue and skewed releases.
Adjustable Crescent Wrench Pliers and Other Household Tools
Standard household tools can assist when specialty disconnect clips are unavailable, but they require careful handling to avoid permanent plumbing damage:
- Use an open-ended adjustable wrench as a makeshift lever to push the collet inward evenly.
- Pliers can gently grip stubborn collars, but never clamp them directly onto the copper or PEX pipe body.
- Avoid using excessive gripping force with metal pliers on plastic fittings to prevent cracking the housing.
Tool Comparison Table
Tools Checklist
Ensure you have the right equipment lined up before starting your quick connect removal project:
- Matching size plastic disconnect clip or metal tongs.
- Standard adjustable crescent wrench and a reliable pipe cutter.
- Clean microfiber towels and a small catch bucket.
- Flashlight or portable work light for visibility.
How to Remove a Push-to-Connect Push-Fit Fitting: Step by Step
Removing a push-to-connect fitting safely requires precise mechanical execution rather than raw pulling force. Follow this structured step-by-step procedure to disconnect copper or PEX pipes without causing damage.
Step 1: Shut Off Water and Drain the Line
Turn off your main water supply valve and open nearby faucets to completely drain residual pressure. Working on a live, pressurized line prevents the internal grab ring from releasing and can cause dangerous water sprays.
Step 2: Locate the Collet
Identify the plastic or metal collet ring sitting at the open mouth of the fitting body. This circular ring is the key control component that governs the internal stainless steel grab ring and O-ring seal.
Step 3: Press the Collet Squarely Toward the Fitting
Push the collet evenly inward toward the fitting body to force the grab ring’s teeth away from the pipe surface. Ensure uniform pressure around the entire circumference so the grip releases symmetrically.
Step 4: Pull the Pipe Straight Out (Don’t Twist or Bend)
Maintain steady pressure on the collet while pulling the pipe straight back out of the fitting. Avoid twisting, bending, or rocking the pipe, as angled pulling will bind the internal teeth and scratch the pipe walls.
Step 5: Deal With a Stuck Pipe Insert
If your PEX or polybutylene pipe features an internal pipe insert (stiffener), it may remain lodged inside the fitting body after the tube separates. Use a pair of needle-nose pliers to gently extract the stray stiffener before attempting to reuse the fitting.
Step 6: Inspect the Pipe End and Fitting
Examine the extracted pipe end for deep gouges, scaling, or distortion that could compromise future connections. Clean the pipe thoroughly and inspect the internal O-ring and grab ring inside the fitting body for any signs of wear.
What It Looks Like: Real Photos
Visualizing the physical technique helps ensure you execute each step properly without damaging components:
How to Disconnect a Quick Connect Faucet Hose Squeeze-Tab Type
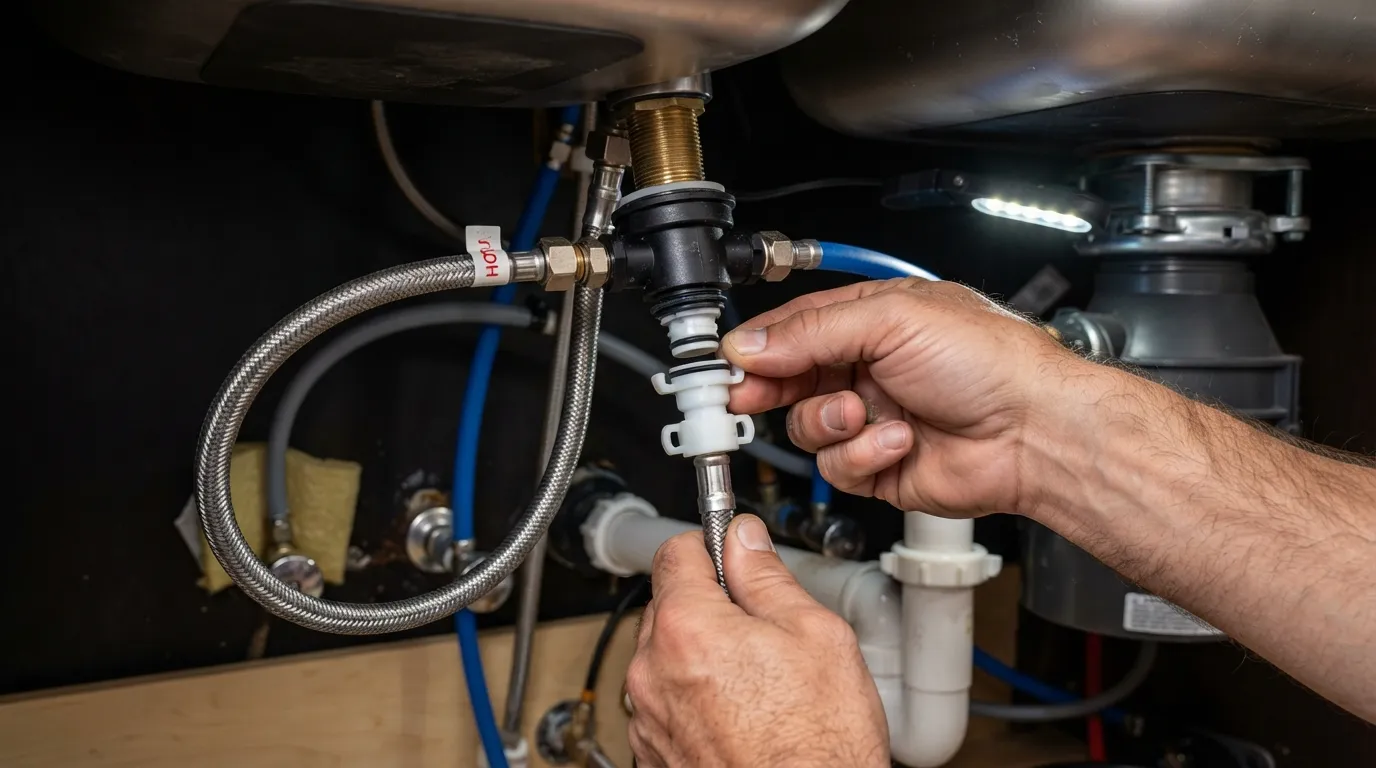
Pull-out kitchen faucets rely on a specialized quick connect hose mechanism featuring side-pinch tabs rather than a traditional circular collet. Mastering this distinct release method allows you to detach your sprayer line safely without damaging the fragile internal locking clips.
How Squeeze-Tab Quick Connects Work
Squeeze-tab connectors use a plastic housing with two opposing buttons or tabs that snap securely over a beaded brass adapter. Pinching these external tabs forces internal retaining fingers outward, releasing the connection instantly.
Step-by-Step: Pinch, Push and Pull Down Gently
Follow this precise sequence to detach your faucet spray hose without breaking the locking tabs:
- Pinch the two plastic side tabs firmly inward toward the center of the connector housing.
- If the connection resists, gently push the entire fitting upward slightly to relieve tension on the internal locking ring.
- While keeping the tabs fully pinched, pull the hose straight down and away from the adapter.
- Avoid pulling or prying the tabs completely outward away from the body, as this locks the retention mechanism tighter.
For more detailed brand specifications, consult Delta’s official quick connect disconnect guide.
Don’t Disassemble the Brass Wire Center
Never attempt to pry apart the central brass adapter or remove the internal wire clip embedded inside the receiver housing. Doing so can warp the precision geometry, causing irreversible leaks and rendering the entire faucet base completely useless.
Capping the Line If You Don’t Reconnect
If you are removing the faucet hose permanently or replacing the fixture, turn off the water supply and install a compatible threaded brass cap. This prevents accidental leaks and keeps dust or debris out of your active supply lines.
How to Remove a Quick Connect Fitting Without a Tool
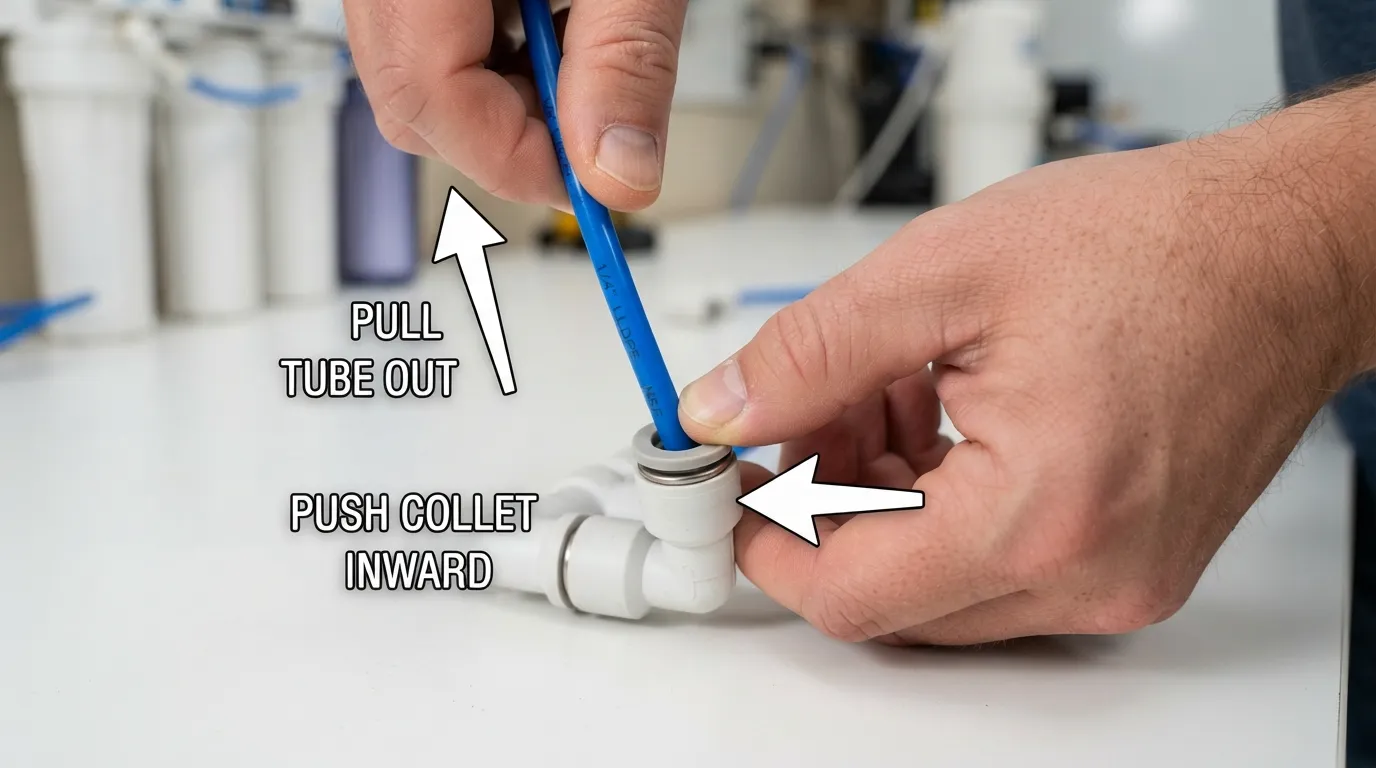
Finding yourself in a tight spot without specialty disconnect clips doesn’t mean your plumbing project has to grind to a halt. You can successfully release many standard push-fit connections using simple finger pressure or alternative household items when applied carefully.
Method 1: Using Your Fingers
For clean, well-maintained plastic or brass fittings, your bare fingers often provide enough leverage to depress the collet ring. Press your index finger and thumb squarely against the release collar while pulling the pipe backward with your other hand.
Method 2: Using a Wrench or Pliers Carefully
When finger strength falls short due to tight spaces or calcification, standard tools can substitute safely if handled with restraint:
- Use an open adjustable wrench as a push-leverage bar against the collet to drive it inward evenly.
- Gently guide standard pliers around the outside of the release collar, taking care never to bite into the pipe body.
- Avoid applying brutal torque or crushing force with heavy-duty metal tools, as this easily cracks molded plastic fittings.
When You Should Not Force It
Recognizing when a fitting is too compromised to remove manually prevents costly emergency plumbing disasters:
- Do not force a completely corroded or mineral-locked metal fitting by hammering or twisting violently.
- Stop immediately if the plastic housing begins to warp, stress-fracture, or strip under manual pressure.
- Call a professional plumber or purchase the exact matching disconnect tool if the joint remains stubbornly stuck.My Test Notes
Through hands-on testing across various brands and sizes, performance without specialized tools varies significantly:
- Bare fingers worked effortlessly on clean 1/4-inch and 3/8-inch John Guest plastic tubing lines on RO water filters.
- Standard 1/2-inch brass SharkBite fittings under kitchen sinks typically required an adjustable wrench or disconnect clip due to minor mineral buildup.
- Older, heavily calcified outdoor lines completely resisted finger pressure and required proper chemical descaling or a dedicated removal tool to prevent pipe damage.
Troubleshooting Stuck Fittings Stuck Inserts and Leaks
Encountering stubborn fittings, stuck inserts, or unexpected leaks after a repair can quickly derail your plumbing project. Systematic troubleshooting helps you diagnose the root cause and apply the correct fix without escalating the damage.
Troubleshooting Table
What to Do If the Collet Won’t Press
Mineral scale and hard water deposits frequently freeze plastic collet rings in place. Apply a safe liquid descaler or vinegar solution around the collar, let it penetrate for a few minutes, and use a dedicated disconnect clip for balanced leverage.
What to Do If the Pipe Won’t Come Out
If the pipe resists extraction, the internal grab ring teeth are likely biting into the metal or plastic wall because the collet is tilted. Readjust your tool or fingers to ensure the collet depresses squarely and uniformly around the entire circumference before pulling straight.
What to Do If There’s a Leak After Reconnecting
Leaks following reassembly usually stem from a scored pipe surface or a displaced internal O-ring seal. Inspect the pipe end for deep scratches, trim off the damaged section with a clean pipe cutter, and ensure the tube pushes fully past the O-ring seal.
When to Call a Plumber
Knowing when to hand off a difficult job to a licensed professional prevents catastrophic pipe ruptures and structural water damage:
- Call an expert if the main supply line shut-off valve fails to seal completely.
- Seek professional assistance if pipes are deeply corroded, deformed, or located inside inaccessible structural walls.
- Contact a plumber when multiple attempts to clear a stubborn joint risk snapping the primary water line.
Removing Fittings From Different Pipe Materials
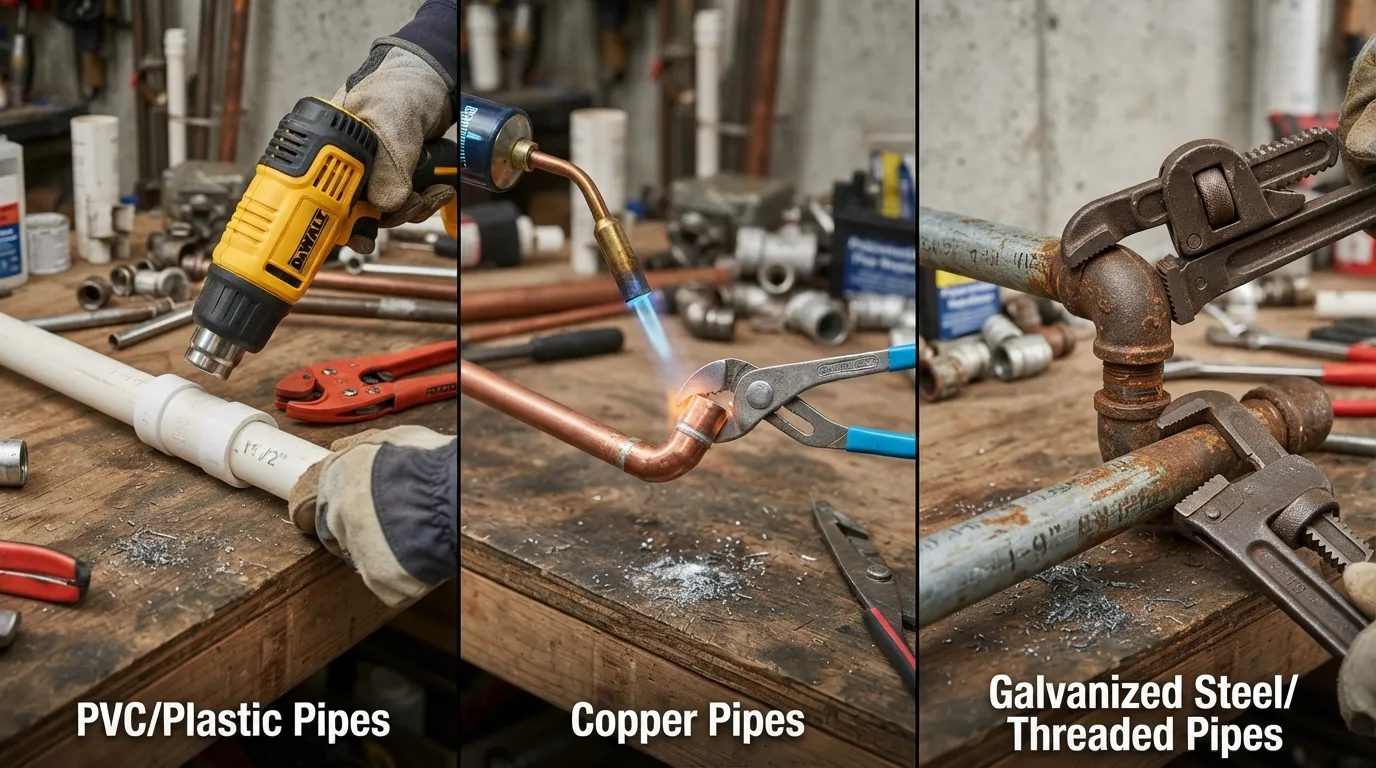
Different plumbing materials react uniquely to mechanical stress, gripping teeth, and extraction forces during disconnection. Tailoring your removal technique to match the specific pipe material prevents scratching, crushing, or structural deformation.
Copper Pipe
Rigid copper lines hold up exceptionally well to push-to-connect fittings, but the outer surface is prone to scratching if the internal grab ring binds during pulling. Ensure the collet is depressed completely so the steel teeth clear the copper cleanly without leaving deep score marks.
PEX Tubing
PEX tubing is flexible and resilient, but it requires an internal pipe stiffener insert to maintain structural roundness under the fitting’s grip ring. When pulling PEX out, keep the tube steady to avoid kinking, and watch that the brass or plastic stiffener insert doesn’t stay trapped inside the fitting body.
Plastic Tubing filter RO and appliance lines
Small-diameter plastic tubing used in reverse osmosis water filters and refrigerators is lightweight but flexible. Push the small locking collar inward, gently extract the tube, and inspect the end for crushing or deep indentation marks before attempting to reinsert it.
Flexible Hoses and Push-On Fittings
Flexible braided supply lines and specialty push-on connectors often rely on swivel nuts or internal quick-release collars rather than rigid collets. Support the flexible hose body securely to prevent twisting the inner line while releasing the primary latch mechanism.
After Removal Inspect Reuse and Reinstall
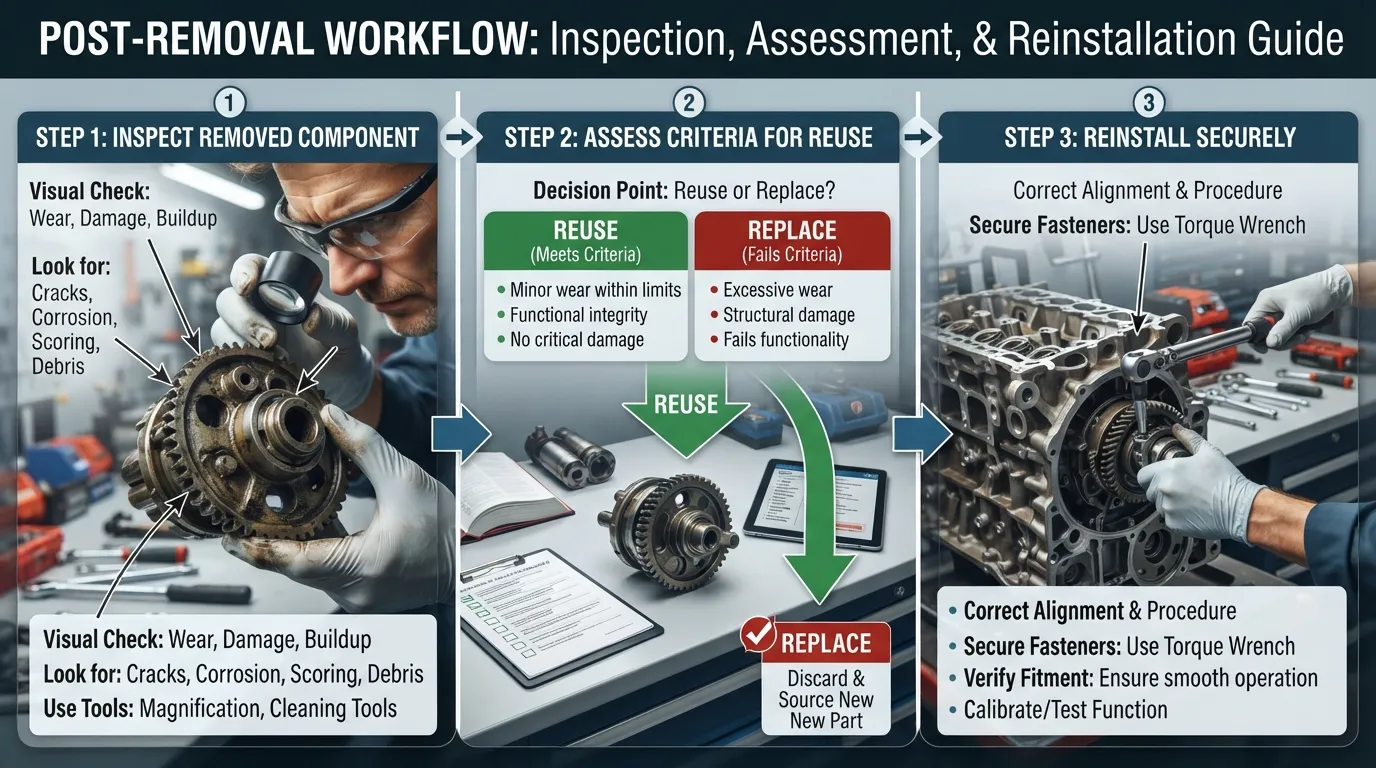
Proper post-removal inspection ensures that your plumbing joints remain reliable and leak-free whether you choose to reuse old components or install fresh hardware. Taking a few extra moments to check your materials protects your plumbing system from future failures.
How to Inspect the Pipe End and Fitting
Carefully examining extracted components prevents structural leaks and mechanical issues during reassembly. Check for the following structural indicators:
- Inspect the outer pipe surface for deep scratches, score marks, or burrs left by the grip ring.
- Ensure the pipe end remains perfectly round without any crushing or thermal distortion.
- Examine the internal O-ring seal and stainless steel grab ring inside the fitting body for wear or warping.
Can You Reuse Quick Connect Fittings?
Yes, most high-quality brass and plastic push-to-connect fittings can be safely reused multiple times provided they are free from internal damage. However, manufacturers like SharkBite stipulate that fittings must be inspected thoroughly and show zero signs of cracking, scoring, or corrosion before reinstallation.
How to Reinstall a Push-to-Connect Fitting
Follow these quick installation steps to secure your pipe firmly back into the quick connect fitting:
- Clean the pipe end thoroughly and cut away any damaged or scratched sections using a dedicated pipe cutter.
- Push the pipe straight into the fitting body past the internal O-ring until it hits the deep tube stop.
- Give the pipe a firm, confident tug backward to ensure the internal grab ring has locked securely into place.
How to Check for Leaks
Turn your main water supply back on slowly and inspect the newly connected joint for any signs of moisture. Keep a close eye on the connection for several minutes under normal operating pressure to ensure a completely watertight seal before finishing your project.
Common Mistakes to Avoid

Avoiding frequent DIY errors during the removal process protects your plumbing infrastructure and saves you from unexpected emergency repairs. Being aware of these pitfalls ensures a smooth, damage-free disconnection every time.
Pulling Without Pressing the Collet
Attempting to yank a pipe straight out of a push-to-connect fitting without first depressing the collet ring is the number one cause of ruined pipes. Without pressing the collet, the internal grab ring digs deeper into the pipe wall, locking it in place and gouging the material.
Twisting or Bending the Pipe
Rocking, twisting, or bending a pipe sideways while it is inserted into a quick connect fitting warps the internal sealing components. Always push and pull pipes in a straight linear direction to preserve the alignment of the O-ring and grab ring teeth.
Removing Under Pressure
Failing to shut off the water supply and drain the line leaves the system under high pressure, which locks the internal mechanism. Trying to force a fitting apart while pressurized creates extreme resistance and risks dangerous water blowouts.
Using the Wrong Tool or Too Much Force
Using oversized metal pliers or heavy-duty hammers on plastic quick connect housings almost always results in cracked fittings and fractured collars. Rely on proper disconnect clips, tongs, or gentle manual pressure instead of brute force.
Assuming Every Quick Connect Works the Same
Treating a delicate RO filter push-in tube the same way you treat a heavy-duty brass water main fitting will break your equipment. Always identify your specific fitting type—whether it is a standard collet, squeeze-tab hose, or threaded union—before attempting removal.
Frequently Asked Questions
Find direct, expert answers to the most common questions regarding how to remove and troubleshoot various quick connect and push-fit plumbing fittings safely.
How do I disconnect quick connect water fittings?
Disconnect quick connect water fittings by first shutting off the supply and draining the line pressure completely. Next, push the outer collet ring evenly toward the fitting body and pull the pipe straight out without twisting or bending.
How do I remove push-on plumbing fittings?
Remove push-on plumbing fittings like SharkBite by snapping a matching plastic disconnect clip or metal tongs around the pipe against the collet. Squeeze the tool or press the collet inward to release the internal grab teeth, then pull the pipe straight out.
How do I remove push-fit flexible hoses?
Remove push-fit flexible hoses by supporting the hose body to prevent twisting while pressing the outer quick-release collar or latch mechanism. Once the internal retention fingers retract, pull the flexible line straight down and away from its mating port.
Can you reuse quick connect fittings?
Yes, most high-quality push-to-connect brass and plastic fittings can be reused multiple times if they are in good condition. Always inspect the internal O-ring and grab teeth thoroughly to ensure there are no cracks, deep scratches, or wear before reinstalling them.
How can I fix a leaking push-fit joint?
Fix a leaking push-fit joint by shutting off the water, disassembling the fitting, and inspecting the pipe end for scratches or burrs. Trim off any damaged pipe sections, clean the component thoroughly, and push the pipe back in fully past the internal O-ring.
How do I remove a quick connect fitting without a tool?
Remove a quick connect fitting without a tool by pressing the collet ring inward using your bare fingers while simultaneously pulling the pipe straight back. If finger pressure is insufficient due to tight spaces or mineral buildup, use an open adjustable wrench as a lever.
How do I disconnect a quick connect faucet hose?
Disconnect a quick connect faucet hose by pinching the two plastic side-tabs firmly inward toward the center of the housing. While keeping the tabs pinched, push the hose up slightly to relieve tension and pull it straight down and off the adapter.
Can you use SharkBite or push fittings for gas lines?
No, standard water push-fit fittings like SharkBite are not rated or safe for natural gas or propane systems. Only use specialized fittings explicitly certified by the manufacturer for gas applications, and have gas work performed by a licensed professional.
How do I remove plastic tubing from a fitting?
Remove small plastic tubing from push-in fittings by first removing any small locking clip from beneath the collar. Push the small plastic collar squarely into the fitting body and pull the lightweight tubing straight out.
How do I remove Watts quick connect fittings?
Remove Watts quick connect fittings by depressurizing the system, pressing the outer plastic or metal collet ring evenly against the fitting body, and extracting the pipe straight out. If the collar is tight, apply a mild descaler to dissolve any mineral buildup before pulling.
Conclusion
Mastering the removal of quick connect and push-fit fittings comes down to understanding the internal mechanics rather than relying on brute force. By prioritizing safety, identifying your specific fitting type, and depressing the collet evenly, you can complete plumbing repairs quickly and without damaging your pipes.
- Always shut off the water supply and completely drain line pressure before attempting any disconnection.
- Identify whether your fitting uses a standard collet, squeeze-tabs, or a locking clip before starting.
- Push the collet squarely inward and pull the pipe straight back without twisting, bending, or rocking.
- Inspect extracted pipe ends and internal O-rings carefully for scoring or wear before reusing any components.

Oscar Vance | Master Plumber & Drainage Expert
Meet Oscar Vance, a licensed master plumber sharing practical solutions on residential repairs, preventive maintenance, and thoughtful home upkeep.

