Introduction & Quick-Start Technical Specs
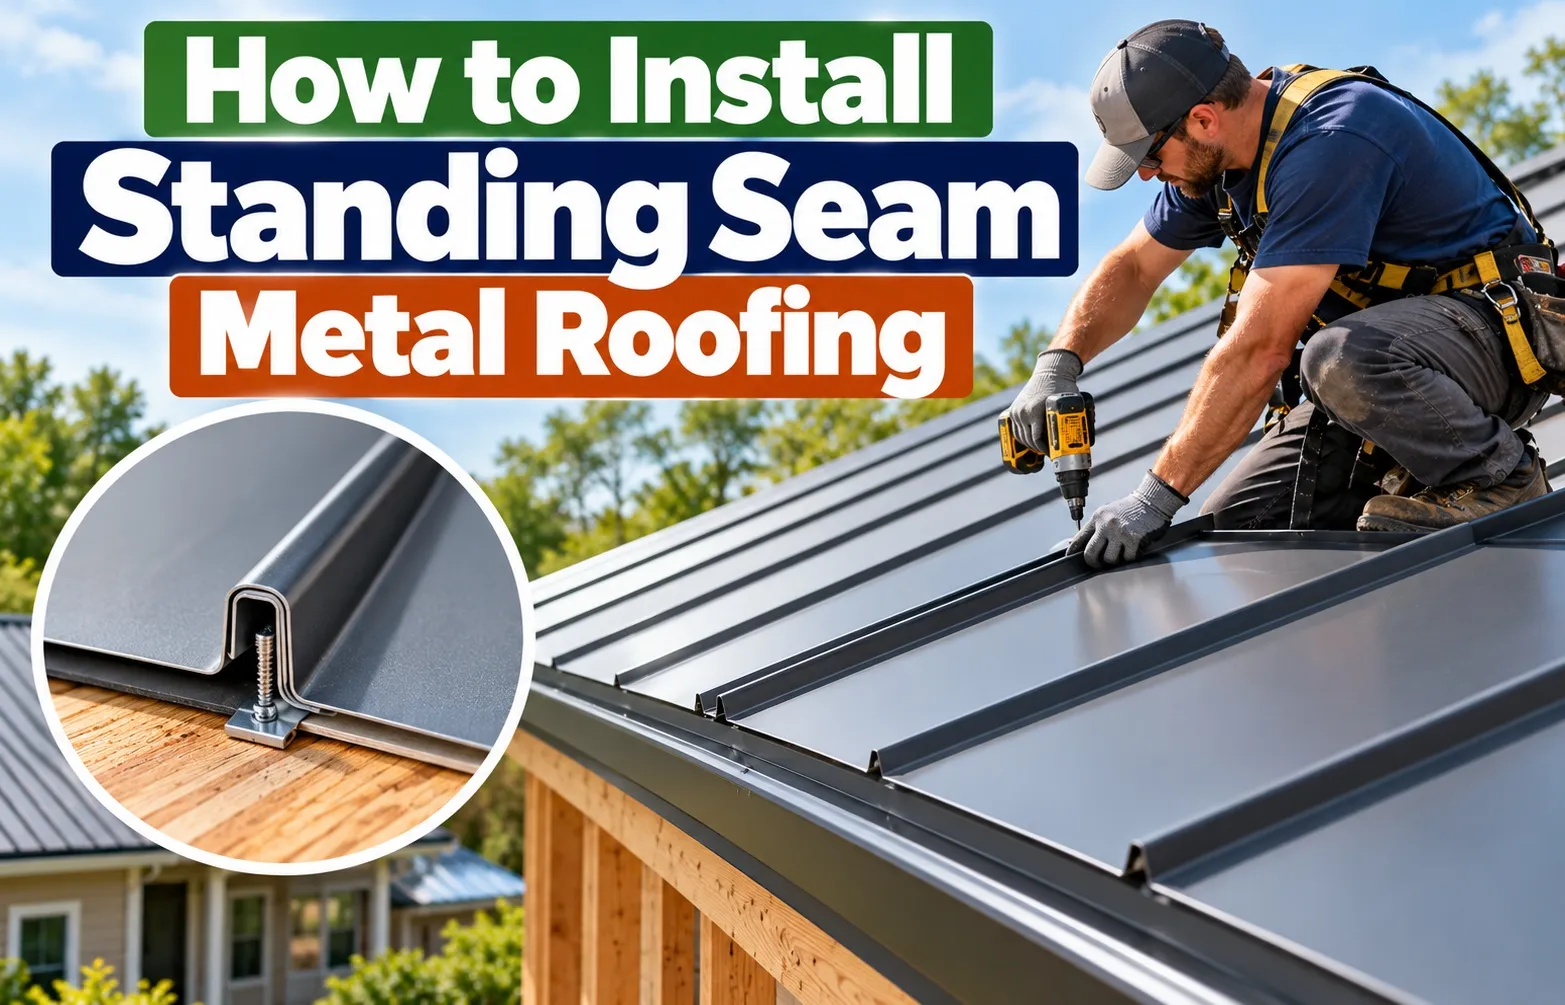 Standing seam metal roofing features concealed fasteners and raised interlocking seams that elevate panel joins above the water line, offering decades of weather protection. Successful installation requires precise roof pitch planning, correct structural substrate selection, and adherence to manufacturer-specific panel expansion allowances.
Project Overview: Skill Level Minimum Pitch & Scope
Installing a standing seam metal roof requires advanced construction skills, precise sheet metal tools, and rigorous adherence to steep-slope safety protocols. The structural layout depends heavily on your roof’s pitch and chosen panel profile.
- Minimum Roof Pitch: Snap-lock panels require a minimum slope of 3:12 (14 degrees). Mechanically seamed profiles with factory butyl sealant can accommodate lower slopes down to 1:12 or 0.5:12.
- Fastening System: Concealed clips secured to the roof deck allow individual standing seam metal panels to slide during temperature fluctuations.
- Thermal Expansion: Steel panels experience thermal expansion and contraction along their length. Fastening must never restrict longitudinal movement, or panels will warp.
- Building Codes: Installations must meet local wind uplift ratings, snow load requirements, and regional fire resistance classifications (typically Class A).
Is Standing Seam Roofing DIY-Friendly? (The Reality Check)
While DIY installation is possible on simple gable structures, complex roofs with multiple valleys, hips, or dormers present extreme technical challenges. The high cost of specialized tools and pre-formed panels leaves little room for measuring or cutting errors.
- Safety Requirements: Installers must use OSHA-compliant personal fall arrest systems (PFAS), including a full-body safety harness, shock-absorbing lanyard, and roof anchors for adequate fall protection.
- Panel Selection: Snap-lock panels click together using hand pressure, making them accessible for experienced DIYers. Mechanically seamed systems require renting heavy electric seaming machines.
- Tool Investment: Professional results demand dedicated hand seamers, offset aviation snips, folding tongs, and torque-limiting screw guns.
Essential Tools Fasteners & Materials Checklist
Executing a code-compliant standing seam installation requires specialized, high-temperature materials and precision sheet metal tools. Substituting standard asphalt roofing accessories or generic fasteners will compromise the roof’s structural integrity and void panel warranties.
Core Materials & Underlayment Selection
The substrate preparation dictates the long-term weatherproofing performance of your metal roof. Because metal panels transfer extreme heat, standard felt paper will degrade and fuse to the underside of the steel.
- High-Temperature Self-Adhered Underlayment: Use polymer-modified, high-temperature ice and water shield rated to at least 240°F (115°C) across the entire roof deck or along high-vulnerability eaves and valleys.
- Synthetic Underlayment: For non-critical deck areas on slopes steeper than 3:12, install high-density woven synthetic underlayment as a secondary water-resistive barrier.
- Butyl Tape: High-tack non-curing butyl tape sealant is mandatory at all trim overlaps, Z-closures, and flashing seams to prevent wind-driven rain infiltration.
Specialized Roofing Tools & Safety Gear
Standard carpentry tools cannot handle the precise folding, cutting, and seaming operations required for standing seam metal panels.
- Cutting Tools: Left and right offset snips (aviation snips) for clean trim modifications without distorting metal edges, along with power shears for longitudinal panel rips.
- Bending & Folding Tools: Hand seamers (folding tongs) in 3-inch and 6-inch widths to fold drip edges, hem panel ends, and form custom flashing turns.
- Layout Equipment: High-visibility chalk line for squaring roof runs and marking clip lines without staining panel finishes.
- Fastening Equipment: A torque-limiting drill or adjustable clutch screw gun to prevent over-driving pan-head screws and stripping clip attachments.
- Safety Gear: OSHA-compliant full-body safety harness, rope grab, heavy-duty roof anchor, and cut-resistant gloves.
Fastener & Concealed Clip Requirements
Standing seam systems rely entirely on hidden fasteners to allow thermal expansion and contraction without creating exterior leak points.
- Concealed Clips: Use stainless steel or coated carbon steel clips matching your panel profile. Expansion clips (two-piece) are required for panel runs over 30 feet, while fixed clips (one-piece) suit shorter runs.
- Fasteners: Secure clips using #10 or #12 low-profile pancake-head or pan-head screws. Never use hex-head screws with neoprene washers under concealed seams, as they create high spots that distort the overlapping female leg.
- Pop Rivets: Stainless steel or color-matched aluminum sealed pop rivets are required for securing trim-to-trim overlaps, end caps, and Z-closures.
Roof Deck Preparation & High-Temp Underlayment
Substrate preparation forms the critical foundation of any standing seam metal roof installation. Proper deck inspection and the application of a high-temperature self-adhered membrane ensure long-term waterproofing, prevent thermal degradation, and protect the structure against moisture entrapment.
Substrate Inspection: Plywood Decking & Flashing Over Shingles
Before installing any underlayment, the roof deck must be thoroughly inspected, cleaned, and repaired. Standing seam panels require a completely flat, smooth substrate to prevent oil-canning and uneven panel engagement.
- Plywood & OSB Inspection: Ensure structural plywood decking or OSB is at least 15/32 inches thick, securely fastened to rafters, and free of rot, sagging, or delamination. Re-fasten loose sheets using ring-shank nails or deck screws.
- Surface Fastener Clearance: Pull or hammer down all protruding nails, staple heads, and wood splinters. Any raised surface anomaly will telegraph through the high-temp membrane and dent the metal panels under foot traffic.
- Retrofitting Over Asphalt Shingles: If code permits installing over single-layer asphalt shingles, inspect for cupping or curling. Install a furring strip grid or lay an approved structural recovery board to create a flat substrate, ensuring proper eave layout and drip edge trim alignment.
Step-by-Step High-Temp Underlayment Application
Standard asphalt felt paper degrades under the extreme thermal transfer of metal roofs, where temperatures can exceed 200°F (93°C). Installing a specialized high-temperature self-adhering membrane is non-negotiable for a durable moisture barrier.
- Eave Alignment & Starter Strip: Begin at the lowest eave edge. Unroll the self-adhering membrane horizontally along the roof edge, keeping it perfectly parallel to the eave. Peel back the release liner gradually while pressing the membrane flat onto the clean substrate.
- Overlaps & Seams: Maintain a minimum 4-inch side lap on horizontal courses and a 6-inch end lap on vertical seams. Roll all seams with a heavy hand roller to ensure complete adhesion and air-tight moisture seals.
- High-Vulnerability Detail: Extend the high-temp underlayment over all eaves, valleys, sidewalls, and rakes. At valley centers, lay a dedicated 36-inch wide strip of high-temp membrane prior to running course layers over top.
Perimeter Trim, Drip Edge, & Roof Layout Squaring
Perimeter trim installation and precise roof layout squaring dictate whether your standing seam panels run straight or drift off-center. Establishing a plumb baseline prevents severe panel binding, tension distortion, and edge failures.
Installing Eave Trims & T-Style Drip Edges
Installing T-style drip edges along the eave line secures the underlying membrane and directs water away from the fascia. Proper fastening ensures maximum wind uplift protection.
- Eave Trim Alignment: Align the drip edge flush with the eave board, overlapping adjacent pieces by a minimum of 2 inches.
- Fastener Pattern: Secure the drip edge using annular ring-shank roofing nails or pancake-head screws spaced every 6 to 8 inches to resist high wind uplift forces.
- Starter Strip Integration: Install the metal starter trim directly over the eave drip edge, locking the starter tab into position to receive the first standing seam panel leg.
How to Square the Roof Layout Using the 3-4-5 Triangle Method
Laying out standing seam panels without squaring the roof leads to crooked rows that magnify errors across every subsequent joint. The classic 3-4-5 geometric triangle method establishes a true 90-degree right angle from the eave to the ridge.
- Establish Baseline: Snap a chalk line parallel to the gable or rake edge, ensuring it runs completely straight from the eave to the peak.
- Measure 3-4-5 Triangles: Measure 3 feet out from the corner along the eave line, and 4 feet up along the rake line. Adjust the diagonal line until the span measures precisely 5 feet.
- Chalk Control Lines: Snap perpendicular reference chalk lines across the roof deck at regular intervals (e.g., every 4 feet) to track panel squareness during installation.
Installing Panels & Fastening Concealed Clips
Accurate panel alignment and proper clip spacing are critical for maintaining structural stability and accommodating metal thermal movement. Securing panels with concealed fasteners prevents leaks while ensuring the roof expands and contracts freely under extreme weather cycles.
Positioning the Starter Panel & Setting Expansion Gaps
Positioning the starter panel accurately along your layout chalk line dictates the plumb alignment of the entire roof. Leaving precise thermal expansion gaps at panel ends ensures steel panels can slide freely without warping, buckling, or causing oil-canning across the roof surface.
- Initial Alignment: Align the starter panel edge precisely with your pre-snapped vertical chalk line to prevent cumulative layout drift.
- Eave Engagement: Fully engage the starter panel hem onto the eave starter strip or drip edge lock securely before fastening.
- Thermal Clearance: Leave a 1/4-inch to 1/2-inch thermal expansion gap at ridge and eave terminations to accommodate steel movement.
How Many Clips Per Panel? (Spacing & Fastener Rules)
Panel clip spacing must adhere strictly to local wind uplift requirements and panel manufacturer specifications. Standard installations typically position clips on 16-inch centers, using low-profile pan-head screws to anchor the clip tabs without binding the sliding metal legs.
- Standard Wind Zones: Space concealed clips every 16 to 24 inches along the panel seam for optimal wind uplift resistance.
- High Wind / Coastal Zones: Reduce clip spacing to 12 inches on center for perimeter and corner roof areas subject to heavy uplift forces.
- Fastener Attachment: Secure each concealed clip using two approved #10 pancake-head screws driven flush into the wood decking without over-torquing.
Locking the Seams: Snap-Lock vs. Mechanical Seamer
Locking the panel seams creates a weather-tight waterproof seal between adjacent sheets. Snap-lock joints snap together using downward hand or foot pressure, whereas mechanically seamed profiles require specialized electric or manual folding machines to crimp the seam edges shut.
- Snap-Lock Mechanism: Position the female leg over the male leg and apply firm downward pressure from eave to ridge until the joint clicks.
- Mechanical Seaming: Use a motorized mechanical seaming tool or manual hand crimpers to fold the standing seam legs 90 or 180 degrees.
- Factory Sealant Check: Verify that pre-applied factory butyl sealant inside the panel leg remains continuous and clean before locking.
Flashing Details: Hips, Valleys, & Ridge Caps
Proper flashing installation at high-stress roof penetrations, valleys, hips, and ridges prevents wind-driven rain infiltration. Sealing these critical junctions with continuous butyl tape and heavy-gauge metal trims ensures long-term weatherproofing performance.
Valley & Hip Flashing Details
Valleys and hips handle concentrated runoff and require wide flashing pans installed over dedicated high-temperature self-adhered membranes. Precision cutting and hemming secure these water channels against high-velocity flows.
- Valley Pan Installation: Center a minimum 24-inch wide valley pan over the valley underlayment, securing the outer edges with cleats rather than face nails to allow thermal movement.
- Panel Hemming & Miter Cuts: Cut standing seam panels at matching valley and hip angles, then use hand tongs to hem the cut edges over foam closure strips or continuous valley clamping trims.
- Sidewall & Gable Trim: Install step or continuous sidewall flashings with an integrated hem, embedding non-curing butyl tape underneath to stop moisture migration.
Installing Z-Closures & Vented/Non-Vented Ridge Caps
Closing the top of the roof requires installing perforated Z-closures or foam profile blocks beneath ridge caps to block insects and wind-driven rain while maintaining attic ventilation.
- Z-Closure Placement: Fasten the continuous Z-closure profile across the top ends of the metal panels just below the ridge line, applying a continuous bead of butyl tape underneath.
- Ventilation Setup: Choose vented ridge closures for breathable roof assemblies or solid foam non-vented closures for unvented cathedral ceilings.
- Ridge Cap Fastening: Set the ridge cap over the closure assembly, overlapping joints by at least 4 inches, and secure the sides using color-matched pop rivets or pan-head screws. For additional reference on approved installation procedures and panel profiles, consult the Western States Metal Roofing Technical Guides.
Troubleshooting & Preventing Common Installation Errors
Real-world roofing challenges often stem from minor installation oversights, thermal binding, or improper fastener torquing. Addressing these common failure points prevents costly callbacks, leaks, and aesthetic distortions.
What Causes Metal Roof Oil-Canning (and How to Stop It)
Oil-canning refers to the perceived waviness or stress buckling in the flat pans of metal roofing panels. It occurs due to uneven deck surfaces, over-torqued clips, or unmanaged thermal expansion.
- Uneven Substrate: Plywood or decking irregularities push upward against the metal pan, creating localized stress points. Ensure the deck is 100% flat before membrane application.
- Over-Tightened Clips: Driving clip screws down too tightly or binding the sliding leg restricts natural thermal movement, forcing the metal to buckle upward.
- Panel Width & Striations: Choose narrow panel widths (12 to 16 inches) or specify factory roll-formed stiffening ribs (striations) to minimize optical oil-canning effects.
Fixing Fasteners That Back Out Over Time
Fasteners backing out over time compromise weather seals and create loose trim connections under high wind loads.
- Torque Control: Always use a torque-limiting drill clutch to prevent stripping wood threads or over-compressing washers on exposed trim fasteners.
- Correct Fastener Selection: Use annular ring-shank nails or structural pan-head screws with high pull-out resistance rather than standard smooth wood screws.
Avoiding Underlayment Melting & Noise Issues
Standard synthetic underlayments or felt paper can degrade under extreme metal surface heat, while uninsulated metal roofs can generate rain rattle.
- High-Temp Rating: Verify that self-adhered membranes are rated to 240°F+ to prevent asphalt bleeding and bonding failure.
- Acoustic Dampening: Install solid insulation boards or acoustic felt underlayment beneath panels to absorb rain impact sound
Frequently Asked Questions
Are standing seam metal roofs hard to install?
Installing standing seam metal roofing involves high installation difficulty due to precise sheet metal cutting, rigorous layout squaring, and strict safety rules. While simple gable roofs suit ambitious DIYers, complex multi-valley projects require professional expertise and specialized folding equipment to ensure proper weatherproofing.
What goes directly under a standing seam metal roof?
The primary underlayment requirement is a high-temperature self-adhered polymer membrane, such as an ice and water shield rated to at least 240°F. This membrane lays directly over 15/32-inch plywood or OSB decking to act as a crucial thermal barrier and moisture defense layer.
How many clips do you need for a standing seam metal roof?
Clip count calculation depends on local wind uplift ratings and panel lengths. Standard installations position concealed clips every 16 to 24 inches along panel seams. In high-wind or coastal zones, engineers require tighter spacing down to 12-inch intervals to securely anchor the roof assembly.
How far apart are the seams on a standing seam metal roof?
Seam spacing corresponds directly to panel width, which typically ranges from 12 to 20 inches across. Residential standing seam profiles commonly feature 16-inch panel widths, balancing structural rigidity and thermal movement tolerance while minimizing optical surface waviness or oil-canning.
Can you install a standing seam metal roof over old shingles?
While retrofit roofing over a single layer of flat asphalt shingles is sometimes permitted by local codes, it is generally discouraged. Shingle irregularities telegraph through metal panels, causing oil-canning. Stripping old shingles or installing furring strips ensures a smooth, optimal deck substrate.
Do you put metal roof screws in the ridge or the flat?
Proper screw placement is vital; standing seam panels use concealed clips fastened into side legs, meaning zero face screws pierce the flat panel pans. Exposed fasteners with neoprene washers are reserved strictly for trims, flashings, and ridge caps to allow natural thermal expansion.

Oscar Vance | Master Plumber & Drainage Expert
Meet Oscar Vance, a licensed master plumber sharing practical solutions on residential repairs, preventive maintenance, and thoughtful home upkeep.

