How to Plumb a Shower Drain
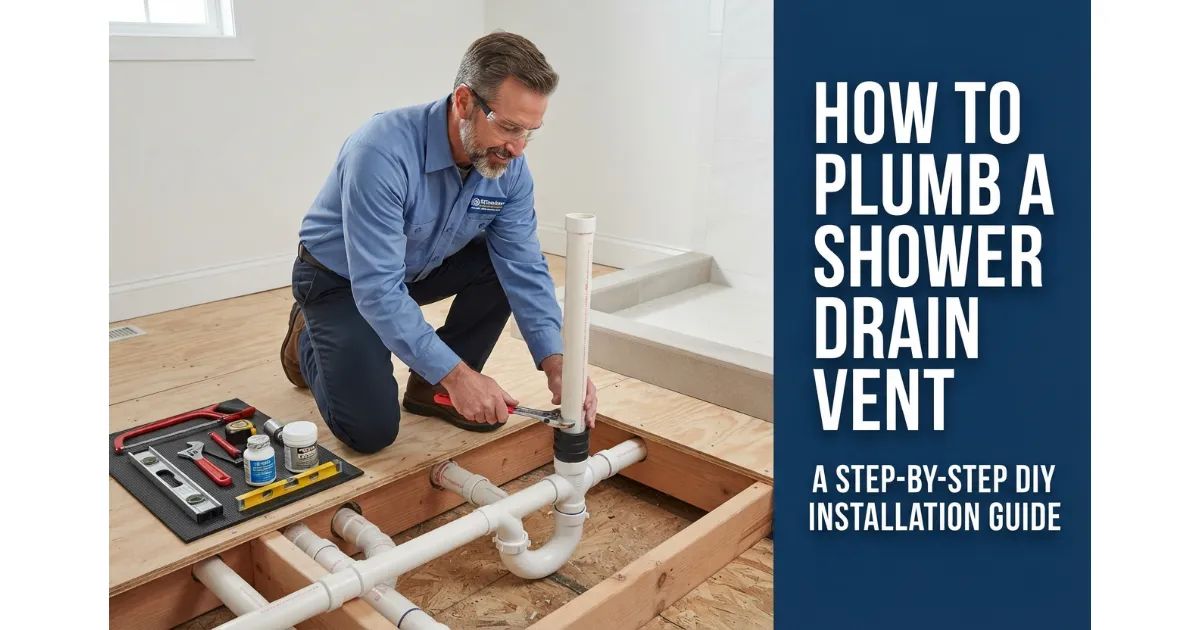
Plumbing a shower drain requires precise execution within your DWV system to ensure fast drainage and prevent sewer gas leaks. Plumb a shower drain by setting the drain body, installing a 2-inch P-trap with a slope of 1/4 inch per foot on the trap arm, connecting the vent, securing the shower pan, and testing it before closing up.
- Plan: Map out the layout aligning with your local plumbing codes and drain positioning.
- Rough-in pipe: Run the main drain line from the main stack to the shower location.
- P-trap: Install a code-compliant 2-inch P-trap to block sewer gases effectively.
- Vent: Connect an upstream or wet vent to maintain proper atmospheric pressure.
- Connect to pan: Securely attach the drain body and strainer to the shower pan flange.
- Test: Perform a rigorous water or air pressure test to verify zero leaks.
- Close up: Finish subfloor installations and wall boards only after passing inspection.
Three-Stage Breakdown Rough-in to Pan Connection
Mastering this installation requires dividing the workflow into three distinct, sequential stages. Skipping or rushing any of these phases can lead to structural water damage down the line.
- Stage 1: Rough-in Framework: Establishing the subfloor cutouts and aligning the main waste line to match your specific shower pan template.
- Stage 2: Trap and Vent Assembly: Installing the 2-inch P-trap and maintaining the strict slope of 1/4 inch per foot on the trap arm to prevent slow draining.
- Stage 3: Pan Integration: Gasketing and bolting the shower drain body tightly to the shower pan to create a permanent waterproof seal.
How a Shower Drain System Works
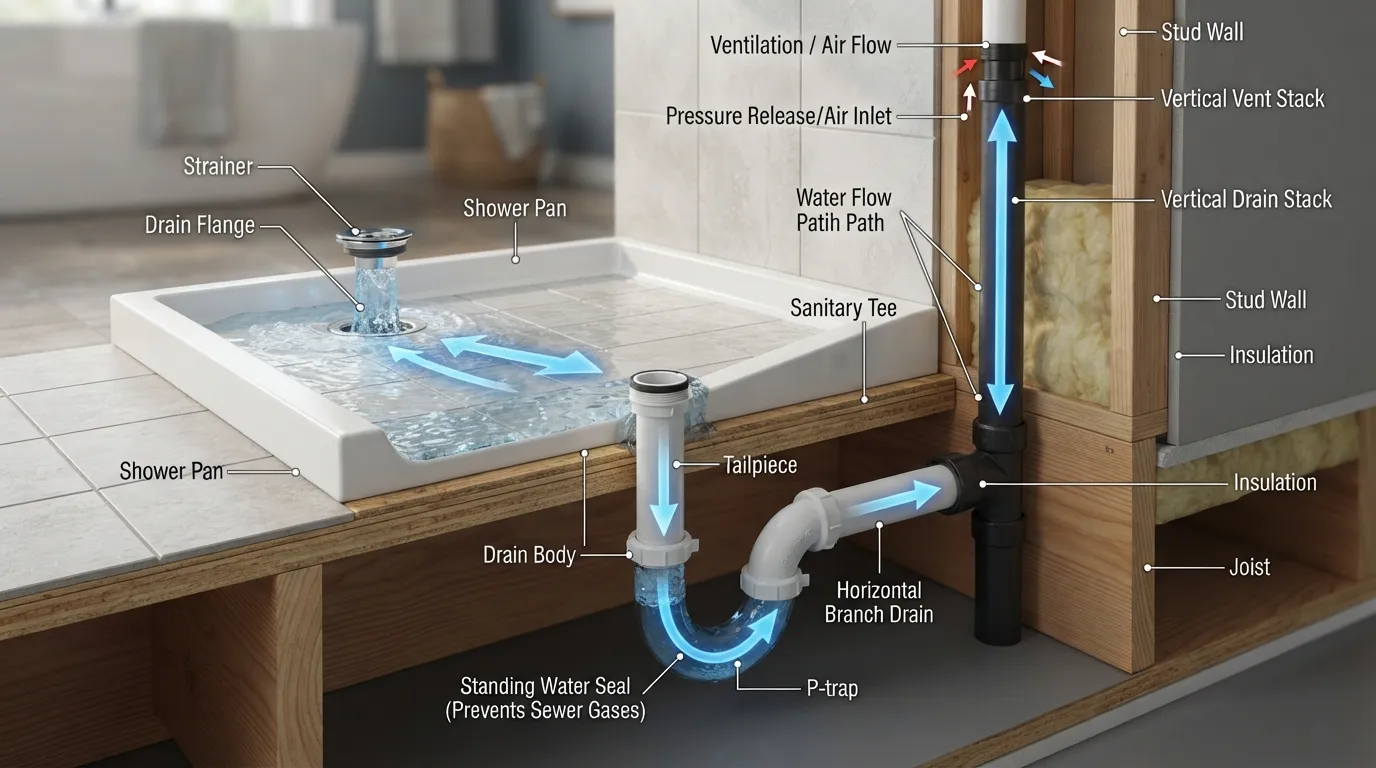
Understanding the underlying mechanics of your shower drain plumbing prevents costly mistakes and ensures long-term performance. A standard drain-waste-vent system routes wastewater safely away from your home while utilizing water seals and air pressure regulation to block dangerous sewer gases.
The 5 Key Parts Drain Body Riser Tailpiece P-Trap Trap Arm Vent
Every reliable shower installation relies on five interconnected components working in harmony. Each part has a specific function within your DWV system to manage wastewater flow efficiently.
- Drain Body & Strainer: The visible top entry point featuring a strainer that catches hair and debris while channeling water into the flange.
- Riser or Tailpiece: The short vertical pipe section connecting the drain flange down to the inlet of the P-trap.
- P-Trap: The curved U-bend section situated underneath that traps a standing pool of water to block sewer odors.
- Trap Arm: The horizontal pipe running away from the P-trap exit toward the main vent stack with a precise downward slope.
- Vent Stack: The vertical extension rising through the roof that equalizes atmospheric pressure and prevents drain siphoning.
Why the P-Trap Blocks Sewer Gas
The P-trap is a critical safety component mandated by all modern plumbing codes. Its unique curved geometry retains a small volume of water after every shower.
- Water Seal Barrier: The trapped water creates an airtight physical plug between the indoor living space and the outdoor sewer system.
- Odor Prevention: Without this constant water seal, toxic and foul-smelling sewer gases would freely vent up through your shower strainer.
- Self-Replenishing: Every time you use the shower, fresh water flushes through, replacing stagnant water and keeping the seal active.
Why Every Shower Needs a Vent
Without proper venting, your drainage system will experience severe hydraulic fluctuations and performance issues. Vents regulate airflow to ensure smooth, rapid wastewater evacuation.
- Preventing Siphoning: As large volumes of water rush down the pipe, they can pull the water right out of your P-trap if a vent is missing.
- Eliminating Gurgling: A connected vent stack introduces atmospheric air behind moving water, stopping noisy gurgling sounds in your walls.
- Maintaining Flow Speed: Proper air pressure prevents vacuums from forming, ensuring your shower water drains away instantly without backup.
Rough-In vs. Pan-Side Installation
Differentiating between rough-in plumbing and pan-side installation keeps your workflow organized and prevents alignment errors during a bathroom build.
- Rough-In Phase (Below Subfloor): Involves installing the main branch drain, the 2-inch P-trap, and the lower trap arm entirely underneath the subfloor framework.
- Pan-Side Phase (Above Subfloor): Involves connecting the upper drain body, clamping collar, and strainer directly to the shower pan liner or base surface.
- Clear Distinction: Rough-in deals with permanent waste-line infrastructure, whereas pan-side installation focuses on waterproof sealing right at the pan interface.
Before You Start Code Permits & Drain Type
Navigating local regulations and identifying your specific drain configuration ensures your plumbing installation passes inspection on the first try. Before cutting any pipes, verify your local municipal codes, secure necessary permits, and match your drain assembly to your shower base type.
Do You Need a Permit to Plumb a Shower Drain?
Major modifications to a drain-waste-vent system almost always require a municipal plumbing permit and mandatory inspections. Skipping this step can lead to hefty fines or complications when selling your home.
- Permit Mandate: Altering or installing new DWV lines changes your home’s structural infrastructure, triggering a local permit requirement.
- Inspection Process: Most jurisdictions require a rough-in inspection (before closing walls) and a final inspection after fixtures are set.
- Homeowner Legality: In many regions, homeowners can legally pull their own permits and do the plumbing, provided the work passes strict municipal code inspections.
IPC vs. UPC Why Vent Distances Differ
Plumbing rules vary based on whether your local municipality enforces the International Plumbing Code (IPC) or the Uniform Plumbing Code (UPC). These model codes dictate specific maximum distances allowed between your P-trap and the vent stack.
Which Shower Drain Type Do You Have?
Your choice of shower base dictates the exact drain assembly and installation method you must use. Selecting the wrong type will result in chronic water leaks.
Slab vs. Floor Joists vs. Basement What Changes
The structural foundation of your home radically alters how you access, route, and tie into your plumbing lines.
- Slab-on-Grade: Requires breaking concrete to rough-in underground drain lines, making precise initial measurements critical.
- Raised Floor Joists: Offers open crawlspace or basement access, making pipe routing, leveling, and slope adjustments much easier.
- Basement/Second Story: Upper floors allow routing pipes between floor joists, while basements provide direct ceiling access from below.
Tools & Materials Checklist
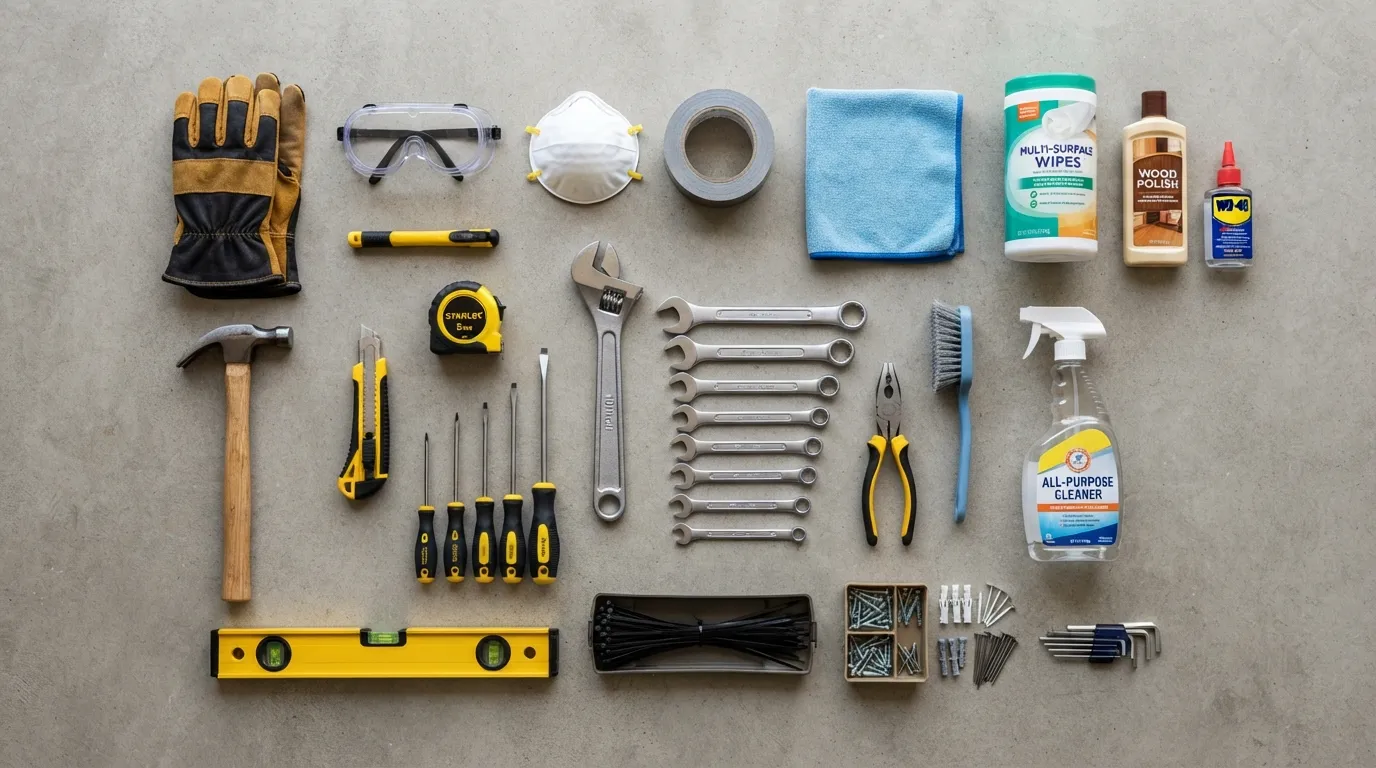
Gathering all required tools and plumbing supplies before starting prevents frustrating mid-project trips to the hardware store. Ensure you have the correct sizing, matching pipe materials, and specialized sealing compounds ready to assemble your shower drain system efficiently.
Pipes & Fittings
A standard residential shower drain requires robust materials capable of handling continuous wastewater flow. Industry standards mandate specific pipe diameters and fitting layouts to prevent clogging.
- 2-Inch PVC or ABS Pipe: The universal standard for shower drain-waste-vent systems to ensure proper flow capacity.
- 2-Inch P-Trap: A matching curved fitting installed beneath the drain to trap water and block sewer gas.
- 45-Degree Elbows & Couplings: Used to navigate tight spaces smoothly while maintaining a continuous downward slope.
- Pipe Hangers & Straps: Securely anchor horizontal and vertical pipe runs to floor joists or studs to eliminate sagging.
Solvent Cement Primer & Sealants
Choosing the correct chemical adhesives and sealants guarantees a permanently watertight and code-compliant plumbing network.
- Solvent Cement & Primer: Must match your pipe material (purple primer and clear cement for PVC; black or yellow cement for ABS).
- Plumber’s Putty: Used beneath the drain strainer flange to create a watertight seal against the shower basin top.
- 100% Silicone Sealant: Applied around threaded connections or rubber gaskets where putty is not recommended by manufacturers.
Tools
Having precision layout and cutting tools on hand ensures your pipes fit tightly and align with strict code slopes.
- Precision Level & Tape Measure: Essential for measuring exact distances and verifying the mandatory 1/4-inch per foot drainage slope.
- PVC/ABS Saw & Deburring Tool: A fine-toothed saw or plastic pipe cutter combined with a deburring tool for clean, smooth pipe edges.
- Test Plug & Pliers: A mechanical test plug to seal the drain line during pressure checks, along with tongue-and-groove pliers.
Don’t Mix These PVC and ABS Without a Transition Fitting
Mixing different plastic pipe materials incorrectly can lead to catastrophic joint failures and leaks over time.
- Incompatible Chemicals: Standard solvent cements will not chemically weld PVC to ABS, resulting in a weak, brittle joint.
- Thermal Expansion Differences: PVC and ABS expand and contract at different rates under fluctuating water temperatures, which shears glued direct connections.
- Transition Solution: If you must connect PVC to ABS, you are required by code to use a mechanical Fernco transition coupling with stainless steel bands.
Rough-In the Shower Drain Plumbing
Roughing in your shower drain plumbing establishes the foundational waste line network beneath your subfloor. Executing this phase correctly ensures your shower pan links up seamlessly without leaks or drainage bottlenecks.
Step 1: Locate and Mark the Drain Center
Precision alignment is crucial so your drain body matches the manufacturer cutout on your shower pan. Use a plumb bob or laser level dropped from your framing layout to establish the exact center point on the subfloor.
- Template Verification: Double-check your shower pan installation manual to verify the precise drain offset dimensions before cutting.
- Reference Lines: Snap chalk lines across the subfloor grid to intersect at your exact drain center coordinates.
Step 2: Cut the Floor and Check for Obstacles
Opening up the subfloor or concrete slab requires careful scouting to avoid damaging structural supports or hidden utilities. Clear out a clean access zone around your marked center point.
- Joist and Wiring Check: Inspect the crawlspace or basement below to ensure no electrical wires, supply lines, or critical joists block your path.
- Controlled Openings: Use a reciprocating saw or hole saw to cut an appropriately sized opening through the plywood subfloor or concrete.
Step 3: Run the 2-Inch Drain Line with Proper Slope
Establishing the correct downward grade prevents standing water and ensures rapid waste evacuation. Maintain the mandatory code slope across your horizontal pipe runs [00:01:28].
- Slope Standard: Pitch your 2-inch drain line downward at a consistent rate of 1/4 inch per foot toward the main stack.
- Dry-Fit First: Assemble your pipes, 45-degree elbows, and couplings without glue first to verify exact measurements and alignment.
Step 4: Support the Pipe and Connect to the Branch Main Drain
Unsecured pipes will sag over time, creating low spots that trap water and clog. Lock your rough-in plumbing firmly into place using heavy-duty hardware.
- Secure Strapping: Fasten pipe hangers or metal straps every 3 to 4 feet along horizontal runs to eliminate vibration and movement [00:01:16].
- Branch Tie-in: Connect your shower branch line securely into the main house DWV stack using sanitary tees or appropriate sweeps.
What If the Drain Doesn’t Line Up With the Pan?
Minor framing shifts or measurement discrepancies often cause drain misalignments between the subfloor rough-in and the shower pan. You can easily correct this without tearing out your entire plumbing network [00:01:06].
- Offset Adjustments: Use a combination of 45-degree or 22.5-degree fittings to gently jog the pipe over, aligning it perfectly with the pan opening [00:01:06].
- Structural Integrity: If boring through a floor joist was necessary to achieve alignment, ensure you sister an additional joist alongside it for reinforcement [00:01:06].
How to Plumb a Shower Drain Trap P-Trap
Plumbing a shower drain trap correctly is the most critical step to prevent hazardous sewer gases from entering your living space. Installing a code-compliant P-trap ensures a reliable water seal while maintaining smooth wastewater evacuation.
What Size P-Trap Does a Shower Need?
Building codes strictly dictate the pipe dimensions for shower installations to handle high-volume water output without backing up.
- Standard 2-Inch Diameter: Residential codes uniformly require a 2-inch P-trap and drain line for showers, unlike bathroom sinks which typically use 1-1/4 or 1-1/5 inch pipes.
- Code Compliance Check: Always verify your local municipal guidelines, as undersized drain traps will fail inspection and cause chronic slow drainage.
Which Way Does a P-Trap Face?
Proper orientation of the P-trap is essential for correct hydraulic flow and trap priming performance.
- Tailpiece Alignment: The inlet side of the P-trap faces straight up, connecting directly to the vertical tailpiece coming down from the shower drain.
- Trap Arm Direction: The outlet side connects to the horizontal trap arm, which must slope downward toward the main vent stack.
Aligning the Trap Under the Drain Body
Getting your P-trap to line up precisely with the upper shower drain requires meticulous dry-fitting before applying any solvent cement.
- Vertical Plummet: Ensure the vertical drop from your shower drain flange centers squarely over the P-trap inlet without creating lateral stress on the pipes.
- Adjustment leeway: Utilize short pipe segments and 45-degree elbows during the dry-fit phase to micro-adjust the trap position until alignment is exact [00:08:37].
Slip Nuts, Glue or Both?
Knowing where to use solvent welds versus mechanical connections prevents joint failure and future leaks.
- Solvent Welded PVC/ABS: Permanent underground or behind-the-wall P-trap assemblies must be joined using chemical primer and solvent cement.
- No Glue on Threaded Parts: Never apply glue to slip nuts or rubber washers; these rely entirely on mechanical compression to maintain a watertight seal.
Trap Depth Water Seal and Dry Trap Problem
The physical structure of the P-trap relies on trapped liquid to perform its primary safety function.
- Water Seal Barrier: The internal bend retains a standard 2-to-4 inch pool of water that blocks noxious sewer odors from entering the room.
- Dry Trap Risk: In guest bathrooms or rarely used showers, the standing water can evaporate over time (becoming a “dry trap”), allowing sewer gas to leak in until refilled.
Common P-Trap Mistakes
Avoiding typical DIY plumbing errors ensures your installation passes inspection and functions safely for decades.
- Prohibited S-Traps: Installing a trap that drops straight down into a vertical waste line without a horizontal vent arm creates an S-trap, which siphons the water seal dry.
- Misalignment Stress: Forcing pipes together out of alignment puts permanent tension on glued joints, leading to premature cracking and leaks.
Venting a Shower Drain
Proper venting is the hidden engine of your shower plumbing, ensuring waste water evacuates rapidly and safely. Neglecting vent requirements leads to sluggish drainage, annoying gurgling sounds, and dangerous siphoning of your protective P-trap water seal.
Why a Shower Drain Needs a Vent
As large volumes of water surge down your 2-inch drainpipe, they push air ahead and create a partial vacuum behind them. Without a dedicated air supply, this hydraulic suction wreaks havoc on your system.
- Preventing Trap Siphoning: A missing vent acts like a straw, sucking the standing water completely out of your P-trap and opening a direct pathway for sewer gas.
- Eliminating Gurgling Noises: Air pulled backwards through your shower strainer creates bubbling or gurgling sounds as the system gasps for atmospheric pressure.
- Maximizing Flow Speed: Introducing steady airflow behind wastewater allows it to free-fall smoothly down the waste stack without creating flow bottlenecks.
How Far Can the Vent Be From the Trap?
Plumbing codes strictly limit how far a horizontal trap arm can travel before it must intersect with a vent. Exceeding these maximum distances creates an illegal unvented trap.
Wet Vent Individual Vent and Air Admittance Valve
Depending on your bathroom layout and local municipal code amendments, you can choose from several approved venting configurations.
- Individual Vent: A dedicated vertical pipe running straight from your shower trap arm up through the roof or tying into a higher vent stack.
- Wet Venting: A clever code-approved method where a bathroom group (like a lavatory sink drain) doubles as a vent for your shower.
- Air Admittance Valve (AAV): A mechanical one-way spring valve that lets fresh air in when water drains, though many local codes prohibit them or restrict their use.
Connecting to an Existing Vent Stack
Tying your shower trap arm into an existing home vent network requires careful fitting selection to keep waste out of your dry vents.
- Above Flood Level: Any horizontal wet-to-dry vent transition must occur at least 6 inches above the flood rim of the highest fixture served.
- Proper Fittings: Use sanitary tees or directional sweeps when tying into vertical vent stacks to prevent accidental wastewater backflow into dry vent lines.
Signs Your Shower Vent Is Wrong
Recognizing the symptoms of poor venting helps you diagnose and correct plumbing failures before they compromise indoor air quality.
- Foul Sewer Odors: A dry or frequently siphoned P-trap will release unmistakable sulfur smells around your shower base.
- Sluggish Pulsing Drains: Water that starts draining fast then slows down and gulps air points directly to an inadequate air supply.
Connecting the Drain to the Shower Pan
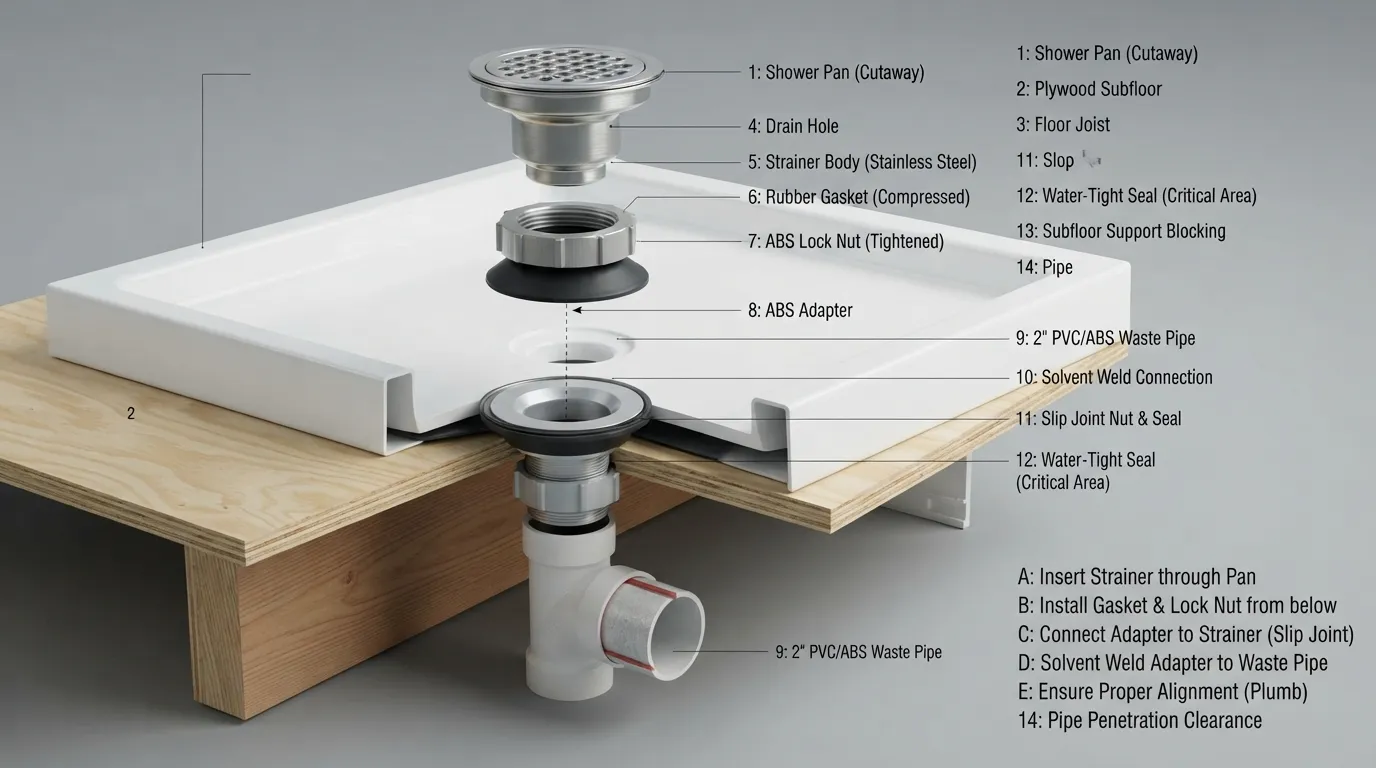
Connecting your drain assembly to the shower pan is the pivotal moment where rough plumbing transitions into finished waterproofing. Selecting the correct installation method depends entirely on whether you are using a preformed acrylic base or building a custom tiled shower pan.
Preformed Shower Base With a No-Caulk Drain
Preformed acrylic or fiberglass shower bases use a no-caulk compression drain that locks directly onto the vertical tailpipe from above. Always review Oatey’s no-caulk preformed shower drain installation guide to verify specific torque and sealant requirements.
- Flange Sealing: Apply a liberal bead of plumber’s putty beneath the upper strainer flange (or 100% silicone if required by the manufacturer for ABS bases).
- Compression Gasket: Push the rubber gasket down over the pipe and into the drain body, using soapy water as a lubricant to help it seat evenly.
- Locking Nut: Tighten the compression nut with the included tool to squeeze the rubber gasket tightly against the 2-inch pipe, creating a permanent watertight grip.
Tile Shower Pan With a Clamping-Ring Drain
Custom tiled shower floors require a multi-piece clamping-ring drain designed to integrate seamlessly with a flexible waterproof pan liner.
- Lower Flange Connection: Solvent-weld the lower drain body securely to your 2-inch P-trap riser pipe before laying your sub-base mortar.
- Liner Sandwiching: Lay your PVC or CPE waterproof membrane over the lower flange, pierce a hole for the drain bolt pattern, and bolt the upper clamping ring down over it.
- Weep Hole Protection: Place small pieces of pea gravel or a specialized weep protector directly over the weep holes to prevent mortar from clogging them later.
The Step Most DIYers Skip
Skipping the pre-slope mortar bed beneath your shower pan liner is the leading cause of chronic subfloor rot and foul odors in custom tiled showers.
- Sub-Liner Pitch: You must trowel a sloped mortar bed directly over the subfloor before laying your waterproof liner, pitching downward at 1/4 inch per foot toward the drain.
- Catching Subsurface Water: Water that permeates through grout and thinset hits the waterproof liner and relies on this pre-sloped bed to guide it safely down to the drain’s weep holes.
- Preventing Stagnant Puddles: Without a proper pre-slope, water pools under the liner, breeding mold and mildew that eventually ruins your bathroom floor.
Linear or Bonding-Flange Drain
Modern curbless and open-concept tiled showers frequently utilize contemporary linear drains or bonding-flange assemblies.
- Direct Membrane Integration: Instead of clamping a flexible liner, these drains feature a wide bonding flange wrapped directly with liquid or sheet waterproofing membranes.
- Precise Grading: Tile setters must slope the shower floor uniformly toward the linear channel, maintaining a consistent gradient (often 2% per meter) for rapid drainage.
Setting the Drain Height for Tile Thickness
Matching your drain strainer height to your final finished floor elevation prevents annoying standing water rings or tripping hazards.
- Accounting for Build-Up: Calculate the combined thickness of your cement backer board, mortar bed, thinset adhesive, and floor tiles before locking in your drain height.
- Adjustable Strainers: Use threaded collar extensions or adjustable-height drain heads to raise or lower the grate until it sits flush with the finished tile surface.
Leak Test & Flood Test Before You Close Up
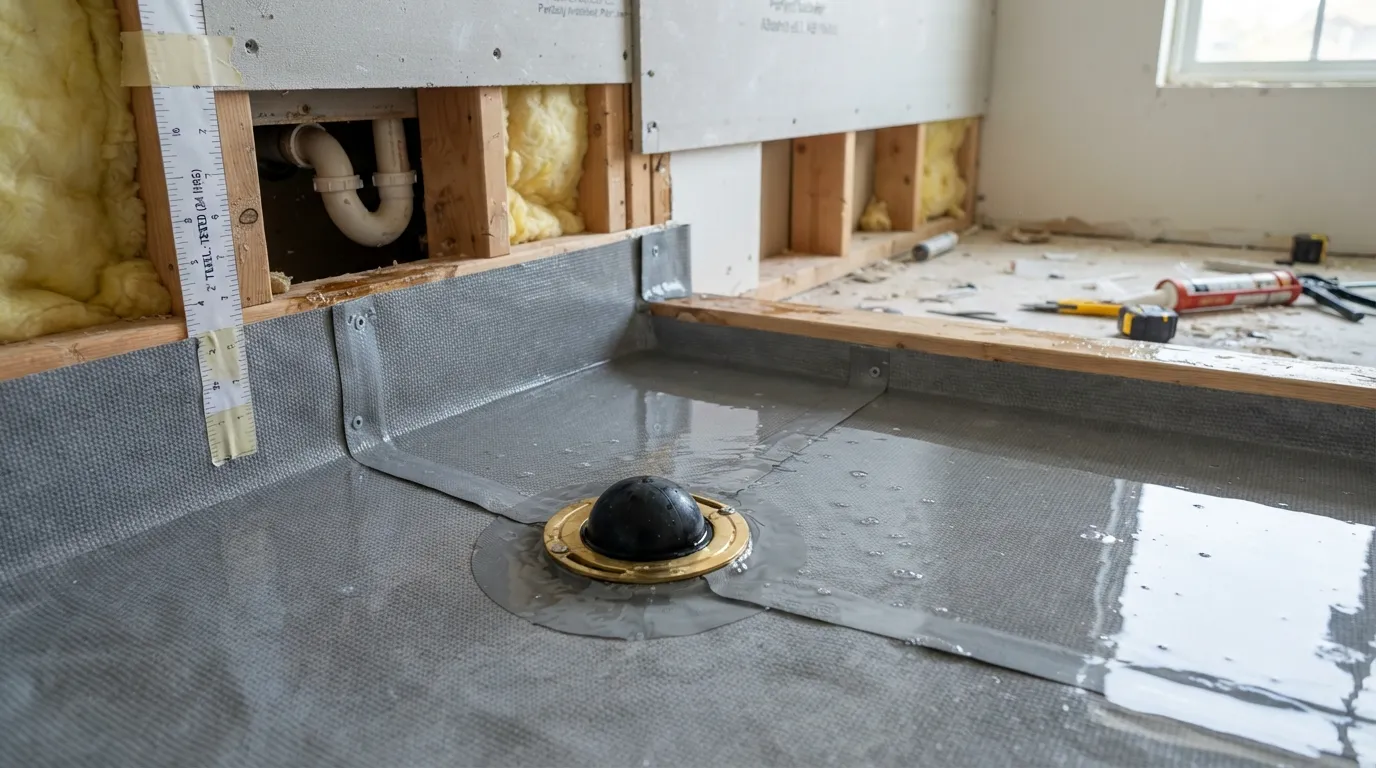
Rigorous water testing before closing up walls and installing tile is the ultimate safeguard against catastrophic structural water damage. Performing structured leak and flood tests ensures your newly plumbed drain system and waterproof membrane are completely airtight and watertight.
Step 1: Test the Drain Pipe Joints for Leaks
Before installing your shower pan or pouring mortar, verify that every solvent-welded joint in your rough-in plumbing is completely leak-free under actual flow conditions.
- Mechanical Test Plug: Insert a mechanical test plug into the 2-inch drain pipe downstream of your P-trap and tighten it securely.
- Upstream Water Fill: Fill the upper pipe assembly with water from above or run a hose directly into the rough-in line to pressurize the joints.
- Inspection Window: Let the water sit under pressure for at least 15 to 30 minutes while inspecting every PVC primer and cement joint from below with a flashlight.
Step 2: Flood Test the Shower Pan
Once your shower pan liner or waterproofing membrane is fully installed—but long before any tile goes down—you must perform a mandatory flood test to verify waterproof integrity.
- Plug the Drain: Insert an inflatable test ball or mechanical plug tightly into the drain opening inside the shower pan.
- Water Depth & Duration: Fill the shower pan with 2 to 3 inches of water, mark the exact water level with a waterproof marker or piece of tape, and let it sit for a full 24 hours.
- Concrete and Subfloor Inspection: Check the ceiling or crawlspace below immediately after filling and again 24 hours later; if the water level drops or moisture appears below, your liner has a leak.
Step 3: Check That the Weep Holes Drain
A standard pan flood test checks the waterproof liner basin, but it completely bypasses the weep holes. You must perform a separate targeted check to ensure subsurface moisture can escape.
- Targeted Pour Test: After draining the main pan test, pour a small cup of water directly into the pre-slope mortar bed area surrounding the clamping ring.
- Flow Verification: Inspect the drain assembly from below to confirm water is actively weeping out through the drain channels rather than pooling under the floor.
- Clear Blockages: If water does not emerge from the weep holes, immediately clear out any trapped mortar, thinset, or excess silicone blocking the channels.
What to Do If You Find a Leak
Discovering a leak during testing is frustrating, but it is infinitely better than finding one six months after your custom tile is finished.
- Drain Joint Failure: If a PVC glue joint weeps water, completely cut out the faulty fitting, allow the pipe to dry thoroughly, and rebuild the section with new primer and cement.
- Liner Puncture: If a custom tile pan liner fails a flood test, locate the tear using a moisture meter, patch it with manufacturer-approved chemical adhesive and a liner patch, and re-test for another 24 hours.
Common Mistakes & Troubleshooting
Even seasoned do-it-yourselfers can run into snags if crucial installation steps are overlooked. Reviewing the most frequent plumbing errors helps you troubleshoot unexpected drainage issues and prevents costly structural repairs down the road.
8 Mistakes That Cause Leaks Slow Drains or Smells
Avoiding these eight critical missteps ensures your shower plumbing remains watertight, odorless, and fully code-compliant throughout its lifespan.
- Improper Slope: Failing to maintain the mandatory 1/4-inch per foot downward pitch creates back-pitch, leading to standing water and clogs.
- Glue on Threaded Parts: Applying solvent cement to slip nuts or threaded tailpieces destroys mechanical seals and causes chronic weeping leaks.
- Missing Vent Stack: Omitting a proper vent line causes severe pneumatic suction that siphons your P-trap dry and pulls sewer gas indoors.
- Blocked Weep Holes: Allowing excessive silicone or mortar to smother clamping-ring weep holes traps moisture beneath your tile base.
- Incorrect Drain Height: Setting the rough drain body too high or too low relative to finished tile thickness creates dangerous tripping hazards or pooling rims.
- Mixing PVC and ABS: Gluing PVC directly to ABS without a code-approved transition coupling results in brittle joints that shear apart over time.
- Inadequate Pipe Support: Leaving horizontal drain runs unstrapped causes pipe sagging, joint stress, and eventual structural separation.
- Skipping Permits & Tests: Bypassing municipal inspections and water pressure tests leaves hidden leaks undiscovered until finished walls rot.
Gurgling Slow Drain or Sewer Smell What It Means
Your plumbing system communicates distress through distinct sensory warnings. Matching the symptom to its root cause allows you to target the exact fix immediately.
- Gurgling Sounds: Indicates air starving in the waste line, typically caused by a blocked vent stack or an undersized wet vent configuration.
- Sluggish Drainage: Usually points to an obstructed pipe, grease buildup, or an incorrect pipe slope that slows down wastewater velocity.
- Fewer Sewer Odors: Points directly to a dry P-trap (from infrequent use) or a cracked trap seal allowing toxic sewer gas to vent into your bathroom.
Drain Too High or Too Low for the Tile
Misjudging your finished floor elevation during the rough-in stage creates frustrating alignment mismatches once tilework begins.
- Drain Too High: Forces water to pool in a wide ring around the strainer because the surrounding tile floor slopes upward toward it.
- Drain Too Low: Creates an unsightly depression or recessed basin where standing water and soap scum permanently accumulate.
- Correction Method: Use adjustable-height clamping assemblies or threaded collar extensions during the pan integration phase to dial in a perfectly flush finish.
DIY vs. Hiring a Plumber
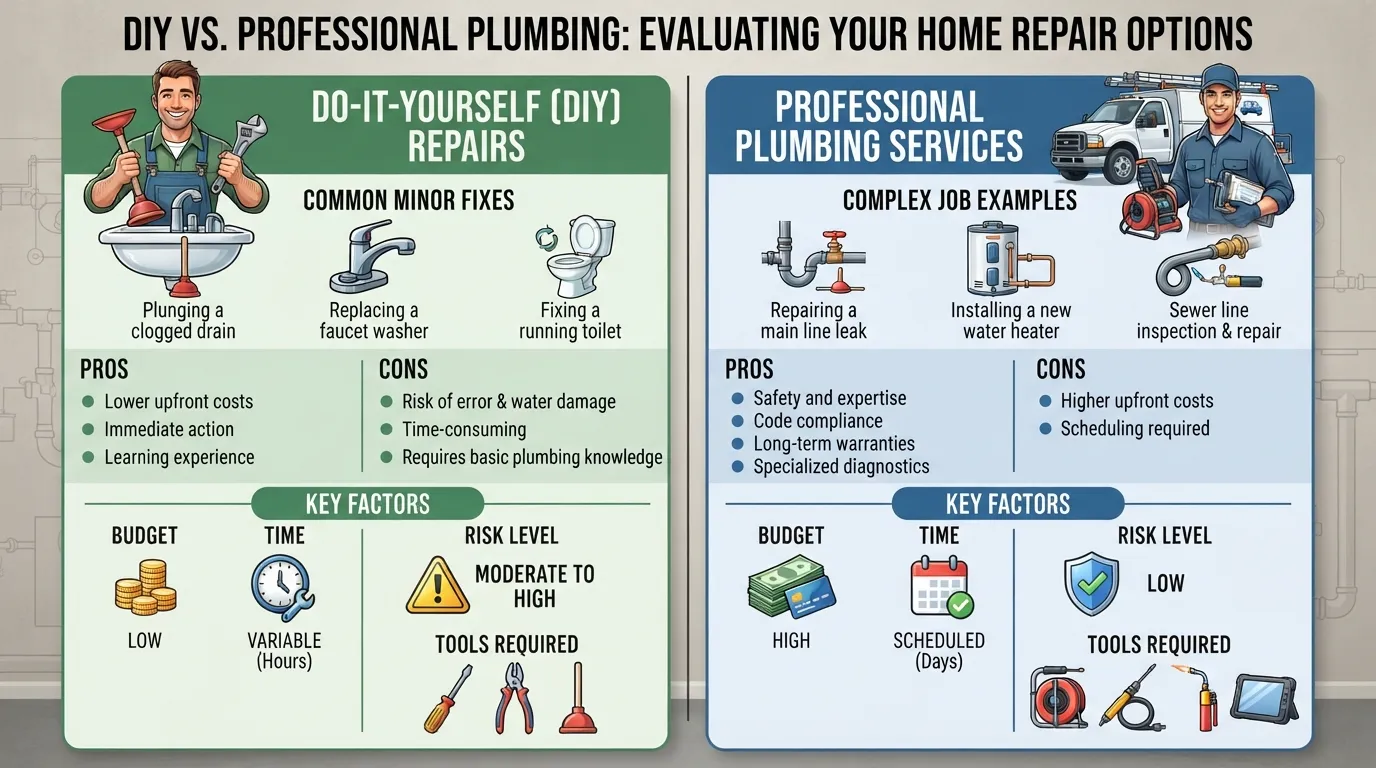
Deciding whether to tackle your shower drain installation yourself or hire a professional depends heavily on your comfort level with PVC assembly, structural framing, and local building codes. Evaluating the complexity of your specific project helps prevent costly mistakes.
When DIY Makes Sense
Taking on shower drain plumbing as a do-it-yourself project is entirely feasible under the right conditions and saves significant labor costs.
- Accessible Crawlspace or Basement: Open framing beneath the subfloor makes routing pipes, setting the P-trap, and making connections straightforward.
- Straightforward Replacement: Swapping out an existing shower drain or installing a preformed acrylic base in a ground-floor bathroom requires basic cutting and gluing skills.
- Comfort with Code and Tools: If you are willing to study your local IPC or UPC guidelines, pull a permit, and perform meticulous dry-fits, DIY is a rewarding path.
When to Call a Licensed Plumber
Certain complex plumbing scenarios involve high-stakes structural or safety risks where bringing in a licensed professional is the smartest choice.
- Second-Story Work: Working on upper floors increases water damage risks and often requires tying into vertical vent stacks hidden inside finished walls.
- Subfloor Rot or Structural Damage: Rotted joists or compromised subfloor framing require structural repair before any new plumbing can be safely supported.
- Historic Cast Iron or Lead Pipes: Tying modern PVC or ABS into old cast iron or lead waste stacks requires specialized transition fittings and professional cutting tools.
What Affects the Cost
If you decide to hire a professional plumber, several variables will influence the overall project estimate and labor timeline.
- Accessibility: Tight crawlspaces, finished ceilings below, or concrete slab-on-grade tear-outs significantly increase labor hours.
- Code Upgrades: Bringing an older, non-compliant waste-and-vent system up to modern municipal standards adds required materials and time.
- Permit and Inspection Fees: Local municipal permit costs and mandatory inspection fees vary by region and are typically factored into professional bids.
Frequently Asked Questions
Why Does a Shower Drain Need a Vent?
Proper venting is essential for every shower drainage system to ensure smooth, high-speed wastewater discharge and protect your home from hazardous sewer gases. Without a functional vent, rushing water creates vacuum pressure that disrupts the plumbing infrastructure.
- Preventing Trap Siphoning: A dedicated vent introduces air behind the flowing water, stopping suction from pulling the protective water seal out of the P-trap.
- Eliminating Gurgling: Adequate air supply prevents disruptive bubbling, slow drainage, and strange noises in your bathroom plumbing lines.
- Maintaining Flow Speed: Proper air pressure balance allows wastewater to evacuate smoothly and rapidly toward the main stack.
Maximum Distance From the Vent?
Plumbing codes strictly regulate how far your 2-inch shower trap can be located from the main vertical vent stack to prevent trap dry-out and siphoning.
- IPC Code Standard: The International Plumbing Code allows up to 6 feet of developed distance for a 2-inch trap arm maintaining a 1/4 inch per foot slope.
- UPC Code Standard: The Uniform Plumbing Code sets a stricter limit of 5 feet (60 inches) for the same 2-inch trap arm configuration.
- Local Verification: Always confirm which building code (IPC or UPC) is enforced in your local municipality before roughing in your pipes.
Air Admittance Valves AAVs and Permits?
Navigating local plumbing regulations and mechanical venting options ensures your shower installation passes official inspection without costly do-overs.
- Using an AAV: An Air Admittance Valve is a mechanical one-way vent option if tying into a traditional vent stack is impossible, though many local building codes restrict or outright ban their use.
- Permit Requirements: Plumbing a new shower drain almost universally requires a municipal permit. While homeowners are often legally allowed to perform the work themselves, passing a formal inspection is mandatory.
Conclusion & Next Steps
Successfully plumbing a shower drain requires meticulous planning, strict adherence to local building codes, and patience during the testing phases. By methodically routing your 2-inch waste line, setting a secure P-trap, maintaining a proper vent connection, and conducting thorough flood tests, you ensure a professional, leak-free installation that protects your home for decades.
Final Checklist Before You Tile
Review this essential final checklist to confirm your plumbing and waterproofing systems are completely secure before laying your finished shower tiles.
- Drain Slope Verified: Confirm that your horizontal trap arm maintains a consistent downward slope of 1/4 inch per foot toward the main stack.
- P-Trap Water Seal Active: Ensure the 2-inch P-trap is correctly oriented and filled to maintain a reliable gas-blocking water barrier.
- Drain Height Adjusted: Double-check that your strainer and flange sit flush with your projected finished floor and tile thickness.
- Weep Holes Clear: Inspect clamping or bonding flanges to verify that weep holes remain entirely unobstructed by silicone or mortar.
- Flood Test Passed: Confirm your 24-hour shower pan flood test showed zero drop in water level and no moisture below.
- Rough-In Inspection: Verify that all required municipal permits and rough-in plumbing inspections have officially passed.

Oscar Vance | Master Plumber & Drainage Expert
Meet Oscar Vance, a licensed master plumber sharing practical solutions on residential repairs, preventive maintenance, and thoughtful home upkeep.


Pingback: How to Flush a Water Heater Safely: Step-by-Step Guide
Pingback: How to Check for Water Leaks Using Water Meter: 6 Steps