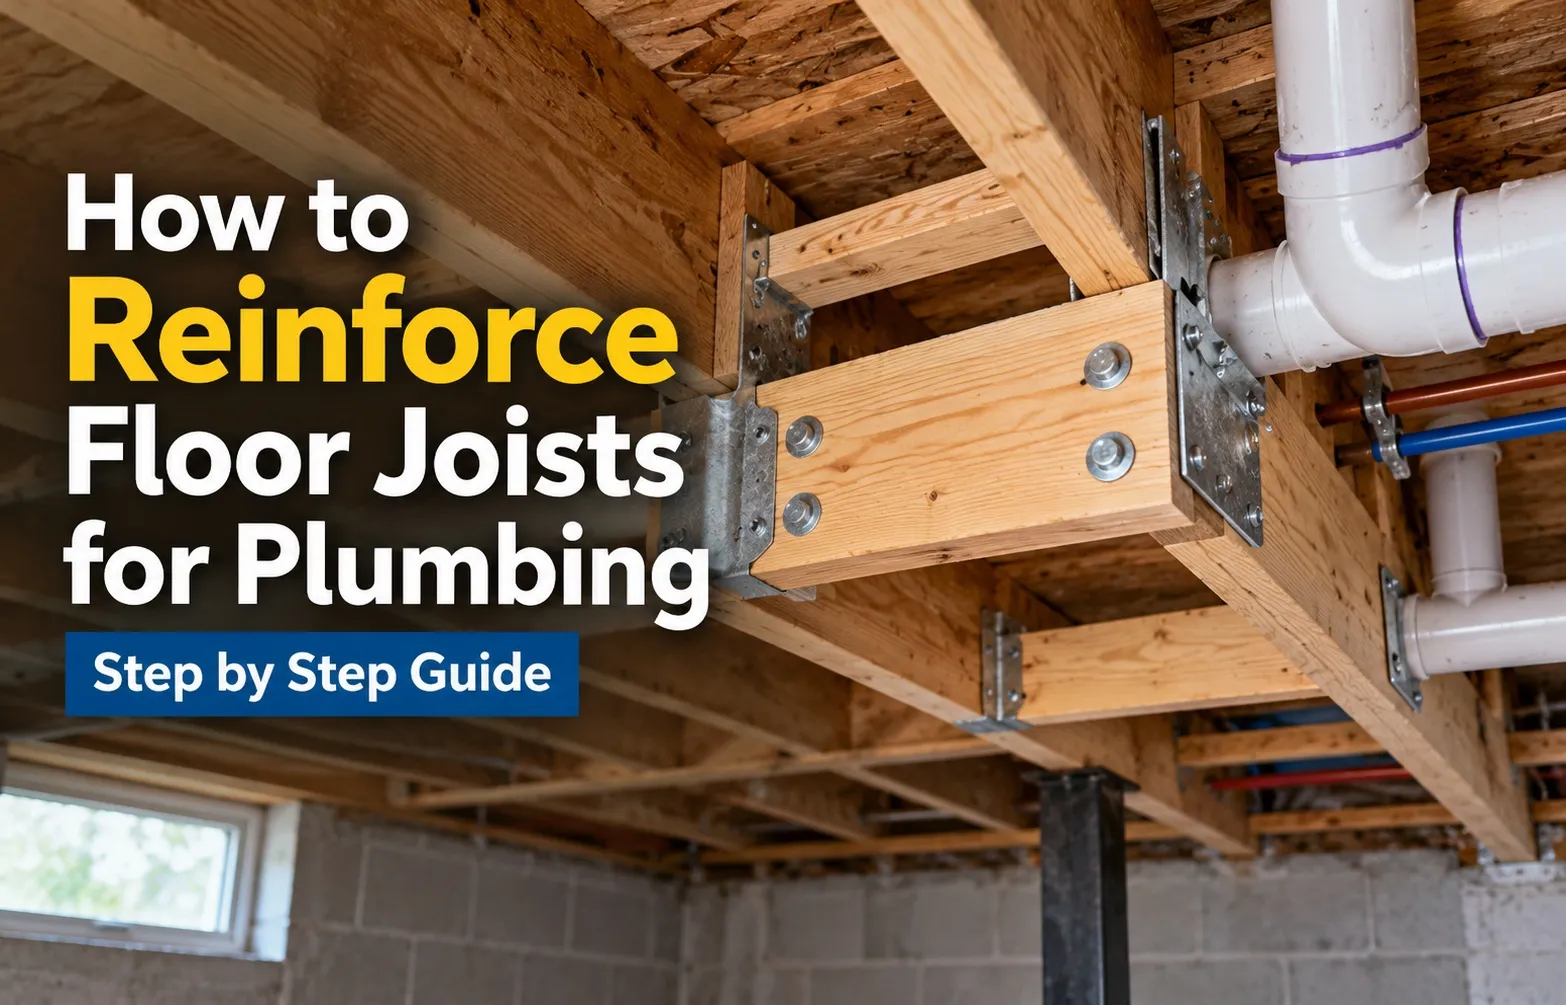
 Why Plumbing Wreaks Havoc on Floor Joists
Unauthorized plumbing modifications can severely compromise the structural integrity of a building, turning a standard pipe installation into a costly structural hazard. When plumbers cut, drill, or notch through core load-bearing beams without adhering to proper load paths, your entire flooring framework loses its capacity to distribute weight effectively.
The Hidden Danger of Unauthorized Plumbing Holes and Notches
During a fast-paced plumbing rough-in, installers frequently carve out excessive space for drain lines and supply pipes without realizing how wood framing reacts to structural stress. Floor joists rely on continuous solid lumber or engineered web integrity to support live loads from furniture and residents alongside dead loads from construction materials.
- Excessive Hole Diameter: Drilling oversized holes too close to the top or bottom edges destroys critical tension and compression zones.
- Improper Notching: Cutting notches into the middle third of a joist span acts as an immediate stress concentration point under heavy weight.
- Compromised Load Paths: Interrupting continuous lumber forces adjacent, unprepared joists to carry unbalanced weight distributions.
Once these structural boundaries are crossed, deflection occurs rapidly. The wood begins to bow, causing noticeable distortions across your finished flooring long before a catastrophic failure manifests.
When is a Weakened Joist an Emergency? (Signs Your Floor is Sinking)
Identifying the early warning signs of a failing floor joist helps homeowners prevent expensive structural collapses and hazardous living conditions. If you notice localized bouncing, uneven surfaces, or drywall cracking directly beneath your plumbing fixtures, your framing requires immediate professional evaluation and reinforcement.
- Springy or Bouncing Floors: A noticeable dip or excessive springiness when walking across specific rooms or plumbing corridors.
- Sticking Doors and Windows: Interior doors failing to latch properly due to shifting wall studs tied to sagging floors.
- Visible Ceiling Cracks: Drywall cracks radiating outward on the ceiling directly underneath second-story bathrooms or kitchens.
- Gaps Along Baseboards: Separation forming between baseboards and flooring as structural load-bearing beams settle unevenly.
Ignoring these symptoms allows continuous deflection to worsen over time under everyday household use. Implementing prompt, code-compliant reinforcement methods restores your framing system’s stability before structural damage spreads further.
Building Code Rules: Where Can You Drill and Cut?
Adhering to established building codes ensures your framing system maintains maximum load-bearing capacity during plumbing installations. Understanding the strict structural boundaries set by the International Code Council (ICC) prevents costly structural failures and inspection failures.
The Golden Rule: The “Middle Third” Principle for Drilling Holes
According to standard building codes, holes drilled through solid lumber floor joists must always remain strictly within the middle third of the joist depth. Furthermore, maintaining a mandatory 2-inch edge clearance from both the top and bottom edges protects the lumber’s primary load-bearing tension and compression zones.
- Hole Diameter Limits: The maximum diameter of any drilled hole must never exceed one-third of the total depth of the joist.
- Spacing Requirements: Multiple holes must be spaced at least two diameters apart from edge to edge to prevent localized stress concentration.
- Prohibited Zones: Never drill holes near the extreme top or bottom fibers where bending stress is highest.
Notch Restrictions: Why You Must Never Cut the Middle Span
Notches are significantly more destructive to structural integrity than drilled holes and are strictly prohibited within the middle third of a joist’s span. Permitted notches are exclusively restricted to the ends of the joist directly over structural supports.
- End Notch Limits: Notches located at the ends of a joist must not exceed one-fourth of the total joist depth.
- Span Notches: Notches along the outer edges elsewhere on the span are generally limited to one-sixth of row depth under strict IRC codes.
- Avoidance: Plumbers should always prefer drilling centered holes over cutting edge notches whenever structural safety is a priority.
Solid Lumber vs. Engineered Wood: Know Your Joist Type
Standard dimensional lumber obeys traditional IRC rules, but engineered wood products like I-joists feature completely different manufacturer-specified limitations. Cutting or drilling the oriented strand board (OSB) web of an I-joist requires strict adherence to proprietary manufacturer charts rather than standard dimensional formulas.
- Solid Lumber (2×8, 2×10): Follows classic IRC hole placement and notching rules precisely based on nominal depth.
- Engineered I-Joists: Feature pre-stamped knockout locations or strict manufacturer limitations where web cuts must follow exact engineering guidelines.
- LVL Beams: Laminated Veneer Lumber beams have zero structural tolerance for unauthorized drilling or notching without an engineer’s explicit sign-off.
Decision Matrix: Which Reinforcement Method Do You Need?
Selecting the proper structural fix depends entirely on the severity and location of the plumbing cutout. Matching your specific floor damage to the correct reinforcement method prevents wasted effort and ensures the structural load path is safely restored across your framing.
Damage-to-Solution Mapping Table (Small Holes vs. Severed Joists)
Reviewing a structured damage-to-solution matrix helps homeowners instantly identify whether a minor patch, joist sistering, or a complete framing box is required for their specific plumbing layout.
Assessing the Risk: When DIY Fixes Aren’t Enough
Assessing structural risk accurately prevents amateur mistakes from escalating into expensive home failures. While minor plywood scabbing handles standard plumbing mishaps, multiple compromised primary beams require professional engineering oversight to secure the continuous load path.
- Multiple Adjacent Damage: When several parallel joists are compromised within the same bathroom or kitchen corridor.
- Load-Bearing Walls Above: If the damaged joist supports a main wall, stairwell, or heavy second-story appliance.
- Severe Deflection: Visible sagging or permanent bowing exceeding half an inch requires professional evaluation before any DIY application.
Joist Sistering (Step-by-Step for Solid Lumber)
Joist sistering restores lost structural strength by running a matching piece of dimensional lumber directly alongside the compromised beam. This proven method successfully bridges the cut or drilled section, locking the structural load path back into place safely.
What is Joist Sistering and How Does It Restore Strength?
Joist sistering is a structural repair technique where a fresh piece of dimensional lumber is installed parallel and flush against a damaged joist. By fastening them together with high-strength adhesives and structural screws, the new member shares the load and completely compensates for any plumbing holes or notches.
- Full-Span vs. Partial Sistering: Ideally, the new joist should span the entire distance between supports, though partial boards spanning at least three feet on either side of the damage can work if full placement is blocked.
- Load Sharing: The sistered assembly behaves as a single composite unit, eliminating bounce and stabilizing sagging subfloors.
- Stress Redistribution: Bending stress is transferred smoothly from the weakened core directly into the fresh, solid timber board.
Materials & Hardware Required (#10 Structural Screws, 2×10 Lumber, Construction Adhesive)
Gathering professional-grade materials is essential for a permanent joist repair. Standard drywall screws and basic wood glue lack the shear strength required for structural framing; you must use heavy-duty hardware designed specifically for load-bearing wood-to-wood connections.
- Dimensional Lumber: Select a board of identical dimension (such as 2×10 lumber) and species to match the existing joist.
- Structural Screws: Use #10 structural screws (at least 3 inches long) instead of standard nails or weak drywall screws.
- Construction Adhesive: Apply heavy-duty polyurethane construction adhesive, such as PL Premium, to bond the faces together securely.
- Clamping Tools: Heavy-duty C-clamps or bar clamps are necessary to squeeze the boards tightly prior to fastening.
Clamping, Gluing, and Staggered Fastener Patterns
Installing a sistered joist requires precise preparation, heavy clamping, and an aggressive staggered screw pattern. Following a controlled installation sequence ensures maximum adhesive transfer and eliminates any gaps between the lumber faces.
- Surface Preparation: Clean all dust, debris, and protruding staple points from the target face of the existing joist to ensure proper wood contact.
- Apply Adhesive: Spread a thick zigzag bead of PL Premium construction adhesive across the entire face of the new lumber board.
- Position and Clamp: Lift the new board flush against the damaged joist, aligning the top edges, and secure it tightly using multiple heavy-duty C-clamps.
- Drive Staggered Fasteners: Install #10 structural screws using a staggered screw pattern (alternating high and low along the length) spaced roughly 12 inches apart.
- Curing Time: Allow the construction adhesive to cure fully according to manufacturer instructions before removing the clamps or subjecting the floor to heavy loads.
Plywood Scabbing & Gussets (Fixing from Below in Finished Ceilings)
Plywood scabbing allows homeowners to repair compromised floor joists from below without tearing out finished ceiling drywall or upper-level flooring. This targeted reinforcement method sandwiches the damaged zone with structural wood panels to restore load paths efficiently.
How to Reinforce Joists Without Tearing Out Your Entire Floor
Reinforcing from below requires cutting a strategic drywall window only around the damaged joist zone rather than dismantling the entire room. This localized approach minimizes renovation mess while providing direct access to apply structural gusset plates.
- Targeted Drywall Removal: Exposing only the specific span section containing the plumbing cutout or notch.
- Minimal Disruption: Preserving the surrounding ceiling structure and finished flooring surfaces upstairs.
- Direct Access: Allowing installers to apply mechanical fasteners and heavy adhesives directly to the exposed framing.
Cutting and Positioning 3/4-Inch Plywood Gussets
High-grade 3/4-inch exterior plywood cut into long rectangular gusset plates must span at least 3 feet on either side of the damaged area. Proper centering ensures structural loads bypass the plumbing cutout entirely.
- Panel Thickness: Always select exterior-grade 3/4-inch plywood to match or exceed structural rigidity requirements.
- Span Extension: Ensure the plywood extends at least 36 inches past both sides of the hole or notch center.
- Precise Fit: Cut the plywood profile to match the exact height of the joist so it fits flush against the subfloor above.
Sandwiching the Weakened Area: Adhesive and Screw Specifications
Successful plywood scabbing depends on a dual-sided sandwich configuration bonded with structural construction adhesive and secured with heavy-duty structural screws. Double-sided plates provide maximum load distribution around severe plumbing cuts.
- Double-Sided Sandwiching: Fastening 3/4-inch plywood plates to both left and right faces of the joist whenever accessible.
- Adhesive Application: Applying a thick bed of polyurethane construction adhesive between all mating timber and plywood surfaces.
- Dense Fastener Grid: Driving #10 structural screws in a staggered pattern across the entire surface of the plywood gussets to ensure uniform shear transfer.
Building a “Plumber’s Box” (Headers & Trimmers for Cut Joists)
When a large 3-inch or 4-inch waste line completely severs a floor joist, standard sistering or plywood scabbing is no longer sufficient. You must construct a professional “plumber’s box” using double headers and double trimmers to transfer structural loads safely around the opening.
Dealing with Completely Severed Joists (Large Waste Lines & Tubs)
Completely severed floor joists destroy the continuous load path, creating a hazardous structural void that requires a framing box. Large waste lines and bathtub drains often demand this aggressive intervention to prevent localized floor failure.
- Structural Void: A cut joist loses 100% of its load-bearing capacity across that specific span segment.
- Load Rerouting: A plumber’s box redistributes the dead and live loads from the cut joist onto adjacent, uninterrupted framing members.
- Framing Framework: Requires installing perpendicular header joists running between full-length trimmer joists to box out the opening.
Installing Double Headers and Double Trimmer Joists
Building a robust plumber’s box requires doubling up the lumber for both headers and trimmers to handle the concentrated weight loads safely. Fastening these doubled members securely ensures stability across the newly framed plumbing corridor.
- Double Trimmer Joists: The uncut joists on either side of the cut are doubled to carry the extra weight transferred from the headers.
- Double Header Joists: Perpendicular framing pieces running between the trimmers that physically capture and support the cut joist ends.
- Fastening Protocol: Nail or screw the doubled lumber pieces together densely using staggered structural fasteners before attaching hanging hardware.
Using Heavy-Duty Metal Joist Hangers to Transfer Loads
Heavy-duty metal joist hangers are mandatory when assembling a plumber’s box to guarantee secure load transfer. Relying solely on face-nailing headers into trimmers creates a weak connection that will sag under heavy household loads.
- Code-Approved Hangers: Use galvanized structural hangers rated specifically for the dimensional size of your lumber headers and trimmers.
- Dedicated Fasteners: Always drive structural joist hanger nails or approved structural screws into every pre-punched hole on the hardware.
- Secure Load Path: Metal hangers ensure weight flows seamlessly from the cut joist into the header, then to the trimmers, and finally down to the foundation.
Visual Demonstration & Framing in Action
Watching an experienced contractor frame structural openings provides invaluable clarity for handling complex plumbing cuts safely. Visual demonstrations bridge the gap between theoretical building codes and hands-on execution, ensuring your reinforcement techniques meet rigorous structural standards.
Watch: Step-by-Step Framing and Boxing Out Floor Openings
This detailed video walkthrough breaks down the exact sequence required to frame floor openings and reinforce compromised timber during a typical bathroom remodeling project.
- Accurate Layout: Marking precise framing openings before making any physical modifications to load-bearing timber.
- Header Placement: Installing double headers securely into position to distribute structural loads evenly across adjacent members.
- Hardware Installation: Fastening heavy-duty hangers correctly to lock the entire framing assembly together.
Engineered I-Joists and Steel Reinforcement Kits
Modern residential construction frequently relies on engineered I-joists rather than traditional solid lumber, requiring completely different repair protocols when plumbing cuts occur. Utilizing specialized steel reinforcement kits restores load paths safely without compromising engineered wood properties.
Why Traditional Fixes Fail on Engineered I-Joists (OSB Webs & LVL Flanges)
Engineered I-joists combine thin oriented strand board (OSB) webs with laminated veneer lumber (LVL) flanges, making standard solid-wood sistering methods ineffective. Cutting or drilling these structural components without manufacturer approval destroys their specialized load distribution mechanisms.
- LVL Flanges: The top and bottom flanges handle primary tension and compression loads; cutting them causes immediate structural failure.
- OSB Webs: Designed purely to separate flanges and resist shear forces, making oversized plumbing holes extremely dangerous.
- Manufacturer Specs: Traditional wood screws cannot grip thin OSB webs reliably under heavy structural loads.
Using Steel U-Channel Web Reinforcers and Repair Kits
Specialized steel reinforcement kits, such as Metwood repair kits and U-channel steel web reinforcers, are engineered specifically to repair compromised I-joists. These heavy-duty steel components clamp around the damaged web to restore original load capacities perfectly.
- U-Channel Design: Heavy steel channels slide directly over the damaged OSB web section to bridge large plumbing cutouts.
- Pre-Engineered Fasteners: Kits include specialized structural fasteners designed to grip steel and engineered wood securely.
- Non-Invasive Fit: Allows plumbing lines to pass through engineered sleeves without requiring total joist replacement.
When You Must Call a Structural Engineer
Severe structural damage on engineered framing members requires professional evaluation from a licensed structural engineer before any remedial action is taken. Attempting DIY fixes on heavily compromised primary beams creates catastrophic collapse risks.
- Severed Flanges: Any I-joist with a cut or notched top or bottom LVL flange demands immediate engineering consultation.
- Multiple Damaged Spans: When consecutive engineered joists are compromised across a large kitchen or bathroom layout.
- Official Sign-Off: Building inspectors frequently require a licensed engineer’s stamped repair detail before passing framing compliance.
Frequently Asked Questions
Addressing common technical concerns helps homeowners and DIY builders execute plumbing installations safely while strictly complying with structural building codes.
How much of a floor joist can be safely cut for plumbing?
For solid dimensional lumber, drilled holes must remain strictly within the middle third of the joist depth and must never exceed one-third of the total joist height. Additionally, maintaining a 2-inch edge clearance prevents stress concentration fractures.
- Maximum Hole Diameter: Up to one-third of the nominal joist depth (e.g., roughly 3 inches for a 2×10 joist).
- Edge Clearance: At least 2 inches of solid wood must remain above and below every drilled hole.
- Notch Limitations: Mid-span notches are entirely prohibited; end notches are restricted to one-fourth of the joist depth.
Is it okay to run PEX tubing through floor joists without reinforcement?
Yes, running flexible PEX tubing through small, code-compliant holes drilled in the middle third of solid joists generally requires zero structural reinforcement. Because PEX lines require significantly smaller diameter holes than rigid waste pipes, they rarely compromise framing integrity.
- Small Hole Tolerances: Holes sized for 1/2-inch or 3/4-inch PEX lines fall well within safe IRC limits.
- Proper Separation: Multiple holes must maintain adequate spacing (at least two hole diameters apart).
- Drain Line Contrast: Unlike 3-inch waste pipes that sever joists, PEX tubing bypasses heavy structural risks entirely.
What size screws should be used for joist sistering?
Always use heavy-duty #10 structural screws measuring at least 3 inches in length when performing joist sistering. Standard drywall or utility screws lack the necessary shear strength and will fail under household load pressures.
- Structural Rating: Select engineered structural screws designed specifically for heavy wood-to-wood framing applications.
- Penetration Depth: Fasteners must penetrate deeply into the existing joist without breaking through the opposite face.
- Staggered Spacing: Install screws in an alternating high-and-low pattern spaced roughly 12 inches apart along the board length.

Oscar Vance | Master Plumber & Drainage Expert
Meet Oscar Vance, a licensed master plumber sharing practical solutions on residential repairs, preventive maintenance, and thoughtful home upkeep.