What Is a Slip Joint in Plumbing?
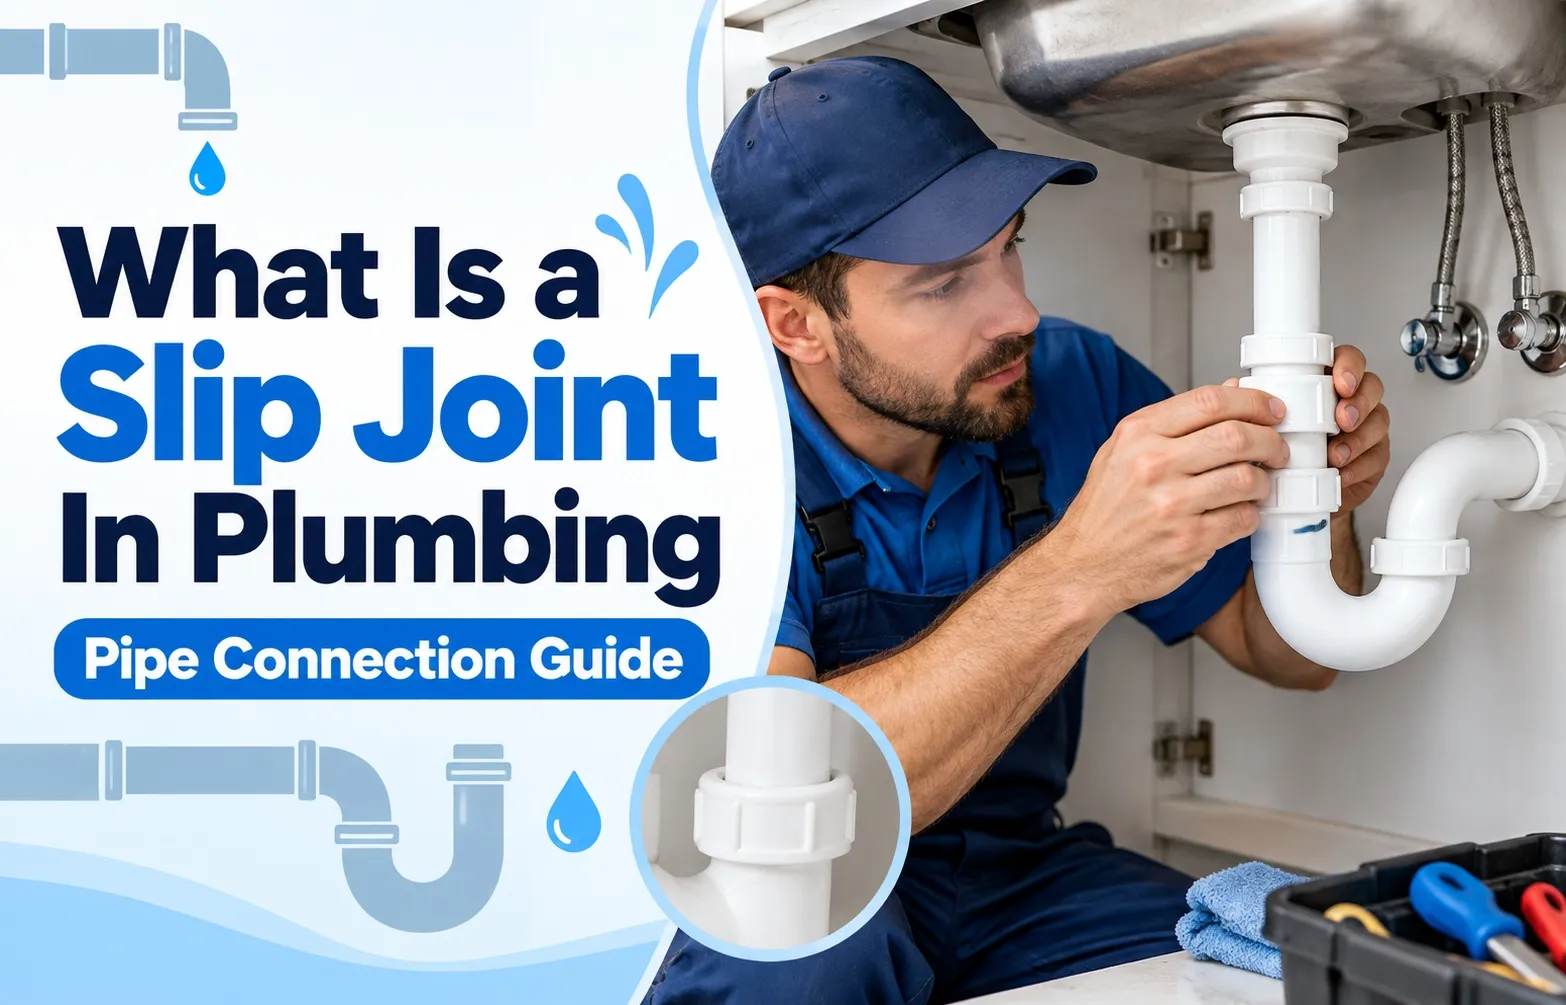 A slip joint in plumbing is an adjustable, non-pressurized compression connection that joins two overlapping pipes without permanent glue, solder, or threading. Designed primarily for drainage lines under sinks, bathtubs, and fixtures, it relies on a threaded nut and a tapered washer to create a watertight mechanical seal.
This fitting design allows the inner pipe to slide smoothly inside the receiving fitting before locking in place. Because it accommodates slight variations in length and alignment, it serves as the standard joining method for residential waste and drainage systems.
Direct Definition & Primary Function
A slip joint in plumbing functions as a removable, adjustable seal engineered specifically for gravity-fed, non-pressurized drainage lines. Unlike high-pressure supply lines that carry incoming freshwater, drainage assemblies operate under ambient pressure, allowing a compression washer to contain wastewater safely.
The primary purpose of a slip joint is to bridge the connection between plumbing fixtures and the household drain network. Key operational characteristics include:
- Adjustable Insertion Depth: The tailpiece pipe can slide up or down inside the receiving fitting to achieve the exact length required.
- Compression Sealing: As the outer slip joint nut tightens onto the male threads, it wedges a beveled washer into the joint gap, forming an immediate watertight barrier.
- Gravity-Fed Water Containment: Designed to channel wastewater safely through the P-trap assembly without leaking under ambient atmospheric pressure.
Why Plumbers Use Slip Joints Over Permanent Welds
Plumbers rely on slip joint connections for drainage assemblies because permanent solvent welds or soldered copper joints lack the flexibility needed under sinks and fixtures. Drainage lines frequently require access for maintenance, clearing clogs, and replacing worn parts.
Using mechanical slip joints offers distinct practical advantages over rigid, permanent connections:
- Non-Destructive Removal: The entire P-trap or sink tailpiece assembly can be disassembled by hand or with channel lock pliers to clear severe clogs or recover dropped valuables.
- Flexible Alignment Tolerances: Small spatial misalignments between the wall drain outlet and the sink strainer can be absorbed without stressing or cracking the PVC, ABS, or brass pipes.
- Simple Toolless Maintenance: Most plastic slip joint nuts can be installed and adjusted by hand, eliminating the need for heavy pipe wrenches or specialized chemical cements.
- Code Compliance for Accessibility: According to the official plumbing code standards on slip joints, these mechanical fittings are explicitly mandated in accessible locations so home inspectors and plumbers can inspect and repair wastewater fittings easily.
Components of a Plumbing Slip Joint
A slip joint connection relies on three primary components working together to form a watertight seal: a male-threaded receiving pipe, a threaded slip joint nut, and a tapered beveled washer. Each element plays a distinct structural role in securing non-pressurized drainage assemblies.
Understanding how these components assemble prevents common DIY plumbing mistakes, such as persistent slow leaks, cracked locknuts, or misaligned drain lines under kitchen and bathroom sinks.
The Slip Joint Nut
The slip joint nut is a internally threaded locknut that slides over the outer wall of the inserted pipe. When screwed onto the male threads of the female receiving pipe, it applies uniform downward pressure against the sealing gasket underneath.
Slip joint nuts are manufactured in two standard materials, depending on the plumbing assembly design:
- Plastic (PVC or ABS) Nuts: Common in modern residential drain kits. They feature heavy outer ridges that allow for tool-free hand-tightening, reducing the risk of over-torquing and cracking the threads.
- Chrome-Plated Brass Nuts: Used in exposed brass drainage installations, such as decorative pedestal sinks. They require smooth-jawed pliers or a strap wrench to tighten without scratching the chrome finish.
The Beveled Washer (Gasket)
The beveled washer—also called a slip joint gasket—is the core sealing element in the assembly. As the slip joint nut tightens, it compresses this washer directly into the triangular gap between the inner pipe and the outer female receiving pipe.
Gaskets come in various materials, each suited to specific pipe types and fluid conditions:
- Polyethylene (Rigid Plastic) Washers: Highly durable washers commonly supplied with white polypropylene drain kits. They resist chemical degradation from standard household drain cleaners.
- Tapered Rubber Gaskets: Flexible and highly forgiving on minor pipe surface imperfections. Ideal for brass-to-plastic transitional joints where a softer compression seal is required.
- Nylon Washers: Rigid, low-friction gaskets engineered for high-temperature resistance, frequently used on dishwasher branch connections and kitchen sink tailpieces.
- Friction Rings: Thin metal or hard plastic rings placed between brass nuts and rubber washers to prevent the spinning nut from twisting or tearing the soft rubber gasket during tightening.
Washer Orientation (The #1 Installation Mistake)
The most frequent cause of an immediate leak in a newly installed slip joint is installing the beveled washer backward. A slip joint washer is intentionally asymmetrical, featuring one flat face and one narrow, tapered edge.
To establish a watertight seal, the washer must be oriented precisely according to the following mechanical rules:
- Narrow Edge Position: The narrow, tapered edge of the washer must always point away from the slip joint nut and directly into the mouth of the female receiving pipe.
- Direction of Water Flow: The tapered bevel points forward in the exact direction of water flow, ensuring that incoming wastewater glides over the inner seal without pushing past the washer lip.
- Flat Side Alignment: The wide, flat face of the washer must rest flush against the underside of the slip joint nut (or against the friction ring in brass fittings) to receive balanced compression force.
Where Are Slip Joints Used (and Where Are They Banned)?
Slip joints are strictly designed for accessible, exposed gravity-drainage applications and must never be installed in concealed or pressurized locations. Building codes regulate their placement because thermal expansion, sink vibration, and aging rubber gaskets can cause these mechanical connections to loosen over time.
Understanding where slip joints are permitted versus where they are legally banned ensures your plumbing installation remains leak-free, safe, and fully compliant with local safety standards.
Permitted Drainage Locations
Plumbing codes allow slip joints exclusively on the fixture side of the trap seal in exposed, easily reachable spaces. Because these fittings permit fast disassembly for cleaning and maintenance, they are standard across several residential fixtures:
- Under-Sink P-Traps: Connecting the vertical drain pipe from the sink basin to the curved trap bend and horizontal trap arm under kitchen and bathroom sinks.
- Bathroom Vanity Tailpieces: Joining pop-up drain assemblies from the sink basin to the top inlet of the P-trap.
- Kitchen Continuous Waste Assemblies: Connecting double-bowl kitchen sinks where two waste lines combine before entering a shared P-trap.
- Bathtub Overflow Drains: Connecting the vertical overflow tube and tub shoe assembly beneath access panels or exposed floor clearances.
Building Code Prohibitions
Both the Uniform Plumbing Code (UPC) and International Plumbing Code (IPC) strictly prohibit the installation of slip joint fittings inside concealed spaces. Placing a slip joint inside a closed wall cavity, floor joist, or drop ceiling creates a high risk of unnoticeable water damage and structural rot.
Key code restrictions and compliance rules include:
- Concealed Spaces Ban: Slip joints must never be enclosed behind drywall, plaster, or permanent wall paneling. Any drainage piping inside a wall must use permanently welded solvent-cemented PVC/ABS joints or soldered copper connections.
- Mandatory Access Panel Requirements: If a slip joint is used on a tub overflow or whirlpool drain, code requires an accessible location featuring a minimum removable panel size (typically 12×12 inches) for inspection and repair.
- Prohibition on Pressurized Lines: Slip joints cannot be installed on incoming freshwater supply lines or pumped discharge lines, as water pressure will force the compression seal apart.
PVC/ABS Plastic vs. Brass Slip Joints: Which Is Best?
Choosing between plastic and chrome-plated brass slip joints depends on whether your plumbing is hidden inside a cabinet or exposed to view. While both materials meet building codes for fixture drainage, they differ significantly in structural lifespan, installation torque tolerances, and long-term resistance to corrosion.
Selecting the right material prevents costly thread failure, overtightening cracks, and unnecessary replacement cycles under your sinks.
PVC & ABS Polyethylene Joints
Polyvinyl chloride (PVC) and acrylonitrile butadiene styrene (ABS) slip joints are the standard choice for modern residential under-sink drainage. Manufactured from lightweight thermoplastics, these fittings offer high chemical stability and simple, tool-free assembly.
Key advantages of plastic slip joints include:
- Complete Corrosion Resistance: Plastic components never rust, pit, or react to harsh liquid drain cleaners or acidic wastewater.
- Hand-Tightened Sealing: Heavy outer ridges on plastic nuts allow users to achieve a watertight compression seal by hand, drastically reducing the risk of stripping threads.
- Cost-Efficiency: Inexpensive and widely available, plastic drain kits allow for quick, affordable replacements during sink upgrades.
Chrome-Plated Brass Joints
Chrome-plated brass slip joints consist of tubular brass pipes secured with cast brass nuts. They are designed primarily for open, exposed installations—such as wall-hung sinks or open-vanity bathrooms—where visual appearance is paramount.
Key operational characteristics of brass slip joints include:
- Superior Aesthetic Finish: Polished chrome plating provides a clean, premium look that matches exposed metallic fixtures.
- High Mechanical Strength: Metal tubing resists accidental impacts from stored items beneath sinks far better than thin-walled plastic.
- Risk of Thread Galling & Corrosion: Over time, metal-on-metal threads can seize due to mineral buildup (galling), making future disassembly difficult without damaging the thin brass tubing.
Torque & Performance Comparison
Understanding the mechanical limitations of each material ensures correct installation technique and prevents structural failure during assembly.
How to Install and Fix a Leaking Slip Joint
Fixing a leaking sink trap or performing a correct slip joint installation requires methodically inspecting the old components, aligning the beveled washer correctly, and avoiding over-tightening. By following a structured repair process, you can permanently eliminate drips and restore compression seal integrity without damaging plastic or brass threads.
Step 1: Inspection & Thread Cleaning
Before installing replacement parts or tightening a leaking sink trap, completely disassemble the connection and inspect all threads and sealing surfaces for wear, mineral scale, or hairline cracks. Debris or dried soap residue left on the male threads prevents the locknut from spinning smoothly and distorts the compression seal.
Perform the following inspection steps before reassembly:
- Scrape Away Mineral Buildup: Use a stiff nylon brush or rag to clean old plumber’s putty and calcium deposits off the male pipe threads.
- Check for Plastic Deformation: Examine old slip joint nuts and washers for warping or splitting caused by excessive past tightening.
- Verify Pipe Alignment: Ensure the vertical tailpiece and horizontal wall arm line up squarely without forcing lateral stress on the joint.
Step 2: Correct Component Stacking
Successful slip joint installation depends entirely on placing the hardware onto the drain pipe in the correct mechanical sequence. Reversing the order of components or flipping the gasket upside down is the primary reason DIY repairs fail.
Slide the components onto the incoming tailpiece in this exact order:
- 1. The Slip Joint Nut: Slide the threaded nut onto the pipe first, with the internal threads facing toward the connection opening.
- 2. The Friction Ring (If Applicable): Position the flat plastic or metal ring directly behind the washer to protect it from friction.
- 3. The Beveled Washer: Slide the gasket onto the pipe with its narrow, tapered edge pointing away from the nut and directly into the receiving fitting.
Step 3: Tightening Mechanics (Hand-Tight Plus 1/4 Turn Rule)
Achieving a reliable seal requires strict adherence to torque limits, specifically using the hand-tight plus quarter turn rule to avoid crushing plastic components. Overtightening plastic slip joint nuts distorts the rubber washer inside, pushing it out of position and causing an immediate leak.
Follow these tightening practices:
- Initial Hand Tightening: Screw the slip joint nut onto the male threads entirely by hand until it meets firm resistance.
- Controlled Wrench Adjustment: Use channel lock pliers for brass fittings or a gentle quarter-turn on plastic nuts to lock the compression seal in place.
- Water Flow Testing: Fill the sink basin completely and release the water rapidly to check for base leaks under peak drainage pressure.
Step 4: Troubleshooting Persistent Leaks
If a slip joint continues to drip after tightening, avoid the common Teflon tape mistake and investigate the root cause of the seal failure. A strict thread sealant prohibition exists for slip joints because compression seals rely on physical washer deformation rather than threaded water barriers.
Troubleshoot persistent leaks using these corrections:
- Check for the Teflon Tape Mistake: Remove any plumber’s tape or pipe dope applied to the threads, as thread sealants interfere with compression washer mechanics.
- Correct Inverted Washers: Disassemble the joint to ensure the beveled edge of the rubber gasket points downward into the receiving pipe opening.
- Replace Damaged Gaskets: Swap out flattened, old, or dry-rotted rubber washers with fresh polyethylene or tapered rubber gaskets.
Frequently Asked Questions About Plumbing Slip Joints
Addressing specific technical questions about installation, maintenance, and building code compliance helps prevent common repair mistakes and ensures long-term drainage system reliability.
Can you use Teflon tape or pipe dope on a slip joint?
No, you should never use Teflon tape or pipe dope on a slip joint connection. Thread sealants are designed exclusively for tapered pipe threads (like NPT supply lines) that create a seal directly within the threads themselves.
Slip joints rely on a friction seal created by compressing a tapered rubber or plastic washer into the fitting gap. Applying thread tape or pipe dope prevents the slip joint nut from tightening smoothly down onto the washer, which often disrupts the compression seal integrity and causes persistent leaks.
What is the difference between a slip joint and a glued PVC joint?
The main difference lies in accessibility and permanence. A slip joint is a removable, mechanical compression connection held together by a nut and gasket, making it easy to disassemble by hand for cleaning or clearing clogs.
A glued PVC joint uses solvent weld cement to chemically fuse the pipe and fitting together into a single, continuous piece of plastic. Solvent welds create a permanent, leak-proof seal ideal for concealed in-wall piping, but they cannot be disassembled without cutting the pipe.
Why does my slip joint leak even after I tightened it?
A slip joint that continues to leak after tightening is usually suffering from washer misalignment, over-torquing, or structural pipe strain. Common causes include:
- Inverted Beveled Washer: The tapered washer was installed backward with the narrow edge facing the nut instead of pointing into the female receiving pipe.
- Over-Tightened Nut: Excessive pressure from channel lock pliers cracked the plastic nut or crushed the rubber gasket out of shape.
- Misaligned Drain Pipe: The tailpiece is entering the fitting at an angle, preventing the washer from sitting flush around the pipe perimeter.
Are slip joints allowed behind drywalled walls?
No, slip joints are strictly prohibited inside closed, drywalled walls, ceilings, or unexposed floor spaces under both the Uniform Plumbing Code (UPC) and International Plumbing Code (IPC). Because mechanical compression seals can loosen over time due to thermal expansion or vibration, they must remain fully accessible for inspection and repair.
Drainage piping located behind walls must use permanent solvent weld joints or soldered copper connections. If a slip joint must be used near a wall boundary, such as for a bathtub overflow drain, a dedicated wall access panel must be installed to maintain physical access to the joint.

Oscar Vance | Master Plumber & Drainage Expert
Meet Oscar Vance, a licensed master plumber sharing practical solutions on residential repairs, preventive maintenance, and thoughtful home upkeep.