How to Replace a Roof That Is Rolled Roofing
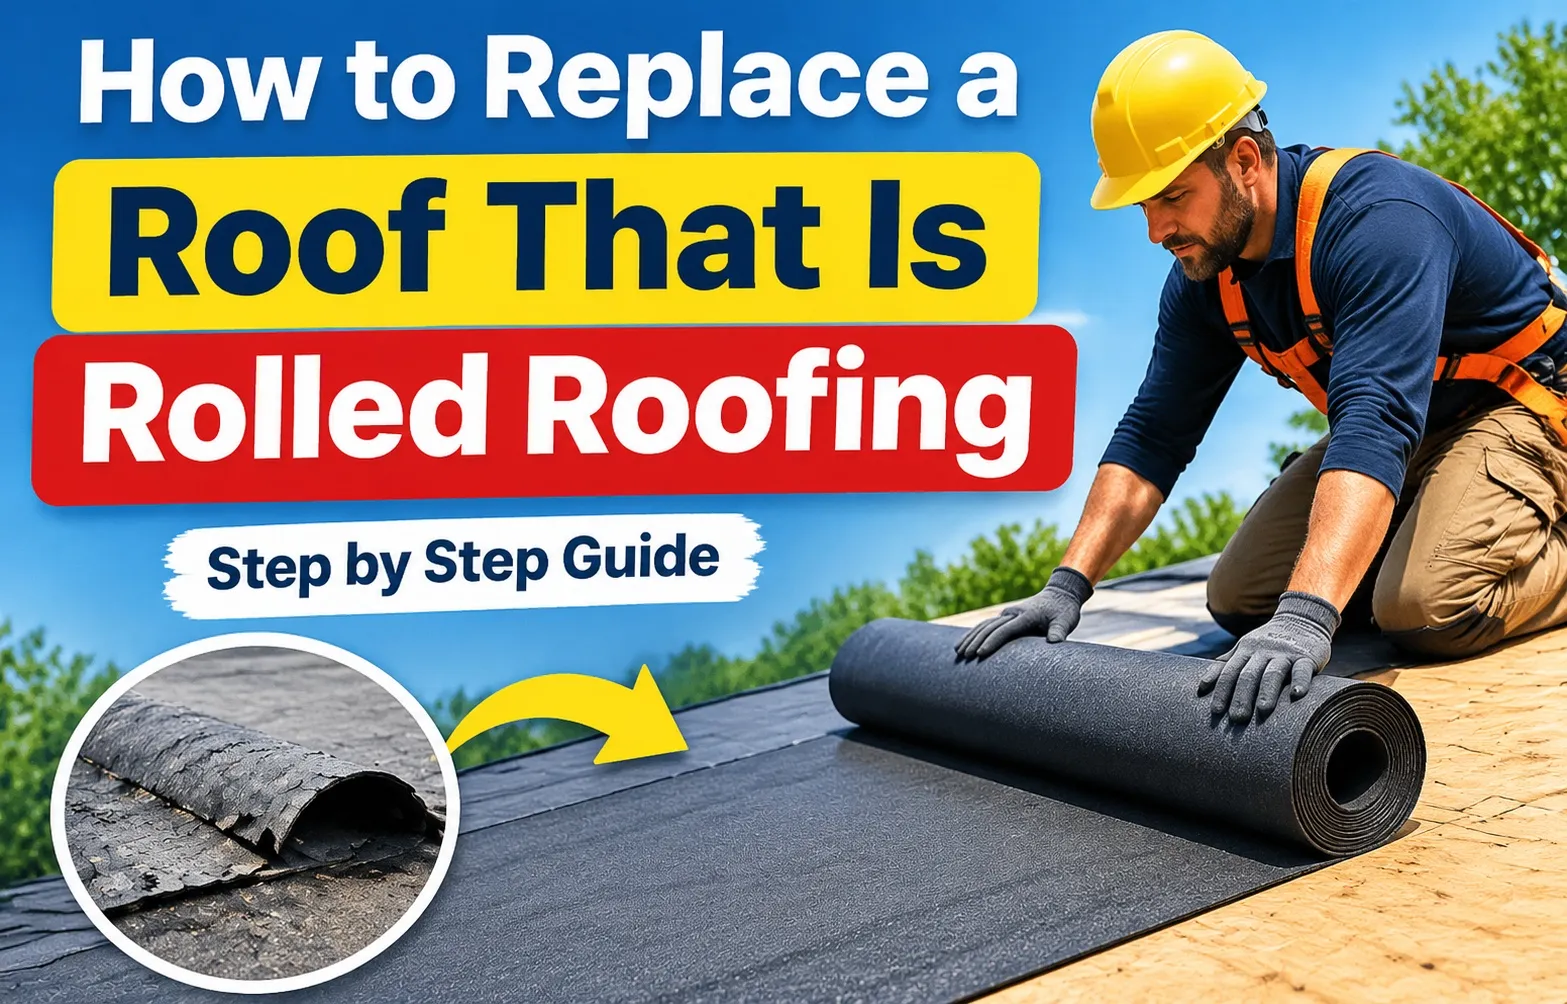
Replacing a low-slope or flat roof covered in asphalt material requires a methodical approach to ensure a watertight seal and long-term durability. The entire replacement process involves stripping the worn surface down to the bare wooden deck, inspecting for structural damage, laying down a fresh protective base, and applying a new mineral-surface roll roofing cap sheet.
Understanding each phase of this project prevents common installation mistakes that lead to premature leaks, blistering, or wind uplift. Whether protecting a residential shed, porch addition, or outbuilding, following professional installation standards guarantees maximum performance from your new roof.
What is Rolled Roofing and When Does It Need Replacing?
Rolled roofing is an asphalt-based sheet material embedded with mineral granules, manufactured in long rolls specifically designed for low-slope or flat roofs. Because these roofs lack a steep pitch to shed rainwater quickly, the material relies heavily on overlapping seams and sealed edges to prevent water intrusion.
Typical rolled roofing systems have a service life of 5 to 15 years depending on weather exposure, thickness, and initial installation quality. You will know it is time to replace your roof when you notice severe cracking, widespread granule loss, persistent leaks, blistering, or exposed fiberglass matting.
- Granule Shedding: Accumulation of heavy mineral granules in gutters indicates the protective asphalt coating has worn away.
- Blistering and Cracking: Trapped moisture and intense sun exposure cause bubbles to form, which eventually crack and split open.
- Active Leaks: Water stains on interior ceilings or pooling water on the surface signal complete membrane failure.
Can You Install New Roll Roofing Over the Old Layer? (The Truth About Tear-Offs)
While some contractors attempt to overlay a new layer of rolled roofing directly on top of an old one to save time, this practice is strongly discouraged by roofing professionals. Laying fresh material over deteriorated surfaces traps existing moisture, adds excessive weight to low-slope framing, and prevents proper nail penetration.
Performing a complete tear-off down to the bare plywood or OSB deck is the only way to inspect for hidden wood rot and ensure a flat, secure bonding surface. Skipping this critical step significantly shortens the lifespan of your new roof and voids manufacturer warranties.
- Moisture Trapping: Trapped water and dampness within the old layers accelerate wood rot on the underlying decking.
- Fastener Holding Power: Old, warped, or spongy layers prevent roofing nails and adhesives from gripping the structural deck securely.
- Surface Evenness: Lumps and bumps from previous layers transfer through the new material, creating vulnerable pockets where water pools.
Tools and Materials Checklist for Rolled Roofing Replacement
Gathering all necessary equipment, safety gear, and building supplies before starting your roofing project prevents frustrating delays and ensures job-site efficiency. Having the right tools on hand allows you to execute the complete tear-off and clean installation of your new rolled roofing system safely and correctly.
Preparing an organized workstation with specialized flat-roofing instruments guarantees that every phase—from stripping the old deck to rolling out the final cap sheet—proceeds without interruption.
Essential Safety Gear & Equipment
Working on a low-slope or flat roof still presents safety hazards from slips, falls, sharp metal edges, and handling heavy adhesive products. Prioritizing personal protection equipment safeguards you against accidental injuries and harsh chemical exposure during installation.
- Safety Harness & Anchor Kit: Essential if your roof has any elevation or fall risk, securing you to a rated structural anchor.
- Heavy-Duty Work Gloves: Thick leather or rubber-coated gloves protect your hands from sharp utility blades, abrasive granules, and sticky roofing tar.
- Eye Protection & Proper Footwear: Safety glasses prevent flying debris or asphalt splashes from entering your eyes, while soft-soled, slip-resistant shoes maintain traction on flat surfaces.
Required Tools (Pry Bars, Utility Knives, Heavy Rollers)
Specialized flat roofing tools are necessary to strip away old, weathered layers and cleanly trim heavy asphalt membranes without tearing them. Using standard household tools will slow down the tear-off process and compromise precision cuts.
- Flat Pry Bar & Tear-Off Shovel: Designed specifically to slide under old roofing layers and pop out stubborn roofing nails with minimal damage to the underlying wood decking.
- Utility Knife with Hook Blades: A heavy-duty utility knife equipped with hook blades allows you to slice cleanly through thick asphalt cap sheets and underlayment rolls.
- Heavy 100-Lb Floor Roller: A weighted roller is indispensable for pressing down self-adhered membranes or cold-adhesive sheets to eliminate trapped air pockets and ensure complete bonding.
Roofing Materials (Cap Sheets, Base Sheets, Roofing Nails, and Cold Adhesive/Tar)
Selecting high-grade materials compatible with a low-slope application ensures your new roof remains completely watertight against rain and standing water. Purchasing sufficient quantities of fasteners and sealants prevents mid-project shortages.
- Mineral-Surface Cap Sheet & Base Sheet: The primary protective waterproofing layers, consisting of a heavy fiberglass-reinforced asphalt mat topped with weather-resistant mineral granules.
- Roofing Nails with Plastic Caps: Specialized large-head nails or plastic cap nails secure base sheets tightly to the wood deck without tearing through the membrane under wind stress.
- Flashing Cement & Cold Adhesive: High-viscosity asphalt tar and flashing cement used to seal seams, edge details, and pipe penetrations against water infiltration.
Step 1: Stripping the Old Roof and Inspecting the Deck
Removing the deteriorated membrane down to the structural framing is the most critical foundation for a successful roof replacement. Executing this phase carefully ensures that hidden structural weaknesses are uncovered and repaired before installing new materials.
A clean, solid wood deck provides the flat, stable surface required for proper adhesion and long-term weatherproofing of your new rolled roofing system.
How to Safely Strip Away Old Rolled Roofing and Fasteners
Begin stripping the roof at the highest point and work downward toward the eaves, letting gravity assist in removing heavy debris. Slide a flat pry bar or tear-off shovel beneath the old membrane seams to peel back the material in manageable sections.
Once the upper layer is removed, thoroughly inspect the wood deck for leftover roof fasteners, staples, and embedded nails. Every single protruding nail must be pulled or hammered flush to prevent punctures in your new underlayment.
- Controlled Teardown: Strip away material in strips using a pry bar to avoid damaging structural wood panels underneath.
- Fastener Extraction: Pull stubborn nails or staple remnants completely out of the decking to leave a smooth surface.
- Debris Management: Clear away all old asphalt granules, nails, and torn scraps before moving on to structural inspections.
Inspecting Plywood/OSB Decking for Rot, Soft Spots, and Protruding Nails
Examine the exposed wood deck thoroughly by checking every panel of plywood or OSB for signs of water damage, delamination, and fungal decay. Press down firmly across the surface to identify hidden soft spots that indicate structural compromise.
Replace any severely rotted or spongy plywood sheets with new, matching-thickness exterior-grade wood panels screwed securely into the underlying rafters. A rigid and stable deck prevents future sagging and keeps the new roofing membrane tightly anchored.
- Checking for Soft Spots: Walk carefully or push down on panels to find weakened OSB or plywood sections that give way under pressure.
- Panel Replacement: Cut out and replace damaged decking squares with new structural panels to ensure solid fastener holding power.
- Surface Sweeping: Sweep the entire deck clean of dust, sawdust, and residual grit prior to laying down any new materials.
Temperature & Weather Constraints for Flat Roofing Work
Flat roofing installations are highly sensitive to ambient temperature and weather conditions, directly impacting how adhesives and self-adhered sheets bond. Never attempt installation during rain, high winds, or freezing temperatures when moisture gets trapped or adhesives fail to cure.
Most cold adhesives and peel-and-stick membranes require ambient temperatures above 50°F for proper bonding performance. Planning your project during dry, mild weather ensures your materials seal correctly without premature blistering or peeling.
- Temperature Thresholds: Ensure outdoor and surface temperatures remain above manufacturer-recommended minimums (typically 50°F) before applying adhesives.
- Moisture Control: The wood deck must be completely dry before laying down base sheets to prevent moisture from getting sealed inside.
- Wind Conditions: Avoid working with large, unwieldy sheets of rolled roofing on windy days when handling becomes hazardous.
Step 2: Installing Drip Edges and Starter Strips
Protecting the vulnerable perimeter of your low-slope roof requires installing metal drip edges and custom starter strips before the main membrane goes down. These edge components direct water runoff cleanly away from the fascia boards and prevent wind uplift from peeling up the roofing edges.
Executing this preparatory edge work with precision establishes a clean, square baseline that keeps subsequent membrane layers aligned correctly across the entire roof deck.
Installing Metal Drip Edges Along Eaves and Rakes
Nail corrosion-resistant metal drip edges directly to the wooden deck along all rake edges first, followed by the eaves. Overlap the vertical flange joints by at least 2 inches, positioning the drip edge so it extends slightly below the wooden deck to shed water away from the fascia.
Secure the metal flange to the plywood or OSB deck using roofing nails spaced every 8 to 10 inches in a staggered pattern. Hammer each nail completely flush so the smooth metal surface does not puncture your upcoming underlayment or cap sheets.
- Rake vs. Eave Order: Install drip edges along the sloping rake edges first, then layer the eave drip edges over them so water flows outward.
- Fastener Spacing: Drive roofing nails through the pre-punched holes in the metal flange at regular intervals to prevent lifting.
- Flush Alignment: Ensure the lower edge hangs squarely over the fascia board to channel runoff directly into gutters.
Cutting and Fastening Custom Starter Strips
Create starter strips by cutting 9-inch-wide strips from your rolled roofing material or using manufacturer-recommended starter rolls. These specialized strips provide a dedicated adhesive and nailing anchor point along the bottom eave before the first full course is laid.
Position the starter strips along the eave edge so they overhang the metal drip edge by 1/4 to 3/8 of an inch. Fasten them securely using roofing nails spaced every 4 inches along the upper edge, sealing the bottom overlap with a thin layer of cold adhesive if specified.
- Precise Strip Cutting: Measure and slice straight 9-inch sections from your roll using a utility knife and a straightedge.
-
Overhang Placement: Align the bottom edge to overhang the drip edge slightly to prevent water from wicking back onto the wood deck.
- Tightly Spaced Fasteners: Nail the top boundary securely to resist high wind forces acting on the lowest roof edge.
Step 3: Laying Down the Base Sheet and Underlayment
Installing a resilient foundational underlayment layer creates an impenetrable secondary moisture barrier beneath your final cap sheet. This critical layer protects your wood decking from condensation and wind-driven rain should minor leaks ever develop on the upper surface.
Following strict manufacturer guidelines for layout direction and seam spacing guarantees structural integrity. For comprehensive technical application criteria, consult the official rolled roofing application guide.
Choosing Between Self-Adhered Underlayment and Base Sheets
Selecting the right underlayment system depends on your roof’s slope, local building codes, and your comfort level with hot or cold adhesives. Traditional base sheets require mechanical fastening and cold adhesive bonding, whereas modern self-adhered membranes use a peel-and-stick backing for a watertight seal.
Self-adhering ice and water shield products are exceptionally popular for low-slope applications because they seal tightly around fastener penetrations. However, standard multi-ply base sheets remain a reliable, cost-effective choice for outbuildings and detached structures.
- Self-Adhered Membranes: Provide continuous waterproof adhesion directly to the plywood deck without requiring exposed nailing zones.
- Standard Base Sheets: Require mechanical fastening and cold tar adhesive, offering heavy-duty reinforcement for multi-ply asphalt systems.
- Code Compliance: Always verify local building regulations to determine if a fire-rated base sheet or specific ice barrier is mandatory.
Working from the Eaves Upward with Proper Seam Overlaps
Begin laying your base sheet or underlayment at the lowest point of the roof, typically the eave line, and work your way upward toward the highest point. This ensures that every upper layer naturally overlaps the lower layer, allowing water to shed harmlessly downward without seeping into joints.
Maintain consistent 4-inch side overlaps and 6-inch end seams across every roll to prevent water migration. Secure the upper edges using specialized capped roofing nails spaced closely together, ensuring the fasteners are completely concealed by the subsequent overlapping layer.
- Upward Directional Flow: Roll out the material horizontally along the eave, progressing systematically toward the roof peak or ridge.
- Precise Overlap Margins: Maintain strict 4-to-6-inch overlaps on all vertical and horizontal seams to block standing water infiltration.
-
Capped Fastener Usage: Drive capped roofing nails through the upper margins to hold the base sheet flat against wind uplift before the cap sheet is applied.
Step 4: Applying the Cap Sheet (Rolled Roofing)
Installing the final mineral-surface cap sheet is the most vital phase of your roofing project, providing the primary defense against UV radiation and weather. Precision alignment and proper adhesive bonding during this step ensure your roof remains watertight for years to come.
Taking your time to dry-fit, align, and secure each membrane course prevents wrinkles, bubbles, and open seams that compromise low-slope roof performance.
Relaxing and Dry-Fitting the Cap Sheet
Unroll your asphalt roll roofing across the deck and let it relax flat in the sun for 15 to 30 minutes before installation. This thermal relaxation eliminates curl memory from packaging, allowing the heavy membrane to lay flat and smooth against the base sheet.
Dry-fitting each section across the roof allows you to verify proper coverage, check overhang allowances, and correct any alignment issues before permanent adhesives or fasteners are applied.
- Thermal Relaxation: Let rolled sheets sit unrolled in warm sunlight so the asphalt compound flattens out completely.
- Dry-Fitting Layouts: Position rolls across the deck to check straightness and overlap margins before committing to adhesive.
- Wrinkle Prevention: Eliminating material memory prevents stubborn air pockets and ridges from forming underneath.
Snapping Chalk Lines for Straight Courses
Snap clean chalk lines across the roof deck before laying down your cap sheet courses to maintain a straight, uniform installation. Crooked courses create uneven overlap seams that trap water and ruin the professional appearance of the roof.
Measure upward from your eave starter strip based on the manufacturer’s recommended overlap width (typically accounting for a 3-to-4-inch selvage edge) and snap your guideline across the deck.
- Chalk Line Alignment: Use a chalk line reel to mark exact guidelines for every subsequent course of asphalt roll roofing.
- Selvage Edge Measurement: Account for the non-granular selvage margin so your overlapping rows remain uniform and straight.
- Continuous Monitoring: Check your progress against the chalk line every few feet to prevent gradual course drifting.
Cold Adhesive vs. Peel-and-Stick Installation Methods
Choose between traditional cold adhesive (roofing cement) and modern peel-and-stick membrane technologies based on your product specifications. Cold adhesive systems require spreading a uniform layer of tar across seams, whereas peel-and-stick rolls rely on a removable release liner.
When using peel-and-stick membrane, slowly peel away the protective backing film while pressing the sheet firmly downward to prevent wrinkles. For traditional cap sheets, trowel a smooth 1/8-inch layer of roofing cement into all overlap zones.
- Peel-and-Stick Application: Progressively strip the release film while smoothing the self-adhered membrane flat onto the clean base sheet.
- Cold Adhesive Spreading: Trowel approved asphalt roofing cement evenly across overlap seams to create a watertight chemical bond.
- Adhesive Thickness: Avoid applying tar too thickly, as excess cement can squeeze out and cause blisters in the cap sheet.
Nailing Patterns and Seam Sealing
Secure the upper, unsealed margin of each cap sheet course using approved roofing nails spaced evenly according to product instructions (usually every 6 to 12 inches). Ensure every nail head is driven straight and flush without cutting into the mineral surface.
Seal all exposed nail heads, perimeter edges, and overlapping seams with a generous bead of flashing cement to lock out moisture. The next overlapping course will completely conceal the fastener line of the row below it.
-
Flush Fastener Driving: Drive nail heads flat against the cap sheet without sinking them so deep that they tear the membrane.
- Concealed Fastening: Cover upper nailing lines entirely beneath the selvage edge of the next consecutive course.
- Seam Waterproofing: Apply a protective dab of flashing cement over exposed nail heads and edge transitions to ensure a permanent seal.
Step 5: Rolling, Flashing, and Final Sealing
Completing your rolled roofing installation requires eliminating trapped air pockets, sealing vulnerable roof penetrations, and performing a thorough final inspection. Proper finishing techniques guarantee that high-stress transition zones remain completely waterproof against driving rain and standing water.
Paying close attention to flashing details around pipes, walls, and corners prevents the vast majority of common flat roof leaks before they can occur.
Eliminating Air Pockets with a Weighted Roller
Walk the entire surface of your newly installed cap sheet or use a heavy weighted roller (up to 100 lbs) to press the membrane firmly into the adhesive. Rolling eliminates trapped air pockets and guarantees complete, continuous contact between the cap sheet and the base layers.
Pay special attention to overlapping seams and edges during the rolling process, pushing outward from the center to force out any hidden bubbles that could cause future blistering under the sun.
- Full Surface Rolling: Slowly push a heavy weighted roller across every square foot of the roof deck to set the adhesive bond.
- Air Bubble Removal: Chase out any trapped air pockets toward the nearest edge or seam before the tar fully cures.
- Seam Pressure: Ensure extra pressure is applied along all lap joints to lock down overlapping membrane edges securely.
Critical Flashing Details Around Vents, Chimneys, and Wall Transitions
Install corrosion-resistant metal flashing and custom cut-ins around all vent pipes, chimneys, and wall transitions where the roof meets vertical structures. These areas experience high stress and movement, making meticulous flashing installation essential for total leak prevention.
Embed custom-bent metal flashings into thick layers of flashing cement and seal all overlapping joints and exposed fastener heads with compatible waterproof sealants.
- Pipe Boot Flashing: Slip specialized rubber or metal pipe boots over vent stacks and seal the base flanges with roofing cement.
- Wall Transitions: Install stepped or continuous metal flashing along wall junctions, overlapping the roofing membrane by at least 4 inches.
- Generous Sealing: Trowel a thick bead of flashing cement over all metal flanges and corner joints to block moisture infiltration.
Final Waterproof Seal Inspection
Conduct a meticulous inspection across the entire roof surface to verify that every seam, nail head, and flashing detail is completely sealed. Check that all edges are bonded tightly without any lifting corners, exposed fasteners, or unsealed gaps.
Address any minor imperfections immediately by applying a fresh dab of roofing cement or smoothing down loose edges with a trowel, ensuring your new roof is fully prepared to withstand severe weather.
- Seam Verification: Inspect every horizontal and vertical overlap line to confirm adhesive has squeezed out uniformly.
- Fastener Check: Ensure every single nail head near perimeter edges is covered securely with a protective dollop of tar.
- Post-Installation Cleanup: Remove all scrap material, tools, and debris from the finished roof surface before declaring the project complete.
Frequently Asked Questions About Rolled Roofing Replacement
Addressing common homeowner questions regarding rolled roofing longevity, installation rules, and insurance considerations provides immediate clarity on key project decisions. Understanding these vital details ensures you make informed choices that protect your property’s value and structural integrity.
Reviewing these expert answers helps clear up common misconceptions about low-slope roofing materials and installation best practices.
Can I install rolled roofing over existing rolled roofing?
Installing new rolled roofing directly over an existing layer is strongly discouraged by professional contractors and manufacturers alike. Overlaying adds excessive dead weight to your low-slope framing, traps hidden moisture that causes rapid wood rot, and prevents proper fastener penetration.
Always perform a complete tear-off down to the bare wood deck to inspect for structural damage and ensure a flat, stable surface for your new roofing system.
- Trapped Moisture Risk: Existing layers trap dampness and condensation, accelerating mold growth and structural deck decay.
- Weight Limitations: Low-slope roof framing is engineered for limited dead loads, making multiple layers a structural hazard.
- Fastener Holding Power: Old, uneven layers prevent nails and cold adhesives from gripping the plywood deck securely.
What is the average life expectancy of a rolled roof?
Standard mineral-surface rolled roofing typically lasts between 5 to 15 years, depending heavily on material quality, local climate exposure, and installation precision. Because low-slope roofs retain rainwater longer than pitched shingled roofs, they experience faster wear from thermal expansion and UV radiation.
Opting for high-performance self-adhered cap sheets or multi-ply systems can significantly extend the lifespan and reliability of your low-slope roof.
- Standard Grade Lifespan: Basic mineral-surfaced asphalt rolls generally require replacement every 5 to 10 years.
- Premium Systems: Modern multi-ply or modified bitumen applications can protect structures for up to 15 or 20 years with proper maintenance.
- Environmental Factors: Intense sun exposure, heavy foot traffic, and poor drainage shorten overall material life expectancy.
Can I put shingles over rolled roofing on a low slope?
You cannot install traditional asphalt shingles over rolled roofing if the roof pitch is too low (typically anything less than a 2:12 slope). Shingles require gravity and a steeper incline to shed rainwater effectively; on low-slope surfaces, rain will back up beneath shingle tabs and cause severe leaks.
If your structure has a low pitch or flat design, rolled roofing, modified bitumen, or specialized membrane systems remain the only viable waterproof options.
- Slope Restrictions: Asphalt shingles require a minimum 2:12 or steeper pitch to prevent water from penetrating underneath the tabs.
- Water Pooling Vulnerability: Low slopes cause standing water to seep directly through shingle nail penetrations.
- Alternative Solutions: Stick with approved low-slope rolled roofing or self-adhered membranes for flat and gently sloped structures.
Why do insurance companies often dislike rolled roofing?
Insurance underwriters often view rolled roofing with caution due to its higher susceptibility to wind uplift, blistering, and premature seam failure compared to pitched shingle roofs. Because flat and low-slope roofs are more prone to standing water and storm damage, insurers may inspect their condition closely before issuing or renewing policies.
Proper professional installation, regular maintenance, and choosing high-tensile self-adhered membranes help mitigate these underwriting concerns.
- Wind Uplift Vulnerability: Low-slope surfaces catch wind currents easily, creating upward pressure that can peel unsealed edges loose.
- Blistering Risks: Trapped solar heat and moisture form blisters that split open, leading to uninspected interior water damage.
- Underwriting Scrutiny: Insurers look for aging, granule loss, or active leaks when evaluating risk on low-slope and flat structures.

Oscar Vance | Master Plumber & Drainage Expert
Meet Oscar Vance, a licensed master plumber sharing practical solutions on residential repairs, preventive maintenance, and thoughtful home upkeep.

