Where Do You Put Screws on Metal Roofing?
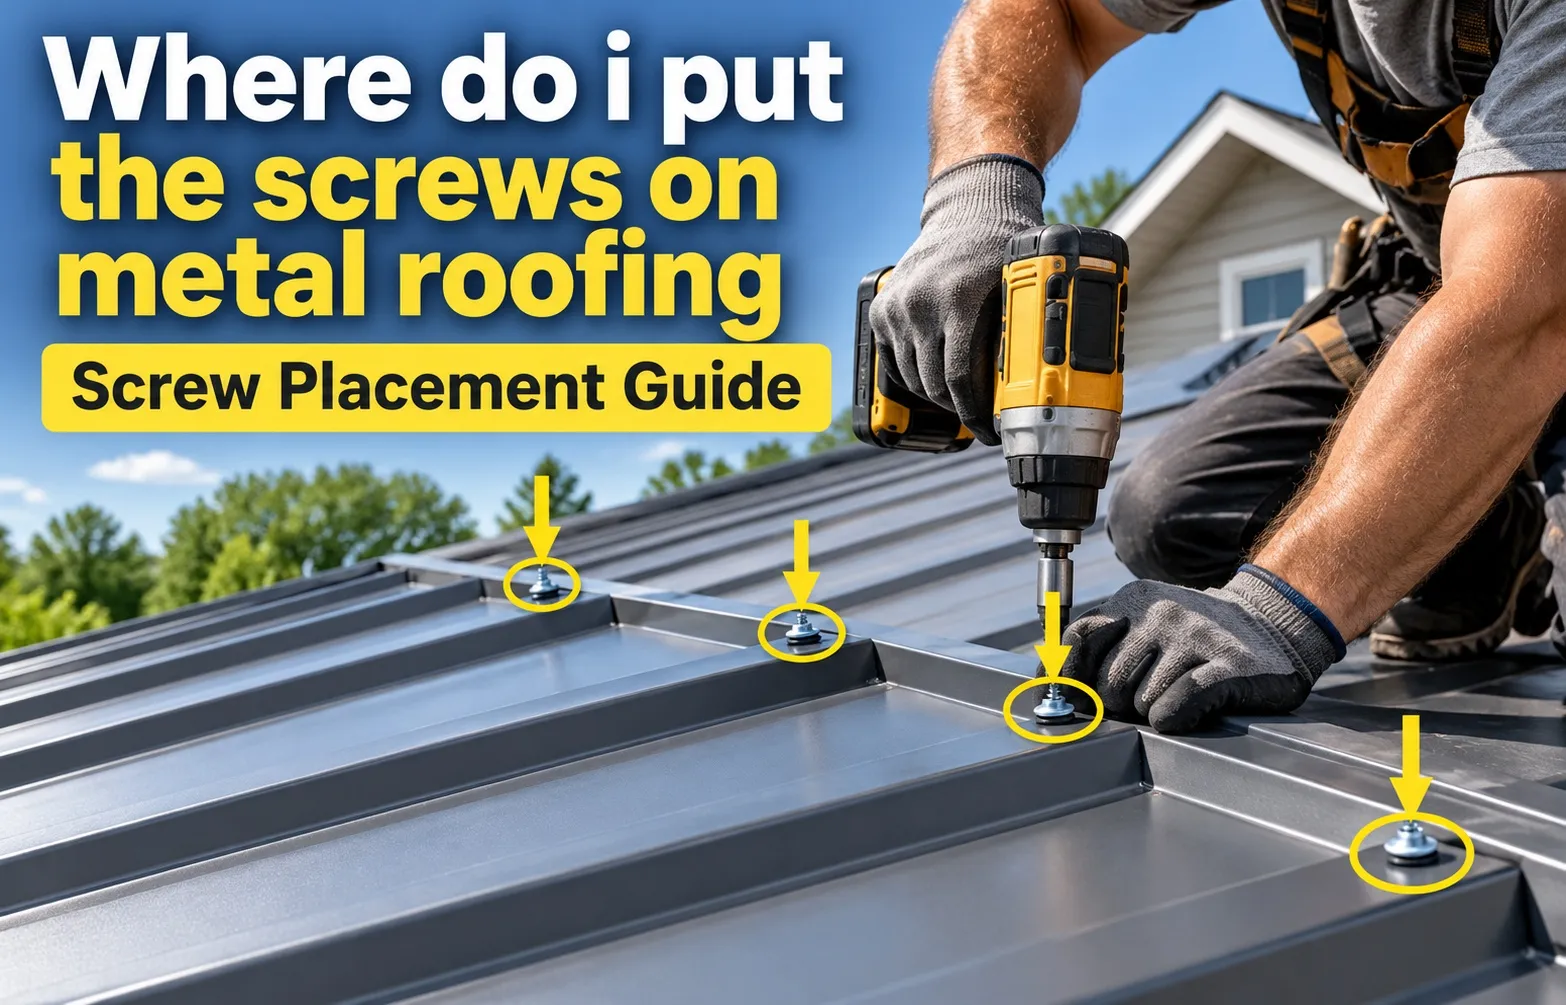 For modern exposed-fastener metal roofing systems, screws should be installed in the flat part of the panel (the valley or trough) immediately adjacent to the major rib, rather than on top of the high rib. Driving fasteners into the flat surface ensures the screw sits tight against the solid wood deck or purlin.
Fastening in the flat provides maximum holding power and allows the integrated rubber washer to seal correctly:
- Watertight EPDM Washer Seal: The flat metal surface permits the neoprene or EPDM rubber washer to compress evenly without shifting or splitting.
- Maximum Structural Bite: Screws pull the metal flush against the underlying decking, eliminating air gaps that cause fastener loosening under load.
- Thermal Expansion Resistance: Securing the sheet at its lowest resting point reduces panel flexing as temperatures rise and fall.
- Prevention of Metal Distortion: High-rib fastening often leads to oil-canning, dimpling, and crushing of the panel profile under torque.
Fastener Placement by Roof Panel Profile
While the flat valley is the standard installation point for the vast majority of residential and agricultural jobs, panel geometry ultimately dictates exact fastener placement. Differing sheet designs require specific anchoring techniques to maintain structural integrity.
Reference these profile guidelines before driving fasteners on your project:
- Ag-Panels (36″ Coverage): Place screws in the flat flat area right next to every major rib. Double up fasteners along eaves and ridge caps.
- PBR / R-Panels: Fasten in the flat pan beside the rib. Use self-drilling fasteners into steel purlins or heavy-duty woodgrip screws into timber framing.
- Corrugated Roofing (Classic 2.67″ Wavy Profile): Fasteners are traditionally installed on the high rib peak when applied over open purlins without solid decking, preventing standing water contact. However, if installed over solid decking, valley placement is preferred for superior clamping force.
- Standing Seam Panels: Fasteners are concealed via clips or a pre-punched nail flange; no exposed screws are driven through the face of the panel.
Flat vs. High Rib: Technical Deep-Dive
Understanding the engineering mechanics behind screw placement prevents catastrophic water leaks and structural failure. Structural load distribution and washer compression rely heavily on whether fasteners are driven into the flat valley or the raised crown.
Why Fastening in the Flat (Valley) Produces Superior Results
Driving screws directly into the flat pan ensures the metal rests flush against the underlying framing. This alignment eliminates dead space, prevents metal flexing, and maximizes structural stability under wind uplift.
- Solid Wood Substrate Contact: Positioning screws in the valley ensures the panel makes direct contact with solid decking or purlins, preventing air gaps that cause fastener pullout.
- Uniform Compression of Neoprene/EPDM Washers: A flat installation surface guarantees that the EPDM washer seal is compressed evenly across 360 degrees under correct torque tension.
- Prevention of Panel Distortion & Metal Dimpling: Fastening in the trough distributes shear force naturally, stopping profile deformation and oil-canning caused by over-tightening on raised peaks.
When Do Screws Go on the High Rib? (Exceptions to the Rule)
While valley placement is standard for modern agricultural panels, specific profile geometries and joint configurations require high-rib fastening. Specialized applications depend entirely on how the sheets handle water shedding and lateral wind loads.
- Corrugated Panels (7/8″ Wavy Profile) vs. Modern Ag-Panels: Traditional corrugated metal sheets installed over open purlins use high-rib placement to keep fastener holes above standing water in the troughs. Modern Ag-panels with solid decking rely exclusively on flat fastening.
- Stitch Screws for Metal-to-Metal Overlaps/Side Laps: Specialized side-lap stitch screws are driven through overlapping ribs. These fasteners bind adjacent sheets laterally rather than anchoring the roof to structural framing.
Panel-Specific Screw Placement & Spacing Master Chart
Precise fastener placement and correct on-center spacing vary significantly across profile types like 5-Rib metal roofing, R-Panel/PBR, Ag-Panel, and Corrugated 2.67×1/2 sheets. Adhering to manufacturer specifications ensures structural endurance against severe weather loads.
Master Fastener Location Chart by Profile
A comprehensive summary table clarifies exact fastening points for each major commercial and residential panel configuration. Utilizing the correct pattern prevents water intrusion and panel failure.
Spacing Rules: Eaves Ridge Mid-Panel (Field) and Side Laps
Maintaining strict linear spacing prevents fastener fatigue and sheet displacement under changing environmental loads. Critical architectural zones require tighter fastener density to withstand heavy wind forces.
- Eaves & Ridge Cap (High Wind Zones): Fasten every flat (9″–12″ on-center) along the eave line and ridge purlin to combat intense high wind uplift zones.
- Field / Intermediate Supports (Purlins): Secure fasteners every 18″–24″ on-center across the mid-panel field to handle uniform load stresses and prevent rattling.
- Side-Lap / Overlap Seams: Install stitch screws every 12″–18″ on-center along overlapping edges to maintain weather-tight lateral sealing and structural rigidity.
Screw Calculation Formula: How Many Screws Do You Need?
Accurate fastener estimation prevents project delays and reduces material waste during metal roof installations. Calculating your required fastener count depends directly on total roof area, overall panel coverage width, and structural purlin layout.
The Standard Formula for Metal Roof Fastener Calculation
To determine the exact quantity of fasteners needed for exposed-fastener panels, professional contractors rely on the industry-standard 80 screws per square rule. One roofing square equals 100 square feet of roof surface.
Use this multi-step mathematical approach to calculate your total screw requirements:
- Calculate Total Roofing Squares: Divide total roof area (in square feet) by 100. (Example: 2,000 sq. ft. ÷ 100 = 20 squares).
- Apply Base Fastener Multiplier: Multiply total squares by 80 fasteners. (Example: 20 squares × 80 = 1,600 main structural screws).
- Calculate Stitch Screws for Side Laps: Multiply total lineal feet of panel overlaps by 1 screw per 1.5 feet.
Quick Reference Table: Screws per Roofing Square (100 Sq. Ft.)
This reference chart outlines estimated fastener quantities based on common roof sizes using standard 36-inch coverage panels mounted over 24-inch purlin spacing.
Factoring Waste & High-Wind Reinforcement
Never order exact calculations without building safety margins into your purchasing list. Real-world job site variables consistently increase total fastener consumption beyond base formulas.
- Standard Waste Allowance (10%): Always add a 10% safety margin to account for stripped heads, dropped screws, misalignments, and misfires.
- High-Wind Uplift Zones: Eaves, gables, and ridge perimeters require double-fastening, which increases base fastener demand by roughly 15% across coastal or high-wind installations.
- Stitch Screws & Flashing Fasteners: Purchase a separate bag of 1/4-inch hex head self-drilling stitch screws specifically dedicated for trim, ridge caps, and side-lap seams.
Washer Compression & Driving Technique
Mastering correct driving technique is the single most important factor in preventing roof leaks. Proper EPDM washer compression ensures a watertight seal that lasts for decades without degradation.
How Tight Should Metal Roof Screws Be?
Achieving the ideal torque balance requires understanding how the neoprene washer reacts under pressure. Driving fasteners too loosely or too aggressively ruins the weather barrier entirely.
- Under-Driven: An under-driven fastener leaves the washer loose against the metal surface, creating an open gap that permits water intrusion and wind rattling.
- Over-Driven: An over-tightened screw crushes the neoprene, causing it to squeeze out sideways while creating a concave metal depression that traps stagnant water.
- Perfect Drive: The ideal installation features a flush hex washer head with the EPDM rubber slightly visible, uniformly bulging outward around the metal perimeter without splitting.
Recommended Tools & Torque Settings
Using professional-grade equipment prevents screw head stripping and controls driving depth. Field experience shows that tool choice directly impacts fastener longevity.
- Impact Driver Caution: While a cordless screwgun with high RPMs drives screws quickly, standard impact drivers lack clutch sensitivity, making it easy to overdrive self-drilling woodgrip fasteners.
- Adjustable Clutch Screwgun: Professional roofers prefer drill drivers with adjustable depth-sensing clutches or magnetic socket adapters to maintain precise torque settings on every screw.
- Socket Selection: Always use a high-quality magnetic 1/4-inch hex driver socket that securely grabs the hex washer head without slipping or marring the coated panel surface.
Pre-Drilling Hole Sizing & Metal Preparation
Determining whether pre-drilling metal panels is required depends primarily on your underlying structural substrate. Using the correct combination of drill bit and fastener type speeds up installation and prevents costly panel misalignments.
Do You Need to Pre-Drill Metal Roof Panels?
Most modern roofing screws feature integrated drill points that bypass the need for preliminary drilling. However, structural steel framing requires specific pilot preparation.
- Wood Substrates: Standard self-drilling screws feature sharp woodgrip points designed to pierce metal panels and drive into timber purlins without pre-drilling.
- Heavy Steel Framing/Purlins: Mounting panels over thick structural steel requires specialized self-tapping screws with tek-points or drilling a precise pilot hole size matching your screw gauge.
- Drill Bit Sizing: When pre-drilling pilot holes for sheet metal screws (#8, #10, #12), choose a bit slightly smaller than the outer thread diameter so fastener threads bite firmly into the steel purlins.
Pre-Drilling Multiple Stacks for Faster Layout
Pre-drilling stacked panels on the ground is a proven contractor trick to ensure perfectly uniform screw spacing across the entire roof slope.
- Stack Alignment: Align up to 10 to 15 panels precisely on a flat work surface before measuring fastener locations along the flat troughs.
- Pilot Hole Punching: Use a 1/8-inch bit to drill through the entire stack at once, creating crisp guide holes for every screw location without distorting the metal profile.
- Debris Cleanup: Always brush away loose metal shavings immediately after pre-drilling to prevent surface rust spots from forming on the factory coating.
Maintenance & Troubleshooting: Fixing Loose Stripped or Backed-Out Screws
Addressing backed-out or leaking fasteners is a critical component of long-term roof maintenance. When exposed-fastener systems age, structural movement and fastener fatigue frequently cause screws to loosen, exposing underlying pilot holes to water intrusion and EPDM degradation.
Why Metal Roof Screws Back Out Over Time
Continuous environmental shifts and timber degradation are the primary culprits behind fastener failure. Understanding these mechanical stresses helps homeowners diagnose why screws lose their grip on the substrate.
- Thermal Expansion and Contraction Cycle: Daily and seasonal temperature fluctuations create continuous thermal movement, causing metal sheets to expand and contract while gradually working standard fasteners loose from their anchoring holes.
- Rotted or Strip-Out Wood Decking: Moisture accumulation around failing washers can rot underlying timber purlins, causing pilot hole stripping where standard screws no longer retain bite.
- EPDM Washer Degradation: Over years of UV exposure, rubber washers harden and crack, allowing moisture to reach the fastener shank and accelerate wood rot around the screw thread.
Step-by-Step Fix for Backed-Out or Leaking Screws
Correcting loose or stripped fasteners requires replacing old hardware with specialized oversized components rather than simply re-tightening them into stripped timber holes.
- Upsizing to #10 or #14 Replacement Fasteners: When standard screws spin freely in stripped wood, switch immediately to an oversized repair fastener or a heavy-duty #14 woodbinder replacement screw that features wider threads to re-anchor securely into fresh wood grain.
- Applying Polyurethane Sealants Correctly: For minor leak repairs or temporary patches, apply a UV-resistant polyurethane sealant around the fastener head, ensuring a weather-tight bond over compromised washers.
- Consulting Engineering Standards: For commercial retrofit guidelines and official fastener replacement protocols, review technical documentation provided by the Metal Construction Association (MCA).
Frequently Asked Questions
Quick, direct answers to common questions about sheet metal fastening rules and roof screw placement helps clarify technical installation nuances.
Do screws go in the ridge on a metal roof?
No, screws driven through face panels should not go into the high ridge itself, but rather into the flat pan right along the ridge purlin line. When securing the ridge cap over the panel overlap, stitch screws or longer wood-grip fasteners are driven through the ridge cap flanges into the flat pans on either side of the ridge line, usually backed by butyl tape or foam closure strips to maintain a watertight seal.
Where should screws be installed on a 5-rib metal roof?
On a 5-rib metal roof layout, screws are driven into the flat pan directly adjacent to each of the major ribs. Along the eave lines and ridge terminations, fasteners are installed in every flat space (four screws per panel width across the five ribs). Across the mid-panel field purlins, fasteners can be spaced in every other flat, following the specific engineering load recommendations for your region.
How often do you put screws on a metal roof?
Screw frequency depends on panel location and local wind load requirements. Across the mid-panel field, fasteners are spaced every 18 to 24 inches on-center along the purlin lines. At high-stress perimeter locations like eave lines, rake edges, and ridge cap connections, fastener frequency increases to every 9 to 12 inches on-center to prevent wind uplift.
What do you put in a hole before inserting a screw on a leaking metal roof?
Before replacing a loose fastener or driving a repair screw into a leaking hole, clean away all loose rust and debris. Apply a generous sealant injection of high-grade, 100% polyurethane sealant or butyl tape compound directly into the stripped screw hole. Inserting the new oversized replacement screw squeezes the sealant outward, completely filling the void and bonding the washer head to the metal surface for a permanent leak seal.

Oscar Vance | Master Plumber & Drainage Expert
Meet Oscar Vance, a licensed master plumber sharing practical solutions on residential repairs, preventive maintenance, and thoughtful home upkeep.

