Introduction & Essential Material Selection
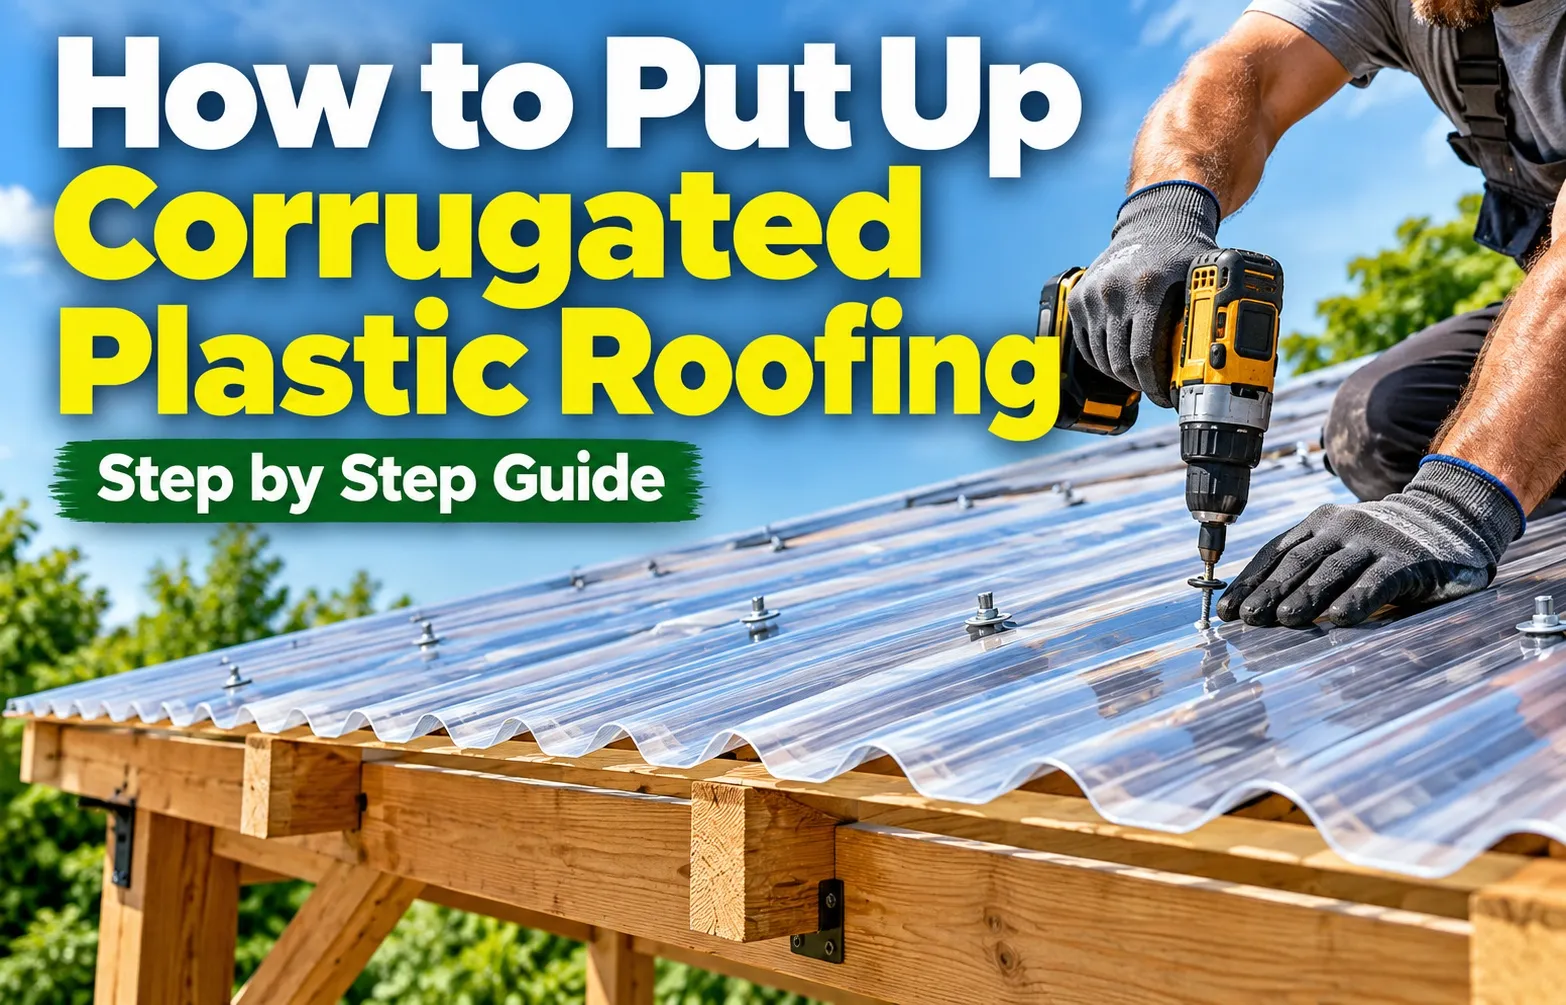 Installing corrugated plastic roofing provides a lightweight, durable, and weather-resistant solution for structures like pergolas, sheds, carports, and greenhouses. Selecting the proper panel material and calculating your roof structure measurements accurately before installation prevents structural sagging, water pooling, and premature weathering.
- Polycarbonate Panels: Offer maximum impact resistance and high light transmission. They withstand severe weather, hail, and high heat without yellowing or cracking when equipped with a co-extruded UV protection layer.
- PVC Sheets: Provide a cost-effective alternative for utility structures. However, PVC sheets have lower thermal tolerance, making them prone to brittle fractures in freezing temperatures or warping in extreme summer sunlight.
- Fiberglass (GRP) Panels: Deliver diffused light and good chemical resistance, making them suitable for agricultural enclosures, though they lose transparency over time due to surface fiber bloom.
Key Technical Requirements Before You Start (Slope, Spacing & Sunlight Exposure)
Proper framing specifications ensure efficient water drainage and structural stability under wind and snow loads.
- Roof Pitch & Slope Calculation: Maintain a minimum slope of 1 inch per linear foot (a 10° pitch or 1:12 slope). This pitch allows rainwater to drain freely, preventing dirt accumulation and standing water leaks at the overlapping seams.
- Purlin & Rafter Spacing: Support corrugated panels with purlins spaced no more than 24 inches apart on center (or up to 30 inches for heavy-duty multiwall corrugated sheets). Excessive spacing causes sheet deflection under heavy snow or rain loads.
- Thermal Expansion Allowance: Corrugated plastic expands and contracts significantly with ambient temperature changes. Always account for thermal expansion by pre-drilling pilot holes slightly larger than your fastener shanks during installation.
- UV Protection Layer Orientation: Polycarbonate and PVC panels generally feature integrated UV protection on one side only. Identify the printed factory film or label stating “This Side Out/To Sun” and ensure this side faces upward toward direct sunlight to prevent rapid panel degradation.
Complete Tools Hardware and Safety Equipment Checklist
Gathering the correct tools, specialized fasteners, and safety gear before starting your project ensures a smooth installation and prevents costly damage to your panels. Using improper drill bits, incorrect saw blades, or incompatible sealants can compromise panel integrity, cause stress fractures, or void manufacturer warranties.
Specialized Tools & Fasteners You Need
Installing corrugated plastic roofing requires hardware engineered specifically for flexible, semi-rigid plastic sheet materials.
- Roofing Screws with Neoprene EPDM Washers: Use self-drilling fasteners equipped with bonded EPDM rubber washers. These washers create a flexible, watertight seal over pre-drilled holes while accommodating panel movement during weather shifts.
- Fine-Tooth Circular Saw Blade: Cutting corrugated plastic requires a high-tooth-count blade (80+ teeth) installed in reverse on a circular saw, or a fine-tooth jigsaw blade to cut cleanly without chipping or shattering the edges.
- Tin Snips & Shears: Essential for precise trimming around flashing, corners, and eave edges without creating dust or sharp jagged plastic fragments.
- Foam Closure Strips: Pre-shaped foam or plastic profile strips (wavy or corrugated profile) match the panel contours to seal gaps at eaves and ridge lines, blocking wind, insects, and driving rain.
- Plastic-Safe Silicone Sealant: Use only 100% neutral-cure silicone or non-solvent sealants specifically labeled as safe for polycarbonate and PVC. Avoid solvent-based caulks, which chemically attack and crack plastic panels.
- Step Drill Bit or Unibit: Cleanly enlarges pilot holes in plastic without catching, tearing, or splitting the sheet edges.
Crucial Safety Protocols for Working with Lightweight Plastic Panels
Lightweight plastic panels can be slick and fragile under concentrated weight, presenting unique safety hazards during elevated roof installation.
- Never Walk Directly on Panels: Corrugated plastic roofing cannot support human weight. Always place crawling boards or plywood sheets spanning across at least three roof rafters to distribute your body weight safely.
- Use Stable Support Systems: Work from a secure scaffolding ladder or stable step ladder positioned on firm, level ground rather than leaning ladders against fragile roof overhangs.
- Wear Protective Eyewear: Always wear safety goggles when cutting or pre-drilling sheets, as plastic shavings and fine dust fly rapidly during high-speed cutting.
- Manage High Wind Conditions: Avoid installing large corrugated sheets on windy days. The lightweight, wide-surface-area panels act like sails and can easily catch gusting winds, causing footing instability on ladders and roof frames.
Step-by-Step Installation Framework
Executing a flawless installation of corrugated plastic roofing requires precise adherence to structural preparation, panel orientation, overlap standards, and proper fastener torque limits. Following a methodical, chronological process ensures a long-lasting, leak-free structure.
Step 1: Substructure Prep & Frame Thermal Coating
Proper substructure framing and heat-reflective surface treatment prevent thermal conduction from warping your corrugated plastic roofing. Ensure rafter support and purlin spacing are securely fastened and aligned before any panels are laid out.
- Rafter Support & Purlin Spacing: Install wooden or metal purlins perpendicular to your rafters, maintaining a maximum spacing of 24 inches on center to prevent mid-span panel sagging under heavy snow or rain loads.
- White Heat-Reflective Paint: Paint the top surface of your wood purlins with white exterior paint or apply foil tape. Dark wood absorbs intense solar heat through translucent sheets, which can cause premature thermal distortion along the contact lines.
- Square Alignment Check: Verify that your framing structure is completely square and level by measuring diagonally from corner to corner before attaching any roofing material.
Step 2: Precision Cutting & Determining UV-Protected Orientation
Always face the UV-protected side of the sheet upward toward the sun to prevent rapid polymer degradation and yellowing. Use reverse blade cutting techniques with a fine-tooth saw to achieve clean, splinter-free cuts.
- Identifying the UV Label: Check the protective factory film or printed tape for the indicator stating “This Side Up” or “To Sun.” Installing panels upside down eliminates UV defense and voids warranties within months.
- Reverse Blade Cutting: Install a fine-tooth circular saw blade backwards (teeth running in reverse) or use a fine-tooth jigsaw blade. This prevents the teeth from catching and cracking the brittle plastic edges.
- Supporting the Sheet: Clamp panels securely between plywood sheets or support them evenly along the cut line to eliminate vibration and chipping during power cutting.
Step 3: Laying Panels, Overlap Rules & Wind Direction Strategy
Start installing your panels from the edge opposite to prevailing winds to prevent wind-driven rain from penetrating the joints. Maintain a strict 1-to-2 corrugation side overlap and a 4-to-6 inch end overlap for complete waterproof protection.
- Prevailing Wind Direction: Begin laying sheets on the side of the roof facing away from local prevailing wind patterns so that wind blows across the overlapping seams rather than directly lifting them.
- Side Overlap: Overlap adjacent panels by 1 to 2 full corrugations (flutes), ensuring the top sheet rests neatly over the lower sheet to maintain uniform roof height.
- End Overlap: When stacking panels vertically down a slope, allow a 4-to-6 inch end overlap, placing the upslope panel on top of the downslope panel to shed water smoothly over the joint.
Step 4: The Golden Rule of Fastening (Pre-Drilling, Crest vs. Valley, and Torque Limits)
Master the crest vs. valley debate by always fastening through the corrugation peaks to ensure waterproof drainage. Pre-drill oversized pilot holes to provide a thermal clearance gap, and tighten screws only until the neoprene washer compresses gently without crushing the plastic.
- Crest Fastening Advantage: Always drive fasteners through the crest (peak) of the corrugation rather than the valley. Valley fastening leaves screw holes directly exposed to standing runoff water, leading to inevitable leaks.
- Pre-Drilling Pilot Holes: Drill pilot holes 1/16 to 3/32 of an inch larger than the screw shank diameter. This creates a thermal clearance gap, allowing the plastic sheet to expand and contract freely during temperature shifts without buckling.
- Neoprene Washer Compression: Drive roofing screws using a clutch-limited drill. Stop tightening the moment the neoprene EPDM washer barely puckers and seals the hole; over-tightening crushes the plastic and causes stress fractures.
Ridge Caps Apron Flashing and Weatherproof Sealing
Completing your roofing installation with proper flashing and compatibility-verified sealants provides long-term structural integrity and total water ingress prevention. Skipping edge finishing or using improper adhesives leads to wind-driven rain penetration, localized rot, and chemical destruction of your plastic panels.
Installing Ridge Caps and Wall Apron Flashing
Sealing high-risk roof junctions requires specialized flashings contoured to match the profile of your corrugated plastic sheets.
- Ridge Cap Flashing Installation: On dual-pitch or gabled roofs, place corrugated ridge cap flashing directly over the top panel edges at the peak. Secure the ridge cap by driving fasteners through the crests of both the cap and the underlying roofing panel into the ridge purlin.
- Wall Apron Flashing Alignment: Where the upper edge of your roof terminates against a vertical wall or fascia, install metal or plastic apron flashing. Tuck the vertical leg under the existing wall cladding and let the lower contoured apron overlap the corrugated panels by at least 4 to 6 inches.
- Integrating Foam Closure Strips: Insert pre-molded foam closure strips directly under ridge caps, apron flashings, and sidewall flashing. These contoured foam profiles fill the hollow valleys of the corrugated sheet to block driving rain, wind lift, dust, and nesting insects.
- Manufacturer Specification Compliance: Adhere directly to recognized structural standards, such as those detailed in the AmeriLux Corrugated Panel Technical Installation Guide, to guarantee correct overlap distances and fastener placement across specialized flashing junctions.
Choosing the Right Sealant (Avoiding Chemical Plastic Degradation)
Selecting chemically safe adhesives is critical because standard household caulks contain active solvents that permanently degrade plastic panel chemistry.
- Use 100% Neutral-Cure Silicone: Always apply neutral-cure (non-acidic) silicone sealants formulated specifically for polycarbonate and PVC materials. Neutral-cure formulas bond securely without releasing aggressive acids during the curing process.
- Avoid Solvent-Based Caulks: Never use solvent-based adhesives, polyurethane foams, or standard acetic-cure silicones (which smell strongly like vinegar). Solvents attack the polymer chains within plastic panels, causing stress crazing, yellowing, and brittle cracking over time.
- Targeted Sealing Locations: Apply small beads of non-solvent sealant along overlap seams on low-pitch roofs, around perimeter flashing joints, and beneath screw washers if installing in regions prone to high winds and heavy downpours.
Pro Maintenance & Thermal Noise Troubleshooting
Addressing thermal expansion noises, conducting routine inspections, and executing proper maintenance preserves the structural integrity and aesthetic clarity of your corrugated plastic roof. Long-term performance relies on managing dynamic panel movement and stopping minor leaks before water damages underlying framing.
How to Prevent Loud “Ticking” Noises from Thermal Expansion
Loud popping or clicking sounds occur when corrugated plastic expands and contracts against wood framing under direct sun exposure without adequate clearance.
- Enlarge Fastener Hole Clearance: Ensure all screw pilot holes are drilled 1/16 to 3/32 of an inch larger than the fastener shank. This clearance gap allows the panel to slide freely along the fastener during temperature fluctuations without binding or building stress.
- Loosen Over-Tightened Screws: Over-tightened screws pinch panels firmly against purlins, preventing smooth movement. Back off fasteners slightly until the neoprene EPDM washer rests snugly against the corrugation crest without dimpling the plastic surface.
- Apply Anti-Friction Barrier Strips: Install soft foam closure strips or self-adhesive polyethylene tape along top edges of purlins prior to panel placement. This reduces friction contact between plastic sheets and wooden framing members during daily thermal cycles.
Inspecting, Cleaning, and Repairing Minor Screw Leaks
Periodic maintenance prevents hardware breakdown and removes dirt accumulation that restricts rainwater drainage.
- Replacing Degraded Neoprene Washers: Inspect hardware annually for cracked or weather-hardened washers. Replace compromised fasteners with new stainless steel screws featuring fresh, UV-resistant EPDM rubber bonded washers.
- Non-Abrasive Soap Cleaning: Clean panels using mild dish soap, warm water, and a soft microfiber cloth or sponge. Avoid dry wiping, stiff brushes, or abrasive scrubbers, which scratch protective UV layers and reduce sheet clarity.
- Patching Minor Screw Leaks: Repair water leaks around misaligned fastener holes by applying a generous bead of 100% neutral-cure silicone beneath and around the neoprene washer before retightening.
- Snow Load Management: Clear heavy snow buildup gently using a soft broom rather than sharp metal shovels to avoid puncturing or cracking cold-sensitised plastic sheets during winter months.
Frequently Asked Questions
Get fast, direct answers to common technical questions about installing corrugated plastic roofing panels correctly.
Where do you screw down corrugated plastic roofing (crest vs. valley)?
Always drive fasteners through the crest (peak) of the corrugation when installing corrugated plastic on a roof. Fastening through the crest ensures water drains down the valleys away from screw holes, preventing leaks. Only use valley fastening on vertical siding applications where water pooling does not occur.
How much slope/fall does a corrugated plastic roof need?
A corrugated plastic roof requires a minimum slope of 1 inch of fall per linear foot of run (approx. 10° pitch or 1:12 slope). This minimum incline guarantees efficient rainwater runoff, prevents dirt accumulation in corrugation grooves, and stops standing water from backing up into overlapping panel seams.
How much should corrugated plastic sheets overlap?
Overlap corrugated plastic sheets by 1 to 2 corrugations (flutes) along side seams, placing the top sheet over the lower sheet away from prevailing winds. For horizontal end overlaps down a slope, overlap panels by 4 to 6 inches to ensure complete waterproof drainage.
Are closure strips necessary for plastic roofing?
Yes, closure strips are essential for a professional, weatherproof installation. Placing foam or plastic closure strips contoured to the corrugated profile along eaves, purlins, and ridge lines fills open gaps underneath panels, preventing wind lift, driving rain penetration, dust buildup, and insect nesting.

Oscar Vance | Master Plumber & Drainage Expert
Meet Oscar Vance, a licensed master plumber sharing practical solutions on residential repairs, preventive maintenance, and thoughtful home upkeep.

